2010 CHEVROLET SILVERADO stop start
[x] Cancel search: stop startPage 37 of 626
Vent:From the closed position, press the rear of the
passenger side switch to vent the sunroof.
Manual-Open/Manual-Close: To open the sunroof,
press and hold the rear of the driver side switch until the
sunroof reaches the desired position. Press and hold
the front of the driver side switch to close it.
Express-Open/Express-Close: To express-open the
sunroof, fully press and release the rear of the driver
side switch until the sunroof reaches the desired
position. To express-close the sunroof, fully press and
release the front of the driver side switch. Press the
switch again to stop it.
The sunroof also has a sunshade that you can pull
forward to block the rays of the sun. The sunshade
must be opened and closed manually.
See Sunroof on page 3‑78.Performance and Maintenance
StabiliTrak®
The vehicle may have a traction control system that
limits wheel spin and the StabiliTrak system that assists
with directional control of the vehicle in difficult driving
conditions. Both systems turn on automatically every
time the vehicle is started.
.To turn off traction control, press and release5on
the instrument panel.
Filluminates and the
appropriate DIC message displays. See DIC
Warnings and Messages on page 4‑63.
.To turn off both traction control and Electronic
Stability Control, press and hold
5untilF
illuminates and the appropriate DIC message
displays. See DIC Warnings and Messageson
page 4‑63.
.Press and release the button again to turn on both
systems.
For more information, see StabiliTrak
®Systemon
page 5‑6.
1-31
Page 38 of 626
Tire Pressure Monitor
This vehicle may have a Tire Pressure Monitor
System (TPMS).
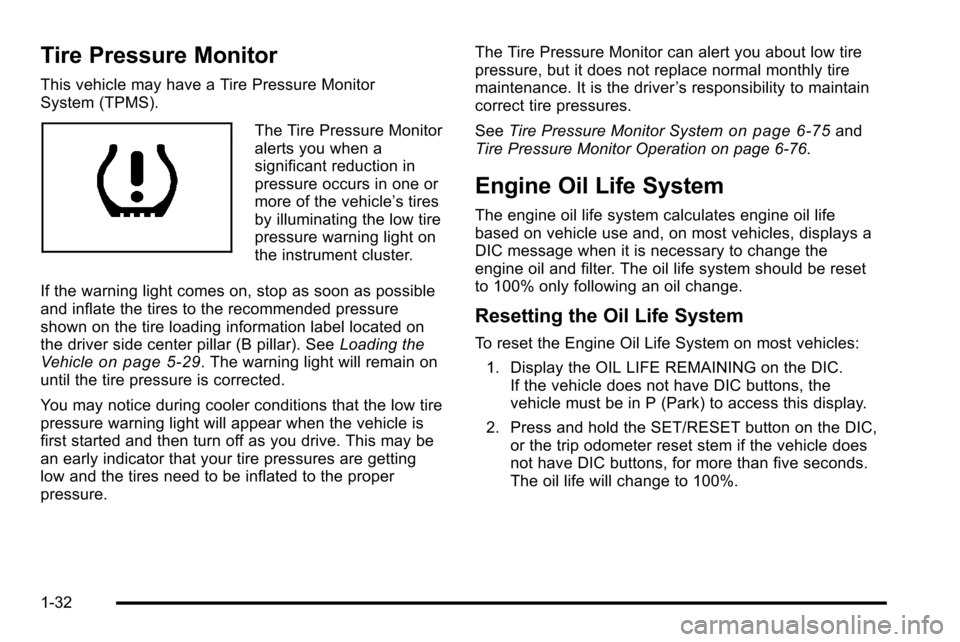
The Tire Pressure Monitor
alerts you when a
significant reduction in
pressure occurs in one or
more of the vehicle’s tires
by illuminating the low tire
pressure warning light on
the instrument cluster.
If the warning light comes on, stop as soon as possible
and inflate the tires to the recommended pressure
shown on the tire loading information label located on
the driver side center pillar (B pillar). See Loading the
Vehicle
on page 5‑29. The warning light will remain on
until the tire pressure is corrected.
You may notice during cooler conditions that the low tire
pressure warning light will appear when the vehicle is
first started and then turn off as you drive. This may be
an early indicator that your tire pressures are getting
low and the tires need to be inflated to the proper
pressure. The Tire Pressure Monitor can alert you about low tire
pressure, but it does not replace normal monthly tire
maintenance. It is the driver
’s responsibility to maintain
correct tire pressures.
See Tire Pressure Monitor System
on page 6‑75and
Tire Pressure Monitor Operation on page 6‑76.
Engine Oil Life System
The engine oil life system calculates engine oil life
based on vehicle use and, on most vehicles, displays a
DIC message when it is necessary to change the
engine oil and filter. The oil life system should be reset
to 100% only following an oil change.
Resetting the Oil Life System
To reset the Engine Oil Life System on most vehicles:
1. Display the OIL LIFE REMAINING on the DIC. If the vehicle does not have DIC buttons, the
vehicle must be in P (Park) to access this display.
2. Press and hold the SET/RESET button on the DIC, or the trip odometer reset stem if the vehicle does
not have DIC buttons, for more than five seconds.
The oil life will change to 100%.
1-32
Page 39 of 626
On all vehicles, the Engine Oil Life System can be reset
as follows:1. Turn the ignition to ON/RUN with the engine off
2. Fully press the accelerator pedal slowly three times within five seconds.
3. Display the OIL LIFE REMAINING on the DIC. If the display shows 100%, the system is reset.
See Engine Oil Life System on page 6‑20.
Fuel E85 (85% Ethanol)
Vehicles that have the 5.3L V8 engine (VIN Code 0), the
5.3L V8 engine (VIN Code 3), the 6.0L V8 engine (VIN
Code J), or the 6.2L V8 engine (VIN Code 2) have a
yellow fuel cap and can use either unleaded gasoline or
ethanol fuel containing up to 85% ethanol (E85). See
Gasoline Octane
on page 6‑7andFuel E85 (85%
Ethanol) on page 6‑9.
Driving for Better Fuel Economy
Driving habits can affect fuel mileage. Here are some
driving tips to get the best fuel economy possible.
.Avoid fast starts and accelerate smoothly.
.Brake gradually and avoid abrupt stops.
.Avoid idling the engine for long periods of time.
.When road and weather conditions are
appropriate, use cruise control, if equipped.
.Always follow posted speed limits or drive more
slowly when conditions require.
.Keep vehicle tires properly inflated.
.Combine several trips into a single trip.
.Replace the vehicle's tires with the same TPC
Spec number molded into the tire's sidewall near
the size.
.Follow recommended scheduled maintenance.
1-33
Page 52 of 626
Easy Exit Seat
The control for this feature is located on the driver’s
door panel between buttons 1 and 2.
With the vehicle in P (Park), the driver's seat exit
position can be recalled by pressing the exit button. You
will hear a single beep, and the driver ’s seat will move
back approximately 8 cm (3 in). To move the seat back
further, press the exit button again until the seat is all
the way back.
If the easy exit seat feature is programmed in the Driver
Information Center (DIC), automatic seat movement will
occur when the key is removed from the ignition. See
“EASY EXIT SEAT” underDIC Vehicle Customization
(With DIC Buttons)
on page 4‑73for more information.
The memory seat and easy exit features can also be
programmed using the DIC.
For programming information, see DIC Vehicle
Customization (With DIC Buttons) on page 4‑73.
Reclining Seatbacks
{WARNING:
You can lose control of the vehicle if you try to
adjust a manual driver's seat while the vehicle is
moving. The sudden movement could startle and
confuse you, or make you push a pedal when you
do not want to. Adjust the driver's seat only when
the vehicle is not moving.
{WARNING:
If either seatback is not locked, it could move
forward in a sudden stop or crash. That could
cause injury to the person sitting there. Always
push and pull on the seatbacks to be sure they
are locked.
2-10
Page 72 of 626
Lap-Shoulder Belt
If the vehicle is a regular cab, then all seating positions
in the vehicle have a lap-shoulder belt. If the vehicle is
a crew or extended cab, then all seating positions in the
vehicle have a lap-shoulder belt except for the center
front passenger position (if equipped), which has a lap
belt. SeeLap Belt (Crew and Extended Cab)
on
page 2‑37for more information.
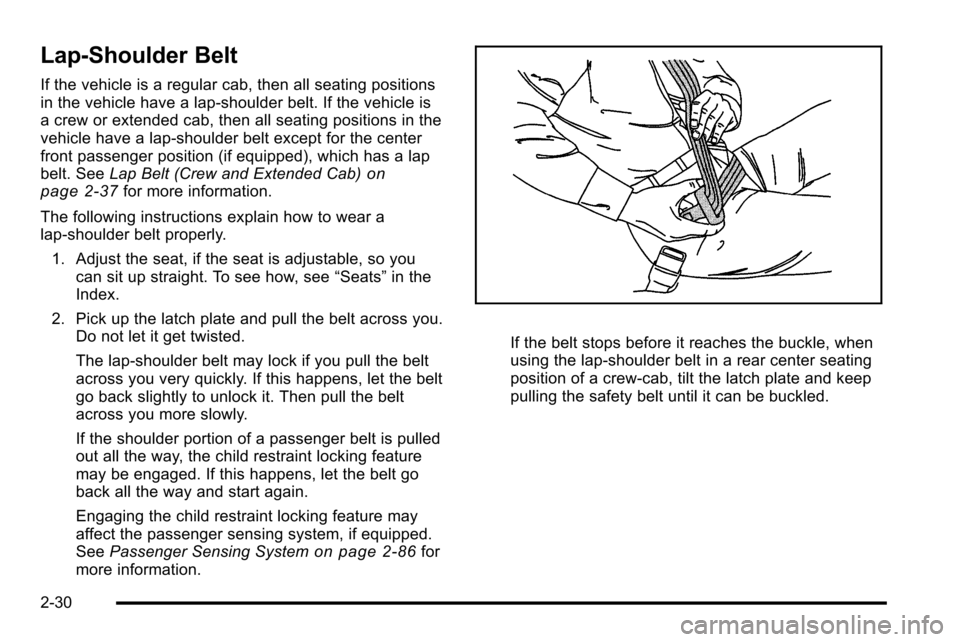
The following instructions explain how to wear a
lap-shoulder belt properly. 1. Adjust the seat, if the seat is adjustable, so you can sit up straight. To see how, see “Seats”in the
Index.
2. Pick up the latch plate and pull the belt across you. Do not let it get twisted.
The lap-shoulder belt may lock if you pull the belt
across you very quickly. If this happens, let the belt
go back slightly to unlock it. Then pull the belt
across you more slowly.
If the shoulder portion of a passenger belt is pulled
out all the way, the child restraint locking feature
may be engaged. If this happens, let the belt go
back all the way and start again.
Engaging the child restraint locking feature may
affect the passenger sensing system, if equipped.
See Passenger Sensing System
on page 2‑86for
more information.
If the belt stops before it reaches the buckle, when
using the lap-shoulder belt in a rear center seating
position of a crew-cab, tilt the latch plate and keep
pulling the safety belt until it can be buckled.
2-30
Page 146 of 626
3. If it is the first remote start since the vehicle hasbeen driven, repeat these steps, while the engine
is still running, to extend the engine running time
by 10 minutes. Remote start can be extended
one time.
After entering the vehicle during a remote start, insert
and turn the key to RUN to drive the vehicle.
To manually shut off a remote start, do any of the
following:
.Aim the RKE transmitter at the vehicle and press
the remote start button until the parking lamps
turn off.
.Turn on the hazard warning flashers.
.Turn the ignition switch on and then off.
The vehicle can be remote started two separate times
between driving sequences. The engine will run for
10 minutes after each remote start.
Or, you can extend the engine run time by another
10 minutes within the first 10 minute remote start time
frame, and before the engine stops.
For example, if the lock button and then the remote start
buttons are pressed again after the vehicle has been
running for five minutes, 10 minutes are added, allowing
the engine to run for 15 minutes.
The additional ten minutes are considered a second
remote vehicle start. Once two remote starts, or a single remote start with
one time extension has been done, the vehicle must be
started with the key. After the key is removed from the
ignition, the vehicle can be remote started again.
The vehicle cannot be remote started if the key is in the
ignition, the hood is not closed, or if there is an
emission control system malfunction and the check
engine light comes on.
Also, the engine will turn off during a remote vehicle
start if the coolant temperature gets too high or if the oil
pressure gets low.
Vehicles that have the remote vehicle start feature are
shipped from the factory with the remote vehicle start
system enabled. The system may be enabled or
disabled through the DIC. See
“REMOTE START”
under DIC Vehicle Customization (With DIC Buttons)
on
page 4‑73for additional information. If your vehicle
does not have DIC buttons, see your dealer to enable
or disable the remote vehicle start system.
Remote Start Ready
If your vehicle does not have the remote vehicle start
feature, it may have the remote start ready feature. This
feature allows your dealer to add the manufacturer's
remote vehicle start feature.
See your dealer if you would like to add the
manufacturer's remote vehicle start feature to your
vehicle.
3-8
Page 155 of 626

Sun Visors
Pull the sun visor down to block glare. Swing the sun
visor to the side to cover the side window.
The passenger's side sun visor may have a vanity
mirror.
Theft-Deterrent Systems
Vehicle theft is big business, especially in some cities.
This vehicle has theft-deterrent features, however, they
do not make it impossible to steal.
Content Theft-Deterrent
Your vehicle may have a content theft-deterrent alarm
system.
This is the security light.To arm the theft-deterrent system:
1. Open the door.
2. Lock the door with the Remote Keyless Entry (RKE) transmitter. The security light should come
on and flash.
If the delayed locking feature is active, the alarm
will not be activated until all doors are closed and
the security light goes off.
3. Close all doors. The security light will stop flashing and go off after approximately 30 seconds. The
content theft deterrent alarm is not armed until the
security light goes off.
If a locked driver door is opened without using the RKE
transmitter, a ten second pre-alarm will occur. The horn
will chirp and the lights will flash. If the key is not placed
in the ignition and turned to START or the door is not
unlocked by pressing the unlock button on the RKE
transmitter during the ten second pre-alarm, the alarm
will go off. Your vehicle's headlamps will flash and the
horn will sound for about 30 seconds, then will turn off
to save the battery power.
3-17
Page 159 of 626
Starting and Operating Your
Vehicle
New Vehicle Break-In
Notice:The vehicle does not need an elaborate
break-in. But it will perform better in the long run if
you follow these guidelines:
.Keep your speed at 55 mph (88 km/h) or less
for the first 500 miles (805 km).
.Do not drive at any one constant speed, fast
or slow, for the first 500 miles (805 km). Do
not make full-throttle starts. Avoid
downshifting to brake or slow the vehicle.
.Avoid making hard stops for the first
200 miles (322 km) or so. During this time the
new brake linings are not yet broken in. Hard
stops with new linings can mean premature
wear and earlier replacement. Follow this
breaking-in guideline every time you get new
brake linings.
.Do not tow a trailer during break-in. See
Towing a Trailer
on page 5‑51for the trailer
towing capabilities of the vehicle and more
information.
Following break‐in, engine speed and load can be
gradually increased.
3-21