2010 CHEVROLET SILVERADO buttons
[x] Cancel search: buttonsPage 51 of 626
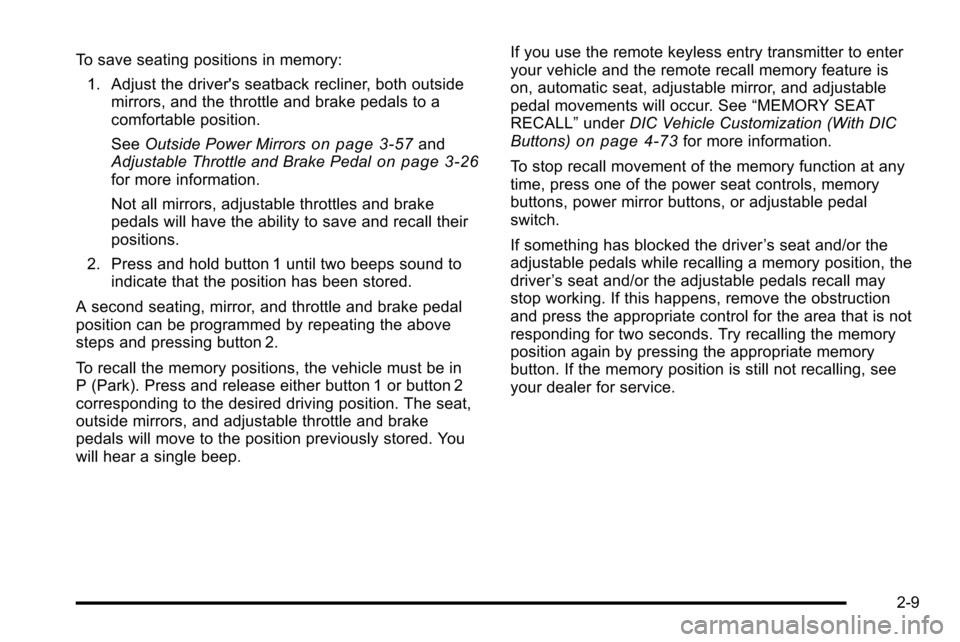
To save seating positions in memory:1. Adjust the driver's seatback recliner, both outside mirrors, and the throttle and brake pedals to a
comfortable position.
See Outside Power Mirrors
on page 3‑57and
Adjustable Throttle and Brake Pedalon page 3‑26for more information.
Not all mirrors, adjustable throttles and brake
pedals will have the ability to save and recall their
positions.
2. Press and hold button 1 until two beeps sound to indicate that the position has been stored.
A second seating, mirror, and throttle and brake pedal
position can be programmed by repeating the above
steps and pressing button 2.
To recall the memory positions, the vehicle must be in
P (Park). Press and release either button 1 or button 2
corresponding to the desired driving position. The seat,
outside mirrors, and adjustable throttle and brake
pedals will move to the position previously stored. You
will hear a single beep. If you use the remote keyless entry transmitter to enter
your vehicle and the remote recall memory feature is
on, automatic seat, adjustable mirror, and adjustable
pedal movements will occur. See
“MEMORY SEAT
RECALL” underDIC Vehicle Customization (With DIC
Buttons)
on page 4‑73for more information.
To stop recall movement of the memory function at any
time, press one of the power seat controls, memory
buttons, power mirror buttons, or adjustable pedal
switch.
If something has blocked the driver ’s seat and/or the
adjustable pedals while recalling a memory position, the
driver ’s seat and/or the adjustable pedals recall may
stop working. If this happens, remove the obstruction
and press the appropriate control for the area that is not
responding for two seconds. Try recalling the memory
position again by pressing the appropriate memory
button. If the memory position is still not recalling, see
your dealer for service.
2-9
Page 52 of 626
Easy Exit Seat
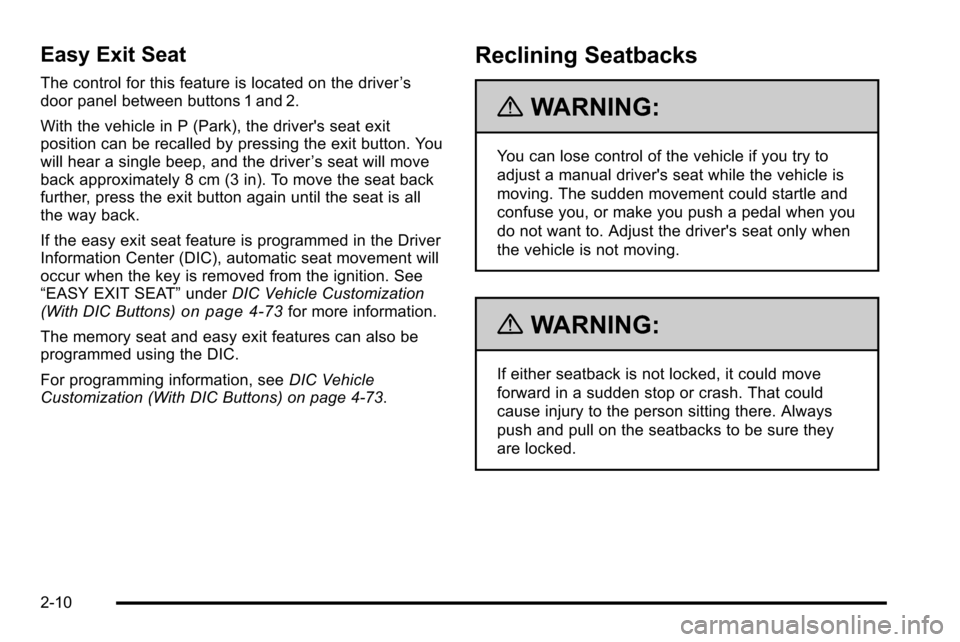
The control for this feature is located on the driver’s
door panel between buttons 1 and 2.
With the vehicle in P (Park), the driver's seat exit
position can be recalled by pressing the exit button. You
will hear a single beep, and the driver ’s seat will move
back approximately 8 cm (3 in). To move the seat back
further, press the exit button again until the seat is all
the way back.
If the easy exit seat feature is programmed in the Driver
Information Center (DIC), automatic seat movement will
occur when the key is removed from the ignition. See
“EASY EXIT SEAT” underDIC Vehicle Customization
(With DIC Buttons)
on page 4‑73for more information.
The memory seat and easy exit features can also be
programmed using the DIC.
For programming information, see DIC Vehicle
Customization (With DIC Buttons) on page 4‑73.
Reclining Seatbacks
{WARNING:
You can lose control of the vehicle if you try to
adjust a manual driver's seat while the vehicle is
moving. The sudden movement could startle and
confuse you, or make you push a pedal when you
do not want to. Adjust the driver's seat only when
the vehicle is not moving.
{WARNING:
If either seatback is not locked, it could move
forward in a sudden stop or crash. That could
cause injury to the person sitting there. Always
push and pull on the seatbacks to be sure they
are locked.
2-10
Page 75 of 626
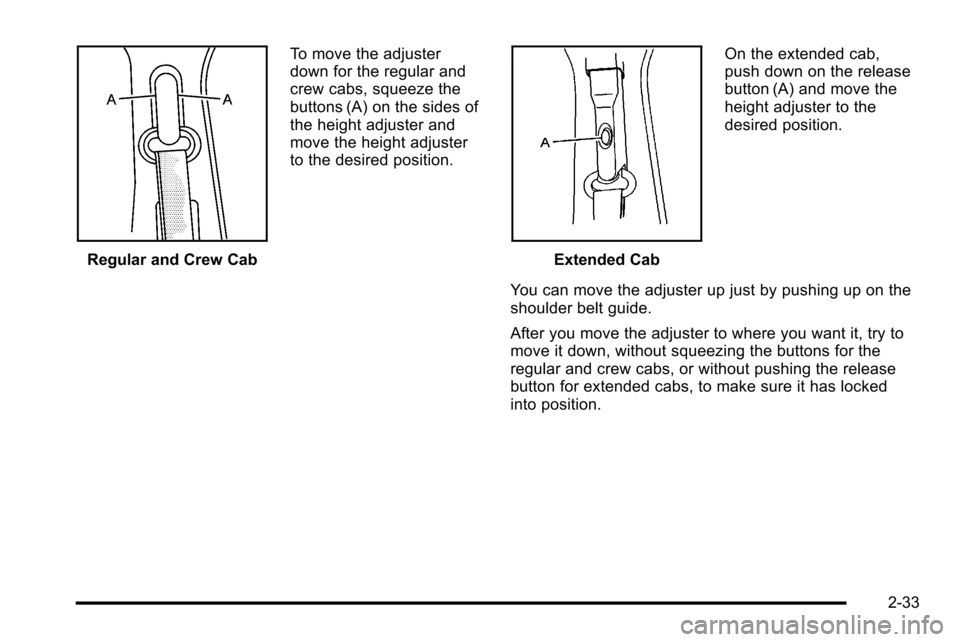
Regular and Crew CabTo move the adjuster
down for the regular and
crew cabs, squeeze the
buttons (A) on the sides of
the height adjuster and
move the height adjuster
to the desired position.Extended CabOn the extended cab,
push down on the release
button (A) and move the
height adjuster to the
desired position.
You can move the adjuster up just by pushing up on the
shoulder belt guide.
After you move the adjuster to where you want it, try to
move it down, without squeezing the buttons for the
regular and crew cabs, or without pushing the release
button for extended cabs, to make sure it has locked
into position.
2-33
Page 143 of 626
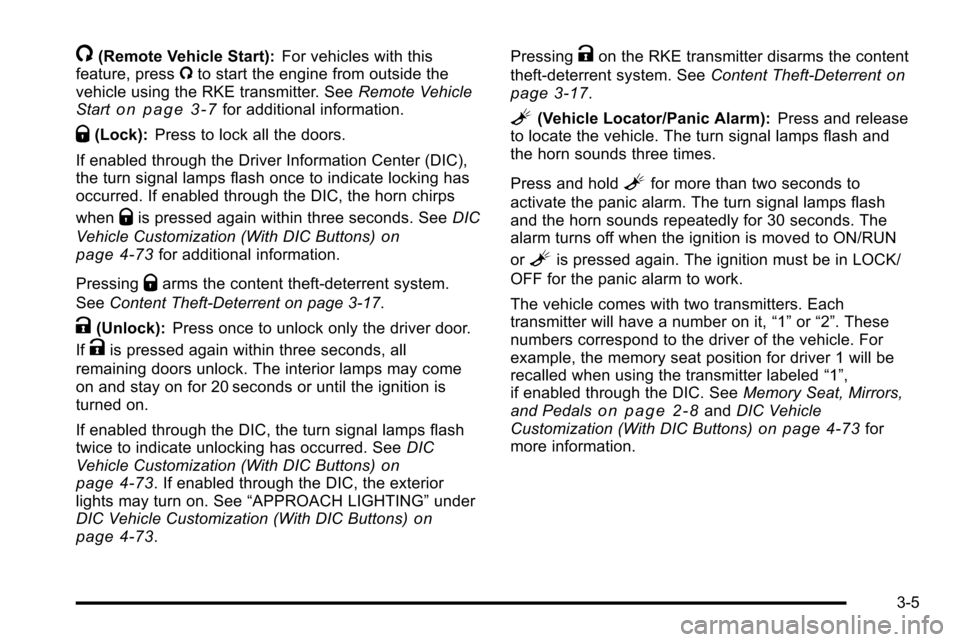
/(Remote Vehicle Start):For vehicles with this
feature, press /to start the engine from outside the
vehicle using the RKE transmitter. See Remote Vehicle
Start
on page 3‑7for additional information.
Q(Lock): Press to lock all the doors.
If enabled through the Driver Information Center (DIC),
the turn signal lamps flash once to indicate locking has
occurred. If enabled through the DIC, the horn chirps
when
Qis pressed again within three seconds. See DIC
Vehicle Customization (With DIC Buttons)
on
page 4‑73for additional information.
Pressing
Qarms the content theft‐deterrent system.
See Content Theft-Deterrent on page 3‑17.
K(Unlock): Press once to unlock only the driver door.
If
Kis pressed again within three seconds, all
remaining doors unlock. The interior lamps may come
on and stay on for 20 seconds or until the ignition is
turned on.
If enabled through the DIC, the turn signal lamps flash
twice to indicate unlocking has occurred. See DIC
Vehicle Customization (With DIC Buttons)
on
page 4‑73. If enabled through the DIC, the exterior
lights may turn on. See “APPROACH LIGHTING” under
DIC Vehicle Customization (With DIC Buttons)
on
page 4‑73. Pressing
Kon the RKE transmitter disarms the content
theft‐deterrent system. See Content Theft-Deterrent
on
page 3‑17.
L(Vehicle Locator/Panic Alarm): Press and release
to locate the vehicle. The turn signal lamps flash and
the horn sounds three times.
Press and hold
Lfor more than two seconds to
activate the panic alarm. The turn signal lamps flash
and the horn sounds repeatedly for 30 seconds. The
alarm turns off when the ignition is moved to ON/RUN
or
Lis pressed again. The ignition must be in LOCK/
OFF for the panic alarm to work.
The vehicle comes with two transmitters. Each
transmitter will have a number on it, “1”or“2”. These
numbers correspond to the driver of the vehicle. For
example, the memory seat position for driver 1 will be
recalled when using the transmitter labeled “1”,
if enabled through the DIC. See Memory Seat, Mirrors,
and Pedals
on page 2‑8and DIC Vehicle
Customization (With DIC Buttons)on page 4‑73for
more information.
3-5
Page 144 of 626
Programming Transmitters to the
Vehicle
Only RKE transmitters programmed to this vehicle will
work. If a transmitter is lost or stolen, a replacement can
be purchased and programmed through your dealer.
When the replacement transmitter is programmed to
this vehicle, all remaining transmitters must also be
reprogrammed. Any lost or stolen transmitters will no
longer work once the new transmitter is programmed.
Each vehicle can have up to eight transmitters
programmed to it. See“Relearn Remote Key” under
DIC Operation and Displays (With DIC Buttons)
on
page 4‑49or DIC Operation and Displays (Without DIC
Buttons)on page 4‑56for instructions on how to match
RKE transmitters to your vehicle.
Battery Replacement
Replace the battery if the REPLACE BATTERY IN
REMOTE KEY message displays in the DIC. See
“REPLACE BATTERY IN REMOTE KEY” underDIC
Warnings and Messages
on page 4‑63for additional
information.
Notice: When replacing the battery, do not touch
any of the circuitry on the transmitter. Static from
your body could damage the transmitter.
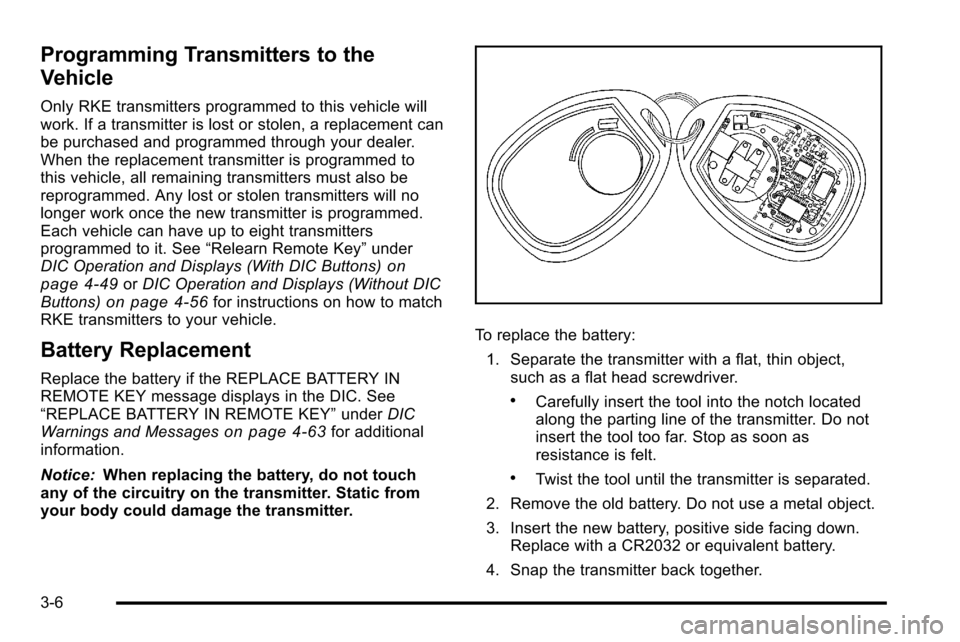
To replace the battery:
1. Separate the transmitter with a flat, thin object, such as a flat head screwdriver.
.Carefully insert the tool into the notch located
along the parting line of the transmitter. Do not
insert the tool too far. Stop as soon as
resistance is felt.
.Twist the tool until the transmitter is separated.
2. Remove the old battery. Do not use a metal object.
3. Insert the new battery, positive side facing down. Replace with a CR2032 or equivalent battery.
4. Snap the transmitter back together.
3-6
Page 146 of 626
3. If it is the first remote start since the vehicle hasbeen driven, repeat these steps, while the engine
is still running, to extend the engine running time
by 10 minutes. Remote start can be extended
one time.
After entering the vehicle during a remote start, insert
and turn the key to RUN to drive the vehicle.
To manually shut off a remote start, do any of the
following:
.Aim the RKE transmitter at the vehicle and press
the remote start button until the parking lamps
turn off.
.Turn on the hazard warning flashers.
.Turn the ignition switch on and then off.
The vehicle can be remote started two separate times
between driving sequences. The engine will run for
10 minutes after each remote start.
Or, you can extend the engine run time by another
10 minutes within the first 10 minute remote start time
frame, and before the engine stops.
For example, if the lock button and then the remote start
buttons are pressed again after the vehicle has been
running for five minutes, 10 minutes are added, allowing
the engine to run for 15 minutes.
The additional ten minutes are considered a second
remote vehicle start. Once two remote starts, or a single remote start with
one time extension has been done, the vehicle must be
started with the key. After the key is removed from the
ignition, the vehicle can be remote started again.
The vehicle cannot be remote started if the key is in the
ignition, the hood is not closed, or if there is an
emission control system malfunction and the check
engine light comes on.
Also, the engine will turn off during a remote vehicle
start if the coolant temperature gets too high or if the oil
pressure gets low.
Vehicles that have the remote vehicle start feature are
shipped from the factory with the remote vehicle start
system enabled. The system may be enabled or
disabled through the DIC. See
“REMOTE START”
under DIC Vehicle Customization (With DIC Buttons)
on
page 4‑73for additional information. If your vehicle
does not have DIC buttons, see your dealer to enable
or disable the remote vehicle start system.
Remote Start Ready
If your vehicle does not have the remote vehicle start
feature, it may have the remote start ready feature. This
feature allows your dealer to add the manufacturer's
remote vehicle start feature.
See your dealer if you would like to add the
manufacturer's remote vehicle start feature to your
vehicle.
3-8
Page 148 of 626
Delayed Locking
The vehicle may have the delayed locking feature.
When locking the doors with the power lock switch and
a door is open, the doors will lock five seconds after the
last door is closed. You will hear three chimes to signal
that the delayed locking feature is in use.
Pressing the power lock switch twice will override the
delayed locking feature and immediately lock all the
doors.
This feature will not operate if the key is in the ignition.
You can program this feature using the Driver
Information Center (DIC). See DELAY DOOR LOCK
underDIC Vehicle Customization (With DIC Buttons)
on
page 4‑73.
Programmable Automatic Door
Locks
Vehicles with an automatic lock/unlock feature enable
you to program the vehicle's power door locks. You can
program this feature through the Driver Information
Center (DIC). See DIC Vehicle Customization (With DIC
Buttons)
on page 4‑73for more information on DIC
programming.
Rear Door Security Locks
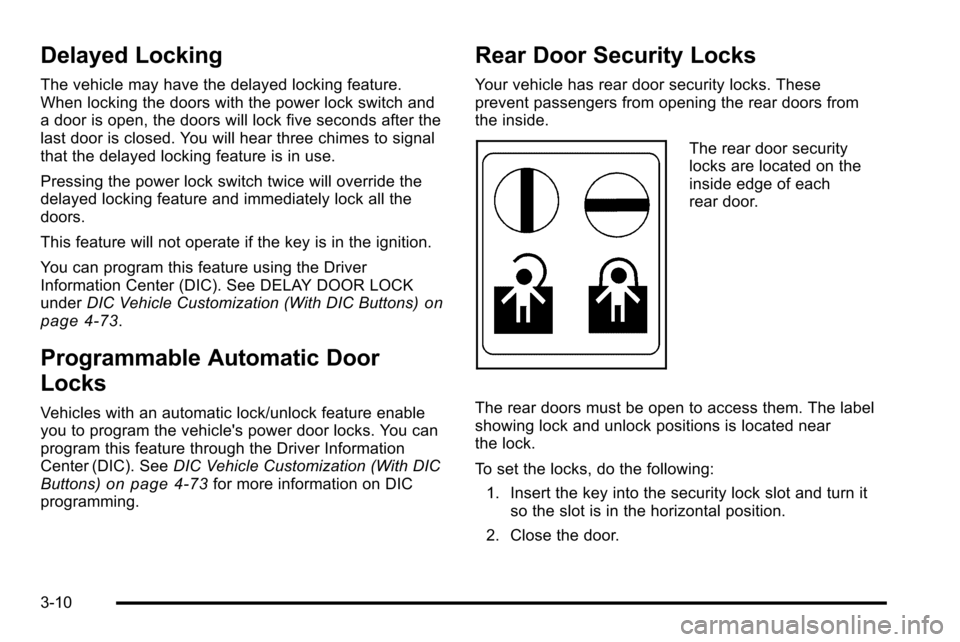
Your vehicle has rear door security locks. These
prevent passengers from opening the rear doors from
the inside.
The rear door security
locks are located on the
inside edge of each
rear door.
The rear doors must be open to access them. The label
showing lock and unlock positions is located near
the lock.
To set the locks, do the following: 1. Insert the key into the security lock slot and turn it so the slot is in the horizontal position.
2. Close the door.
3-10
Page 163 of 626
Fast Idle System
Fast Idle System with Switch
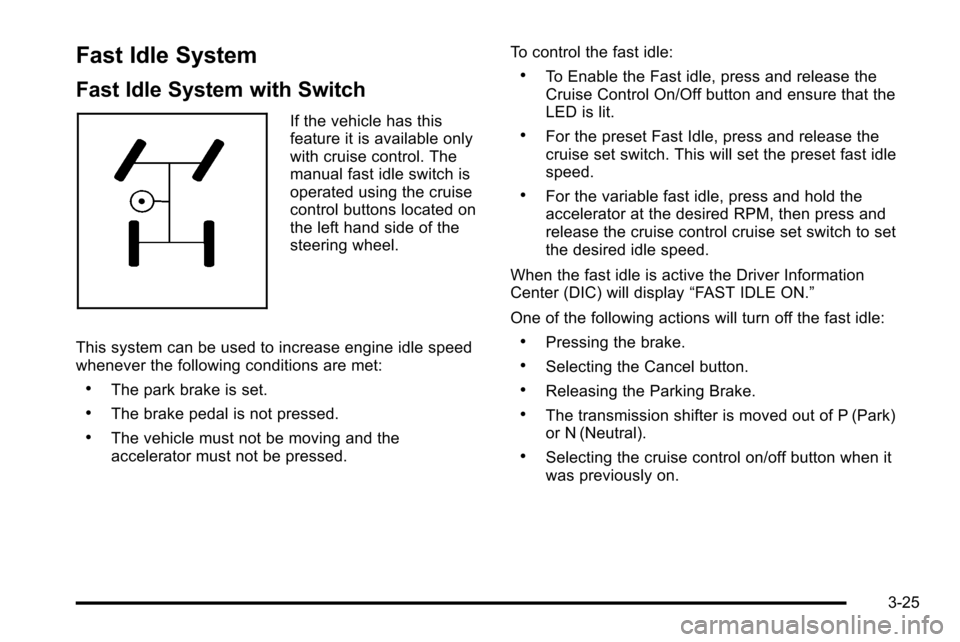
If the vehicle has this
feature it is available only
with cruise control. The
manual fast idle switch is
operated using the cruise
control buttons located on
the left hand side of the
steering wheel.
This system can be used to increase engine idle speed
whenever the following conditions are met:
.The park brake is set.
.The brake pedal is not pressed.
.The vehicle must not be moving and the
accelerator must not be pressed. To control the fast idle:
.To Enable the Fast idle, press and release the
Cruise Control On/Off button and ensure that the
LED is lit.
.For the preset Fast Idle, press and release the
cruise set switch. This will set the preset fast idle
speed.
.For the variable fast idle, press and hold the
accelerator at the desired RPM, then press and
release the cruise control cruise set switch to set
the desired idle speed.
When the fast idle is active the Driver Information
Center (DIC) will display “FAST IDLE ON.”
One of the following actions will turn off the fast idle:
.Pressing the brake.
.Selecting the Cancel button.
.Releasing the Parking Brake.
.The transmission shifter is moved out of P (Park)
or N (Neutral).
.Selecting the cruise control on/off button when it
was previously on.
3-25