2010 CHEVROLET SILVERADO warning
[x] Cancel search: warningPage 1 of 626

2010 Chevrolet Silverado Owner ManualM
In Brief. . . . . . . . . . . . . . . . . . . . . . . . . . . . . . . . . . . . . . . . . . . . 1-1
Instrument Panel . . . . . . . . . . . . . . . . . . . . . . . . . . . . . . . . . 1-2
Initial Drive Information . . . . . . . . . . . . . . . . . . . . . . . . . . . 1-6
Vehicle Features . . . . . . . . . . . . . . . . . . . . . . . . . . . . . . . . 1-24
Performance and Maintenance . . . . . . . . . . . . . . . . . . 1-31
Seats and Restraint System . . . . . . . . . . . . . . . . . . . . . . 2-1
Head Restraints . . . . . . . . . . . . . . . . . . . . . . . . . . . . . . . . . . 2-3
Front Seats . . . . . . . . . . . . . . . . . . . . . . . . . . . . . . . . . . . . . . . 2-4
Rear Seats . . . . . . . . . . . . . . . . . . . . . . . . . . . . . . . . . . . . . . 2-14
Safety Belts . . . . . . . . . . . . . . . . . . . . . . . . . . . . . . . . . . . . . 2-16
Child Restraints . . . . . . . . . . . . . . . . . . . . . . . . . . . . . . . . . 2-39
Airbag System . . . . . . . . . . . . . . . . . . . . . . . . . . . . . . . . . . 2-73
Restraint System Check . . . . . . . . . . . . . . . . . . . . . . . . . 2-94
Features and Controls . . . . . . . . . . . . . . . . . . . . . . . . . . . . 3-1
Keys . . . . . . . . . . . . . . . . . . . . . . . . . . . . . . . . . . . . . . . . . . . . . 3-3
Doors and Locks . . . . . . . . . . . . . . . . . . . . . . . . . . . . . . . . . 3-9
Windows . . . . . . . . . . . . . . . . . . . . . . . . . . . . . . . . . . . . . . . . 3-14
Theft-Deterrent Systems . . . . . . . . . . . . . . . . . . . . . . . . 3-17
Starting and Operating Your Vehicle . . . . . . . . . . . . . 3-21
Mirrors . . . . . . . . . . . . . . . . . . . . . . . . . . . . . . . . . . . . . . . . . . 3-56
Object Detection Systems . . . . . . . . . . . . . . . . . . . . . . . 3-60 Universal Home Remote System . . . . . . . . . . . . . . . . 3-69
Storage Areas . . . . . . . . . . . . . . . . . . . . . . . . . . . . . . . . . . . 3-75
Sunroof . . . . . . . . . . . . . . . . . . . . . . . . . . . . . . . . . . . . . . . . . 3-78
Instrument Panel . . . . . . . . . . . . . . . . . . . . . . . . . . . . . . . . . 4-1
Instrument Panel Overview . . . . . . . . . . . . . . . . . . . . . . . 4-3
Climate Controls . . . . . . . . . . . . . . . . . . . . . . . . . . . . . . . . 4-18
Warning Lights, Gauges, and Indicators . . . . . . . . . 4-28
Driver Information Center (DIC) . . . . . . . . . . . . . . . . . 4-49
Audio System(s) . . . . . . . . . . . . . . . . . . . . . . . . . . . . . . . . 4-82
Driving Your Vehicle . . . . . . . . . . . . . . . . . . . . . . . . . . . . . . 5-1
Your Driving, the Road, and the Vehicle . . . . . . . . . . 5-2
Towing . . . . . . . . . . . . . . . . . . . . . . . . . . . . . . . . . . . . . . . . . . 5-44
Service and Appearance Care . . . . . . . . . . . . . . . . . . . 6-1
Service . . . . . . . . . . . . . . . . . . . . . . . . . . . . . . . . . . . . . . . . . . . 6-4
Fuel . . . . . . . . . . . . . . . . . . . . . . . . . . . . . . . . . . . . . . . . . . . . . . 6-6
Checking Things Under the Hood . . . . . . . . . . . . . . . 6-14
Rear Axle . . . . . . . . . . . . . . . . . . . . . . . . . . . . . . . . . . . . . . . 6-48
Four-Wheel Drive . . . . . . . . . . . . . . . . . . . . . . . . . . . . . . . 6-50
Front Axle . . . . . . . . . . . . . . . . . . . . . . . . . . . . . . . . . . . . . . . 6-52
Noise Control System . . . . . . . . . . . . . . . . . . . . . . . . . . . 6-53
Page 4 of 626

Safety Warnings and Symbols
Warning messages found on vehicle labels and in this
manual describe hazards and what to do to avoid or
reduce them.
Dangerindicates a hazard with a high level of risk
which will result in serious injury or death.
Warning orCaution indicates a hazard that could result
in injury or death.
{WARNING:
These mean there is something that could hurt
you or other people.
Notice: This means there is something that could
result in property or vehicle damage. This would not
be covered by the vehicle's warranty.
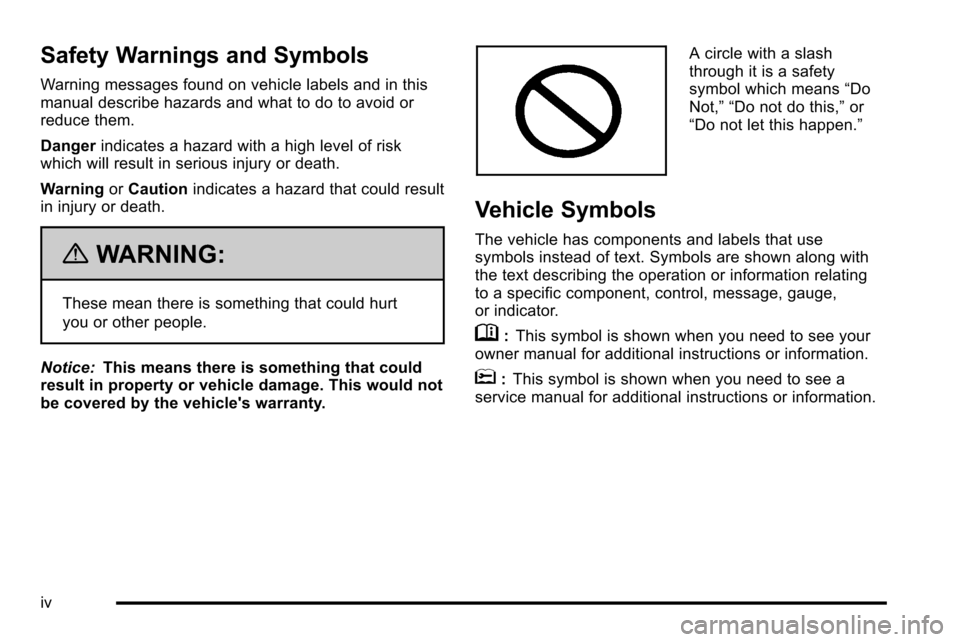
A circle with a slash
through it is a safety
symbol which means “Do
Not,” “Do not do this,” or
“Do not let this happen.”
Vehicle Symbols
The vehicle has components and labels that use
symbols instead of text. Symbols are shown along with
the text describing the operation or information relating
to a specific component, control, message, gauge,
or indicator.
M: This symbol is shown when you need to see your
owner manual for additional instructions or information.
*: This symbol is shown when you need to see a
service manual for additional instructions or information.
iv
Page 5 of 626

Vehicle Symbol Chart
Here are some additional symbols that may be found on
the vehicle and what they mean. For more information
on the symbol, refer to the index.
0:Adjustable Pedals
9:Airbag Readiness Light
#:Air Conditioning
!:Antilock Brake System (ABS)
g:Audio Steering Wheel Controls or OnStar®
$:Brake System Warning Light
":Charging System
I:Cruise Control
B: Engine Coolant Temperature
O:Exterior Lamps
#:Fog Lamps
.: Fuel Gauge
+:Fuses
i: Headlamp High/Low-Beam Changer
j:LATCH System Child Restraints
*: Malfunction Indicator Lamp
::Oil Pressure
g:Outside Power Foldaway Mirrors
}:Power
/:Remote Vehicle Start
>:Safety Belt Reminders
7:Tire Pressure Monitor
_: Tow/Haul Mode
F:Traction Control
M:Windshield Washer Fluid
v
Page 9 of 626

A.Outlet Adjustment on page 4‑28.
B. Turn Signal/Multifunction Lever on page 4‑4.
C. Driver Information Center (DIC) Buttons. See Driver Information Center (DIC) on page 4‑49.
D. Hazard Warning Flashers on page 4‑3.
E. Instrument Panel Cluster on page 4‑29.
F. Shift Lever. See Automatic Transmission Operation
on page 3‑28. Tow/Haul Selector Button
(If Equipped). See Tow/Haul Modeon page 3‑34.
Range Selection Mode (Allison Transmission and
Hydra-Matic
®6‐Speed Button (If Equipped). See
Automatic Transmission Operation on page 3‑28.
G. Audio System(s) on page 4‑82.
H. Instrument Panel Storage on page 3‑76.
I. Integrated Trailer Brake Controller (If Equipped). See Towing a Trailer on page 5‑51.
J. Exterior Lamps on page 4‑10.
K. Hood Release on page 6‑15.
L. Parking Brake on page 3‑50.
M. Dome Lamp Override
on page 4‑15.Dome Lampson page 4‑14.Fog Lampson page 4‑13(If Equipped).
N. Cruise Control on page 4‑7.
O. Tilt Wheel on page 4‑3. P.
Horn on page 4‑3.
Q. Audio Steering Wheel Controls
on page 4‑143(If Equipped).
R. Automatic Transfer Case Control (If Equipped). See Four-Wheel Drive on page 3‑36.
S. Ashtray (If Equipped). See Ashtray(s) and
Cigarette Lighter on page 4‑18.
T. StabiliTrak
®Systemon page 5‑6(If Equipped).
Ultrasonic Rear Parking Assist (URPA)on
page 3‑60(If Equipped). Pedal Adjust Button
(If Equipped). See Adjustable Throttle and Brake
Pedal
on page 3‑26. Heated Windshield Washer
Fluid Button (If Equipped). Windshield Washeron
page 4‑6.
U. Accessory Power Outlet(s) on page 4‑17.
V. Climate Control System (With Air Conditioning)
on
page 4‑18or Climate Control System (With Heater
Only)on page 4‑21and Dual Automatic Climate
Control System on page 4‑22.
W. Power Take Off (PTO) Control (If Equipped). See Power Take Off (PTO) in the Duramax Diesel
Supplement Index.
X. Passenger Airbag Off Control (If Equipped). See Airbag Off Switch on page 2‑82.
Y. Glove Box on page 3‑75.
1-3
Page 11 of 626

A.Outlet Adjustment on page 4‑28.
B. Turn Signal/Multifunction Lever on page 4‑4.
C. Instrument Panel Cluster on page 4‑29.
D. Hazard Warning Flashers
on page 4‑3.
E. Shift Lever. See Automatic Transmission Operation
on page 3‑28.
F. Tow/Haul Mode
on page 3‑34(If Equipped).
G. Driver Information Center (DIC) Buttons. See Driver Information Center (DIC) on page 4‑49.
H. Audio System(s) on page 4‑82.
I. Exterior Lamps on page 4‑10.
J. Integrated Trailer Brake Controller (If Equipped). See Towing a Trailer on page 5‑51.
K. Dome Lamp Override
on page 4‑15.Dome Lampson page 4‑14.
L. Automatic Transfer Case Control. (If Equipped). See Four-Wheel Drive on page 3‑36.
M. Hood Release on page 6‑15.
N. Parking Brake on page 3‑50. O.
Cruise Control on page 4‑7.
P. Tilt Wheel on page 4‑3.
Q. Horn on page 4‑3.
R. Audio Steering Wheel Controls on page 4‑143.
S. Climate Control System (With Air Conditioning)
on
page 4‑18or Climate Control System (With Heater
Only)on page 4‑21or Dual Automatic Climate
Control Systemon page 4‑22(If Equipped).
T. Accessory Power Outlet(s)
on page 4‑17.
Cigarette Lighter (If Equipped). See Ashtray(s) and
Cigarette Lighter
on page 4‑18.
U. StabiliTrak®Systemon page 5‑6(If Equipped).
Pedal Adjust Button (If Equipped). See Adjustable
Throttle and Brake Pedal
on page 3‑26. Ultrasonic
Rear Parking Assist (URPA)on page 3‑60(If Equipped). Heated Windshield Washer Fluid
Button (If Equipped). See Windshield Washeron
page 4‑6.
V. Passenger Airbag Off Control (If Equipped). See Airbag Off Switch on page 2‑82.
W. Glove Box on page 3‑75.
1-5
Page 13 of 626

The engine will continue to run for 10 minutes. Repeat
the steps for a 10-minute time extension. Remote start
can be extended only once.
Canceling a Remote Start
To cancel a remote start:
.Aim the RKE transmitter at the vehicle and press
and hold
/until the parking lamps turn off.
.Turn on the hazard warning flashers.
.Turn the ignition on and then back off.
See Remote Vehicle Start on page 3‑7.
Door Locks
There are several ways to lock and unlock the vehicle.
From outside, use the Remote Keyless Entry (RKE)
transmitter or the key in the driver door. From inside,
use the power door locks or the manual door locks. To
lock or unlock the door with the manual locks, push
down or pull up on the manual lock knob.
Power Door Locks
If available, these switches are located on the front
doors.
K:Press to unlock the doors.
Q:Remove the key from the ignition and press to lock
the doors.
For more information, see:
.Programmable Automatic Door Lockson
page 3‑10.
.Rear Door Security Locks on page 3‑10.
Windows
Turn the hand crank on each door to manually raise or
lower the manual windows.
1-7
Page 37 of 626

Vent:From the closed position, press the rear of the
passenger side switch to vent the sunroof.
Manual-Open/Manual-Close: To open the sunroof,
press and hold the rear of the driver side switch until the
sunroof reaches the desired position. Press and hold
the front of the driver side switch to close it.
Express-Open/Express-Close: To express-open the
sunroof, fully press and release the rear of the driver
side switch until the sunroof reaches the desired
position. To express-close the sunroof, fully press and
release the front of the driver side switch. Press the
switch again to stop it.
The sunroof also has a sunshade that you can pull
forward to block the rays of the sun. The sunshade
must be opened and closed manually.
See Sunroof on page 3‑78.Performance and Maintenance
StabiliTrak®
The vehicle may have a traction control system that
limits wheel spin and the StabiliTrak system that assists
with directional control of the vehicle in difficult driving
conditions. Both systems turn on automatically every
time the vehicle is started.
.To turn off traction control, press and release5on
the instrument panel.
Filluminates and the
appropriate DIC message displays. See DIC
Warnings and Messages on page 4‑63.
.To turn off both traction control and Electronic
Stability Control, press and hold
5untilF
illuminates and the appropriate DIC message
displays. See DIC Warnings and Messageson
page 4‑63.
.Press and release the button again to turn on both
systems.
For more information, see StabiliTrak
®Systemon
page 5‑6.
1-31
Page 38 of 626

Tire Pressure Monitor
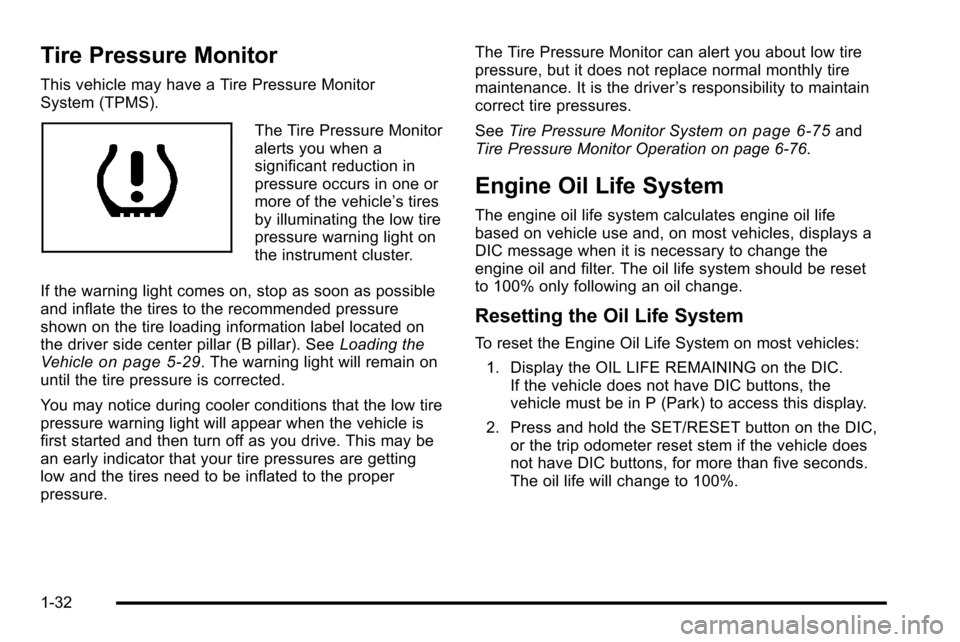
This vehicle may have a Tire Pressure Monitor
System (TPMS).
The Tire Pressure Monitor
alerts you when a
significant reduction in
pressure occurs in one or
more of the vehicle’s tires
by illuminating the low tire
pressure warning light on
the instrument cluster.
If the warning light comes on, stop as soon as possible
and inflate the tires to the recommended pressure
shown on the tire loading information label located on
the driver side center pillar (B pillar). See Loading the
Vehicle
on page 5‑29. The warning light will remain on
until the tire pressure is corrected.
You may notice during cooler conditions that the low tire
pressure warning light will appear when the vehicle is
first started and then turn off as you drive. This may be
an early indicator that your tire pressures are getting
low and the tires need to be inflated to the proper
pressure. The Tire Pressure Monitor can alert you about low tire
pressure, but it does not replace normal monthly tire
maintenance. It is the driver
’s responsibility to maintain
correct tire pressures.
See Tire Pressure Monitor System
on page 6‑75and
Tire Pressure Monitor Operation on page 6‑76.
Engine Oil Life System
The engine oil life system calculates engine oil life
based on vehicle use and, on most vehicles, displays a
DIC message when it is necessary to change the
engine oil and filter. The oil life system should be reset
to 100% only following an oil change.
Resetting the Oil Life System
To reset the Engine Oil Life System on most vehicles:
1. Display the OIL LIFE REMAINING on the DIC. If the vehicle does not have DIC buttons, the
vehicle must be in P (Park) to access this display.
2. Press and hold the SET/RESET button on the DIC, or the trip odometer reset stem if the vehicle does
not have DIC buttons, for more than five seconds.
The oil life will change to 100%.
1-32