Page 272 of 432

Tire Pressure Monitor System.........................6-60
Tire Pressure Monitor Operation.....................6-62
Tire Inspection and Rotation . ..........................6-65
When It Is Time for New Tires.......................6-67
Buying New Tires.........................................6-68
Different Size Tires and Wheels......................6-69
Uniform Tire Quality Grading..........................6-70
Wheel Alignment and Tire Balance..................6-71
Wheel Replacement......................................6-71
Tire Chains . . . ...............................................6-73
If a Tire Goes Flat........................................6-74
Changing a Flat Tire.....................................6-75
Removing the Spare Tire and Tools................6-76
Removing the Flat Tire and Installing the
Spare Tire................................................6-77
Storing a Flat or Spare Tire and Tools................6-83
Compact Spare Tire......................................6-86
Appearance Care............................................6-87
Interior Cleaning...........................................6-87
Fabric/Carpet . ..............................................6-88
Leather.......................................................6-89
Instrument Panel, Vinyl, and Other Plastic
Surfaces . . . ...............................................6-90
Care of Safety Belts......................................6-90Weatherstrips...............................................6-90
Washing Your Vehicle...................................6-91
Cleaning Exterior Lamps/Lenses . . ...................6-91
Finish Care..................................................6-92
Windshield and Wiper Blades.........................6-92
Aluminum Wheels.........................................6-93
Tires...........................................................6-93
Sheet Metal Damage.....................................6-94
Finish Damage.............................................6-94
Underbody Maintenance................................6-94
Chemical Paint Spotting.................................6-94
Vehicle Identification......................................6-95
Vehicle Identification Number (VIN).................6-95
Service Parts Identification Label . . ...................6-95
Electrical System............................................6-95
Add-On Electrical Equipment..........................6-95
Headlamp Wiring..........................................6-96
Windshield Wiper Fuses................................6-96
Power Windows and Other Power Options.......6-96
Fuses and Circuit Breakers . . . . . .......................6-96
Instrument Panel Fuse Block..........................6-96
Underhood Fuse Block..................................6-97
Capacities and Specifications........................6-100
Section 6 Service and Appearance Care
6-2
Page 320 of 432

To remove and replace the wiper blade element do the
following:
4. The wiper blade element has two notches at one
end which are engaged by the bottom claw set of
the wiper blade. At the notched end of the wiper
blade, pull the wiper blade element from the wiper
blade assembly.
5. To replace the element, start at the heel end of the
wiper blade, which is the end nearest to the base of
the wiper arm, and slide the wiper blade element,
notched end last, into the wiper blade claw sets.
6. To engage the last claw into the notched end of the
wiper blade element, squeeze the wiper blade
element at the notched area, and push the wiper
blade element so the claw fits into the notch.
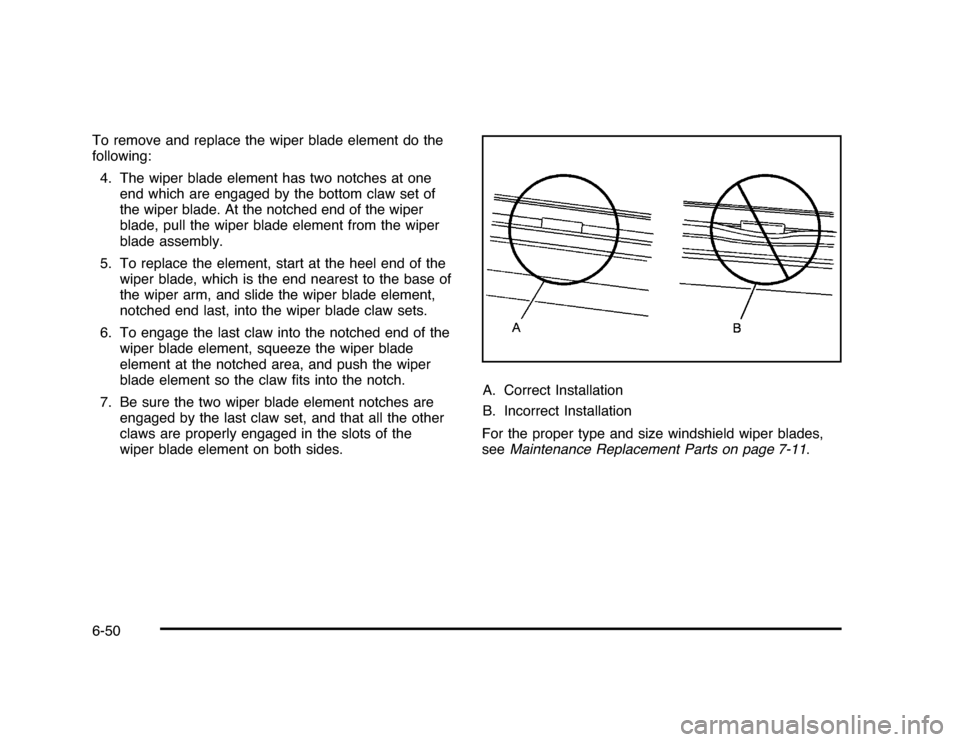
7. Be sure the two wiper blade element notches are
engaged by the last claw set, and that all the other
claws are properly engaged in the slots of the
wiper blade element on both sides.A. Correct Installation
B. Incorrect Installation
For the proper type and size windshield wiper blades,
seeMaintenance Replacement Parts on page 7-11.6-50
Page 366 of 432

Headlamp WiringThe headlamp wiring is protected by fuses in the fuse
block. An electrical overload will cause the lamps to turn
off. If this happens, have the headlamp wiring checked
right away.Windshield Wiper FusesThe windshield wiper motor is protected by a fuse. If the
motor overheats due to heavy snow, etc., the wiper
will stop until the motor cools. If the overload is caused
by some electrical problem, have it fixed.Power Windows and Other Power
OptionsCircuit breakers in the instrument panel fuse panel
protect the power windows and other power accessories.
When the current load is too heavy, the circuit breaker
opens and closes, protecting the circuit until the
problem is fixed.Fuses and Circuit BreakersThe wiring circuits in the vehicle are protected from
short circuits by a combination of fuses and circuit
breakers. This greatly reduces the chance of fires
caused by electrical problems.Look at the silver-colored band inside the fuse. If the
band is broken or melted, replace the fuse. Be sure you
replace a bad fuse with a new one of the identical
size and rating.
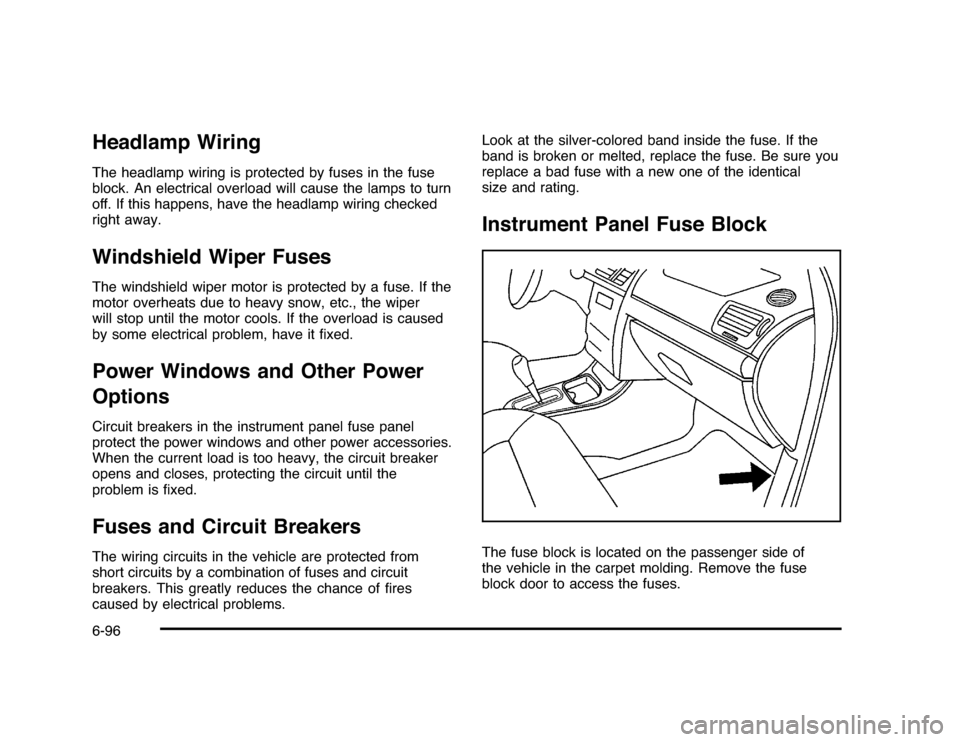
Instrument Panel Fuse BlockThe fuse block is located on the passenger side of
the vehicle in the carpet molding. Remove the fuse
block door to access the fuses.
6-96