2010 CHEVROLET IMPALA key battery
[x] Cancel search: key batteryPage 110 of 432

Remote Keyless Entry (RKE)
SystemSeeRadio Frequency Statement on page 8-20for
information regarding Part 15 of the Federal
Communications Commission (FCC) Rules and
RSS-210/211 of Industry and Science Canada.
Changes or modifications to this system by other than
an authorized service facility could void authorization to
use this equipment.
If there is a decrease in the RKE operating range,
try this:•
Check the distance. The transmitter may be too far
from the vehicle. Stand closer during rainy or
snowy weather.
•
Check the location. Other vehicles or objects may
be blocking the signal. Take a few steps to the
left or right, hold the transmitter higher, and
try again.
•
Check the transmitter’s battery. See “Battery
Replacement” later in this section.
•
If the transmitter is still not working correctly, see
your dealer/retailer or a qualified technician for
service.
Remote Keyless Entry (RKE)
System OperationThe Remote Keyless Entry (RKE) transmitter functions
work up to 195 feet (60 m) away from the vehicle.
There are other conditions which can affect the
performance of the transmitter. SeeRemote Keyless
Entry (RKE) System on page 3-4./
(Remote Vehicle Start):For vehicles with this
feature, press to start the engine from outside the vehicle
using the RKE transmitter. SeeRemote Vehicle Start on
page 3-7for additional information. With Remote Start
Shown, Without Remote
Start Similar
3-4
Page 112 of 432
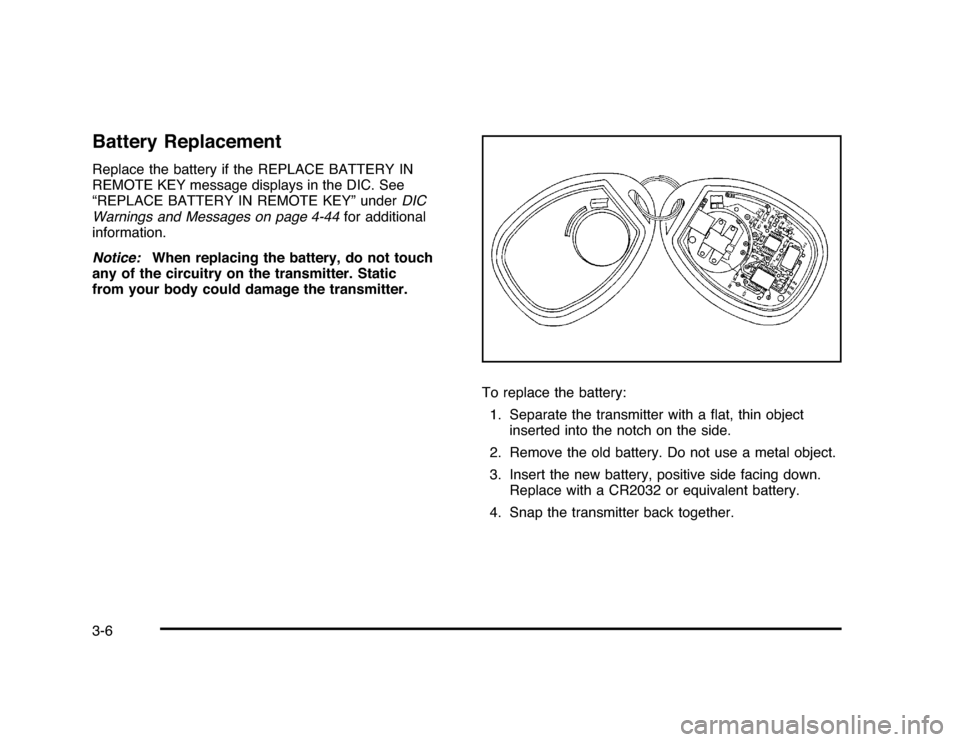
Battery ReplacementReplace the battery if the REPLACE BATTERY IN
REMOTE KEY message displays in the DIC. See
“REPLACE BATTERY IN REMOTE KEY” underDIC
Warnings and Messages on page 4-44for additional
information.
Notice:When replacing the battery, do not touch
any of the circuitry on the transmitter. Static
from your body could damage the transmitter.
To replace the battery:
1. Separate the transmitter with a flat, thin object
inserted into the notch on the side.
2. Remove the old battery. Do not use a metal object.
3. Insert the new battery, positive side facing down.
Replace with a CR2032 or equivalent battery.
4. Snap the transmitter back together.3-6
Page 126 of 432
Ignition Positions
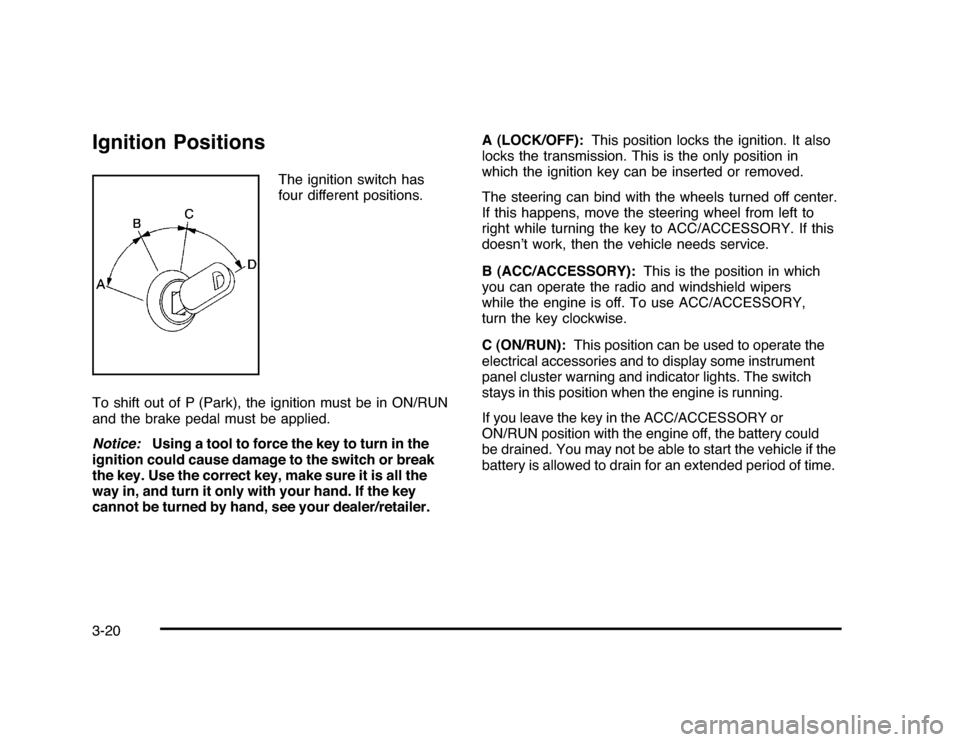
The ignition switch has
four different positions.
To shift out of P (Park), the ignition must be in ON/RUN
and the brake pedal must be applied.
Notice:Using a tool to force the key to turn in the
ignition could cause damage to the switch or break
the key. Use the correct key, make sure it is all the
way in, and turn it only with your hand. If the key
cannot be turned by hand, see your dealer/retailer.A (LOCK/OFF):This position locks the ignition. It also
locks the transmission. This is the only position in
which the ignition key can be inserted or removed.
The steering can bind with the wheels turned off center.
If this happens, move the steering wheel from left to
right while turning the key to ACC/ACCESSORY. If this
doesn’t work, then the vehicle needs service.
B (ACC/ACCESSORY):This is the position in which
you can operate the radio and windshield wipers
while the engine is off. To use ACC/ACCESSORY,
turn the key clockwise.
C (ON/RUN):This position can be used to operate the
electrical accessories and to display some instrument
panel cluster warning and indicator lights. The switch
stays in this position when the engine is running.
If you leave the key in the ACC/ACCESSORY or
ON/RUN position with the engine off, the battery could
be drained. You may not be able to start the vehicle if the
battery is allowed to drain for an extended period of time.
3-20
Page 128 of 432

Starting Procedure1. With your foot off the accelerator pedal, turn the
ignition to START. When the engine starts, let go of
the key. The idle speed will slow down as the engine
warms. Do not race the engine immediately after
starting it. Operate the engine and transmission
gently to allow the oil to warm up and lubricate all
moving parts.
The vehicle has a Computer-Controlled Cranking
System. This feature assists in starting the engine
and protects components. If the ignition key is turned
to the START position, and then released when the
engine begins cranking, the engine will continue
cranking for a few seconds or until the vehicle starts.
If the engine does not start and the key is held in
START, cranking will be stopped after 15 seconds to
prevent cranking motor damage. To prevent gear
damage, this system also prevents cranking if the
engine is already running. Engine cranking can be
stopped by turning the ignition switch to the ACC/
ACCESSORY or LOCK/OFF position.
Notice:Cranking the engine for long periods of
time, by returning the key to the START position
immediately after cranking has ended, can overheat
and damage the cranking motor, and drain the
battery. Wait at least 15 seconds between each try,
to let the cranking motor cool down.2. If the engine does not start after 5-10 seconds,
especially in very cold weather (below 0°F or−18°C),
it could be flooded with too much gasoline. Try
pushing the accelerator pedal all the way to the floor
and holding it there as you hold the key in START
for up to a maximum of 15 seconds. Wait at least
15 seconds between each try, to allow the cranking
motor to cool down. When the engine starts, let go of
the key and accelerator. If the vehicle starts briefly
but then stops again, repeat these steps. This clears
the extra gasoline from the engine. Do not race the
engine immediately after starting it. Operate the
engine and transmission gently until the oil warms
up and lubricates all moving parts.
Notice:The engine is designed to work with the
electronics in the vehicle. If you add electrical parts
or accessories, you could change the way the engine
operates. Before adding electrical equipment, check
with your dealer/retailer. If you do not, the engine
might not perform properly. Any resulting damage
would not be covered by the vehicle warranty.
3-22
Page 136 of 432
The shift lock is always functional except in the case of a
an uncharged or low voltage (less than 9 volt) battery.
If the vehicle has an uncharged battery or a battery with
low voltage, try charging or jump starting the battery.
SeeJump Starting on page 6-39.Console ShiftIf the console shift lever cannot be moved out of
P (Park):
1. Apply and maintain the regular brakes.
2. Turn the ignition to ON/RUN position. SeeIgnition
Positions on page 3-20for more information.
3. Let up on the shift lever and make sure the shift
lever is pushed all the way into P (Park).
4. Press the shift lever button
5. Then, move the shift into the desired gear.
If you still cannot move the shift lever from P (Park),
consult your dealer/retailer or a professional towing
service.
Column ShiftIf the column shift lever cannot be moved out of
P (Park):
1. Apply and maintain the regular brakes.
2. Turn the ignition key to the ON/RUN position. See
Ignition Positions on page 3-20for more information.
3. Shift out of the P (Park) position to the N (Neutral)
position.
4. Move the vehicle to a safe location.
If you still cannot move the shift lever from P (Park),
consult your dealer/retailer or a professional towing
service.Parking Over Things That Burn
{
WARNING:
Things that can burn could touch hot exhaust
parts under the vehicle and ignite. Do not park
over papers, leaves, dry grass, or other things that
can burn.
3-30
Page 163 of 432
Delayed Exit LightingThis feature illuminates the interior for a period of time
after the key is removed from the ignition.
The ignition must be off for delayed exit lighting to work.
When the key is removed, interior illumination activates
and remains on until one of the following occurs:•
The ignition is in ON/RUN.
•
The power door locks are activated.
•
An illumination period of 20 seconds has elapsed.
If during the illumination period a door is opened,
the timed illumination period will be canceled and the
interior lamps will remain on because a door is open.
Parade DimmingParade mode automatically prohibits the dimming of
the instrument panel displays during the daylight while
the headlamps are on so that the displays are still
able to be seen.Reading LampsThe vehicle has reading lamps that also act as the
dome lamp. Press the button near each lamp to turn
them on and off.
Map LampsThe vehicle has map lamps on the rearview mirror.
Press the button near each lamp on the mirror to turn
the map lamps on and off.Electric Power ManagementThe vehicle has Electric Power Management (EPM) that
estimates the battery’s temperature and state of charge.
It then adjusts the voltage for best performance and
extended life of the battery.
When the battery’s state of charge is low, the voltage is
raised slightly to quickly bring the charge back up. When
the state of charge is high, the voltage is lowered slightly
to prevent overcharging. If the vehicle has a voltmeter
gage or a voltage display on the Driver Information
Center (DIC), you may see the voltage move up or down.
This is normal. If there is a problem, an alert will be
displayed.
The battery can be discharged at idle if the electrical
loads are very high. This is true for all vehicles. This is
because the generator (alternator) may not be spinning
fast enough at idle to produce all the power that is
needed for very high electrical loads.
4-13
Page 184 of 432
Emissions Inspection and Maintenance
ProgramsSome state/provincial and local governments have or
might begin programs to inspect the emission control
equipment on the vehicle. Failure to pass this inspection
could prevent getting a vehicle registration.
Here are some things to know to help the vehicle pass
an inspection:•
The vehicle will not pass this inspection if the check
engine light is on with the engine running, or if the
key is in ON/RUN and the light is not on.
•
The vehicle will not pass this inspection if the OBD II
(on-board diagnostic) system determines that critical
emission control systems have not been completely
diagnosed by the system. The vehicle would be
considered not ready for inspection. This can happen
if the battery has recently been replaced or if the
battery has run down. The diagnostic system is
designed to evaluate critical emission control
systems during normal driving. This can take several
days of routine driving. If this has been done and the
vehicle still does not pass the inspection for lack of
OBD II system readiness, your dealer/retailer can
prepare the vehicle for inspection.
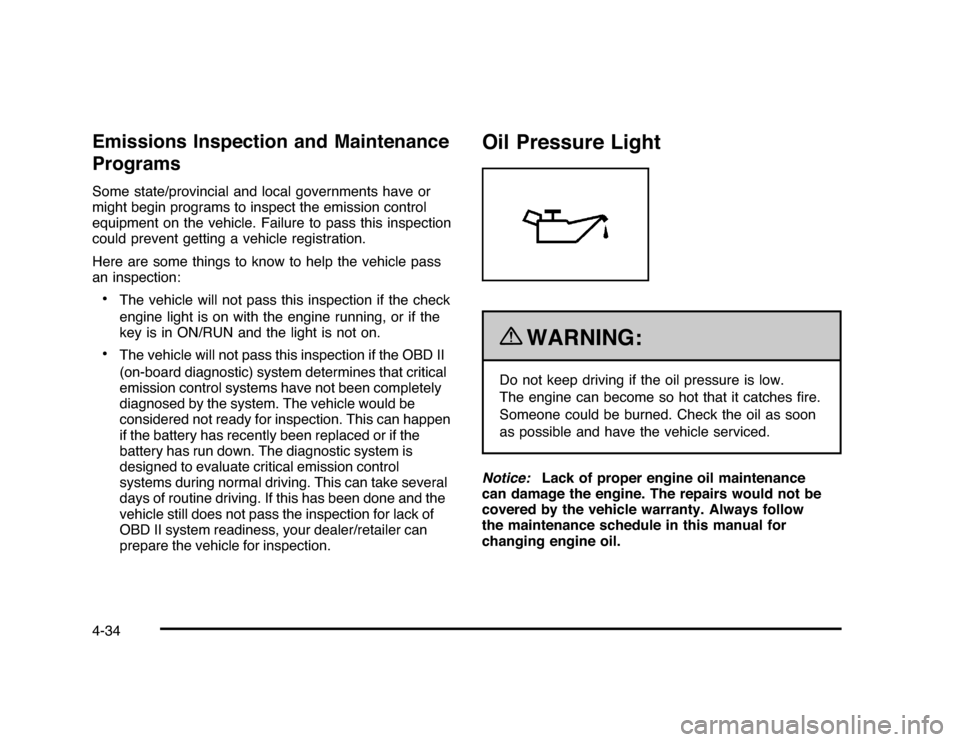
Oil Pressure Light
{
WARNING:
Do not keep driving if the oil pressure is low.
The engine can become so hot that it catches fire.
Someone could be burned. Check the oil as soon
as possible and have the vehicle serviced.
Notice:Lack of proper engine oil maintenance
can damage the engine. The repairs would not be
covered by the vehicle warranty. Always follow
the maintenance schedule in this manual for
changing engine oil.
4-34
Page 197 of 432
REMOTE KEY LEARNING ACTIVEThis message displays while you are matching a
Remote Keyless Entry (RKE) transmitter to your vehicle.
See “Matching Transmitter(s) to Your Vehicle” under
Remote Keyless Entry (RKE) System Operation
on page 3-4andDIC Operation and Displays on
page 4-37for more information.REPLACE BATTERY IN REMOTE KEYThis message displays when the battery in the Remote
Keyless Entry (RKE) transmitter needs to be replaced.
To replace the battery, see “Battery Replacement” under
Remote Keyless Entry (RKE) System Operation on
page 3-4.RIGHT REAR DOOR OPENThis message displays when the passenger side rear
door is not closed properly. Make sure that the door
is closed completely.SERVICE A/C (Air Conditioning)
SYSTEMThis message displays when the electronic sensors that
control the air conditioning and heating systems are
no longer working. Have the climate control system
serviced by your dealer/retailer if you notice a drop
in heating and air conditioning efficiency.
SERVICE AIR BAGThis message displays when there is a problem with
the airbag system. Have your vehicle serviced by your
dealer/retailer immediately. SeeAirbag Readiness
Light on page 4-24for more information.SERVICE BATTERY CHARGING
SYSTEMThis message displays when there is a problem with the
generator and battery charging systems. Driving with this
problem could drain the battery. Turn off all unnecessary
accessories. Stop and turn off the vehicle as soon as it is
safe to do so. Have the electrical system checked by your
dealer/retailer immediately.SERVICE BRAKE SYSTEMThis message displays when service is required on the
brake system. Have the brake system serviced by
your dealer/retailer as soon as possible. The brake
system warning light also appears on the instrument
panel cluster when this message appears on the DIC.
SeeBrake System Warning Light on page 4-27.
4-47