2010 CHEVROLET IMPALA warning light
[x] Cancel search: warning lightPage 102 of 432
If the passenger seat gets wet, dry the seat immediately.
If the airbag readiness light is lit, do not install a child
restraint or allow anyone to occupy the seat. SeeAirbag
Readiness Light on page 4-24for important safety
information.
The on indicator may be lit if an object, such as a
briefcase, handbag, grocery bag, laptop or other
electronic device, is put on an unoccupied seat.
If this is not desired, remove the object from the seat.
{
WARNING:
Stowing of articles under the passenger seat or
between the passenger seat cushion and seatback
may interfere with the proper operation of the
passenger sensing system.
Servicing Your Airbag-Equipped
VehicleAirbags affect how the vehicle should be serviced.
There are parts of the airbag system in several places
around the vehicle. Your dealer/retailer and the
service manual have information about servicing the
vehicle and the airbag system. To purchase a service
manual, seeService Publications Ordering Information
on page 8-17.
{
WARNING:
For up to 10 seconds after the ignition is turned off
and the battery is disconnected, an airbag can still
inflate during improper service. You can be injured
if you are close to an airbag when it inflates. Avoid
yellow connectors. They are probably part of the
airbag system. Be sure to follow proper service
procedures, and make sure the person performing
work for you is qualified to do so.
2-72
Page 105 of 432
Replacing Restraint System Parts
After a Crash
{
WARNING:
A crash can damage the restraint systems in your
vehicle. A damaged restraint system may not
properly protect the person using it, resulting in
serious injury or even death in a crash. To help
make sure your restraint systems are working
properly after a crash, have them inspected and
any necessary replacements made as soon as
possible.If the vehicle has been in a crash, do you need new
safety belts or LATCH system (if equipped) parts?
After a very minor crash, nothing may be necessary.
But the safety belt assemblies that were used during any
crash may have been stressed or damaged. See your
dealer/retailer to have the safety belt assemblies
inspected or replaced.
If the vehicle has the LATCH system and it was being
used during a crash, you may need new LATCH system
parts.
New parts and repairs may be necessary even if the
safety belt or LATCH system (if equipped), was
not being used at the time of the crash.
If an airbag inflates, you will need to replace airbag
system parts. See the part on the airbag system earlier
in this section.
Have the safety belt pretensioners checked if the
vehicle has been in a crash, if the airbag readiness light
stays on after the vehicle is started, or while you are
driving. SeeAirbag Readiness Light on page 4-24.
2-75
Page 114 of 432

The engine will shut off automatically after 10 minutes,
unless a time extension has been done or the vehicle’s
key is inserted into the ignition switch and turned to
ON/RUN.
To manually shut off a remote start, do any of the
following.•
Aim the RKE transmitter at the vehicle and press
and release the remote start button.
•
Turn on the hazard warning flashers.
•
Turn the ignition switch out of LOCK/OFF position
and then back to LOCK/OFF.
After the engine has been started two times, or one
time with a time extension, the vehicle’s ignition must
be turned to ON/RUN using the key before the remote
start procedure can be used again. SeeIgnition
Positions on page 3-20for information regarding the
ignition positions on your vehicle.The remote vehicle start feature will not operate if any
of the follow occur:
•
The remote start system is disabled through the DIC.
•
The vehicle’s key is in the ignition.
•
The vehicle’s hood is open.
•
The hazard warning flashers are on.
•
The check engine light is on. SeeMalfunction
Indicator Lamp on page 4-31.
•
The engine coolant temperature is too high.
•
The oil pressure is low.
•
The content theft-deterrent alarm has been activated.
•
Two remote vehicle starts, or one start with a time
extension, have already been provided for that
ignition cycle.
3-8
Page 126 of 432
Ignition Positions
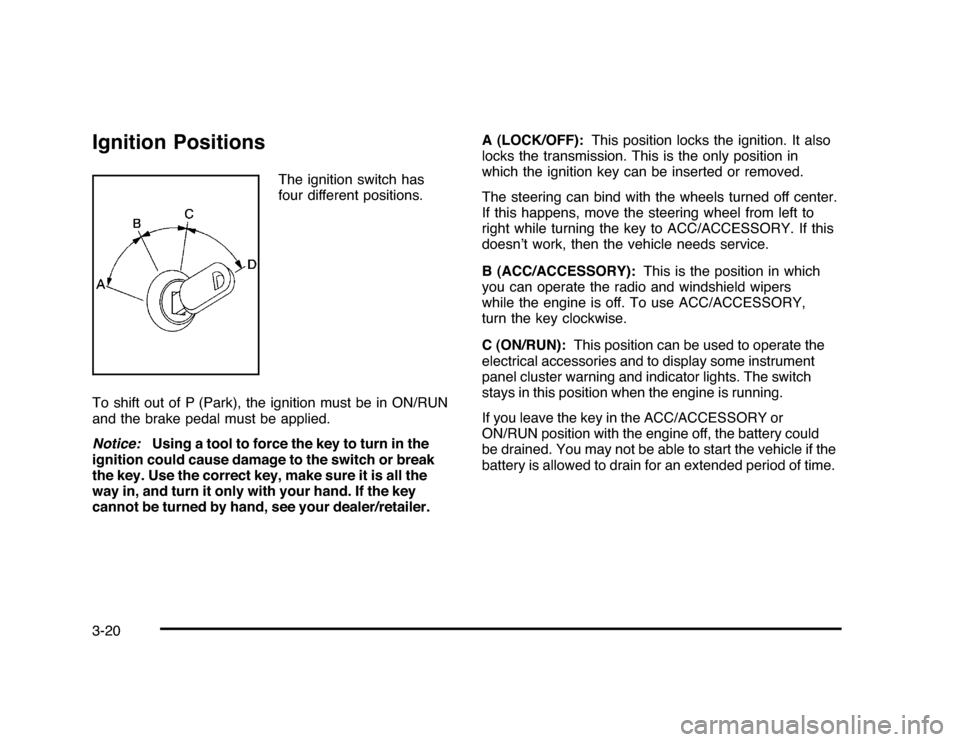
The ignition switch has
four different positions.
To shift out of P (Park), the ignition must be in ON/RUN
and the brake pedal must be applied.
Notice:Using a tool to force the key to turn in the
ignition could cause damage to the switch or break
the key. Use the correct key, make sure it is all the
way in, and turn it only with your hand. If the key
cannot be turned by hand, see your dealer/retailer.A (LOCK/OFF):This position locks the ignition. It also
locks the transmission. This is the only position in
which the ignition key can be inserted or removed.
The steering can bind with the wheels turned off center.
If this happens, move the steering wheel from left to
right while turning the key to ACC/ACCESSORY. If this
doesn’t work, then the vehicle needs service.
B (ACC/ACCESSORY):This is the position in which
you can operate the radio and windshield wipers
while the engine is off. To use ACC/ACCESSORY,
turn the key clockwise.
C (ON/RUN):This position can be used to operate the
electrical accessories and to display some instrument
panel cluster warning and indicator lights. The switch
stays in this position when the engine is running.
If you leave the key in the ACC/ACCESSORY or
ON/RUN position with the engine off, the battery could
be drained. You may not be able to start the vehicle if the
battery is allowed to drain for an extended period of time.
3-20
Page 133 of 432
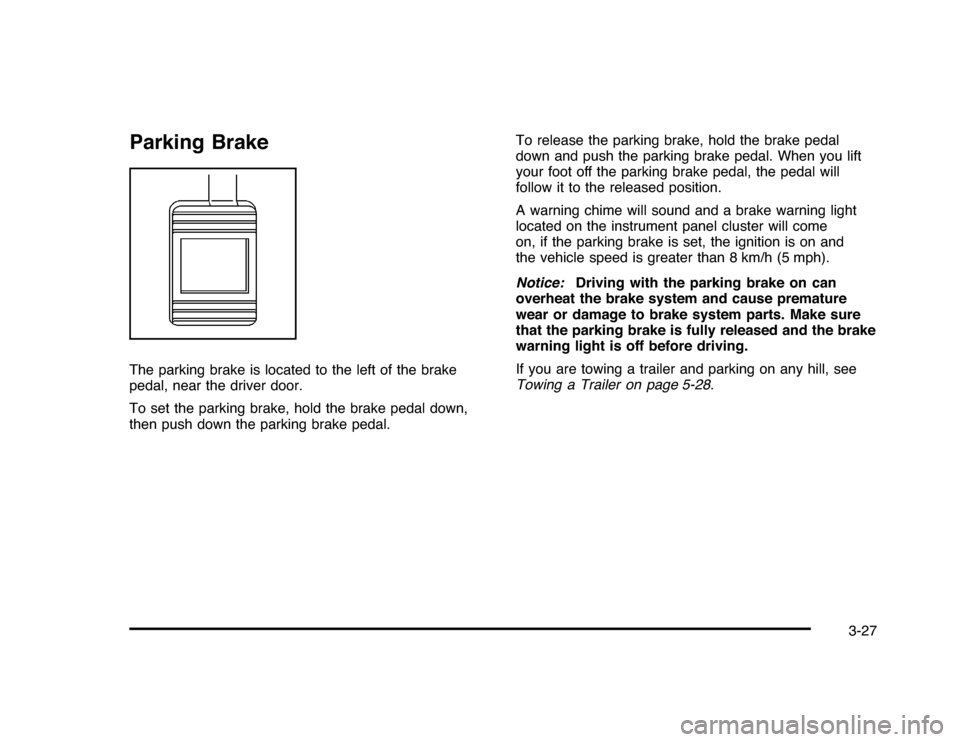
Parking BrakeThe parking brake is located to the left of the brake
pedal, near the driver door.
To set the parking brake, hold the brake pedal down,
then push down the parking brake pedal.To release the parking brake, hold the brake pedal
down and push the parking brake pedal. When you lift
your foot off the parking brake pedal, the pedal will
follow it to the released position.
A warning chime will sound and a brake warning light
located on the instrument panel cluster will come
on, if the parking brake is set, the ignition is on and
the vehicle speed is greater than 8 km/h (5 mph).
Notice:Driving with the parking brake on can
overheat the brake system and cause premature
wear or damage to brake system parts. Make sure
that the parking brake is fully released and the brake
warning light is off before driving.
If you are towing a trailer and parking on any hill, see
Towing a Trailer on page 5-28.
3-27
Page 151 of 432
Instrument Panel Overview...............................4-3
Hazard Warning Flashers................................4-3
Horn.............................................................4-3
Tilt Wheel . . . ..................................................4-3
Turn Signal/Multifunction Lever.........................4-4
Turn and Lane-Change Signals........................4-4
Headlamp High/Low-Beam Changer..................4-5
Flash-to-Pass.................................................4-5
Windshield Wipers..........................................4-5
Windshield Washer.........................................4-6
Cruise Control................................................4-6
Exterior Lamps...............................................4-9
Daytime Running Lamps (DRL)/Automatic
Headlamp System......................................4-10
Fog Lamps..................................................4-11
Instrument Panel Brightness...........................4-11
Courtesy Lamps...........................................4-11
Dome Lamp . . ...............................................4-11
Entry Lighting...............................................4-12
Delayed Entry Lighting...................................4-12
Delayed Exit Lighting.....................................4-13
Parade Dimming...........................................4-13
Reading Lamps............................................4-13
Map Lamps . . ...............................................4-13
Electric Power Management...........................4-13Battery Run-Down Protection ..........................4-14
Accessory Power Outlet(s).............................4-15
Ashtray(s) and Cigarette Lighter......................4-16
Climate Controls............................................4-16
Climate Control System.................................4-16
Outlet Adjustment.........................................4-20
Passenger Compartment Air Filter...................4-20
Warning Lights, Gages, and Indicators............4-21
Instrument Panel Cluster . . ..............................4-22
Speedometer and Odometer
...........................4-23
Tachometer.................................................4-23
Safety Belt Reminders . . .................................4-23
Airbag Readiness Light ..................................4-24
Passenger Airbag Status Indicator...................4-25
Charging System Light ..................................4-26
Brake System Warning Light ..........................4-27
Antilock Brake System (ABS) Warning
Light........................................................4-28
Traction Control System (TCS) Warning
Light........................................................4-28
Electronic Stability Control Indicator Light . . . . . . . . .4-29
Engine Coolant Temperature Warning Light . . . . . .4-30
Engine Coolant Temperature Gage..................4-30
Tire Pressure Light.......................................4-31
Malfunction Indicator Lamp.............................4-31
Section 4 Instrument Panel
4-1
Page 152 of 432
Oil Pressure Light.........................................4-34
Security Light . ..............................................4-35
Fog Lamp Light............................................4-35
Cruise Control Light......................................4-35
Highbeam On Light.......................................4-36
Fuel Gage . ..................................................4-36
Driver Information Center (DIC).......................4-37
DIC Operation and Displays . ..........................4-37
DIC Compass . . . . ..........................................4-42
DIC Warnings and Messages.........................4-44
DIC Vehicle Customization . . ...........................4-51Audio System(s).............................................4-57
Setting the Clock..........................................4-58
Radio(s)......................................................4-59
Using an MP3..............................................4-68
XM Radio Messages.....................................4-72
Bluetooth
®
...................................................4-74
Theft-Deterrent Feature..................................4-84
Audio Steering Wheel Controls.......................4-84
Radio Reception...........................................4-85
Backglass Antenna.......................................4-86
XM™ Satellite Radio Antenna System.............4-86
Section 4 Instrument Panel
4-2
Page 157 of 432
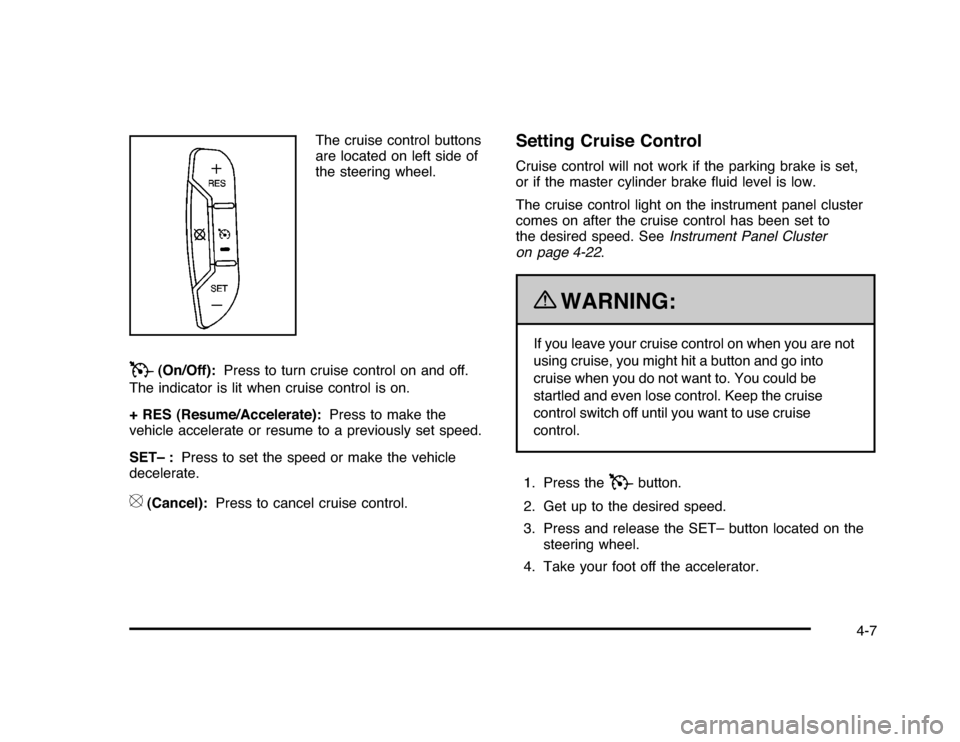
The cruise control buttons
are located on left side of
the steering wheel.
T
(On/Off):Press to turn cruise control on and off.
The indicator is lit when cruise control is on.
+ RES (Resume/Accelerate):Press to make the
vehicle accelerate or resume to a previously set speed.
SET– :Press to set the speed or make the vehicle
decelerate.
[
(Cancel):Press to cancel cruise control.
Setting Cruise ControlCruise control will not work if the parking brake is set,
or if the master cylinder brake fluid level is low.
The cruise control light on the instrument panel cluster
comes on after the cruise control has been set to
the desired speed. SeeInstrument Panel Cluster
on page 4-22.
{
WARNING:
If you leave your cruise control on when you are not
using cruise, you might hit a button and go into
cruise when you do not want to. You could be
startled and even lose control. Keep the cruise
control switch off until you want to use cruise
control.
1. Press the
T
button.
2. Get up to the desired speed.
3. Press and release the SET– button located on the
steering wheel.
4. Take your foot off the accelerator.
4-7