2010 CHEVROLET IMPALA buttons
[x] Cancel search: buttonsPage 21 of 432

Vehicle FeaturesRadio(s)O
:Press to turn the system on and off. Turn to
increase or decrease the volume.
BAND:Press to switch between FM1, FM2 and AM on
the Radio with CD. The selection displays. Press to
switch between FM, AM, and XM™ on the Radio with
CD (MP3).
f
:Select radio stations.
©¨
:Seek or scan stations.
4:Press to display additional text information related to
the current FM-RDS or XM station; or CD, MP3 or
WMA song. If information is available during XM, CD,
MP3 or WMA playback, the song title information
displays on the top line of the display and artist
information displays on the bottom line. When
information is not available, “No Info” displays.
For more information about these and other radio
features, seeAudio System(s) on page 4-57.Storing a Favorite StationDepending on which radio the vehicle has, radio
stations are stored as either favorites or presets.
For radios with a FAV button, a maximum of 36 stations
can be stored as favorites using the six softkeys located
below the radio station frequency tabs and by using the
radio FAV button. Press FAV to go through up to six
pages of favorites, each having six favorite stations
available per page. Each page of favorites can contain
any combination of AM, FM, or XM stations.
For radios without a FAV button, up to 18 stations
(six FM1, six FM2, and six AM), can be programmed
on the six numbered buttons.
SeeRadio(s) on page 4-59. Radio with CD (MP3)
1-15
Page 24 of 432
Cruise Control
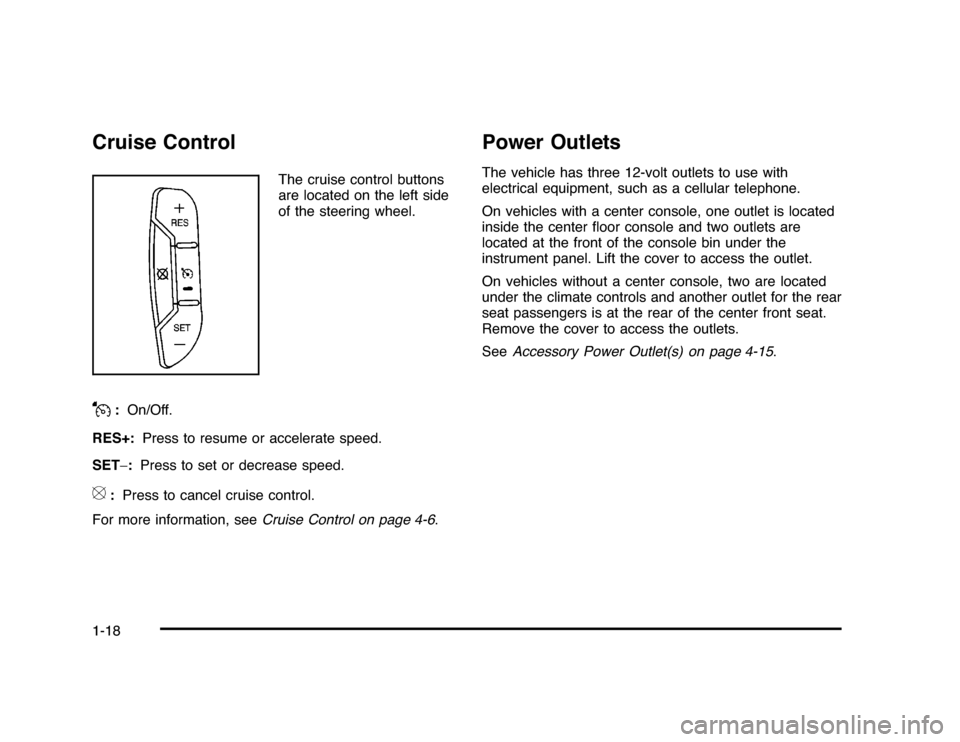
The cruise control buttons
are located on the left side
of the steering wheel.
J
:On/Off.
RES+:Press to resume or accelerate speed.
SET−:Press to set or decrease speed.
[
:Press to cancel cruise control.
For more information, seeCruise Control on page 4-6.
Power OutletsThe vehicle has three 12-volt outlets to use with
electrical equipment, such as a cellular telephone.
On vehicles with a center console, one outlet is located
inside the center floor console and two outlets are
located at the front of the console bin under the
instrument panel. Lift the cover to access the outlet.
On vehicles without a center console, two are located
under the climate controls and another outlet for the rear
seat passengers is at the rear of the center front seat.
Remove the cover to access the outlets.
SeeAccessory Power Outlet(s) on page 4-15.
1-18
Page 29 of 432
![CHEVROLET IMPALA 2010 9.G Owners Manual The OnStar system can record and transmit vehicle
information. This information is automatically sent to an
OnStar call center when
Q
is pressed,
]
is pressed, or
if the airbags or ACR system deploy. CHEVROLET IMPALA 2010 9.G Owners Manual The OnStar system can record and transmit vehicle
information. This information is automatically sent to an
OnStar call center when
Q
is pressed,
]
is pressed, or
if the airbags or ACR system deploy.](/manual-img/24/8202/w960_8202-28.png)
The OnStar system can record and transmit vehicle
information. This information is automatically sent to an
OnStar call center when
Q
is pressed,
]
is pressed, or
if the airbags or ACR system deploy. This information
usually includes the vehicle’s GPS location and, in the
event of a crash, additional information regarding the
crash that the vehicle was involved in (e.g. the direction
from which the vehicle was hit). When the virtual advisor
feature of OnStar hands-free calling is used, the vehicle
also sends OnStar the vehicle’s GPS location so they can
provide services where it is located.
Location information about the vehicle is only available
if the GPS satellite signals are unobstructed and
available.
The vehicle must have a working electrical system,
including adequate battery power, for the OnStar
equipment to operate. There are other problems OnStar
cannot control that may prevent OnStar from providing
OnStar service at any particular time or place. Some
examples are damage to important parts of the vehicle
in a crash, hills, tall buildings, tunnels, weather or
wireless phone network congestion.
OnStar Steering Wheel ControlsThis vehicle may have a Talk/Mute button that can be
used to interact with OnStar hands-free calling. See
Audio Steering Wheel Controls on page 4-84for more
information.
On some vehicles, the mute button can be used to dial
numbers into voice mail systems, or to dial phone
extensions. See the OnStar Owner’s Guide for more
information.Your ResponsibilityIncrease the volume of the radio if the OnStar advisor
cannot be heard.
If the light next to the OnStar buttons is red, the system
may not be functioning properly. Press
Q
and request
a vehicle diagnostic. If the light appears clear (no light is
appearing), your OnStar subscription has expired and
all services have been deactivated. PressQ
to confirm
that the OnStar equipment is active.
1-23
Page 36 of 432
Heated Seats
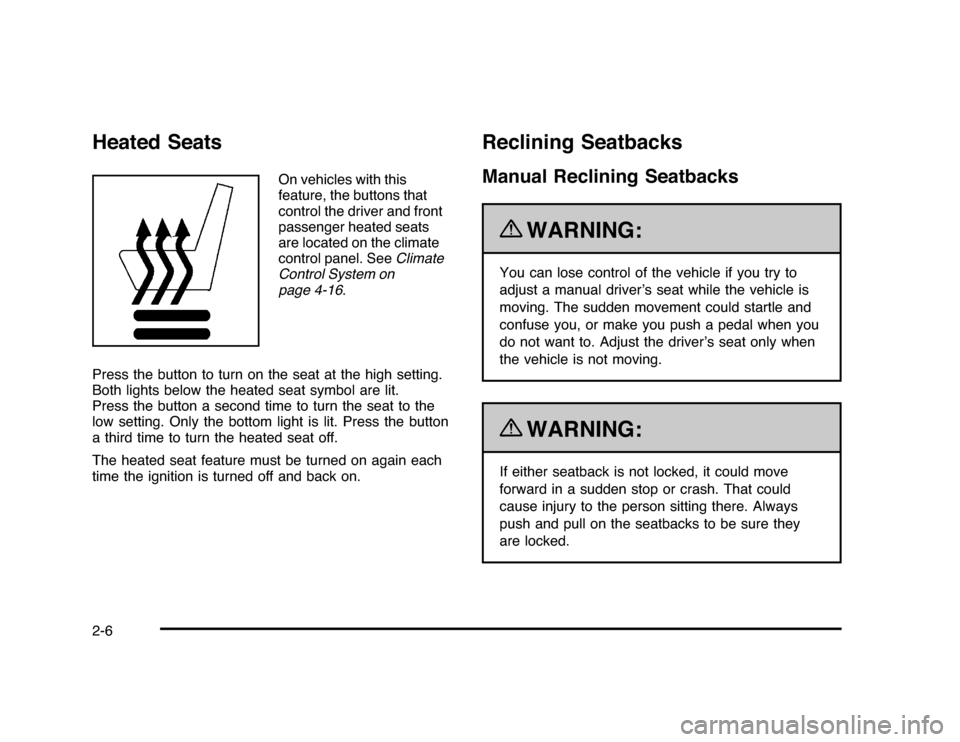
On vehicles with this
feature, the buttons that
control the driver and front
passenger heated seats
are located on the climate
control panel. SeeClimate
Control System on
page 4-16.
Press the button to turn on the seat at the high setting.
Both lights below the heated seat symbol are lit.
Press the button a second time to turn the seat to the
low setting. Only the bottom light is lit. Press the button
a third time to turn the heated seat off.
The heated seat feature must be turned on again each
time the ignition is turned off and back on.
Reclining SeatbacksManual Reclining Seatbacks
{
WARNING:
You can lose control of the vehicle if you try to
adjust a manual driver’s seat while the vehicle is
moving. The sudden movement could startle and
confuse you, or make you push a pedal when you
do not want to. Adjust the driver’s seat only when
the vehicle is not moving.{
WARNING:
If either seatback is not locked, it could move
forward in a sudden stop or crash. That could
cause injury to the person sitting there. Always
push and pull on the seatbacks to be sure they
are locked.
2-6
Page 57 of 432
Shoulder Belt Height AdjusterThe vehicle has shoulder belt height adjusters for the
driver and right front passenger positions.
Adjust the height so that the shoulder portion of the belt
is centered on the shoulder. The belt should be away
from the face and neck, but not falling off the shoulder.
Improper shoulder belt height adjustment could
reduce the effectiveness of the safety belt in a crash.
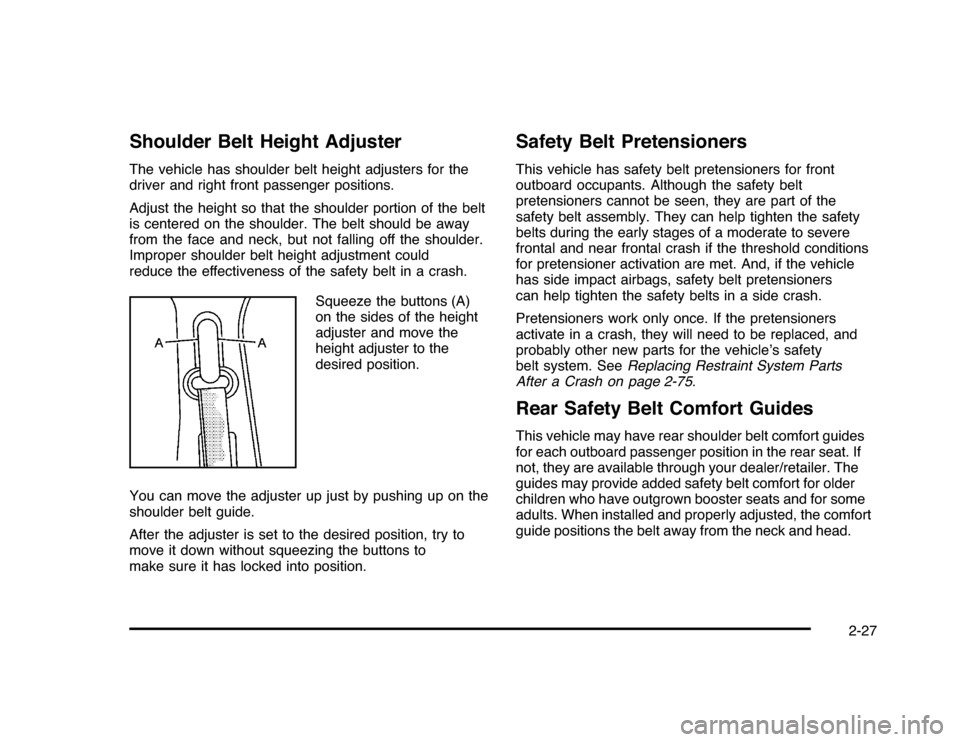
Squeeze the buttons (A)
on the sides of the height
adjuster and move the
height adjuster to the
desired position.
You can move the adjuster up just by pushing up on the
shoulder belt guide.
After the adjuster is set to the desired position, try to
move it down without squeezing the buttons to
make sure it has locked into position.
Safety Belt PretensionersThis vehicle has safety belt pretensioners for front
outboard occupants. Although the safety belt
pretensioners cannot be seen, they are part of the
safety belt assembly. They can help tighten the safety
belts during the early stages of a moderate to severe
frontal and near frontal crash if the threshold conditions
for pretensioner activation are met. And, if the vehicle
has side impact airbags, safety belt pretensioners
can help tighten the safety belts in a side crash.
Pretensioners work only once. If the pretensioners
activate in a crash, they will need to be replaced, and
probably other new parts for the vehicle’s safety
belt system. SeeReplacing Restraint System Parts
After a Crash on page 2-75.Rear Safety Belt Comfort GuidesThis vehicle may have rear shoulder belt comfort guides
for each outboard passenger position in the rear seat. If
not, they are available through your dealer/retailer. The
guides may provide added safety belt comfort for older
children who have outgrown booster seats and for some
adults. When installed and properly adjusted, the comfort
guide positions the belt away from the neck and head.
2-27
Page 139 of 432
MirrorsManual Rearview MirrorHold the inside rearview mirror in the center to move it
for a clearer view behind your vehicle. Adjust the
mirror to avoid glare from the headlamps behind you.
Pull the lever, located at the bottom of the mirror
for nighttime use. Return the lever to its original position
for the day position.
If the vehicle has map lamps, press the buttons located
at the bottom of the mirror to turn them on or off.
Vehicles with OnStar
®
have three additional control
buttons located at the bottom of the mirror. See
your dealer/retailer for more information about OnStar
®
and how to subscribe to it. See the OnStar
®
owner’s
guide for more information about the services OnStar
®
provides.
Automatic Dimming Rearview MirrorThe vehicle may have an automatic dimming rearview
mirror with the OnStar
®
System.
Press the button located below the mirror, on the far
left, for up to three seconds to turn the dimming feature
off and on.
There are two map lamps located on the bottom of the
mirror. Press the button next to each lamp to turn it
on and off.
There are also OnStar®
buttons located at the bottom of
the mirror. See your dealer/retailer for more information
about OnStar
®
and how to subscribe to it. See the
OnStar
®
owner’s guide for more information about the
service OnStar
®
provides.
3-33
Page 140 of 432
Outside Power Mirrors
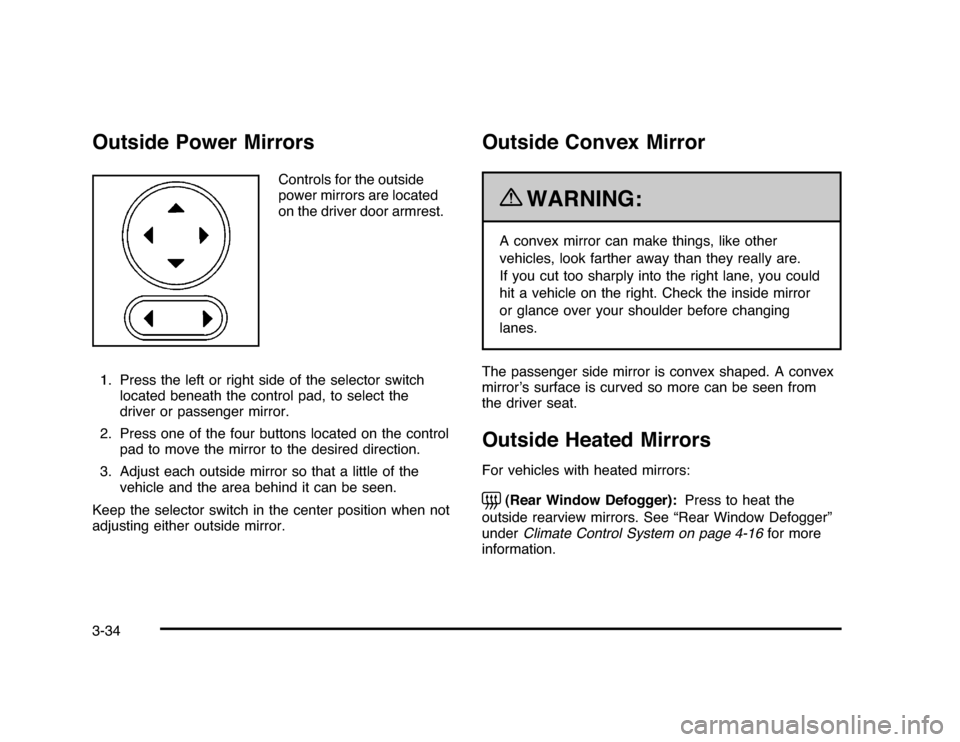
Controls for the outside
power mirrors are located
on the driver door armrest.
1. Press the left or right side of the selector switch
located beneath the control pad, to select the
driver or passenger mirror.
2. Press one of the four buttons located on the control
pad to move the mirror to the desired direction.
3. Adjust each outside mirror so that a little of the
vehicle and the area behind it can be seen.
Keep the selector switch in the center position when not
adjusting either outside mirror.
Outside Convex Mirror
{
WARNING:
A convex mirror can make things, like other
vehicles, look farther away than they really are.
If you cut too sharply into the right lane, you could
hit a vehicle on the right. Check the inside mirror
or glance over your shoulder before changing
lanes.
The passenger side mirror is convex shaped. A convex
mirror’s surface is curved so more can be seen from
the driver seat.
Outside Heated MirrorsFor vehicles with heated mirrors:=
(Rear Window Defogger):Press to heat the
outside rearview mirrors. See “Rear Window Defogger”
underClimate Control System on page 4-16for more
information.
3-34
Page 141 of 432
Universal Home Remote
SystemSeeRadio Frequency Statement on page 8-20for
information regarding Part 15 of the Federal
Communications Commission (FCC) Rules and
RSS-210/211 of Industry and Science Canada.Universal Home Remote System
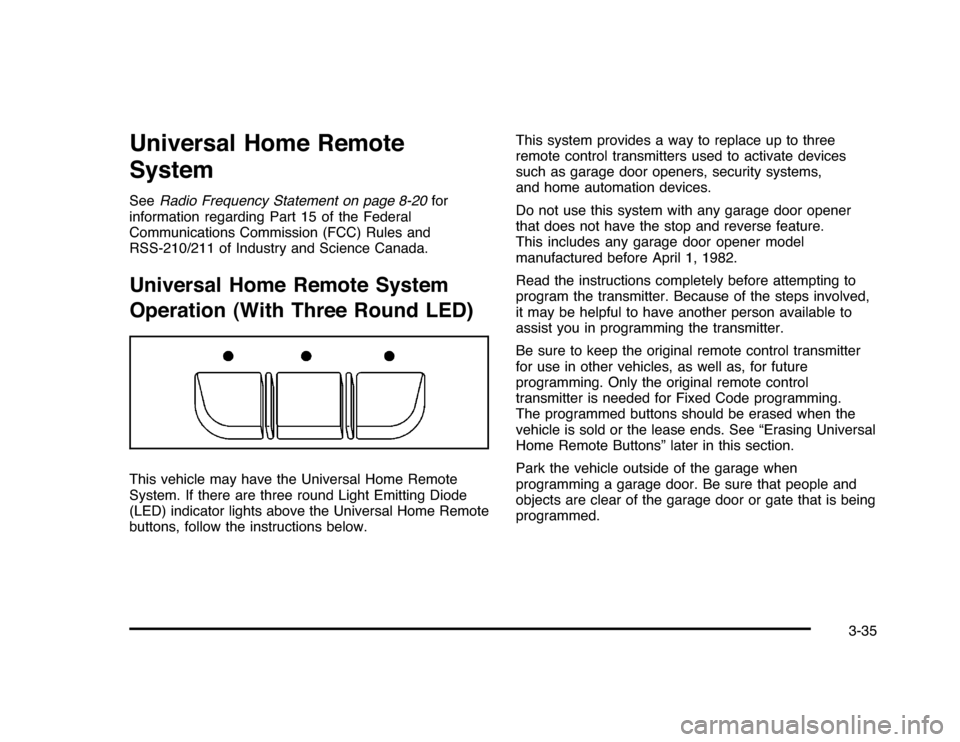
Operation (With Three Round LED)This vehicle may have the Universal Home Remote
System. If there are three round Light Emitting Diode
(LED) indicator lights above the Universal Home Remote
buttons, follow the instructions below.This system provides a way to replace up to three
remote control transmitters used to activate devices
such as garage door openers, security systems,
and home automation devices.
Do not use this system with any garage door opener
that does not have the stop and reverse feature.
This includes any garage door opener model
manufactured before April 1, 1982.
Read the instructions completely before attempting to
program the transmitter. Because of the steps involved,
it may be helpful to have another person available to
assist you in programming the transmitter.
Be sure to keep the original remote control transmitter
for use in other vehicles, as well as, for future
programming. Only the original remote control
transmitter is needed for Fixed Code programming.
The programmed buttons should be erased when the
vehicle is sold or the lease ends. See “Erasing Universal
Home Remote Buttons” later in this section.
Park the vehicle outside of the garage when
programming a garage door. Be sure that people and
objects are clear of the garage door or gate that is being
programmed.
3-35