2010 CHEVROLET HHR engine overheat
[x] Cancel search: engine overheatPage 138 of 480
Manual Transmission
The shift lever should be in N (Neutral) and the parking
brake engaged. Hold the clutch pedal down to the floor
and start the engine. The vehicle will not start if the
clutch pedal is not all the way down.
Starting Procedure
1. With your foot off the accelerator pedal, turn theignition key to START. When the engine starts, let
go of the key. The idle speed will go down as the
engine warms. Do not race the engine immediately
after starting it. Operate the engine and
transmission gently to allow the oil to warm up and
lubricate all moving parts.
The vehicle has a Computer-Controlled Cranking
System. This feature assists in starting the engine
and protects components. If the ignition key is
turned to the START position, and then released
when the engine begins cranking, the engine will
continue cranking for a few seconds or until the
vehicle starts. If the engine does not start and the
key is held in START for many seconds, cranking
will be stopped after 15 seconds to prevent
cranking motor damage. To prevent gear damage,
this system also prevents cranking if the engine is
already running. Engine cranking can be stopped
by turning the ignition switch to ACC/ACCESSORY
or LOCK/OFF. Notice:
Cranking the engine for long periods of
time, by returning the key to the START position
immediately after cranking has ended, can overheat
and damage the cranking motor, and drain the
battery. Wait at least 15 seconds between each try,
to let the cranking motor cool down.
2. If the engine does not start after 5‐10 seconds, especially in very cold weather (below 0°F or
−18°C), it could be flooded with too much gasoline.
Push the accelerator pedal all the way to the floor
and holding it there as you hold the key in START
for a maximum of 15 seconds. Wait at least
15 seconds between each try, to allow the cranking
motor to cool. When the engine starts, let go of the
key and accelerator. If the vehicle starts briefly but
then stops again, repeat the procedure. This clears
the extra gasoline from the engine. Do not race the
engine immediately after starting it. Operate the
engine and transmission gently until the oil warms
up and lubricates all moving parts.
Notice: The engine is designed to work with the
electronics in the vehicle. If you add electrical parts
or accessories, you could change the way the
engine operates. Before adding electrical
equipment, check with your dealer/retailer. If you
do not, the engine might not perform properly.
Any resulting damage would not be covered by the
vehicle warranty.
3-26
Page 139 of 480
Engine Coolant Heater
The engine coolant heater can provide easier starting
and better fuel economy during engine warm‐up in cold
weather condition at or below 0°F (−18°C). Vehicles
with am engine coolant heater should be plugged in at
least four hours before starting. An internal thermostat
in the plug-end of the cord may exist which will prevent
engine coolant heater operation at temperatures above
0°F (−18°C).
To Use the Engine Coolant Heater
1. Turn off the engine.
2. Open the hood and unwrap the electrical cord. Theelectrical cord is located on the passenger side of
the vehicle near the headlamp and the radiator.
3. Plug it into a normal, grounded 110-volt AC outlet.
{WARNING:
Plugging the cord into an ungrounded outlet could
cause an electrical shock. Also, the wrong kind of
extension cord could overheat and cause a fire.
You could be seriously injured. Plug the cord into
a properly grounded three-prong 110-volt AC
outlet. If the cord will not reach, use a heavy-duty
three-prong extension cord rated for at least
15 amps.
4. Before starting the engine, be sure to unplug and store the cord as it was before to keep it away from
moving engine parts, to prevent damage.
The length of time the heater should remain plugged in
depends on several factors. Ask a dealer/retailer in the
area where you will be parking the vehicle for the best
advice on this.
3-27
Page 148 of 480
Shifting Into Park
(Automatic Transmission)
{WARNING:
It can be dangerous to get out of the vehicle if the
shift lever is not fully in P (Park) with the parking
brake firmly set. The vehicle can roll. If you have
left the engine running, the vehicle can move
suddenly. You or others could be injured. To be
sure the vehicle will not move, even when you are
on fairly level ground, use the steps that follow.
If you are pulling a trailer, seeTowing a Trailer
(Automatic Transmission)
on page 5‑32or
Towing a Trailer (Manual Transmission)
on
page 5‑40
.
To shift into P (Park): 1. Hold the brake pedal down and set the parking brake. See Parking Brake
on page 3‑34for more
information.
2. Move the shift lever into P (Park) by holding in the button on the shift lever and pushing the lever all
the way toward the front of the vehicle.
3. Turn the ignition key to LOCK/OFF.
Leaving the Vehicle With the Engine
Running (Automatic Transmission)
{WARNING:
It can be dangerous to leave the vehicle with the
engine running. The vehicle could move suddenly
if the shift lever is not fully in P (Park) with the
parking brake firmly set. And, if you leave the
vehicle with the engine running, it could overheat
and even catch fire. You or others could be
injured. Do not leave the vehicle with the engine
running.
If you have to leave an automatic transmission vehicle
with the engine running, be sure the vehicle is in
P (Park) and the parking brake is firmly set before
you leave it. After you have moved the shift lever into
P (Park), hold the brake pedal down. Then, see if you
can move the shift lever away from P (Park) without first
pushing the button. If you can, it means that the shift
lever was not fully locked into P (Park).
3-36
Page 200 of 480
Engine Coolant Temperature
Warning Light
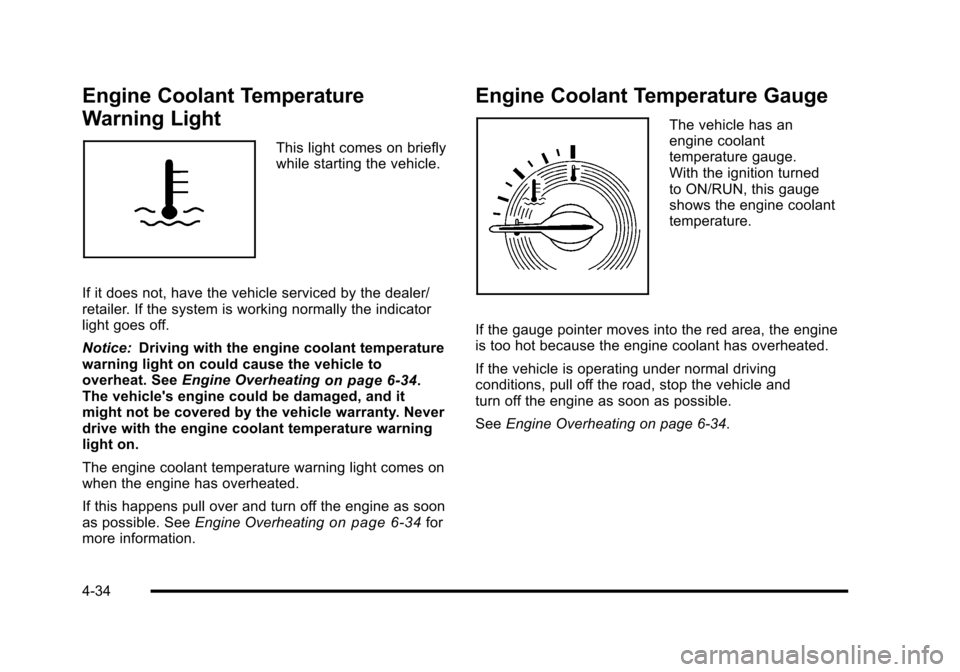
This light comes on briefly
while starting the vehicle.
If it does not, have the vehicle serviced by the dealer/
retailer. If the system is working normally the indicator
light goes off.
Notice: Driving with the engine coolant temperature
warning light on could cause the vehicle to
overheat. See Engine Overheating
on page 6‑34.
The vehicle's engine could be damaged, and it
might not be covered by the vehicle warranty. Never
drive with the engine coolant temperature warning
light on.
The engine coolant temperature warning light comes on
when the engine has overheated.
If this happens pull over and turn off the engine as soon
as possible. See Engine Overheating
on page 6‑34for
more information.
Engine Coolant Temperature Gauge
The vehicle has an
engine coolant
temperature gauge.
With the ignition turned
to ON/RUN, this gauge
shows the engine coolant
temperature.
If the gauge pointer moves into the red area, the engine
is too hot because the engine coolant has overheated.
If the vehicle is operating under normal driving
conditions, pull off the road, stop the vehicle and
turn off the engine as soon as possible.
See Engine Overheating on page 6‑34.
4-34
Page 285 of 480
To save fuel, run the engine for only short periods as
needed to warm the vehicle and then shut the engine
off and close the window most of the way to save heat.
Repeat this until help arrives but only when you feel
really uncomfortable from the cold. Moving about to
keep warm also helps.
If it takes some time for help to arrive, now and then
when you run the engine, push the accelerator pedal
slightly so the engine runs faster than the idle speed.
This keeps the battery charged to restart the vehicle
and to signal for help with the headlamps. Do this as
little as possible to save fuel.
If Your Vehicle is Stuck in Sand,
Mud, Ice, or Snow
Slowly and cautiously spin the wheels to free the
vehicle when stuck in sand, mud, ice, or snow. See
Rocking Your Vehicle to Get It Out on page 5‑24.
If the vehicle has a traction system, it can often help to
free a stuck vehicle. Refer to the vehicle's traction
system in the Index. If stuck too severely for the traction
system to free the vehicle, turn the traction system off
and use the rocking method.
{WARNING:
If the vehicle's tires spin at high speed, they can
explode, and you or others could be injured. The
vehicle can overheat, causing an engine
compartment fire or other damage. Spin the
wheels as little as possible and avoid going above
55 km/h (35 mph) as shown on the speedometer.
For information about using tire chains on the vehicle,
see Tire Chains on page 6‑77.
5-23
Page 300 of 480
Backing Up
Hold the bottom of the steering wheel with one hand.
Then, to move the trailer to the left, move that hand to
the left. To move the trailer to the right, move your hand
to the right. Always back up slowly and, if possible,
have someone guide you.
Making Turns
When turning with a trailer, make wider turns than
normal. Do this so the trailer will not strike soft
shoulders, curbs, road signs, trees or other objects.
Avoid jerky or sudden maneuvers. Signal well in
advance.
Turn Signals When Towing a Trailer
The arrows on the instrument panel flash whenever
signaling a turn or lane change. Properly hooked up,
the trailer lamps also flash, telling other drivers the
vehicle is turning, changing lanes or stopping.
When towing a trailer, the arrows on the instrument
panel flash for turns even if the bulbs on the trailer are
burned out. For this reason you may think other drivers
are seeing the signal when they are not. It is important
to check occasionally to be sure the trailer bulbs are still
working.
Driving on Grades
Notice:Do not tow on steep continuous grades
exceeding 6 miles (9.6 km). Extended, higher than
normal engine and transmission temperatures may
result and damage the vehicle. Frequent stops are
very important to allow the engine and transmission
to cool.
When towing under severe conditions such as hot
ambient temperatures or steep grades, the vehicle may
experience more transmission shifting. A COOLING
MODE ON message may also appear in the DIC. This
alerts the driver that the shifting mode is in progress
and is aiding engine cooling. See DIC Warnings and
Messages
on page 4‑48DIC Warnings and Messages
for more information.
Reduce speed and shift to a lower gear beforestarting
down a long or steep downgrade. If the transmission is
not shifted down, the brakes might have to be used so
much that they would get hot and no longer work well.
Pay attention to the engine coolant gauge. If the
indicator is in the red area, turn off the air conditioning
to reduce engine load. See Engine Overheating
on
page 6‑34.
5-38
Page 302 of 480

Maintenance When Trailer Towing
The vehicle needs service more often when pulling a
trailer. See this manual's Maintenance Schedule or
Index for more information. Things that are especially
important in trailer operation are automatic transmission
fluid, engine oil, axle lubricant, belts, cooling system
and brake system. It is a good idea to inspect these
before and during the trip.
Check periodically to see that all hitch nuts and bolts
are tight.
Engine Cooling When Trailer Towing
The cooling system may temporarily overheat during
severe operating conditions. SeeEngine Overheating
on page 6‑34.
Towing a Trailer
(Manual Transmission)
Do not tow a trailer if the vehicle is equipped with a
manual transmission.
5-40
Page 303 of 480
Section 6 Service and Appearance Care
Service. . . . . . . . . . . . . . . . . . . . . . . . . . . . . . . . . . . . . . . . . . . . . 6-3
Accessories and Modifications . . . . . . . . . . . . . . . . . . 6-3
California Proposition 65 Warning . . . . . . . . . . . . . . . 6-4
California Perchlorate Materials Requirements . . . . . . . . . . . . . . . . . . . . . . . . . . . . . . . . . 6-4
Doing Your Own Service Work . . . . . . . . . . . . . . . . . . 6-4
Adding Equipment to the Outside of the Vehicle . . . . . . . . . . . . . . . . . . . . . . . . . . . . . . . . . . . . . . . . 6-5
Fuel . . . . . . . . . . . . . . . . . . . . . . . . . . . . . . . . . . . . . . . . . . . . . . . . . 6-5
Gasoline Octane . . . . . . . . . . . . . . . . . . . . . . . . . . . . . . . . 6-6
Gasoline Specifications . . . . . . . . . . . . . . . . . . . . . . . . . 6-6
California Fuel . . . . . . . . . . . . . . . . . . . . . . . . . . . . . . . . . . 6-7
Additives . . . . . . . . . . . . . . . . . . . . . . . . . . . . . . . . . . . . . . . . 6-7
Fuel E85 (85% Ethanol) . . . . . . . . . . . . . . . . . . . . . . . . . 6-8
Fuels in Foreign Countries . . . . . . . . . . . . . . . . . . . . . . 6-9
Filling the Tank . . . . . . . . . . . . . . . . . . . . . . . . . . . . . . . . 6-10
Filling a Portable Fuel Container . . . . . . . . . . . . . . . 6-13
Checking Things Under the Hood . . . . . . . . . . . . . . . 6-14
Hood Release . . . . . . . . . . . . . . . . . . . . . . . . . . . . . . . . . 6-15
Engine Compartment Overview . . . . . . . . . . . . . . . . 6-16
Engine Oil . . . . . . . . . . . . . . . . . . . . . . . . . . . . . . . . . . . . . 6-19
Engine Oil Life System . . . . . . . . . . . . . . . . . . . . . . . . 6-23
Engine Air Cleaner/Filter . . . . . . . . . . . . . . . . . . . . . . . 6-25
Automatic Transmission Fluid . . . . . . . . . . . . . . . . . . 6-27
Manual Transmission Fluid . . . . . . . . . . . . . . . . . . . . 6-28
Hydraulic Clutch . . . . . . . . . . . . . . . . . . . . . . . . . . . . . . . 6-28 Cooling System . . . . . . . . . . . . . . . . . . . . . . . . . . . . . . . . 6-28
Engine Coolant . . . . . . . . . . . . . . . . . . . . . . . . . . . . . . . . 6-29
Engine Overheating . . . . . . . . . . . . . . . . . . . . . . . . . . . 6-34
Windshield Washer Fluid . . . . . . . . . . . . . . . . . . . . . . 6-36
Brakes . . . . . . . . . . . . . . . . . . . . . . . . . . . . . . . . . . . . . . . . . 6-37
Battery . . . . . . . . . . . . . . . . . . . . . . . . . . . . . . . . . . . . . . . . . 6-40
Jump Starting . . . . . . . . . . . . . . . . . . . . . . . . . . . . . . . . . . 6-41
Headlamp Aiming . . . . . . . . . . . . . . . . . . . . . . . . . . . . . . . . 6-45
Bulb Replacement . . . . . . . . . . . . . . . . . . . . . . . . . . . . . . . . 6-48
Halogen Bulbs . . . . . . . . . . . . . . . . . . . . . . . . . . . . . . . . . 6-48
Headlamps, Front Turn Signal, and Parking Lamps . . . . . . . . . . . . . . . . . . . . . . . . . . . . . . . . . . . . . . . 6-48
Center High-Mounted Stoplamp (CHMSL) . . . . . 6-50
Taillamps, Turn Signal, Stoplamps and Back-up Lamps . . . . . . . . . . . . . . . . . . . . . . . . . . . . . . . . . . . . . . . 6-51
License Plate Lamp . . . . . . . . . . . . . . . . . . . . . . . . . . . . 6-52
Replacement Bulbs . . . . . . . . . . . . . . . . . . . . . . . . . . . . 6-53
Windshield Wiper Blade Replacement . . . . . . . . . . . 6-53
Tires . . . . . . . . . . . . . . . . . . . . . . . . . . . . . . . . . . . . . . . . . . . . . . . 6-54
Tire Sidewall Labeling . . . . . . . . . . . . . . . . . . . . . . . . . 6-56
Tire Terminology and Definitions . . . . . . . . . . . . . . . 6-60
Inflation - Tire Pressure . . . . . . . . . . . . . . . . . . . . . . . . 6-63
Tire Pressure Monitor System . . . . . . . . . . . . . . . . . 6-64
Tire Pressure Monitor Operation . . . . . . . . . . . . . . . 6-65
Tire Inspection and Rotation . . . . . . . . . . . . . . . . . . . 6-69
6-1