2010 CHEVROLET HHR turn signal
[x] Cancel search: turn signalPage 171 of 480
Headlamp High/Low-Beam Changer
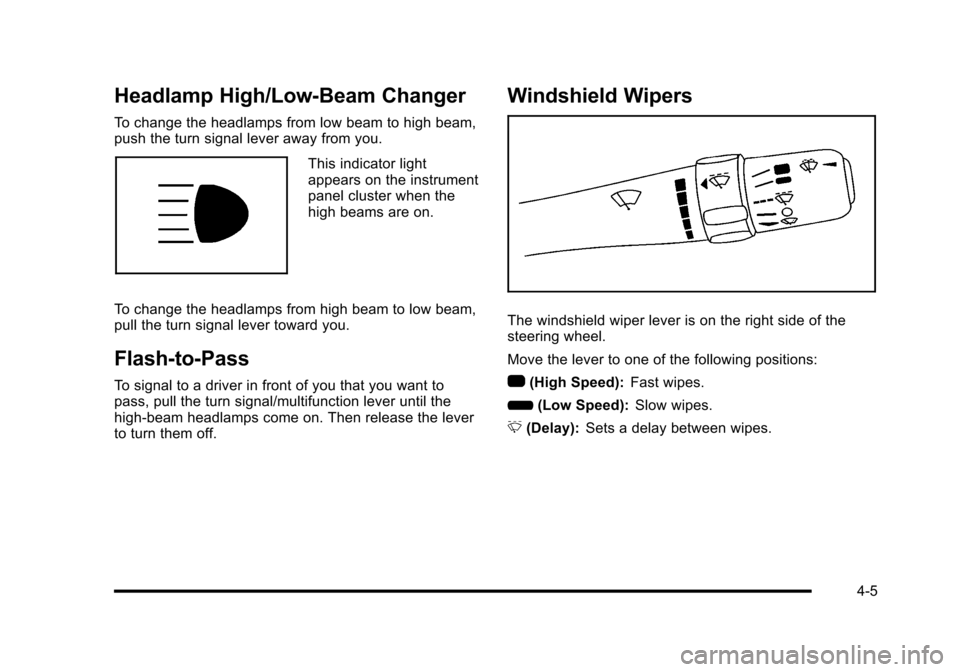
To change the headlamps from low beam to high beam,
push the turn signal lever away from you.
This indicator light
appears on the instrument
panel cluster when the
high beams are on.
To change the headlamps from high beam to low beam,
pull the turn signal lever toward you.
Flash-to-Pass
To signal to a driver in front of you that you want to
pass, pull the turn signal/multifunction lever until the
high-beam headlamps come on. Then release the lever
to turn them off.
Windshield Wipers
The windshield wiper lever is on the right side of the
steering wheel.
Move the lever to one of the following positions:
1 (High Speed): Fast wipes.
6 (Low Speed): Slow wipes.
& (Delay): Sets a delay between wipes.
4-5
Page 223 of 480
LIGHT FLASH
This feature, which allows the vehicle's exterior hazard/
turn signal lighting to flash every time the lock or unlock
button on the Remote Keyless Entry (RKE) transmitter
is pressed, can be enabled or disabled. When LIGHT
FLASH appears on the display, press and hold the reset
button for at least one second to scroll through the
available settings:
OFF:The exterior hazard/turn signal lighting will not
flash when the lock or unlock button on the RKE
transmitter is pressed.
ON (default): The exterior hazard/turn signal lighting
will flash when the lock or unlock button on the RKE
transmitter is pressed.
See Remote Keyless Entry (RKE) System Operation
on
page 3‑4for more information.
To select a setting and move on to the next feature,
press the information button while the desired setting is
displayed on the DIC.
DELAY LOCK
This feature, which delays the actual locking of the
vehicle, can be enabled or disabled. When DELAY
LOCK appears on the display, press and hold the
reset button for at least one second to scroll through
the available settings:
ON (default): The doors will not lock until five seconds
after the last door is closed. You can temporarily
override delayed locking by pressing the power lock
switch or the lock button on the Remote Keyless Entry
(RKE) transmitter a second time.
OFF: The doors will lock immediately when pressing
the power lock switch or the lock button on the RKE
transmitter.
See Power Door Locks
on page 3‑10,Delayed Lockingon page 3‑10, and Remote Keyless Entry (RKE)
System Operationon page 3‑4for more information.
To select a setting and move on to the next feature,
press the information button while the desired setting is
displayed on the DIC.
4-57
Page 226 of 480
Audio System(s)
Determine which radio the vehicle has and read the
following pages to become familiar with its features.
{WARNING:
Taking your eyes off the road for extended periods
could cause a crash resulting in injury or death to
you or others. Do not give extended attention to
entertainment tasks while driving.
This system provides access to many audio and non
audio listings.
To minimize taking your eyes off the road while driving,
do the following while the vehicle is parked:
.Become familiar with the operation and controls of
the audio system.
.Set up the tone, speaker adjustments, and preset
radio stations.
For more information, see Defensive Driving
on
page 5‑2. Notice:
Contact your dealer/retailer before adding
any equipment.
Adding audio or communication equipment could
interfere with the operation of the vehicle's engine,
radio, or other systems, and could damage them.
Follow federal rules covering mobile radio and
telephone equipment.
Notice: The chime signals related to safety belts,
parking brake, and other functions of your vehicle
operate through the radio/entertainment system.
If that equipment is replaced or additional
equipment is added to your vehicle, the chimes
may not work. Make sure that replacement or
additional equipment is compatible with your
vehicle before installing it. See Accessories and
Modifications on page 6‑3.
The vehicle has Retained Accessory Power (RAP).
With RAP, the audio system can be played even after
the ignition is turned off. See Retained Accessory
Power (RAP)
on page 3‑25for more information.
4-60
Page 230 of 480
Playing the Radio
O
(Power/Volume):Press to turn the system on and
off. Turn to increase or decrease the volume.
Speed Compensated Volume (SCV): Radios with
the Speed Compensated Volume (SCV) feature
automatically adjust the radio volume to compensate
for road and wind noise as the vehicle speeds up or
slows down, so that the volume level is consistent.
To activate SCV:
1. Set the radio volume to the desired level.
2. Press MENU to display the radio setup menu.
3. Press the softkey under the AUTO VOLUM tab on the radio display.
4. Press the softkey under the desired Speed Compensated Volume setting (OFF, Low, Med,
or High) to select the level of radio volume
compensation. The display times out after
approximately 10 seconds. Each higher setting
allows for more radio volume compensation at
faster vehicle speeds.
Finding a Station
BAND: Press to choose between FM1, FM2, AM,
or XM™ (if equipped) on the Radio with CD (Base).
Press to choose between FM, AM, XM (if equipped) on
the Radio with CD (MP3) and USB Port or the Radio
with CD (MP3).
f(Tune): Turn to select radio stations.
©SEEK:Press to seek or scan stations with a strong
signal in the selected band.
.To seek stations, press and release©SEEK to
go to the previous station and stay there.
.To scan stations, press and hold©SEEK for a
few seconds until the radio beeps once. The radio
goes to a station, plays for a few seconds, then
goes to the next station. Press
©SEEK again to
stop scanning.
.To scan preset stations in the selected band, press
and hold
©SEEK for four seconds until a double
beep sounds. The radio goes to a stored preset,
plays for a few seconds, then goes to the next
stored preset. Press
©SEEK again to stop
scanning preset stations.
4-64
Page 246 of 480
Repeat Functionality
To use Repeat:
Press the softkey below
"or'to select between
Repeat All and Repeat Track.
"(Repeat All): Press the softkey below"to repeat
all tracks. The tab appears lowered when Repeat All is
being used. This is the default mode when a USB
storage device or iPod is first connected.
'(Repeat Track): Press the softkey below'to
repeat one track. The tab appears raised when Repeat
Track is being used.
Shuffle Functionality
To use Shuffle:
Press the softkey below
>,2,
Songs, Shuffle Album, or Shuffle Folder.
>(Shuffle Off): Press the softkey below2to turn
shuffle off. This is the default mode when a USB
storage device or iPod is first connected.
2(Shuffle All Songs / Shuffle Songs): Press the
softkey below
=or
<(Shuffle Album): Press the softkey below>to
shuffle all songs in the current album on an iPod.
=(Shuffle Folder): Press the softkey below>to
shuffle all songs in the current folder on a USB storage
device.
XM Radio Messages
XL (Explicit Language Channels): These channels,
or any others, can be blocked at a customer's request,
by calling 1-800-852-XMXM (9696).
XM Updating: The encryption code in the receiver is
being updated, and no action is required. This process
should take no longer than 30 seconds.
No XM Signal: The system is functioning correctly, but
the vehicle is in a location that is blocking the XM™
signal. When the vehicle is moved into an open area,
the signal should return.
4-80
Page 259 of 480
To change radio stations:
.Press and releaseworxto go to the next or
previous radio station stored as a preset.
.Press and holdworxto go to the next or
previous radio station in the selected band with a
strong signal.
To select tracks on a CD:
Press and release
worxto go to the next or previous
track.
To select tracks on an iPod or USB device:
1. Press and hold
worxwhile listening to a song
until the contents of the current folder display on
the radio display.
2. Press and release
worxto scroll up or down the
list, then press and hold
wto play the highlighted
track. To navigate folders on an iPod or USB device:
1. Press and hold
worxwhile listening to a song
until the contents of the current folder display on
the radio display.
2. Press and hold
xto go back to the previous
folder list.
3. Press and release
worxto scroll up or down
the list.
.To select a folder, press and holdwwhen the
folder is highlighted.
.To go back further in the folder list, press and
hold
x.
c(End): Press to reject an incoming call, or end a
current call.
b g(Mute / Voice Recognition): Press to silence the
vehicle speakers only. Press again to turn the sound on.
For vehicles with Bluetooth
®or OnStar®systems press
and hold
b gfor longer than two seconds to interact
with those systems. See Bluetooth®on page 4‑82and
the OnStar Owner's Guide for more information.
4-93
Page 272 of 480
If the vehicle is in cruise control while TCS begins to
limit wheel spin, the cruise control will automatically
disengage. The cruise control can be re-engaged when
road conditions allow. SeeTurn Signal/Multifunction
Lever on page 4‑4.
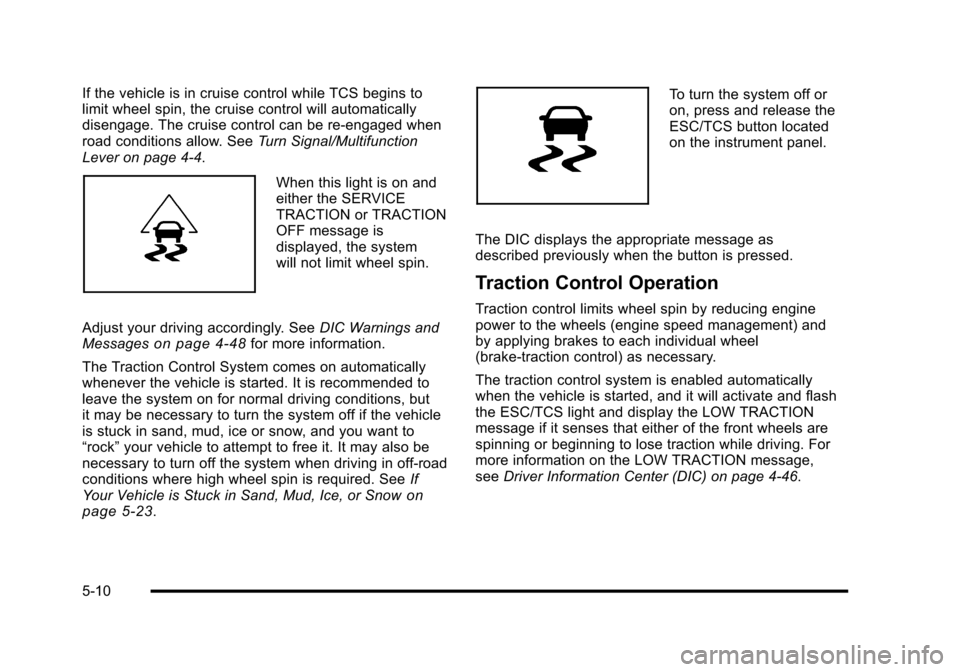
When this light is on and
either the SERVICE
TRACTION or TRACTION
OFF message is
displayed, the system
will not limit wheel spin.
Adjust your driving accordingly. See DIC Warnings and
Messages
on page 4‑48for more information.
The Traction Control System comes on automatically
whenever the vehicle is started. It is recommended to
leave the system on for normal driving conditions, but
it may be necessary to turn the system off if the vehicle
is stuck in sand, mud, ice or snow, and you want to
“rock” your vehicle to attempt to free it. It may also be
necessary to turn off the system when driving in off-road
conditions where high wheel spin is required. See If
Your Vehicle is Stuck in Sand, Mud, Ice, or Snow
on
page 5‑23.
To turn the system off or
on, press and release the
ESC/TCS button located
on the instrument panel.
The DIC displays the appropriate message as
described previously when the button is pressed.
Traction Control Operation
Traction control limits wheel spin by reducing engine
power to the wheels (engine speed management) and
by applying brakes to each individual wheel
(brake-traction control) as necessary.
The traction control system is enabled automatically
when the vehicle is started, and it will activate and flash
the ESC/TCS light and display the LOW TRACTION
message if it senses that either of the front wheels are
spinning or beginning to lose traction while driving. For
more information on the LOW TRACTION message,
see Driver Information Center (DIC) on page 4‑46.
5-10
Page 285 of 480
To save fuel, run the engine for only short periods as
needed to warm the vehicle and then shut the engine
off and close the window most of the way to save heat.
Repeat this until help arrives but only when you feel
really uncomfortable from the cold. Moving about to
keep warm also helps.
If it takes some time for help to arrive, now and then
when you run the engine, push the accelerator pedal
slightly so the engine runs faster than the idle speed.
This keeps the battery charged to restart the vehicle
and to signal for help with the headlamps. Do this as
little as possible to save fuel.
If Your Vehicle is Stuck in Sand,
Mud, Ice, or Snow
Slowly and cautiously spin the wheels to free the
vehicle when stuck in sand, mud, ice, or snow. See
Rocking Your Vehicle to Get It Out on page 5‑24.
If the vehicle has a traction system, it can often help to
free a stuck vehicle. Refer to the vehicle's traction
system in the Index. If stuck too severely for the traction
system to free the vehicle, turn the traction system off
and use the rocking method.
{WARNING:
If the vehicle's tires spin at high speed, they can
explode, and you or others could be injured. The
vehicle can overheat, causing an engine
compartment fire or other damage. Spin the
wheels as little as possible and avoid going above
55 km/h (35 mph) as shown on the speedometer.
For information about using tire chains on the vehicle,
see Tire Chains on page 6‑77.
5-23