2010 CHEVROLET CORVETTE remote control
[x] Cancel search: remote controlPage 7 of 472

Section 1 In Brief
Instrument Panel. . . . . . . . . . . . . . . . . . . . . . . . . . . . . . . . . . . 1-2
Initial Drive Information . . . . . . . . . . . . . . . . . . . . . . . . . . . 1-4
Remote Keyless Entry (RKE) System . . . . . . . . . . . 1-4
Door Locks . . . . . . . . . . . . . . . . . . . . . . . . . . . . . . . . . . . . . 1-5
Trunk Release . . . . . . . . . . . . . . . . . . . . . . . . . . . . . . . . . . 1-6
Windows . . . . . . . . . . . . . . . . . . . . . . . . . . . . . . . . . . . . . . . . 1-6
Seat Adjustment . . . . . . . . . . . . . . . . . . . . . . . . . . . . . . . . 1-7
Safety Belt . . . . . . . . . . . . . . . . . . . . . . . . . . . . . . . . . . . . . . 1-9
Sensing System for Passenger Airbag . . . . . . . . . 1-10
Mirror Adjustment . . . . . . . . . . . . . . . . . . . . . . . . . . . . . . 1-11
Steering Wheel Adjustment . . . . . . . . . . . . . . . . . . . . 1-12
Interior Lighting . . . . . . . . . . . . . . . . . . . . . . . . . . . . . . . . 1-13
Exterior Lighting . . . . . . . . . . . . . . . . . . . . . . . . . . . . . . . 1-13
Windshield Wiper/Washer . . . . . . . . . . . . . . . . . . . . . . 1-14
Climate Controls . . . . . . . . . . . . . . . . . . . . . . . . . . . . . . . 1-15
Transmission . . . . . . . . . . . . . . . . . . . . . . . . . . . . . . . . . . 1-15
Vehicle Features . . . . . . . . . . . . . . . . . . . . . . . . . . . . . . . . . . 1-16
Radio(s) . . . . . . . . . . . . . . . . . . . . . . . . . . . . . . . . . . . . . . . 1-16
Satellite Radio . . . . . . . . . . . . . . . . . . . . . . . . . . . . . . . . . 1-17 Portable Audio Devices . . . . . . . . . . . . . . . . . . . . . . . . 1-18
Steering Wheel Controls . . . . . . . . . . . . . . . . . . . . . . . 1-18
Bluetooth
®. . . . . . . . . . . . . . . . . . . . . . . . . . . . . . . . . . . . . 1-18
Navigation System . . . . . . . . . . . . . . . . . . . . . . . . . . . . . 1-19
Driver Information Center (DIC) . . . . . . . . . . . . . . . . 1-19
Cruise Control . . . . . . . . . . . . . . . . . . . . . . . . . . . . . . . . . 1-20
Power Outlets . . . . . . . . . . . . . . . . . . . . . . . . . . . . . . . . . 1-21
Roof Panel . . . . . . . . . . . . . . . . . . . . . . . . . . . . . . . . . . . . 1-21
Convertible . . . . . . . . . . . . . . . . . . . . . . . . . . . . . . . . . . . . 1-21
Performance and Maintenance . . . . . . . . . . . . . . . . . . 1-21
Traction Control System (TCS) . . . . . . . . . . . . . . . . 1-21
Towing . . . . . . . . . . . . . . . . . . . . . . . . . . . . . . . . . . . . . . . . . 1-22
Tire Pressure Monitor . . . . . . . . . . . . . . . . . . . . . . . . . . 1-22
Z06, Z16, and ZR1 Features . . . . . . . . . . . . . . . . . . . 1-23
Engine Oil Life System . . . . . . . . . . . . . . . . . . . . . . . . 1-24
Driving for Better Fuel Economy . . . . . . . . . . . . . . . 1-24
Battery . . . . . . . . . . . . . . . . . . . . . . . . . . . . . . . . . . . . . . . . . 1-24
Roadside Assistance Program . . . . . . . . . . . . . . . . . 1-25
OnStar
®. . . . . . . . . . . . . . . . . . . . . . . . . . . . . . . . . . . . . . . 1-25
1-1
Page 98 of 472
Section 3 Features and Controls
Universal Home Remote System. . . . . . . . . . . . . . . . 3-42
Universal Home Remote System Operation . . . . 3-43
Storage Areas . . . . . . . . . . . . . . . . . . . . . . . . . . . . . . . . . . . . 3-50
Glove Box . . . . . . . . . . . . . . . . . . . . . . . . . . . . . . . . . . . . . 3-50
Cupholders . . . . . . . . . . . . . . . . . . . . . . . . . . . . . . . . . . . . 3-50
Center Console Storage . . . . . . . . . . . . . . . . . . . . . . 3-50
Floor Mats . . . . . . . . . . . . . . . . . . . . . . . . . . . . . . . . . . . . . 3-50
Rear Storage Area . . . . . . . . . . . . . . . . . . . . . . . . . . . . . 3-51
Convenience Net . . . . . . . . . . . . . . . . . . . . . . . . . . . . . . 3-52
Cargo Cover . . . . . . . . . . . . . . . . . . . . . . . . . . . . . . . . . . . 3-52 Roof Panel
. . . . . . . . . . . . . . . . . . . . . . . . . . . . . . . . . . . . . . . . 3-54
Removing the Roof Panel . . . . . . . . . . . . . . . . . . . . . . 3-54
Storing the Roof Panel . . . . . . . . . . . . . . . . . . . . . . . . . 3-56
Installing the Roof Panel . . . . . . . . . . . . . . . . . . . . . . . 3-58
Convertible Top . . . . . . . . . . . . . . . . . . . . . . . . . . . . . . . . . . . 3-59
Convertible Top (Manual) . . . . . . . . . . . . . . . . . . . . . . 3-59
Convertible Top (Power) . . . . . . . . . . . . . . . . . . . . . . . 3-66
3-2
Page 138 of 472
Outside Convex Mirror
{WARNING:
A convex mirror can make things, like other
vehicles, look farther away than they really are.
If you cut too sharply into the right lane, you could
hit a vehicle on the right. Check the inside mirror
or glance over your shoulder before changing
lanes.
The passenger side mirror is convex shaped. A convex
mirror's surface is curved so more can be seen from the
driver seat.
Outside Heated Mirrors
<(Rear Window Defogger): Press to heat the
mirrors.
See “Rear Window Defogger” underDual Automatic
Climate Control System
on page 4‑22for more
information.
Universal Home Remote
System
See Radio Frequency Statementon page 8‑20for information regarding Part 15 of the Federal
Communications Commission (FCC) Rules and
RSS-210/211 of Industry Canada.
The FCC Grant of Equipment Authorization
Certificate number is KOBFTE05A.
The Canadian Registration ID number
is 3521A-FTE05A.
3-42
Page 139 of 472
Universal Home Remote System
Operation
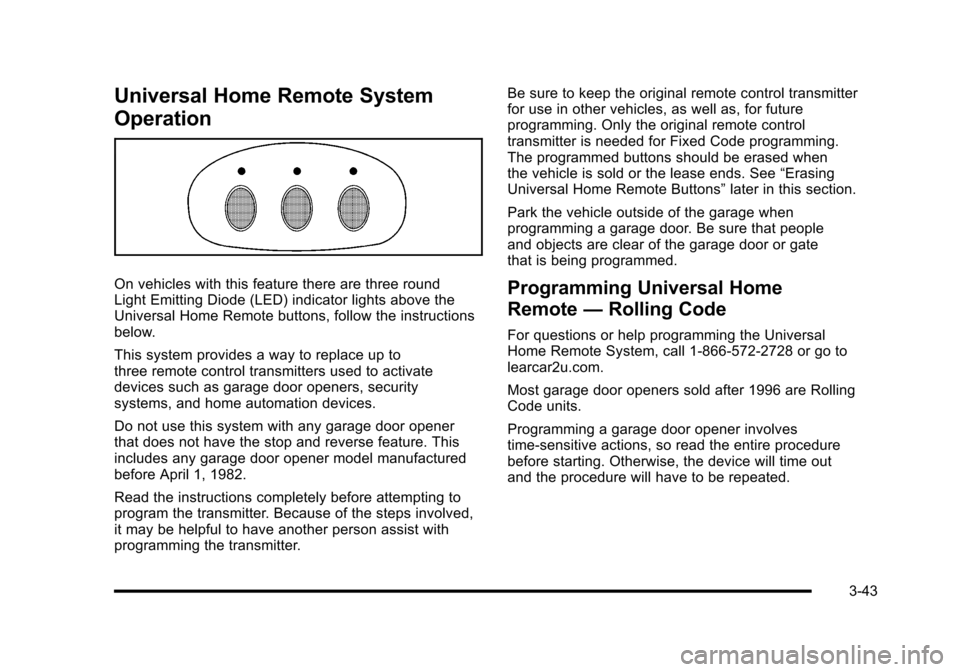
On vehicles with this feature there are three round
Light Emitting Diode (LED) indicator lights above the
Universal Home Remote buttons, follow the instructions
below.
This system provides a way to replace up to
three remote control transmitters used to activate
devices such as garage door openers, security
systems, and home automation devices.
Do not use this system with any garage door opener
that does not have the stop and reverse feature. This
includes any garage door opener model manufactured
before April 1, 1982.
Read the instructions completely before attempting to
program the transmitter. Because of the steps involved,
it may be helpful to have another person assist with
programming the transmitter. Be sure to keep the original remote control transmitter
for use in other vehicles, as well as, for future
programming. Only the original remote control
transmitter is needed for Fixed Code programming.
The programmed buttons should be erased when
the vehicle is sold or the lease ends. See
“Erasing
Universal Home Remote Buttons” later in this section.
Park the vehicle outside of the garage when
programming a garage door. Be sure that people
and objects are clear of the garage door or gate
that is being programmed.Programming Universal Home
Remote —Rolling Code
For questions or help programming the Universal
Home Remote System, call 1-866-572-2728 or go to
learcar2u.com.
Most garage door openers sold after 1996 are Rolling
Code units.
Programming a garage door opener involves
time-sensitive actions, so read the entire procedure
before starting. Otherwise, the device will time out
and the procedure will have to be repeated.
3-43
Page 141 of 472
4. Immediately return to the vehicle. Press and hold the Universal Home Remote button that will be
used to control the garage door until the garage
door moves. The indicator light, above the selected
button, should slowly blink. This button may need
to be held for up to 20 seconds.
5. Immediately, within one second, release the button when the garage door moves. The indicator light
blinks rapidly until programming is complete.
6. Press and release the same button again. The garage door should move, confirming that
programming is successful and complete.
To program another Rolling Code device such as an
additional garage door opener, a security device,
or home automation device, repeat Steps 1-6, choosing
a different function button in Step 4 than what was used
for the garage door opener.
If these instructions do not work, the garage door
opener is probably a Fixed Code unit. Follow the
Programming instructions that follow for a Fixed Code
garage door opener.Programming Universal Home
Remote —Fixed Code
For questions or help programming the Universal
Home Remote System, call 1-866-572-2728 or go to
learcar2u.com.
Most garage door openers sold before 1996 are Fixed
Code units.
Programming a garage door opener involves
time-sensitive actions, so read the entire procedure
before starting. Otherwise, the device will time out and
the procedure will have to be repeated.
To program up to three devices:
1. Press START or put the vehicle in accessory mode. See Ignition Positions
on page 3‑23for
additional information.
Programming can only occur when the vehicle is
running or in accessory mode.
3-45
Page 144 of 472
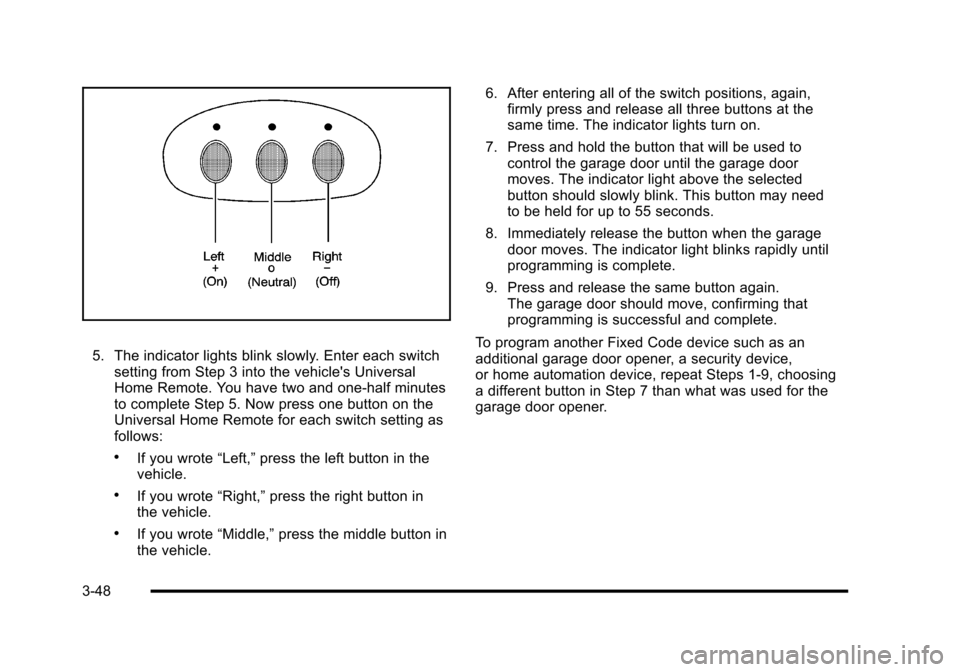
5. The indicator lights blink slowly. Enter each switch setting from Step 3 into the vehicle's Universal
Home Remote. You have two and one-half minutes
to complete Step 5. Now press one button on the
Universal Home Remote for each switch setting as
follows:
.If you wrote “Left,”press the left button in the
vehicle.
.If you wrote “Right,”press the right button in
the vehicle.
.If you wrote “Middle,”press the middle button in
the vehicle. 6. After entering all of the switch positions, again,
firmly press and release all three buttons at the
same time. The indicator lights turn on.
7. Press and hold the button that will be used to control the garage door until the garage door
moves. The indicator light above the selected
button should slowly blink. This button may need
to be held for up to 55 seconds.
8. Immediately release the button when the garage door moves. The indicator light blinks rapidly until
programming is complete.
9. Press and release the same button again. The garage door should move, confirming that
programming is successful and complete.
To program another Fixed Code device such as an
additional garage door opener, a security device,
or home automation device, repeat Steps 1-9, choosing
a different button in Step 7 than what was used for the
garage door opener.
3-48
Page 227 of 472
MAXIMUM SPEED 129 km/h (80 MPH)
This message displays when a malfunction is present in
the Selective Ride Control system. The vehicle speed
will be limited to a value determined by the vehicle
when the shock absorber system has failed and the
shocks are in their full soft mode. Have the vehicle
serviced by your dealer/retailer as soon as possible.
To acknowledge the message, press the RESET button.
The message reappears every 10 minutes until this
condition changes.
NO FOBS DETECTED
This message displays if the vehicle does not detect the
presence of a keyless access transmitter when you
have attempted to start the vehicle or a vehicle door
has just closed. The following conditions may cause this
message to appear:
.Driver-added equipment plugged into the
accessory power outlet on the center console
is causing interference. Examples of these
devices are cell phones and cell phone chargers,
two-way radios, power inverters, or similar items.
Try moving the keyless access transmitter away
from these devices when starting the vehicle.
In addition, PDA devices and remote garage and
gate openers may also generate Electromagnetic
Interference (EMI) that may interfere with the keyless access transmitter. Do not carry the
keyless access transmitter in the same pocket or
bag as these devices.
.The vehicle is experiencing Electromagnetic
Interference (EMI). Some locations, such as
airports, automatic toll booths, and some gas
stations have EMI fields which may interfere
with the keyless access transmitter.
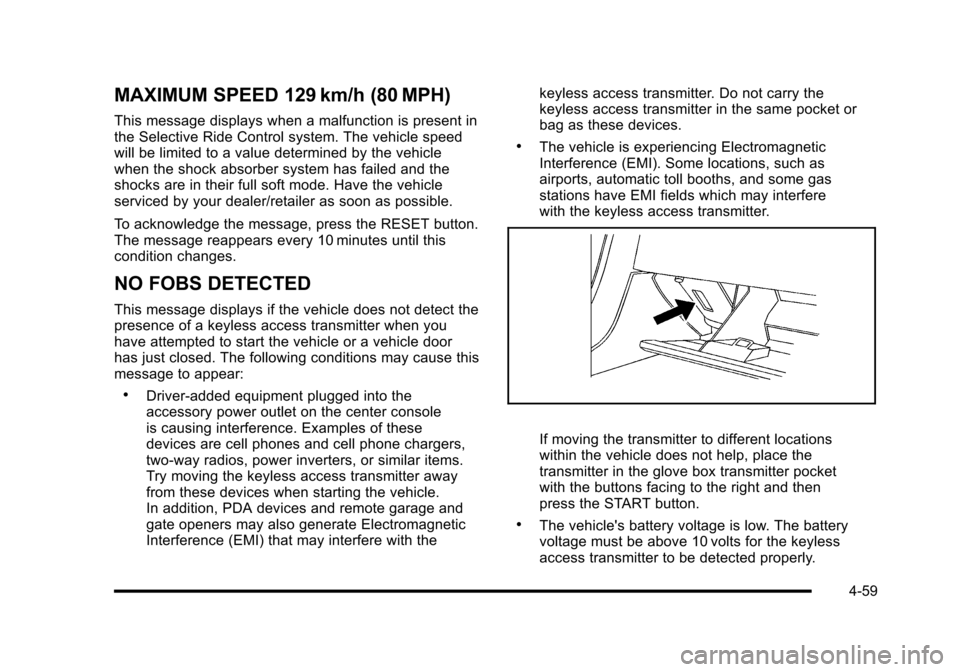
If moving the transmitter to different locations
within the vehicle does not help, place the
transmitter in the glove box transmitter pocket
with the buttons facing to the right and then
press the START button.
.The vehicle's battery voltage is low. The battery
voltage must be above 10 volts for the keyless
access transmitter to be detected properly.
4-59
Page 316 of 472
Damage to vehicle components resulting from the
installation or use of non‐GM certified parts, including
control module modifications, is not covered under the
terms of the vehicle warranty and may affect remaining
warranty coverage for affected parts.
GM Accessories are designed to complement and
function with other systems on the vehicle. Your GM
dealer/retailer can accessorize the vehicle using
genuine GM Accessories. When you go to your
GM dealer/retailer and ask for GM Accessories,
you will know that GM-trained and supported service
technicians will perform the work using genuine GM
Accessories.
Also, see Adding Equipment to Your Airbag-Equipped
Vehicle on page 2‑59.California Proposition 65 Warning
Most motor vehicles, including this one, contain and/or
emit chemicals known to the State of California to
cause cancer and birth defects or other reproductive
harm. Engine exhaust, many parts and systems, many
fluids, and some component wear by-products contain
and/or emit these chemicals.
California Perchlorate Materials
Requirements
Certain types of automotive applications, such as
airbag initiators, seat belt pretensioners, and lithium
batteries contained in remote keyless transmitters,
may contain perchlorate materials. Special handling
may be necessary. For additional information, see
www.dtsc.ca.gov/hazardouswaste/perchlorate.
6-4