2010 CHEVROLET CORVETTE sensor
[x] Cancel search: sensorPage 182 of 472
Twilight Sentinel®
Twilight Sentinel®can turn the lamps on and off for you.
A light sensor on top of the instrument panel makes the
Twilight Sentinel
®work, so be sure it is not covered.
With Twilight Sentinel
®, the following will happen:
.When it is dark enough outside, the front turn
signal lamps (DRL) will go off, and the headlamps
and parking lamps will come on. The other lamps
that come on with headlamps will also come on.
.When it is bright enough outside, the headlamps
will go off, and the front turn signal lamps (DRL)
will come on, as long as the exterior lamp switch is
in the AUTO position.
If the vehicle is started in a dark garage, the automatic
headlamp system come on immediately. Once the
vehicle leaves the garage, it takes about one minute for
the automatic headlamp system to change to DRL if it
is light outside. During that delay, the instrument panel
cluster may not be as bright as usual. Make sure the
instrument panel brightness control is in full bright
position. See Instrument Panel Brightness
on
page 4‑15.
You can idle the vehicle with the lamps off, even when
it is dark outside. After starting the vehicle, turn the exterior lamp control
band on the multifunction lever to off and then release
it. The lamps will remain off until the control band is
turned to off again.
Twilight Sentinel
®also provides exterior illumination as
you leave the vehicle. If Twilight Sentinel®has turned
on the lamps when you turn off the ignition, the lamps
will remain on until:
.The exterior lamp switch is moved from off to the
parking lamp position, or
.A delay time that you select has elapsed.
See “Personal Options” underDIC Vehicle
Personalization
on page 4‑71to select the delay time
that you want. You can also select no delay time.
If you turn off the ignition with the exterior lamp switch
in the parking lamp or headlamp position, the Twilight
Sentinel
®delay will not occur. The lamps will turn off as
soon as the switch is turned off.
The regular headlamp system should be turned on
when needed.
4-14
Page 191 of 472
The system operates to reach the set temperature
as quickly as possible. The AUTO control system
works best with the windows up and the removable
roof installed or the convertible top up. 1. Press the AUTO button.
2. Adjust the temperature to a comfortable setting between 16°C (60°F) and 32°C (90°F). Choosing
the coldest or warmest temperature setting will
not cause the system to heat or cool any faster.
A setting of 23°C (73°F) is suggested.
In cold weather, the system will start at reduced
fan speeds to avoid blowing cold air into your
vehicle until warmer air is available. The system
starts out blowing air at the floor but may change
modes automatically as the vehicle warms up to
maintain the chosen temperature setting. The
length of time needed for warm up depends on the
outside temperature and the length of time that has
elapsed since the vehicle was last driven.
3. Wait for the system to regulate. This may take from 10 to 30 minutes. Then adjust the temperature,
if necessary.
Do not cover the solar sensor located in the center of
the instrument panel, near the windshield. For more
information on the solar sensor, see “Sensor”later in
this section.Manual Operation
Driver Power/Temperature : Press the driver
temperature knob to turn the climate control system off.
This is the only setting that completely shuts off the fan.
The digital display shows only the outside temperature.
The driver and the passenger set temperature and the
air intake mode can still be adjusted when the climate
control is off.
Passenger Power/Temperature : Press the passenger
temperature knob to turn the passenger's climate
control system on or off. Turn the knob to increase or
decrease the temperature for the passenger. If the
passenger's climate control system is off, the driver's
temperature knob will control the temperature for the
entire vehicle.
x 9 w (Fan) :Press to increase or decrease the fan
speed. The fan speed setting will appear in the display.
Pressing the arrows will delete AUTO from the digital
display. The fan graphics with the fan speed bars will be
shown. The AUTO button must be pressed to return to
the automatic fan control.
If the airflow seems low when the fan speed is at the
highest setting, the passenger compartment air filter
may need to be replaced. For more information, see
Passenger Compartment Air Filter
on page 4‑28and
Scheduled Maintenance on page 7‑3.
4-23
Page 194 of 472
Sensors
The solar sensor on the vehicle monitors the solar
heat and uses the information to maintain the selected
temperature when operating in AUTO mode by
automatically adjusting the temperature, fan speed
and air delivery system. The system may also supply
cooler air to the side of the vehicle facing the sun.
The recirculation mode will also be activated, as
necessary. Do not cover the solar sensor located
on the top of the instrument panel near the windshield
or the system will not work properly.
There is also a sensor located behind the front bumper.
This sensor reads the outside air temperature and helps
to maintain the temperature inside the vehicle. Any
cover on the front of the vehicle could give a false
reading in the temperature.
If the outside temperature goes up, the displayed
temperature will not change until:
.The vehicle's speed is above 19 km/h (12 mph) for
five minutes.
.The vehicle's speed is above 52 km/h (32 mph) for
two and a half minutes. These delays prevent false readings. If the temperature
goes down, the outside temperature will be shown when
you start the vehicle. If it has been turned off for less
than three hours, the temperature will be recalled from
the previous vehicle operation.
There is also an inside temperature sensor located to
the left of the ignition switch. The automatic climate
control system uses this sensor to receive information,
so if you block or cover it, the system will not function
properly.
Rear Window Defogger
The rear window defogger uses a warming grid to
remove fog or frost from the rear window.
The rear window defogger only works when the engine
is running.
=(Rear Window Defogger) :
Press to turn the
rear window defogger on or off. Be sure to clear
as much snow from the rear window as possible.
An indicator light comes on to show that the rear
window defogger is on.
4-26
Page 201 of 472
Airbag Readiness Light
The system checks the airbag's electrical system for
possible malfunctions. If the light stays on it indicates
there is an electrical problem. The system check
includes the airbag sensor, the pretensioners, the
airbag modules, the wiring and the crash sensing and
diagnostic module. For more information on the airbag
system, see Airbag System on page 2‑44.
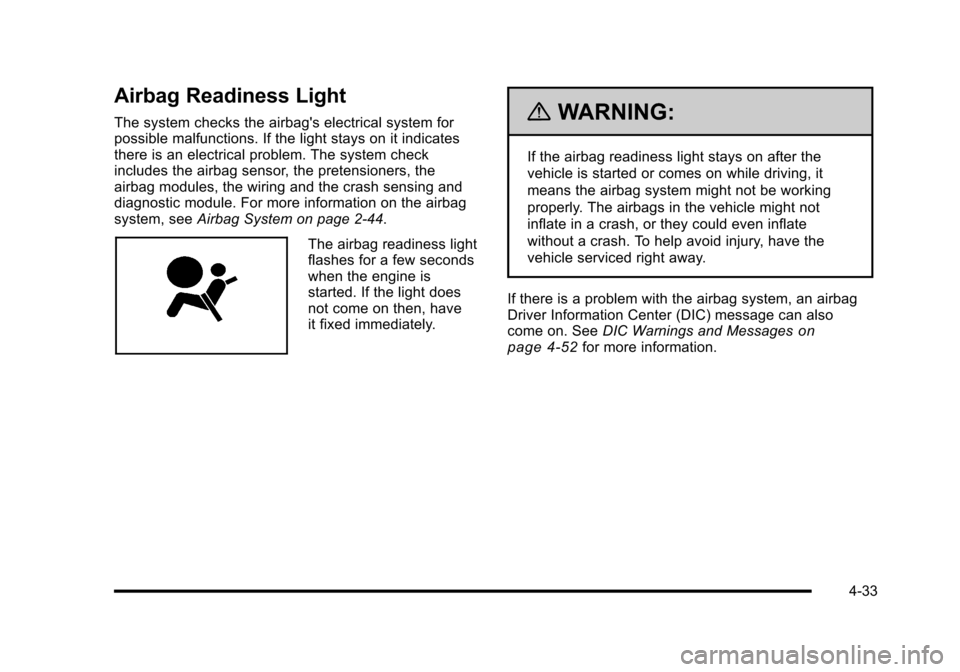
The airbag readiness light
flashes for a few seconds
when the engine is
started. If the light does
not come on then, have
it fixed immediately.
{WARNING:
If the airbag readiness light stays on after the
vehicle is started or comes on while driving, it
means the airbag system might not be working
properly. The airbags in the vehicle might not
inflate in a crash, or they could even inflate
without a crash. To help avoid injury, have the
vehicle serviced right away.
If there is a problem with the airbag system, an airbag
Driver Information Center (DIC) message can also
come on. See DIC Warnings and Messages
on
page 4‑52for more information.
4-33
Page 222 of 472
BUCKLE PASSENGER
This message reminds you to buckle the passenger's
safety belt.
This message displays and a sound will be heard when
the ignition is on, the driver's safety belt is buckled, the
passenger's safety belt is unbuckled with the passenger
airbag enabled, and the vehicle is in motion. You should
have the passenger buckle their safety belt.
The reminder will be repeated if the ignition is on, the
vehicle is in motion, the driver is buckled and the
passenger is still unbuckled, and the passenger airbag
is enabled. If the passenger's safety belt is already
buckled, this message will not come on.
BUCKLE SEATBELT
This message reminds you to buckle the driver's
safety belt.
This message displays and a sound will be heard when
the ignition is on, the driver's safety belt is unbuckled,
and the vehicle is in motion. You should buckle your
safety belt.
If the driver remains unbuckled when the ignition is
on and the vehicle is in motion, the reminder will be
repeated. If the driver's safety belt is already buckled,
this message will not come on. This message is an additional reminder to the safety
belt reminder light in the instrument panel cluster.
See
Safety Belt Reminders
on page 4‑32for more
information.
CHANGE BRAKE PADS
On vehicles with electronic brake pad wear sensors,
this message will be displayed when the pads are worn.
See your dealer/retailer for service.
CHANGE ENGINE OIL
This message displays when the life of the engine
oil has expired. See Scheduled Maintenanceon
page 7‑3. After an oil change, the engine oil life
system must be reset. See “Engine Oil Life”under
DIC Operation and Displays
on page 4‑47. Also, see
Engine Oilon page 6‑19and Engine Oil Life Systemon page 6‑25for more information.
CHECK BRAKE FLUID
This message displays, a sound will be heard, and the
brake system warning light on the instrument panel
cluster turns on if the ignition is on to inform the driver
that the brake fluid level is low. See Brake System
Warning Light
on page 4‑36. Have the brake system
serviced by your dealer/retailer as soon as possible.
See Brakes on page 6‑43.
4-54
Page 231 of 472
SERVICE ACTIVE HANDLING SYSTEM
This message displays if there is a problem with the
Active Handling System and the vehicle needs service.
The active handling system light on the instrument
panel cluster also turns on and a sound will be heard.
See your dealer/retailer. When this message is
displayed, the system is not working. Adjust your driving
accordingly. See Active Handling System
on page 5‑8for more information.
SERVICE AIR CONDITIONING
This message displays when the electronic sensors
that control the air conditioning and heating systems
are no longer working. Have the climate control system
serviced by your dealer/retailer if you notice a drop in
heating and air conditioning efficiency.
SERVICE ANTILOCK BRAKES
If this message displays while you are driving, stop as
soon as possible and turn the ignition off. Then start the
engine again to reset the system. If the message stays
on, or comes back on again while you are driving, the
vehicle is in need of service. See your dealer/retailer. If the antilock brake system (ABS) warning light is on
and the regular brake system warning light is not on,
you still have brakes, but do not have ABS. If the
regular brake system warning light is also on, you do
not have ABS and there is a problem with the brakes.
See
Antilock Brake System (ABS) Warning Light
on
page 4‑37and Brake System Warning Lighton
page 4‑36.
If this message is displayed, the Traction Control
System (TCS) and the Active Handling System will
also be disabled. The DIC will scroll three messages:
SERVICE ANTILOCK BRAKES, SERVICE TRACTION
SYSTEM, and SERVICE ACTIVE HANDLING, and the
instrument panel cluster lights will come on along with a
sound. When the service message is displayed, the
computer controlled systems will not assist the driver.
Have the system repaired by your dealer/retailer as
soon as possible. Adjust your driving accordingly.
To acknowledge these messages, press the RESET
button.
4-63
Page 238 of 472
Other Messages
Here are more messages that you can receive on your
Driver Information Center (DIC). To acknowledge a
message and read another message that may have
come on at the same time, press the RESET button.
.ACCESSORY MODE ON
.BATTERY VOLTAGE HIGH
See Voltmeter Gauge on page 4‑35.
.BATTERY VOLTAGE LOW
See Voltmeter Gauge on page 4‑35.
.CHECK WASHER FLUID
See Windshield Washer Fluid on page 6‑42.
.CRUISE SET TO XXX MPH (XXX km/h)
See Cruise Control on page 4‑7.
.DRIVER DOOR AJAR
.FOB AUTOLEARN WAIT XX MINUTES
See “Matching Transmitter(s) to Your Vehicle”
under Keyless Access System Operation
on
page 3‑5.
.FOB BATTERY LOW
See “Battery Replacement” underKeyless Access
System Operation on page 3‑5.
.HATCH AJAR (Coupe)
.INTRUSION SENSOR OFF, if your vehicle has this
feature
.INTRUSION SENSOR ON, if your vehicle has this
feature
.KNOWN FOB
See “Matching Transmitter(s) to Your Vehicle”
under Keyless Access System Operation
on
page 3‑5.
.MAXIMUM NUMBER OF FOBS LEARNED
See “Matching Transmitter(s) to Your Vehicle”
under Keyless Access System Operation
on
page 3‑5.
.OFF–ACCESSORY TO LEARN
See “Matching Transmitter(s) to Your Vehicle”
under Keyless Access System Operation
on
page 3‑5.
.PASSENGER DOOR AJAR
.READY FOR FOB #X
See “Matching Transmitter(s) to Your Vehicle”
under Keyless Access System Operation
on
page 3‑5.
.TONNEAU AJAR (Convertible)
.TRUNK AJAR (Convertible)
.UPSHIFT NOW
See Manual Transmission Operation on page 3‑32.
4-70
Page 340 of 472
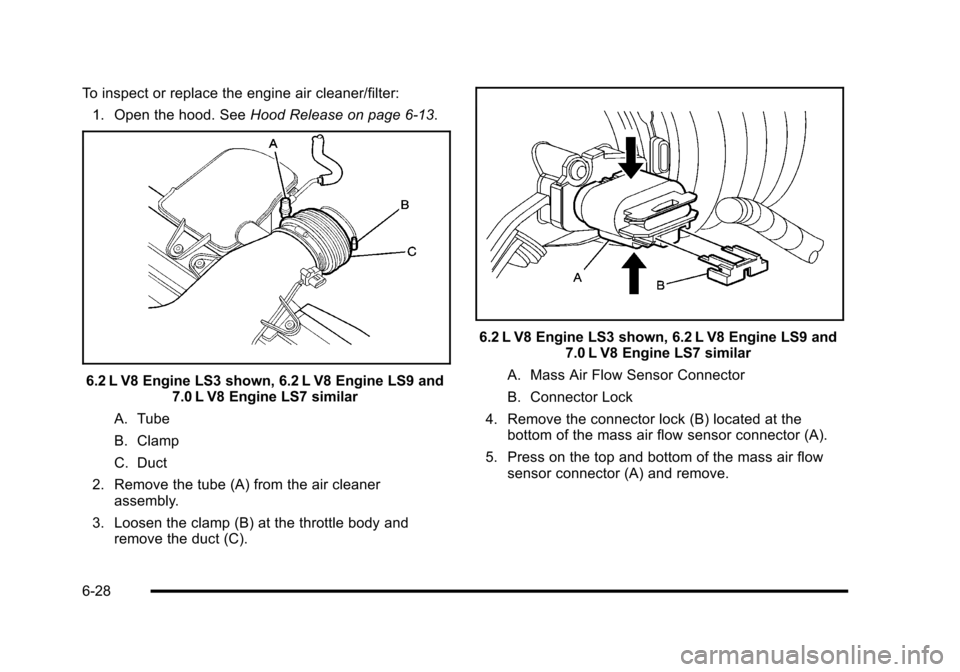
To inspect or replace the engine air cleaner/filter: 1. Open the hood. See Hood Release on page 6‑13.
6.2 L V8 Engine LS3 shown, 6.2 L V8 Engine LS9 and
7.0 L V8 Engine LS7 similar
A. Tube
B. Clamp
C. Duct
2. Remove the tube (A) from the air cleaner assembly.
3. Loosen the clamp (B) at the throttle body and remove the duct (C).
6.2 L V8 Engine LS3 shown, 6.2 L V8 Engine LS9 and 7.0 L V8 Engine LS7 similar
A. Mass Air Flow Sensor Connector
B. Connector Lock
4. Remove the connector lock (B) located at the bottom of the mass air flow sensor connector (A).
5. Press on the top and bottom of the mass air flow sensor connector (A) and remove.
6-28