2010 BUICK LACROSSE four wheel drive
[x] Cancel search: four wheel drivePage 240 of 414

8-18 Driving and Operating
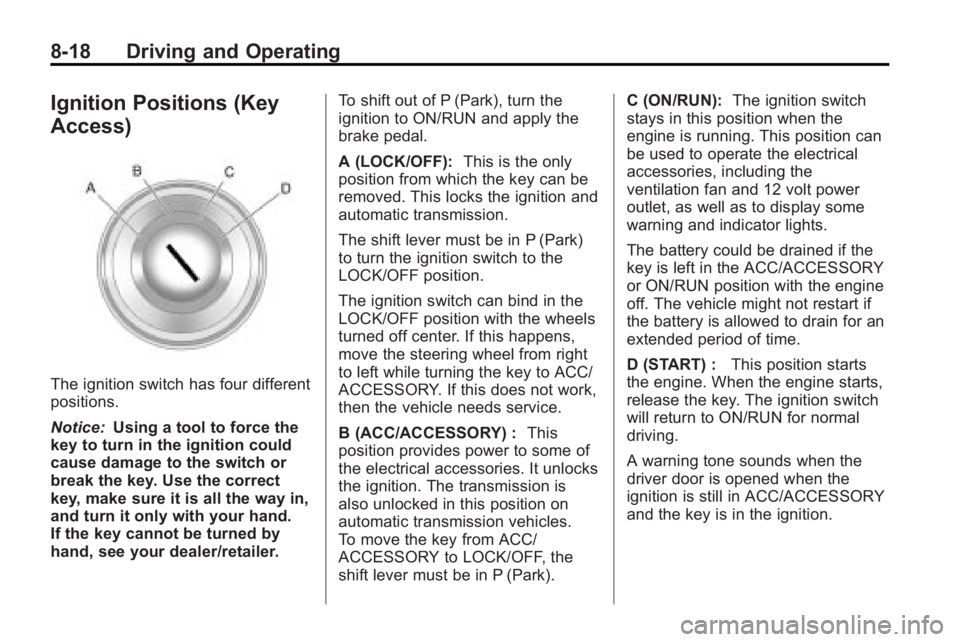
Ignition Positions (Key
Access)
The ignition switch has four different
positions.
Notice:Using a tool to force the
key to turn in the ignition could
cause damage to the switch or
break the key. Use the correct
key, make sure it is all the way in,
and turn it only with your hand.
If the key cannot be turned by
hand, see your dealer/retailer. To shift out of P (Park), turn the
ignition to ON/RUN and apply the
brake pedal.
A (LOCK/OFF):
This is the only
position from which the key can be
removed. This locks the ignition and
automatic transmission.
The shift lever must be in P (Park)
to turn the ignition switch to the
LOCK/OFF position.
The ignition switch can bind in the
LOCK/OFF position with the wheels
turned off center. If this happens,
move the steering wheel from right
to left while turning the key to ACC/
ACCESSORY. If this does not work,
then the vehicle needs service.
B (ACC/ACCESSORY) : This
position provides power to some of
the electrical accessories. It unlocks
the ignition. The transmission is
also unlocked in this position on
automatic transmission vehicles.
To move the key from ACC/
ACCESSORY to LOCK/OFF, the
shift lever must be in P (Park). C (ON/RUN):
The ignition switch
stays in this position when the
engine is running. This position can
be used to operate the electrical
accessories, including the
ventilation fan and 12 volt power
outlet, as well as to display some
warning and indicator lights.
The battery could be drained if the
key is left in the ACC/ACCESSORY
or ON/RUN position with the engine
off. The vehicle might not restart if
the battery is allowed to drain for an
extended period of time.
D (START) : This position starts
the engine. When the engine starts,
release the key. The ignition switch
will return to ON/RUN for normal
driving.
A warning tone sounds when the
driver door is opened when the
ignition is still in ACC/ACCESSORY
and the key is in the ignition.
Page 252 of 414

8-30 Driving and Operating
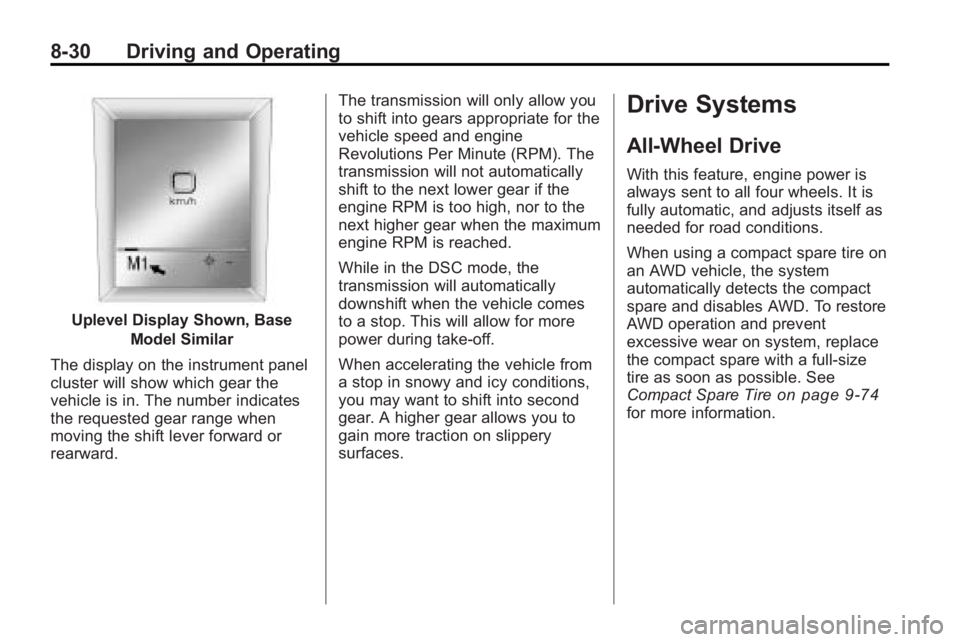
Uplevel Display Shown, BaseModel Similar
The display on the instrument panel
cluster will show which gear the
vehicle is in. The number indicates
the requested gear range when
moving the shift lever forward or
rearward. The transmission will only allow you
to shift into gears appropriate for the
vehicle speed and engine
Revolutions Per Minute (RPM). The
transmission will not automatically
shift to the next lower gear if the
engine RPM is too high, nor to the
next higher gear when the maximum
engine RPM is reached.
While in the DSC mode, the
transmission will automatically
downshift when the vehicle comes
to a stop. This will allow for more
power during take-off.
When accelerating the vehicle from
a stop in snowy and icy conditions,
you may want to shift into second
gear. A higher gear allows you to
gain more traction on slippery
surfaces.
Drive Systems
All-Wheel Drive
With this feature, engine power is
always sent to all four wheels. It is
fully automatic, and adjusts itself as
needed for road conditions.
When using a compact spare tire on
an AWD vehicle, the system
automatically detects the compact
spare and disables AWD. To restore
AWD operation and prevent
excessive wear on system, replace
the compact spare with a full-size
tire as soon as possible. See
Compact Spare Tire
on page 9‑74for more information.
Page 339 of 414

Vehicle Care 9-57
.The TPMS sensor matching
process was started but not
completed or not completed
successfully after rotating the
vehicle's tires. The DIC message
and TPMS malfunction light
should go off once the TPMS
sensor matching process is
performed successfully. See
“TPMS Sensor Matching
Process”later in this section.
.One or more TPMS sensors are
missing or damaged. The DIC
message and the TPMS
malfunction light should go off
when the TPMS sensors are
installed and the sensor
matching process is performed
successfully. See your dealer/
retailer for service.
.Replacement tires or wheels do
not match your vehicle's original
equipment tires or wheels. Tires
and wheels other than those
recommended for your vehicle
could prevent the TPMS from
functioning properly. See Buying
New Tires on page 9‑61.
.Operating electronic devices or
being near facilities using radio
wave frequencies similar to the
TPMS could cause the TPMS
sensors to malfunction.
If the TPMS is not functioning it
cannot detect or signal a low tire
condition. See your dealer/retailer
for service if the TPMS malfunction
light and DIC message comes on
and stays on.
TPMS Sensor Matching
Process
Each TPMS sensor has a unique
identification code. Any time you
rotate your vehicle's tires or replace
one or more of the TPMS sensors,
the identification codes will need to
be matched to the new tire/wheel
position. The sensors are matched
to the tire/wheel positions in the
following order: driver side front tire,
passenger side front tire, passenger
side rear tire, and driver side rear
tire using a TPMS diagnostic tool.
See your dealer/retailer for service. The TPMS sensors can also be
matched to each tire/wheel position
by increasing or decreasing the
tire's air pressure. If increasing the
tire's air pressure, do not exceed
the maximum inflation pressure
indicated on the tire's sidewall.
To decrease air-pressure out of a
tire you can use the pointed end of
the valve cap, a pencil-style air
pressure gage, or a key.
You have two minutes to match the
first tire/wheel position, and
five minutes overall to match all four
tire/wheel positions. If it takes longer
than two minutes, to match the first
tire and wheel, or more than
five minutes to match all four tire
and wheel positions the matching
process stops and you need to
start over.
Page 340 of 414

9-58 Vehicle Care
The TPMS sensor matching process
is outlined below:
1. Set the parking brake.
2. Turn the ignition switch toON/RUN with the engine off.
3. Use the MENU button to select the Vehicle Information Menu in
the Driver Information
Center (DIC).
4. Use the thumbwheel to scroll to the Tire Pressure Menu Item
screen.
5. Press the SET/CLR button to begin the sensor matching
process.
A message asking if you are
sure you want to begin this
process should appear. 6. Press the SET/CLR button again
to confirm the selection.
The horn sounds twice to signal
the receiver is in relearn mode
and the TIRE LEARNING
ACTIVE message displays on
the DIC screen.
7. Start with the driver side front tire.
8. Remove the valve cap from the valve cap stem. Activate the
TPMS sensor by increasing or
decreasing the tire's air pressure
for five seconds, or until a horn
chirp sounds. The horn chirp,
which may take up to
30 seconds to sound, confirms
that the sensor identification
code has been matched to this
tire and wheel position.
9. Proceed to the passenger side front tire, and repeat the
procedure in Step 8. 10. Proceed to the passenger side
rear tire, and repeat the
procedure in Step 8.
11. Proceed to the driver side rear tire, and repeat the procedure
in Step 8. The horn sounds two
times to indicate the sensor
identification code has been
matched to the driver side rear
tire, and the TPMS sensor
matching process is no longer
active. The TIRE LEARNING
ACTIVE message on the DIC
display screen goes off.
12. Turn the ignition switch to LOCK/OFF.
13. Set all four tires to the recommended air pressure
level as indicated on the Tire
and Loading Information label.
14. Put the valve caps back on the valve stems.
Page 344 of 414

9-62 Vehicle Care
GM recommends replacing tires
in sets of four. This is because
uniform tread depth on all tires
will help keep your vehicle
performing most like it did when
the tires were new. Replacing
less than a full set of tires can
affect the braking and handling
performance of your vehicle.
SeeTire Inspection
on page 9‑59
andTire Rotationon page 9‑59
for information on proper tire
rotation.
{WARNING
Mixing tires could cause you
to lose control while driving.
If you mix tires of different
sizes, brands, or types (radial
and bias-belted tires), the
vehicle may not handle
properly, and you could have
a crash. Using tires of different
sizes, brands, or types may
also cause damage to your
vehicle. Be sure to use the
correct size, brand, and type
of tires on all wheels. It is all
right to drive with your
compact spare temporarily, as
it was developed for use on
your vehicle. See Compact
Spare Tire
on page 9‑74.
{WARNING
If you use bias-ply tires on the
vehicle, the wheel rim flanges
could develop cracks after
many miles of driving. A tire
and/or wheel could fail
suddenly, causing a crash.
Use only radial-ply tires with
the wheels on the vehicle.
If you must replace your
vehicle's tires with those that do
not have a TPC Spec number,
make sure they are the same
size, load range, speed rating,
and construction type (radial and
bias-belted tires) as your
vehicle's original tires.