2010 BUICK LACROSSE automatic transmission
[x] Cancel search: automatic transmissionPage 1 of 414

2010 Buick LaCrosse Owner ManualM
Keys, Doors and Windows. . . 1-1
Keys and Locks . . . . . . . . . . . . . . . 1-2
Doors . . . . . . . . . . . . . . . . . . . . . . . . . 1-11
Vehicle Security . . . . . . . . . . . . . . 1-13
Exterior Mirrors . . . . . . . . . . . . . . . 1-15
Interior Mirrors . . . . . . . . . . . . . . . . 1-16
Windows . . . . . . . . . . . . . . . . . . . . . 1-17
Roof . . . . . . . . . . . . . . . . . . . . . . . . . . 1-19
Seats and Restraints . . . . . . . . . 2-1
Head Restraints . . . . . . . . . . . . . . . 2-2
Front Seats . . . . . . . . . . . . . . . . . . . . 2-3
Rear Seats . . . . . . . . . . . . . . . . . . . . 2-9
Safety Belts . . . . . . . . . . . . . . . . . . 2-10
Airbag System . . . . . . . . . . . . . . . . 2-24
Child Restraints . . . . . . . . . . . . . . 2-40
Storage . . . . . . . . . . . . . . . . . . . . . . . 3-1
Storage Compartments . . . . . . . . 3-1
Additional Storage Features . . . 3-2 Instruments and Controls
. . . . 4-1
Instrument Panel Overview . . . . 4-4
Controls . . . . . . . . . . . . . . . . . . . . . . . 4-6
Warning Lights, Gages, and
Indicators . . . . . . . . . . . . . . . . . . . 4-12
Information Displays . . . . . . . . . . 4-25
Vehicle Messages . . . . . . . . . . . . 4-32
Vehicle Personalization . . . . . . . 4-38
OnStar System
®. . . . . . . . . . . . . . 4-43
Universal Remote System . . . . 4-45
Lighting . . . . . . . . . . . . . . . . . . . . . . . 5-1
Exterior Lighting . . . . . . . . . . . . . . . 5-1
Interior Lighting . . . . . . . . . . . . . . . . 5-5
Lighting Features . . . . . . . . . . . . . . 5-6
Infotainment System . . . . . . . . . 6-1
Introduction . . . . . . . . . . . . . . . . . . . . 6-2
Radio . . . . . . . . . . . . . . . . . . . . . . . . . 6-12
Audio Players . . . . . . . . . . . . . . . . 6-20
Rear Seat Infotainment . . . . . . . 6-34
Phone . . . . . . . . . . . . . . . . . . . . . . . . 6-42 Climate Controls
. . . . . . . . . . . . . 7-1
Climate Control Systems . . . . . . 7-1
Air Vents . . . . . . . . . . . . . . . . . . . . . . . 7-8
Maintenance . . . . . . . . . . . . . . . . . . . 7-8
Driving and Operating . . . . . . . . 8-1
Driving Information . . . . . . . . . . . . . 8-2
Starting and Operating . . . . . . . 8-17
Engine Exhaust . . . . . . . . . . . . . . 8-26
Automatic Transmission . . . . . . 8-27
Drive Systems . . . . . . . . . . . . . . . . 8-30
Brakes . . . . . . . . . . . . . . . . . . . . . . . 8-31
Ride Control Systems . . . . . . . . 8-34
Cruise Control . . . . . . . . . . . . . . . . 8-37
Object Detection Systems . . . . 8-40
Fuel . . . . . . . . . . . . . . . . . . . . . . . . . . 8-49
Towing . . . . . . . . . . . . . . . . . . . . . . . 8-54
Conversions and Add-Ons . . . 8-60
Vehicle Care . . . . . . . . . . . . . . . . . . 9-1
General Information . . . . . . . . . . . . 9-2
Vehicle Checks . . . . . . . . . . . . . . . . 9-4
Headlamp Aiming . . . . . . . . . . . . 9-30
Page 93 of 414

Instruments and Controls 4-5
A.Air Vents on page 7‑8.
B. Head-Up Display (HUD)
on
page 4‑28(If Equipped).
C. Turn and Lane-Change Lever. See Turn and Lane-Change
Signals
on page 5‑4. Driver
Information Center Buttons. See
Driver Information Center (DIC)
on page 4‑25.
D. Instrument Cluster
on
page 4‑13. Driver Information
Center Display. See Driver
Information Center (DIC)
on
page 4‑25.
E. Windshield Wiper/Washer
on
page 4‑7.
F. Info-Display.
G. AM-FM Radio on page 6‑12.
H. Exterior Lamp Controls
on
page 5‑1. Fog Lampson
page 5‑5(If Equipped).
Instrument Panel Illumination
Control on page 5‑5. I.
Front Storage on page 3‑1.
J. Cruise Control
on page 8‑37.
Heated Steering Wheelon
page 4‑7.
K. Steering Wheel Adjustment
on
page 4‑6.
L. Horn on page 4‑7.
M. Steering Wheel Controls
on
page 4‑6.
N. Ignition Positions (Key Access)
on page 8‑18orIgnition
Positions (Keyless Access)on
page 8‑19.
O. Heated and Ventilated Front
Seats on page 2‑8.
P. Automatic Climate Control
System
on page 7‑1orDual
Automatic Climate Control
System on page 7‑4.
Q. Power Door Locks
on
page 1‑10. Hazard Warning
Flasherson page 5‑4.
Passenger Sensing Systemon
page 2‑32. R.
Parking Brake on page 8‑32.
S. PRNDL. See Automatic
Transmission on page 8‑27.
T. Shift Lever. See Shifting Into
Park on page 8‑23.
U. Traction Control System (TCS)
on page 8‑34.Electronic
Stability Control (ESC)on
page 8‑35. Ultrasonic Parking
Assiston page 8‑40. Power
Rear Sunshade.
V. Glove Box on page 3‑1.
Page 119 of 414

Instruments and Controls 4-31
Format Two:This display includes
the information in Format One
without the transmission
information, the outside air
temperature, and compass heading.Format Three: This display
includes all the information in
Format One along with a circular
tachometer, but without outside air
temperature and compass heading.
All formats will show the turn-by-turn
navigation information and provide
details about the next driving
maneuver to be made. When you
near your destination, the HUD will
display a distance bar that will
empty the closer you get to your
destination. All navigation information is provided to the HUD
by the navigation radio or OnStar
®
service, for vehicles that have these
features.
The HUD image displayed on the
windshield will automatically dim
and brighten to compensate for
outside lighting. However, the
HUD brightness control can still be
adjusted as needed.
Page 141 of 414

Lighting 5-3
The DRL system turns on the
low-beam headlamps at a reduced
brightness or for vehicles with
High Intensity Discharge (HID)
headlamps, the dedicated
DRL lights will come on when
the following conditions are met:
.The engine is running,
.The exterior lamp band is in
AUTO, and
.The light sensor determines it
is daytime.
When the DRL are on, the
low-beam headlamps will be on.
The taillamps, sidemarker,
instrument panel lights and other
lamps will not be on.
The DRL turn off when the
headlamps are turned to
Oor the
ignition is off.
Automatic Headlamp
System
When the exterior lamp control is
set to AUTO and it is dark enough
outside, the headlamps come on
automatically.
There is a light sensor located on
top of the instrument panel. Do not
cover the sensor or the headlamps
will come on when they are not
needed.
The system may also turn on the
headlamps when driving through a
parking garage or tunnel.
When it is bright enough outside the
headlamps will turn off or may
change to daytime running
lamps (DRL).
The automatic headlamp system
turns off when the exterior lamp
control is turned to
Oor the ignition
is off.
Adaptive Forward
Lighting (AFL)
The Adaptive Forward Lighting
System (AFL) pivots the headlamps
horizontally to provide greater road
illumination while turning. To enable
AFL, set the exterior lamp switch to
the AUTO position. Moving the
switch out of the AUTO position
deactivates the system. AFL
operates when the vehicle speed is
greater than 3 km/h (2 mph).
AFL does not operate when the
transmission is in R (Reverse).
AFL is not immediately operable
after starting the vehicle; driving a
short distance is required to
calibrate the AFL. See Exterior
Lamp Controls on page 5‑1.
Page 223 of 414

Driving and Operating 8-1
Driving and
Operating
Driving Information
Driving for Better FuelEconomy . . . . . . . . . . . . . . . . . . . . 8-2
Defensive Driving . . . . . . . . . . . . . 8-3
Drunk Driving . . . . . . . . . . . . . . . . . 8-3
Control of a Vehicle . . . . . . . . . . . 8-4
Braking . . . . . . . . . . . . . . . . . . . . . . . 8-4
Steering . . . . . . . . . . . . . . . . . . . . . . . 8-5
Off-Road Recovery . . . . . . . . . . . . 8-6
Loss of Control . . . . . . . . . . . . . . . . 8-7
Driving on Wet Roads . . . . . . . . . 8-8
Highway Hypnosis . . . . . . . . . . . . 8-8
Hill and Mountain Roads . . . . . . 8-9
Winter Driving . . . . . . . . . . . . . . . . . 8-9
If the Vehicle is Stuck . . . . . . . . 8-11
Vehicle Load Limits . . . . . . . . . . 8-12
Starting and Operating
New Vehicle Break-In . . . . . . . . 8-17
Ignition Positions (Key Access) . . . . . . . . . . . . . . . . . . . . 8-18
Ignition Positions (Keyless Access) . . . . . . . . . . . . . . . . . . . . 8-19 Retained Accessory
Power (RAP) . . . . . . . . . . . . . . . 8-20
Starting the Engine . . . . . . . . . . 8-20
Engine Heater . . . . . . . . . . . . . . . 8-22
Shifting Into Park . . . . . . . . . . . . 8-23
Shifting Out of Park . . . . . . . . . . 8-25
Parking Over Things That Burn . . . . . . . . . . . . . . . . . . 8-25
Engine Exhaust
Engine Exhaust . . . . . . . . . . . . . . 8-26
Running the Vehicle WhileParked . . . . . . . . . . . . . . . . . . . . . 8-26
Automatic Transmission
Automatic Transmission . . . . . 8-27
Manual Mode . . . . . . . . . . . . . . . . 8-29
Drive Systems
All-Wheel Drive . . . . . . . . . . . . . . 8-30
Brakes
Antilock BrakeSystem (ABS) . . . . . . . . . . . . . . 8-31
Parking Brake . . . . . . . . . . . . . . . 8-32
Brake Assist . . . . . . . . . . . . . . . . . 8-34
Ride Control Systems
Traction Control System (TCS) . . . . . . . . . . . . . . 8-34
Electronic Stability Control (ESC) . . . . . . . . . . . . . . 8-35
Selective Ride Control . . . . . . . 8-36
Cruise Control
Cruise Control . . . . . . . . . . . . . . . 8-37
Object Detection Systems
Ultrasonic Parking Assist . . . . 8-40
Side Blind Zone
Alert (SBZA) . . . . . . . . . . . . . . . 8-43
Rear Vision Camera (RVC) . . . . . . . . . . . . . 8-46
Fuel
Fuel . . . . . . . . . . . . . . . . . . . . . . . . . 8-49
Recommended Fuel . . . . . . . . . 8-50
Gasoline Specifications . . . . . . 8-50
California FuelRequirements . . . . . . . . . . . . . . 8-51
Fuels in Foreign Countries . . . 8-51
Fuel Additives . . . . . . . . . . . . . . . 8-51
Filling the Tank . . . . . . . . . . . . . . 8-52
Filling a Portable Fuel Container . . . . . . . . . . . . . . . . . . . 8-53
Page 240 of 414

8-18 Driving and Operating
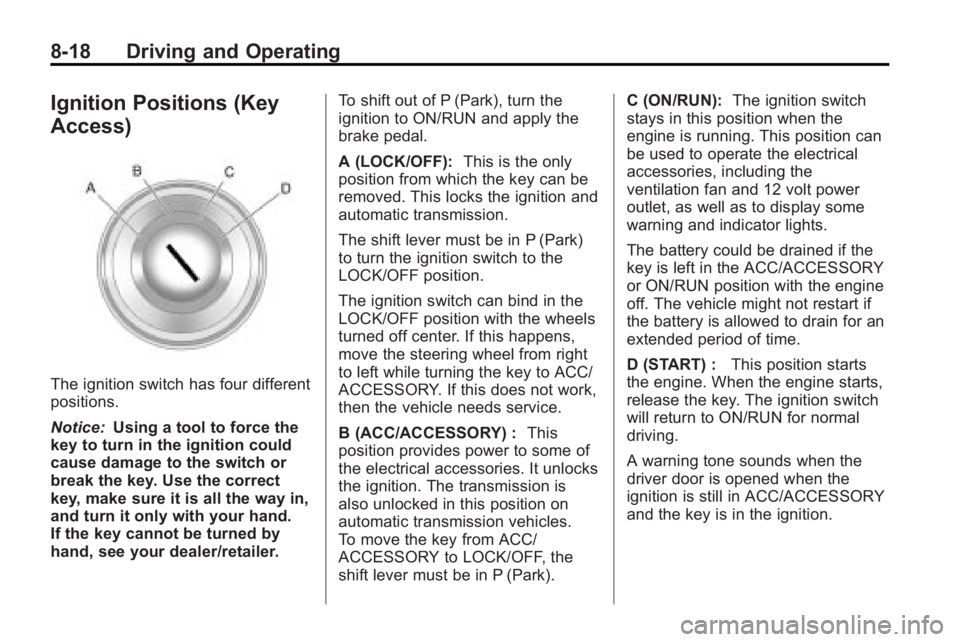
Ignition Positions (Key
Access)
The ignition switch has four different
positions.
Notice:Using a tool to force the
key to turn in the ignition could
cause damage to the switch or
break the key. Use the correct
key, make sure it is all the way in,
and turn it only with your hand.
If the key cannot be turned by
hand, see your dealer/retailer. To shift out of P (Park), turn the
ignition to ON/RUN and apply the
brake pedal.
A (LOCK/OFF):
This is the only
position from which the key can be
removed. This locks the ignition and
automatic transmission.
The shift lever must be in P (Park)
to turn the ignition switch to the
LOCK/OFF position.
The ignition switch can bind in the
LOCK/OFF position with the wheels
turned off center. If this happens,
move the steering wheel from right
to left while turning the key to ACC/
ACCESSORY. If this does not work,
then the vehicle needs service.
B (ACC/ACCESSORY) : This
position provides power to some of
the electrical accessories. It unlocks
the ignition. The transmission is
also unlocked in this position on
automatic transmission vehicles.
To move the key from ACC/
ACCESSORY to LOCK/OFF, the
shift lever must be in P (Park). C (ON/RUN):
The ignition switch
stays in this position when the
engine is running. This position can
be used to operate the electrical
accessories, including the
ventilation fan and 12 volt power
outlet, as well as to display some
warning and indicator lights.
The battery could be drained if the
key is left in the ACC/ACCESSORY
or ON/RUN position with the engine
off. The vehicle might not restart if
the battery is allowed to drain for an
extended period of time.
D (START) : This position starts
the engine. When the engine starts,
release the key. The ignition switch
will return to ON/RUN for normal
driving.
A warning tone sounds when the
driver door is opened when the
ignition is still in ACC/ACCESSORY
and the key is in the ignition.
Page 247 of 414

Driving and Operating 8-25
Shifting Out of Park
Automatic Transmission
Shift Lock
The vehicle has an electronic shift
lock release system. The shift lock
release is designed to:
.Prevent ignition key removal
unless the shift lever is in
P (Park).
.Prevent movement of the shift
lever out of P (Park), unless the
ignition is in ON/RUN and the
brake pedal is applied.
The shift lock is always functional
except in the case of a an
uncharged or low voltage (less than
9 volt) battery.
If the vehicle has an uncharged
battery or a battery with low voltage,
try charging or jump starting the
battery. See Jump Starting
on
page 9‑75. If the console shift lever cannot be
moved out of P (Park):
1. Apply and maintain the regular
brakes.
2. Turn the ignition to ON/RUN position. See Ignition Positions
(Key Access)
on page 8‑18or
Ignition Positions (Keyless
Access)
on page 8‑19for more
information.
3. Let up on the shift lever and make sure the shift lever is
pushed all the way into P (Park).
4. Press the shift lever button
5. Then, move the shift lever into the desired gear.
If you still cannot move the shift
lever from P (Park), consult your
dealer/retailer or a professional
towing service.
Parking Over Things
That Burn
{WARNING
Things that can burn could touch
hot exhaust parts under the
vehicle and ignite. Do not park
over papers, leaves, dry grass,
or other things that can burn.
Page 249 of 414

Driving and Operating 8-27
{WARNING
It can be dangerous to get out of
the vehicle if the automatic
transmission shift lever is not fully
in P (Park) with the parking brake
firmly set. The vehicle can roll. Do
not leave the vehicle when the
engine is running unless you
have to. If you have left the
engine running, the vehicle can
move suddenly. You or others
could be injured. To be sure the
vehicle will not move, even when
you are on fairly level ground,
always set the parking brake and
move the shift lever to P (Park).
Follow the proper steps to be sure
the vehicle will not move. See
Shifting Into Park on page 8‑23.
If parking on a hill and pulling a
trailer, see Driving Characteristics
and Towing Tips on page 8‑54.
Automatic
Transmission
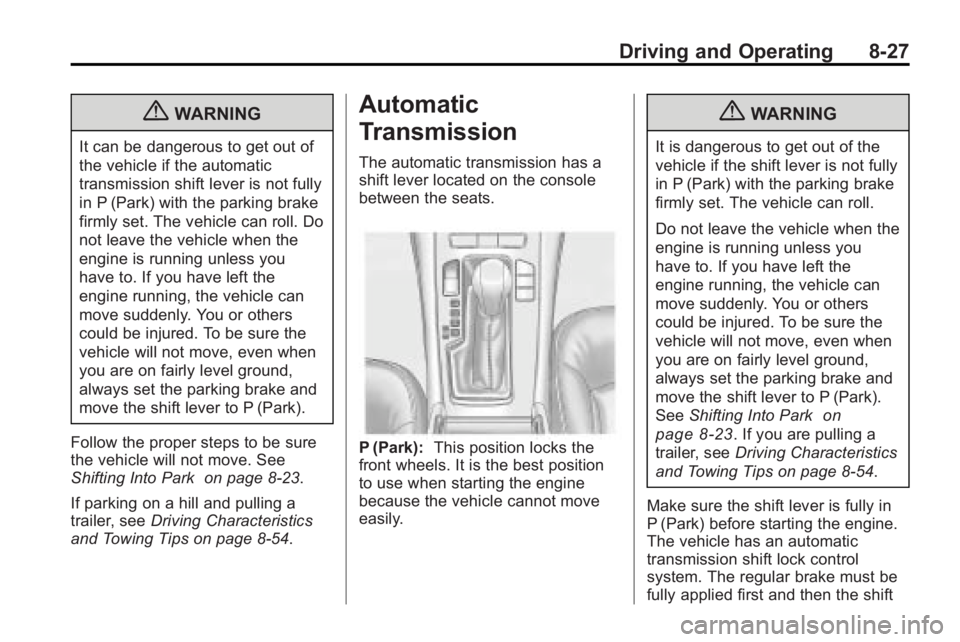
The automatic transmission has a
shift lever located on the console
between the seats.
P (Park): This position locks the
front wheels. It is the best position
to use when starting the engine
because the vehicle cannot move
easily.
{WARNING
It is dangerous to get out of the
vehicle if the shift lever is not fully
in P (Park) with the parking brake
firmly set. The vehicle can roll.
Do not leave the vehicle when the
engine is running unless you
have to. If you have left the
engine running, the vehicle can
move suddenly. You or others
could be injured. To be sure the
vehicle will not move, even when
you are on fairly level ground,
always set the parking brake and
move the shift lever to P (Park).
See Shifting Into Park
on
page 8‑23
. If you are pulling a
trailer, see Driving Characteristics
and Towing Tips on page 8‑54.
Make sure the shift lever is fully in
P (Park) before starting the engine.
The vehicle has an automatic
transmission shift lock control
system. The regular brake must be
fully applied first and then the shift