2010 BUICK LACROSSE automatic transmission
[x] Cancel search: automatic transmissionPage 251 of 414

Driving and Operating 8-29
Manual Mode:This position is
shown on the shifter as a +/−.
It allows the driver to select the
gears appropriate for current driving
conditions. See Manual Mode
on
page 8‑29for more information.
Manual Mode
Driver Shift Control (DSC)
Notice: If you drive the vehicle at
high RPMs without upshifting
while using Driver Shift Control
(DSC), you could damage the
vehicle. Always upshift when
necessary while using DSC. Driver Shift Control (DSC) allows
you to shift an automatic
transmission similar to a manual
transmission. To use the DSC
feature:
With Selective Ride Control
1. Move the shift lever to the left
from D (Drive).
The vehicle will be in Sport
Mode. The gear indicator in the
DIC will still display a D for
Drive, and the Sport Mode On
message will be displayed
momentarily. See Driver
Information Center (DIC)
on
page 4‑25. When you are in
Sport Mode, the vehicle will still
shift automatically, but chassis
tuning is modified. See Selective
Ride Control
on page 8‑36. If you move the shift lever
forward or rearward, the
transmission will enter Manual
Mode, and the DIC gear
indicator will change to an M
followed by a number
representing the gear the vehicle
is currently in.
2. In Manual Mode, press the shift lever forward to upshift or
rearward to downshift.
Without Selective Ride Control
1. Move the shift lever to the left from D (Drive).
The transmission will enter
Manual Mode. The DIC gear
indicator will change to an M
followed by a number
representing the gear the vehicle
is currently in.
2. In Manual Mode, press the shift lever forward to upshift or
rearward to downshift.
Page 252 of 414

8-30 Driving and Operating
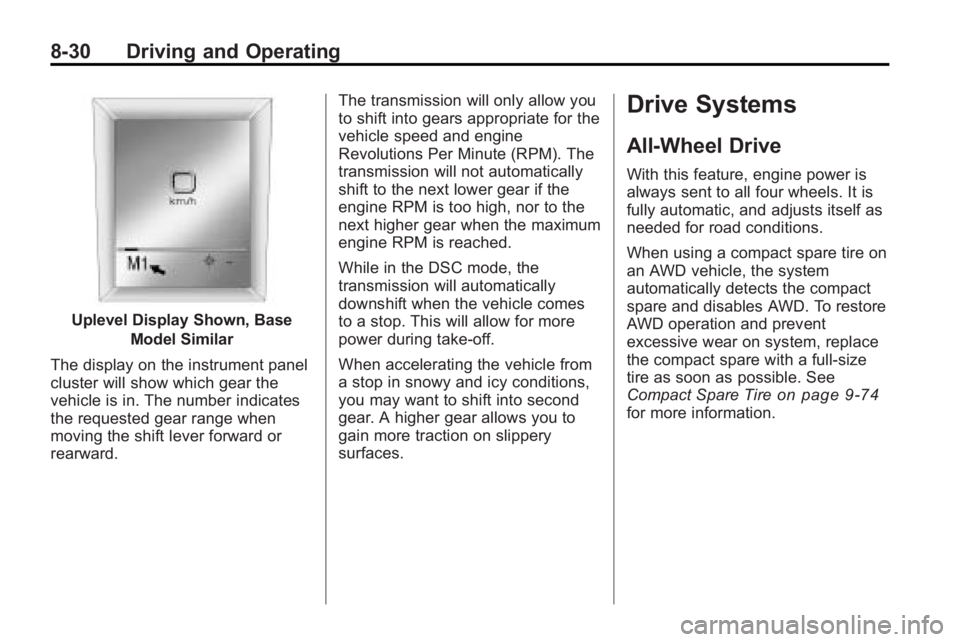
Uplevel Display Shown, BaseModel Similar
The display on the instrument panel
cluster will show which gear the
vehicle is in. The number indicates
the requested gear range when
moving the shift lever forward or
rearward. The transmission will only allow you
to shift into gears appropriate for the
vehicle speed and engine
Revolutions Per Minute (RPM). The
transmission will not automatically
shift to the next lower gear if the
engine RPM is too high, nor to the
next higher gear when the maximum
engine RPM is reached.
While in the DSC mode, the
transmission will automatically
downshift when the vehicle comes
to a stop. This will allow for more
power during take-off.
When accelerating the vehicle from
a stop in snowy and icy conditions,
you may want to shift into second
gear. A higher gear allows you to
gain more traction on slippery
surfaces.
Drive Systems
All-Wheel Drive
With this feature, engine power is
always sent to all four wheels. It is
fully automatic, and adjusts itself as
needed for road conditions.
When using a compact spare tire on
an AWD vehicle, the system
automatically detects the compact
spare and disables AWD. To restore
AWD operation and prevent
excessive wear on system, replace
the compact spare with a full-size
tire as soon as possible. See
Compact Spare Tire
on page 9‑74for more information.
Page 258 of 414

8-36 Driving and Operating
This also occurs when traction
control is activated. A noise might
be heard or vibration might be felt in
the brake pedal. This is normal.
Continue to steer the vehicle in the
intended direction.
If there is a problem detected with
StabiliTrak, the TCS/StabiliTrak light
comes on and the system is not
operational. SeeElectronic Stability
Control (ESC)/Traction Control
System (TCS) Indicator/Warning
Light
on page 4‑22. Driving should
be adjusted accordingly.
StabiliTrak comes on automatically
whenever the vehicle is started. To
assist with directional control of the
vehicle, the system should always
be left on.
StabiliTrak can be turned off if
needed by pressing and holding
g
until the StabiliTrak Off light comes
on the instrument panel. For
information on turning TCS off and
on, see Traction Control System
(TCS) in this section.
If cruise control is being used when
StabiliTrak activates, the cruise
control automatically disengages.
Press the cruise control button to
reengage when road conditions
allow. See Cruise Control
on
page 8‑37for more information.
Selective Ride Control
The vehicle may have a ride control
system called Selective Ride
Control. The system provides the
following performance benefits:
.Reduced Impact Harshness
.Improved Road Isolation
.Improved High-Speed Stability
.Improved Handling Response
.Better Control of Body Ride
Motions
To switch from TOUR to SPORT
mode, move the shift lever to
the left while the transmission is
in D (Drive).
Page 279 of 414

Driving and Operating 8-57
If parking the rig on a hill:
1. Press the brake pedal, but donot shift into P (Park) yet. Turn
the wheels into the curb if facing
downhill or into traffic if facing
uphill.
2. Have someone place chocks under the trailer wheels.
3. When the wheel chocks are in place, release the brake pedal
until the chocks absorb the load.
4. Reapply the brake pedal. Then apply the parking brake and shift
into P (Park).
5. Release the brake pedal.Leaving After Parking on a Hill
1. Apply and hold the brake pedal while you:
.Start the engine.
.Shift into a gear.
.Release the parking brake.
2. Let up on the brake pedal.
3. Drive slowly until the trailer is clear of the chocks.
4. Stop and have someone pick up and store the chocks.
Maintenance When Trailer
Towing
The vehicle needs service more
often when pulling a trailer. See this
manual's Maintenance Schedule or
Index for more information. Things
that are especially important in
trailer operation are automatic
transmission fluid, engine oil, axle
lubricant, belts, cooling system and
brake system. Inspect these before
and during the trip.
Check periodically to see that all
hitch nuts and bolts are tight.
Page 283 of 414

Vehicle Care 9-1
Vehicle Care
General Information
General Information . . . . . . . . . . . 9-2
California Proposition65 Warning . . . . . . . . . . . . . . . . . . 9-2
California Perchlorate Materials Requirements . . . . . . . . . . . . . . . 9-3
Accessories and Modifications . . . . . . . . . . . . . . . . 9-3
Vehicle Checks
Doing Your OwnService Work . . . . . . . . . . . . . . . . 9-4
Hood . . . . . . . . . . . . . . . . . . . . . . . . . . 9-5
Engine Compartment Overview . . . . . . . . . . . . . . . . . . . . 9-6
Engine Oil . . . . . . . . . . . . . . . . . . . 9-11
Engine Oil Life System . . . . . . 9-13
Automatic Transmission Fluid . . . . . . . . . . . . . . . . . . . . . . . 9-15
Engine Air Cleaner/Filter . . . . . 9-15
Cooling System . . . . . . . . . . . . . . 9-17
Engine Coolant . . . . . . . . . . . . . . 9-18
Engine Overheating . . . . . . . . . 9-20
Overheated Engine Protection Operating Mode . . . . . . . . . . . . 9-21
Power Steering Fluid . . . . . . . . 9-22 Washer Fluid . . . . . . . . . . . . . . . . 9-23
Brakes . . . . . . . . . . . . . . . . . . . . . . . 9-24
Brake Fluid . . . . . . . . . . . . . . . . . . 9-25
Battery . . . . . . . . . . . . . . . . . . . . . . . 9-26
Starter Switch Check . . . . . . . . 9-27
Automatic Transmission Shift
Lock Control System
Check . . . . . . . . . . . . . . . . . . . . . . 9-27
Ignition Transmission Lock Check . . . . . . . . . . . . . . . . . . . . . . 9-28
Park Brake and P (Park) Mechanism Check . . . . . . . . . 9-28
Wiper Blade Replacement . . . 9-29Headlamp Aiming
Headlamp Aiming . . . . . . . . . . . . 9-30
Bulb Replacement
Bulb Replacement . . . . . . . . . . . 9-33
Halogen Bulbs . . . . . . . . . . . . . . . 9-33
High Intensity Discharge (HID) Lighting . . . . . . . . . . . . . . . . . . . . 9-33
Headlamps, Front Turn Signal and Parking Lamps . . . . . . . . . 9-33
Fog Lamps . . . . . . . . . . . . . . . . . . 9-35 Taillamps, Turn Signal,
Stoplamps, and Back-Up
Lamps . . . . . . . . . . . . . . . . . . . . . . 9-35
License Plate Lamp . . . . . . . . . . 9-36
Replacement Bulbs . . . . . . . . . . 9-37
Electrical System
Electrical System Overload . . . . . . . . . . . . . . . . . . . 9-38
Fuses and Circuit Breakers . . . . . . . . . . . . . . . . . . . 9-38
Engine Compartment Fuse Block . . . . . . . . . . . . . . . . . . . . . . . 9-39
Instrument Panel Fuse Block . . . . . . . . . . . . . . . . . . . . . . . 9-41
Rear Compartment Fuse Block . . . . . . . . . . . . . . . . . . . . . . . 9-43
Wheels and Tires
Tires . . . . . . . . . . . . . . . . . . . . . . . . . 9-46
Winter Tires . . . . . . . . . . . . . . . . . . 9-46
Tire Sidewall Labeling . . . . . . . 9-47
Tire Designations . . . . . . . . . . . . 9-49
Tire Terminology and
Definitions . . . . . . . . . . . . . . . . . . 9-50
Tire Pressure . . . . . . . . . . . . . . . . 9-53
Tire Pressure Monitor System . . . . . . . . . . . . . . . . . . . . . 9-54
Page 289 of 414

Vehicle Care 9-7
A.Engine Air Cleaner/Filteron
page 9‑15
B. Engine Cover.
C. Engine Oil Fill Cap. See Engine
Oil on page 9‑11
D. Engine Oil Dipstick. See Engine
Oil on page 9‑11
E. Transmission Fluid Cap and Dipstick. See Automatic
Transmission Fluid
on
page 9‑15
F. Brake Master Cylinder Reservoir. See Brakeson
page 9‑24
G. Power Steering Reservoir and Cap. See Power Steering Fluid
on page 9‑22
H. Engine Coolant Reservoir and
Pressure Cap. See Engine
Coolant on page 9‑18
I. Battery Cover. See Battery
on
page 9‑26
J. Engine Compartment Fuse
Block on page 9‑39
K. Windshield Washer Fluid Reservoir. See Washer Fluid
on
page 9‑23
Page 291 of 414

Vehicle Care 9-9
A.Engine Air Cleaner/Filteron
page 9‑15
B. Power Steering Reservoir and
Cap. See Power Steering Fluid
on page 9‑22
C. Engine Oil Fill Cap. See Engine
Oil on page 9‑11
D. Engine Oil Dipstick (Out of View). See Engine Oil
on
page 9‑11
E. Engine Cover.
F. Transmission Fluid Cap and Dipstick. See Automatic
Transmission Fluid
on
page 9‑15
G. Brake Master Cylinder Reservoir. See Brakeson
page 9‑24
H. Engine Coolant Reservoir and Pressure Cap. See Engine
Coolant on page 9‑18
I. Battery Cover. See Battery
on
page 9‑26
J. Engine Compartment Fuse
Block on page 9‑39
K. Windshield Washer Fluid Reservoir. See Washer Fluid
on
page 9‑23
Page 293 of 414

Vehicle Care 9-11
A.Engine Air Cleaner/Filteron
page 9‑15.
B. Power Steering Reservoir and Cap. See Power Steering Fluid
on page 9‑22.
C. Engine Oil Fill Cap. See Engine
Oil on page 9‑11.
D. Engine Oil Dipstick (Out of View). See Engine Oil
on
page 9‑11.
E. Engine Cover.
F. Transmission Fluid Cap and Dipstick. See Automatic
Transmission Fluid
on
page 9‑15. G. Brake Master Cylinder
Reservoir. See Brakes
on
page 9‑24.
H. Engine Coolant Reservoir and Pressure Cap. See Engine
Coolant on page 9‑18.
I. Battery Cover. See Battery
on
page 9‑26.
J. Engine Compartment Fuse
Block on page 9‑39.
K. Windshield Washer Fluid Reservoir. See Washer Fluid
on
page 9‑23.
Engine Oil
Checking Engine Oil
It is a good idea to check the engine
oil level at each fuel fill. In order to
get an accurate reading, the oil
must be warm and the vehicle must
be on level ground.
The engine oil dipstick handle is a
yellow loop. See Engine
Compartment Overview
on
page 9‑6for the location of the
engine oil dipstick.
1. Turn off the engine and give the oil several minutes to drain back
into the oil pan. If this is not
done, the oil dipstick might not
show the actual level.
2. Pull out the dipstick and clean it with a paper towel or cloth, then
push it back in all the way.
Remove it again, keeping the tip
down, and check the level.