2010 BMW MOTORRAD G 650 GS jump start
[x] Cancel search: jump startPage 5 of 136
Clutch . . . . . . . . . . . . . . . . . . . . . . . 73Tyres . . . . . . . . . . . . . . . . . . . . . . . . 74Rims . . . . . . . . . . . . . . . . . . . . . . . . 74Chain . . . . . . . . . . . . . . . . . . . . . . . . 75Wheels . . . . . . . . . . . . . . . . . . . . . . 76BMW Motorrad front-wheelstand . . . . . . . . . . . . . . . . . . . . . . . . 83Fuses . . . . . . . . . . . . . . . . . . . . . . . 84Bulbs . . . . . . . . . . . . . . . . . . . . . . . . 85Air filter . . . . . . . . . . . . . . . . . . . . . . 91Jump starting . . . . . . . . . . . . . . . 92Battery . . . . . . . . . . . . . . . . . . . . . . 93Body panels . . . . . . . . . . . . . . . . . 96
9 Care . . . . . . . . . . . . . . . . . . . . 101Care products . . . . . . . . . . . . . 102Washing motorcycle . . . . . . . 102Cleaning easily damagedcomponents . . . . . . . . . . . . . . . 102Paint care . . . . . . . . . . . . . . . . . 103Protective wax coating . . . . 104Laying up motorcycle . . . . . 104Restoring motorcycle touse . . . . . . . . . . . . . . . . . . . . . . . . 104
10 Technical data . . . . . . 105Troubleshooting chart . . . . . 106Threaded fasteners . . . . . . . 107Engine . . . . . . . . . . . . . . . . . . . . 109Fuel . . . . . . . . . . . . . . . . . . . . . . . 110Engine oil . . . . . . . . . . . . . . . . . 110Clutch . . . . . . . . . . . . . . . . . . . . . 111Transmission . . . . . . . . . . . . . . 111Rear-wheel drive . . . . . . . . . . 112Running gear . . . . . . . . . . . . . . 112Brakes . . . . . . . . . . . . . . . . . . . . 113Wheels and tyres . . . . . . . . . . 113Electrics . . . . . . . . . . . . . . . . . . . 114Frame . . . . . . . . . . . . . . . . . . . . . 116Dimensions . . . . . . . . . . . . . . . 117Weights . . . . . . . . . . . . . . . . . . . 117Riding specifications . . . . . . 118
11 Service . . . . . . . . . . . . . . . 119BMW Motorrad service . . . . 120BMW Motorrad servicequality . . . . . . . . . . . . . . . . . . . . . 120BMW Motorrad mobilityservices - roadside assist-ance . . . . . . . . . . . . . . . . . . . . . . . 120
BMW Motorrad servicenetwork . . . . . . . . . . . . . . . . . . . 121Maintenance work . . . . . . . . . 121Confirmation of mainten-ance work . . . . . . . . . . . . . . . . . 122Confirmation of service . . . . 127
Page 47 of 136
Wait until the warning light forthe coolant temperature stopsflashing.
The idle actuator is posi-tioned after you switch onthe ignition. The coolant-tem-perature warning light flashesif the idle actuator has not cor-rectly positioned before the pre-ride check completes. In orderto avoid subsequent problems,wait for this process to completebefore proceeding.
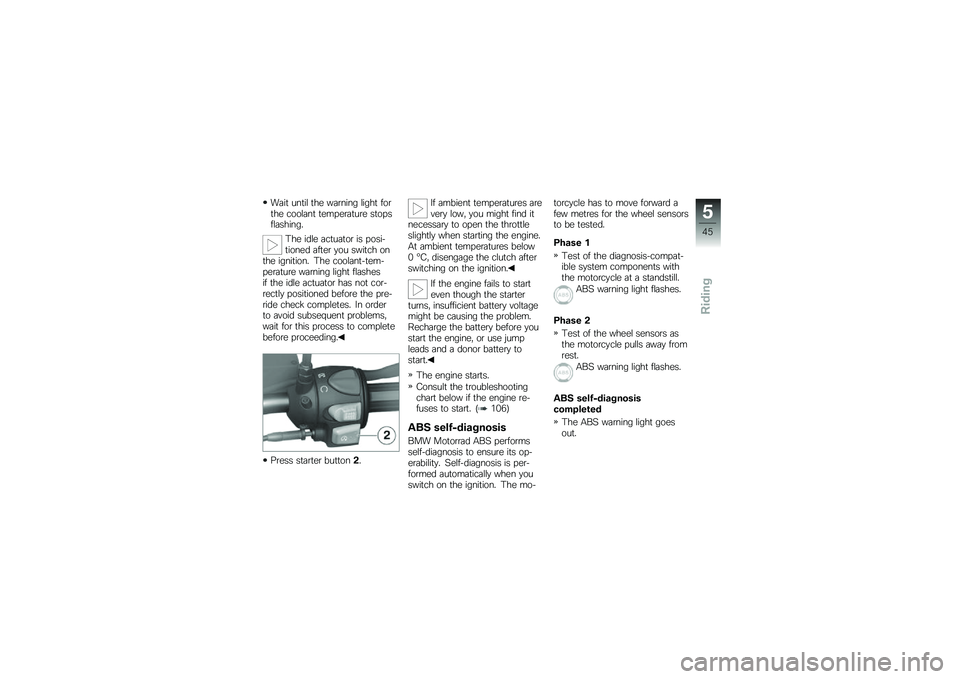
Press starter button2.
If ambient temperatures arevery low, you might find itnecessary to open the throttleslightly when starting the engine.At ambient temperatures below0 °C, disengage the clutch afterswitching on the ignition.
If the engine fails to starteven though the starterturns, insufficient battery voltagemight be causing the problem.Recharge the battery before youstart the engine, or use jumpleads and a donor battery tostart.
The engine starts.
Consult the troubleshootingchart below if the engine re-fuses to start. (106)
ABS self-diagnosis
BMW Motorrad ABS performsself-diagnosis to ensure its op-erability. Self-diagnosis is per-formed automatically when youswitch on the ignition. The mo-
torcycle has to move forward afew metres for the wheel sensorsto be tested.
Phase 1
Test of the diagnosis-compat-ible system components withthe motorcycle at a standstill.
ABS warning light flashes.
Phase 2
Test of the wheel sensors asthe motorcycle pulls away fromrest.
ABS warning light flashes.
ABS self-diagnosiscompleted
The ABS warning light goesout.
5
45
zRiding
Page 67 of 136
Maintenance
Maintenance
Notes . . . . . . . . . . . . . . . . . . . . . . . . . . . . . . . 66
Toolkit . . . . . . . . . . . . . . . . . . . . . . . . . . . . . . 66
Engine oil . . . . . . . . . . . . . . . . . . . . . . . . . . . 66
Brake system . . . . . . . . . . . . . . . . . . . . . . . 68
Brake pads . . . . . . . . . . . . . . . . . . . . . . . . . 68
Brake fluid . . . . . . . . . . . . . . . . . . . . . . . . . . 70
Coolant . . . . . . . . . . . . . . . . . . . . . . . . . . . . . 72
Clutch . . . . . . . . . . . . . . . . . . . . . . . . . . . . . . 73
Tyres . . . . . . . . . . . . . . . . . . . . . . . . . . . . . . . 74
Rims . . . . . . . . . . . . . . . . . . . . . . . . . . . . . . . . 74
Chain . . . . . . . . . . . . . . . . . . . . . . . . . . . . . . . 75
Wheels . . . . . . . . . . . . . . . . . . . . . . . . . . . . . 76
BMW Motorrad front-wheel
stand . . . . . . . . . . . . . . . . . . . . . . . . . . . . . . . 83
Fuses . . . . . . . . . . . . . . . . . . . . . . . . . . . . . . . 84
Bulbs . . . . . . . . . . . . . . . . . . . . . . . . . . . . . . . 85
Air filter . . . . . . . . . . . . . . . . . . . . . . . . . . . . . 91
Jump starting . . . . . . . . . . . . . . . . . . . . . . . 92
Battery . . . . . . . . . . . . . . . . . . . . . . . . . . . . . . 93
Body panels . . . . . . . . . . . . . . . . . . . . . . . . 96
8
65
zMaintenance
Page 94 of 136
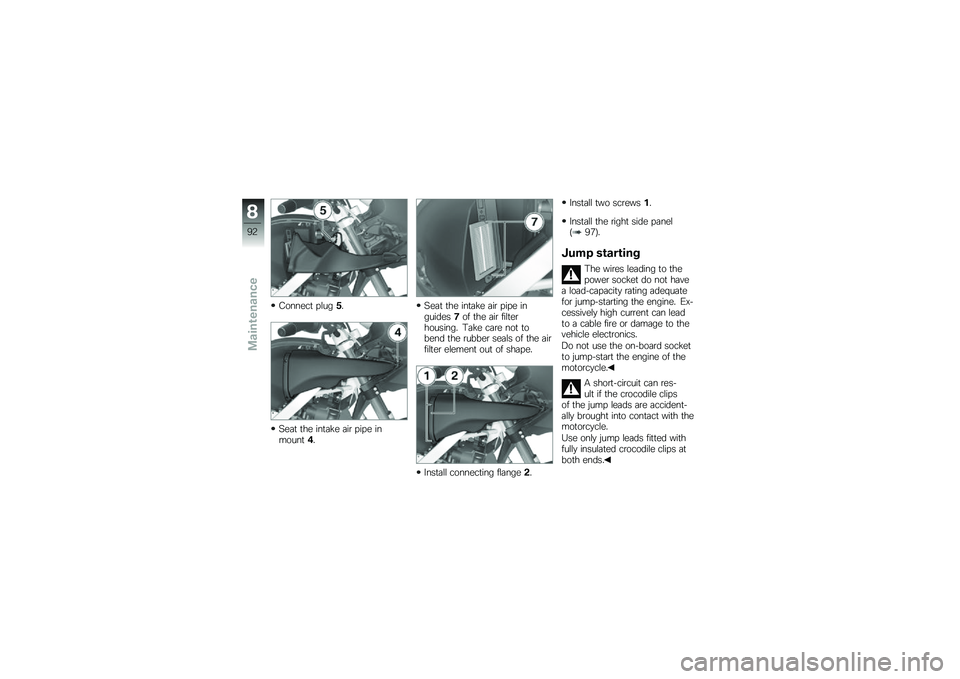
Connect plug5.
Seat the intake air pipe inmount4.
Seat the intake air pipe inguides7of the air filterhousing. Take care not tobend the rubber seals of the airfilter element out of shape.
Install connecting flange2.
Install two screws1.
Install the right side panel(97).
Jump starting
The wires leading to thepower socket do not havea load-capacity rating adequatefor jump-starting the engine. Ex-cessively high current can leadto a cable fire or damage to thevehicle electronics.
Do not use the on-board socketto jump-start the engine of themotorcycle.
A short-circuit can res-ult if the crocodile clipsof the jump leads are accident-ally brought into contact with themotorcycle.
Use only jump leads fitted withfully insulated crocodile clips atboth ends.
8
92
zMaintenance
Page 95 of 136
Jump-starting with a donor-battery voltage higher than12 V can damage the vehicleelectronics.
Make sure that the battery of thedonor vehicle has a voltage ratingof 12 V.
Make sure the ground is leveland firm and place the motor-cycle on its stand.
Remove the seat (38).
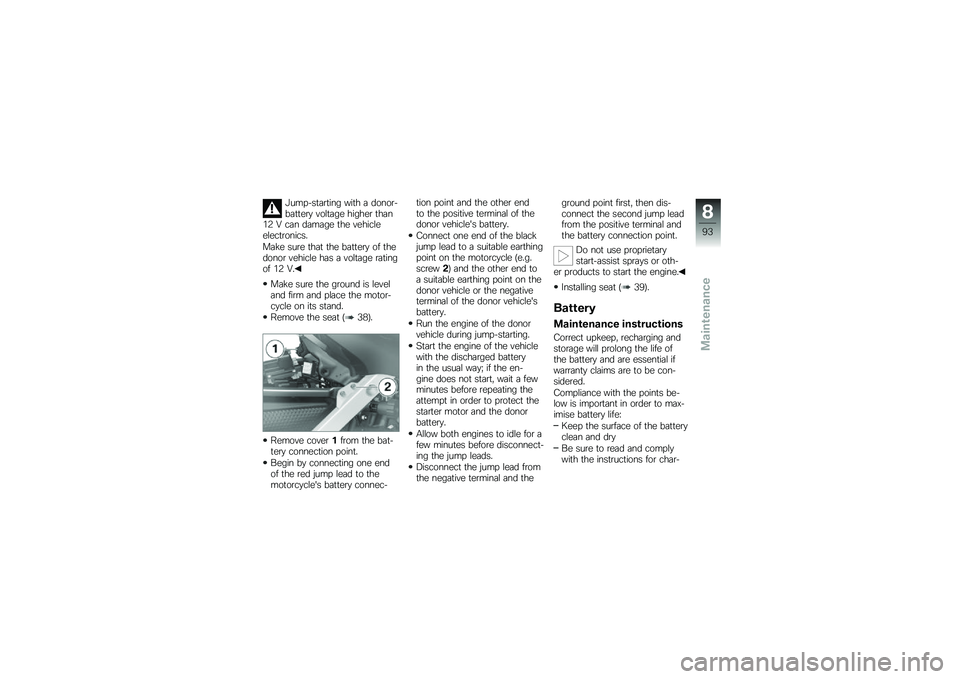
Remove cover1from the bat-tery connection point.
Begin by connecting one endof the red jump lead to themotorcycle's battery connec-
tion point and the other endto the positive terminal of thedonor vehicle's battery.
Connect one end of the blackjump lead to a suitable earthingpoint on the motorcycle (e.g.screw2) and the other end toa suitable earthing point on thedonor vehicle or the negativeterminal of the donor vehicle'sbattery.
Run the engine of the donorvehicle during jump-starting.
Start the engine of the vehiclewith the discharged batteryin the usual way; if the en-gine does not start, wait a fewminutes before repeating theattempt in order to protect thestarter motor and the donorbattery.
Allow both engines to idle for afew minutes before disconnect-ing the jump leads.
Disconnect the jump lead fromthe negative terminal and the
ground point first, then dis-connect the second jump leadfrom the positive terminal andthe battery connection point.
Do not use proprietarystart-assist sprays or oth-er products to start the engine.
Installing seat (39).
Battery
Maintenance instructions
Correct upkeep, recharging andstorage will prolong the life ofthe battery and are essential ifwarranty claims are to be con-sidered.
Compliance with the points be-low is important in order to max-imise battery life:
Keep the surface of the batteryclean and dry
Be sure to read and complywith the instructions for char-
8
93
zMaintenance
Page 133 of 136
IgnitionSwitching off, 28
Switching on, 28
Ignition switch, 28
Instrument clusterOverview, 15
JJump starting, 92
KKeys, 28
LLaying up, 104
LightsHeadlight flasher, 31
Switch on the high-beamheadlight, 31
Switch on the parking lights, 29
Switching on low-beamheadlight, 31
Switching on the parkinglights, 30
Low-beam headlightSwitching on, 31
LuggageInstructions for loading, 42
MMaintenanceNotes, 66
Maintenance intervals, 121
MirrorsAdjusting, 34
Mobility services, 120
MotorcycleCare, 101
Laying up, 104
Overview, 11, 13
Parking, 49
Restoring to use, 104
OOdometer and tripmeters, 15Operation, 30
Off-roading, 47
PParking, 49
Power socket, 11Notes on use, 58
RRear-wheel driveTechnical data, 112
Refuelling, 49
Restoring to use, 104
Rev. counter, 15
Rider's ManualStowage, 14
Running gearTechnical data, 112
Running in, 46
SSafety instructions, 42
SeatInstallation, 38
Lock, 11
Removal, 38
Service, 120Side lightSwitching on, 30
Spark plugsTechnical data, 114
Speedometer, 15
12
131
zIndex