Page 8 of 136

Overview
Chapter 2 of this Rider's Manu-al will provide you with an initialoverview of your motorcycle. Allmaintenance and repair work onthe motorcycle is documented inChapter 11. This record of themaintenance work you have hadperformed on your motorcycle isa precondition for generous treat-ment of goodwill claims.
When the time comes to sellyour BMW, please rememberto hand over this Rider's Manu-al; it is an important part of themotorcycle.
Abbreviations and
symbols
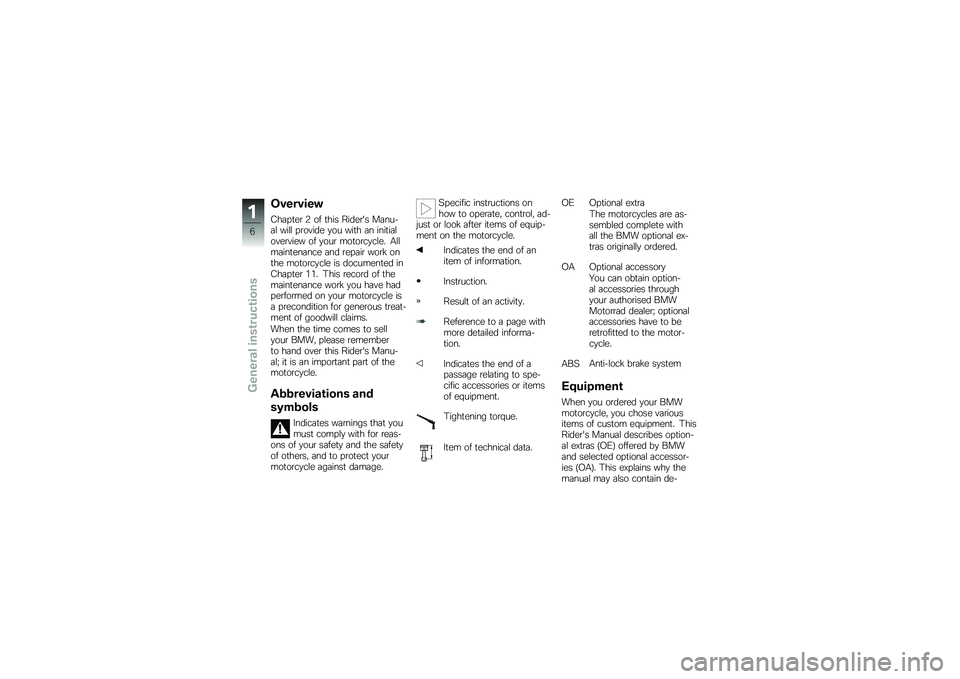
Indicates warnings that youmust comply with for reas-ons of your safety and the safetyof others, and to protect yourmotorcycle against damage.
Specific instructions onhow to operate, control, ad-just or look after items of equip-ment on the motorcycle.
Indicates the end of anitem of information.
Instruction.
Result of an activity.
Reference to a page withmore detailed informa-tion.
Indicates the end of apassage relating to spe-cific accessories or itemsof equipment.
Tightening torque.
Item of technical data.
OE Optional extraThe motorcycles are as-sembled complete withall the BMW optional ex-tras originally ordered.
OA Optional accessoryYou can obtain option-al accessories throughyour authorised BMWMotorrad dealer; optionalaccessories have to beretrofitted to the motor-cycle.
ABSAnti-lock brake system
Equipment
When you ordered your BMWmotorcycle, you chose variousitems of custom equipment. ThisRider's Manual describes option-al extras (OE) offered by BMWand selected optional accessor-ies (OA). This explains why themanual may also contain de-
1
6
zGeneral instructions
Page 37 of 136

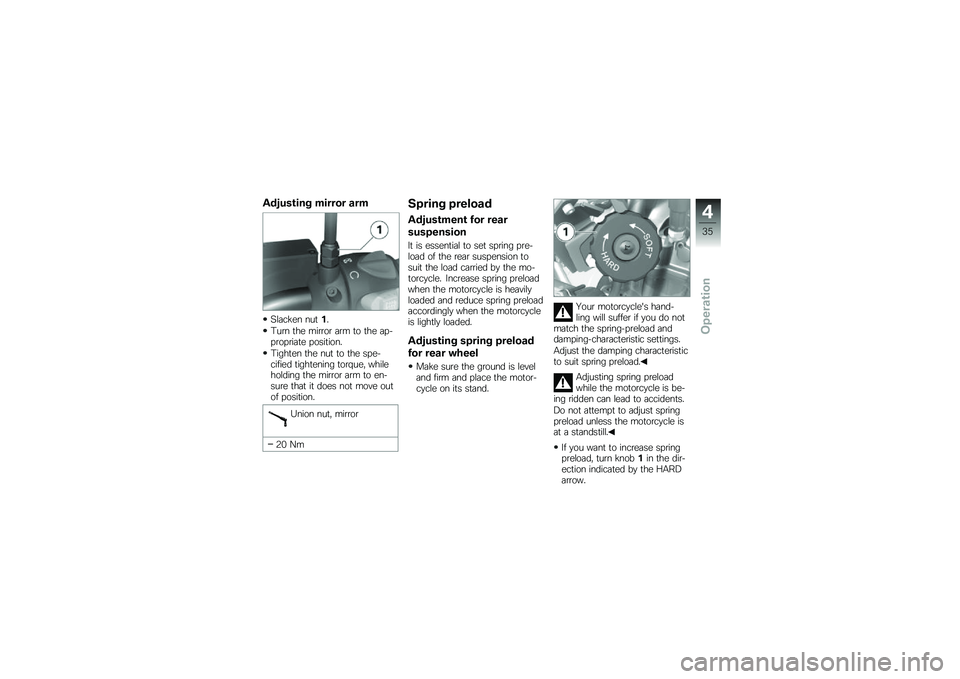
Adjusting mirror arm
Slacken nut1.
Turn the mirror arm to the ap-propriate position.
Tighten the nut to the spe-cified tightening torque, whileholding the mirror arm to en-sure that it does not move outof position.
Union nut, mirror
20 Nm
Spring preload
Adjustment for rear
suspension
It is essential to set spring pre-load of the rear suspension tosuit the load carried by the mo-torcycle. Increase spring preloadwhen the motorcycle is heavilyloaded and reduce spring preloadaccordingly when the motorcycleis lightly loaded.
Adjusting spring preload
for rear wheel
Make sure the ground is leveland firm and place the motor-cycle on its stand.
Your motorcycle's hand-ling will suffer if you do notmatch the spring-preload anddamping-characteristic settings.
Adjust the damping characteristicto suit spring preload.
Adjusting spring preloadwhile the motorcycle is be-ing ridden can lead to accidents.
Do not attempt to adjust springpreload unless the motorcycle isat a standstill.
If you want to increase springpreload, turn knob1in the dir-ection indicated by the HARDarrow.
4
35
zOperation
Page 68 of 136

Notes
The "Maintenance" chapter de-scribes straightforward proced-ures for checking and replacingcertain wear parts.
Special tightening torques are lis-ted as applicable. The tighteningtorques for the threaded fasten-ers on your motorcycle are listedin the section entitled "Technicaldata".
You will find information on moreextensive maintenance and repairwork in the Repair Manual onDVD for your motorcycle, whichis available from your authorisedBMW Motorrad dealer.
Some of the work calls for spe-cial tools and a thorough know-ledge of motorcycle technology.If you are in doubt consult a spe-cialist workshop, preferably yourauthorised BMW Motorrad deal-er.
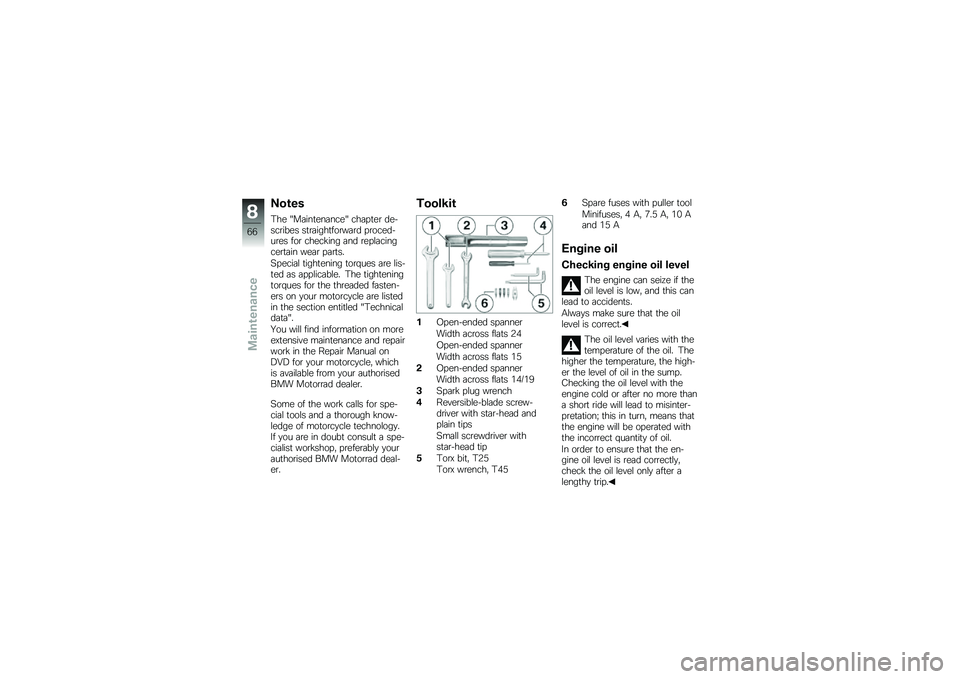
Toolkit
1Open-ended spanner
Width across flats 24
Open-ended spanner
Width across flats 15
2Open-ended spanner
Width across flats 14/19
3Spark plug wrench
4Reversible-blade screw-driver with star-head andplain tips
Small screwdriver withstar-head tip
5Torx bit, T25
Torx wrench, T45
6Spare fuses with puller tool
Minifuses, 4 A, 7.5 A, 10 Aand 15 A
Engine oil
Checking engine oil level
The engine can seize if theoil level is low, and this canlead to accidents.
Always make sure that the oillevel is correct.
The oil level varies with thetemperature of the oil. Thehigher the temperature, the high-er the level of oil in the sump.Checking the oil level with theengine cold or after no more thana short ride will lead to misinter-pretation; this in turn, means thatthe engine will be operated withthe incorrect quantity of oil.
In order to ensure that the en-gine oil level is read correctly,check the oil level only after alengthy trip.
8
66
zMaintenance
Page 78 of 136

Adjust the chain sag
Make sure the ground is leveland firm and place the motor-cycle on its stand.
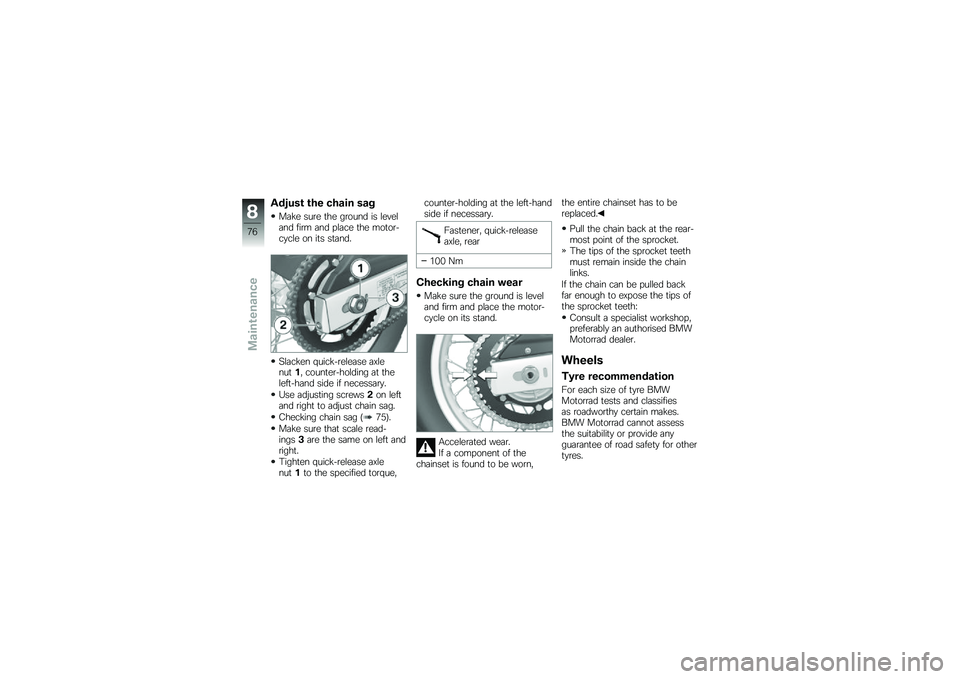
Slacken quick-release axlenut1, counter-holding at theleft-hand side if necessary.
Use adjusting screws2on leftand right to adjust chain sag.
Checking chain sag (75).
Make sure that scale read-ings3are the same on left andright.
Tighten quick-release axlenut1to the specified torque,
counter-holding at the left-handside if necessary.
Fastener, quick-releaseaxle, rear
100 Nm
Checking chain wear
Make sure the ground is leveland firm and place the motor-cycle on its stand.
Accelerated wear.
If a component of thechainset is found to be worn,
the entire chainset has to bereplaced.
Pull the chain back at the rear-most point of the sprocket.
The tips of the sprocket teethmust remain inside the chainlinks.
If the chain can be pulled backfar enough to expose the tips ofthe sprocket teeth:
Consult a specialist workshop,preferably an authorised BMWMotorrad dealer.
Wheels
Tyre recommendation
For each size of tyre BMWMotorrad tests and classifiesas roadworthy certain makes.BMW Motorrad cannot assessthe suitability or provide anyguarantee of road safety for othertyres.
8
76
zMaintenance
Page 80 of 136
Release axle clamping screw2.
Remove axle3, while support-ing the wheel.
Do not remove the grease fromthe axle.
Roll the front wheel forward toremove.
Remove spacing bushings4and5from the wheel hub.
Installing front wheel
Slip spacing bushings5and4onto the wheel hub.
The front wheel must beinstalled right way round torotate in the correct direction.
Note the direction-of-rotation ar-rows on the tyre or the wheelrim.
Roll the front wheel into posi-tion between the forks, makingsure that the brake disc passesbetween the brake pads.
Raise the front wheel, insertaxle3and tighten to specifiedtorque.
8
78
zMaintenance
Page 81 of 136
Fastener, quick-releaseaxle, front
45 Nm
Remove the front-wheel stand.
Apply the front brake and firmlycompress the front forks sever-al times
Tighten axle clamping screw2to the specified torque.
Clamp, front quick-re-lease axle
23 Nm
Insert the ABS sensor into itsbore and install screw1.
without centre standOE
Remove the auxiliary stand.
Removing rear wheel
Make sure the ground is leveland firm and place the motor-cycle on its stand.
Remove two screws1.
Remove three screws2andremove the rear-wheel cover.
without centre standOE
Make sure the ground is leveland firm and place the mo-
8
79
zMaintenance
Page 83 of 136
Remove quick-release axle5,supporting the rear wheel asyou do so.
Roll the rear wheel back untilit is clear of the swinging arm,while holding the brake caliperon the left-hand side.
The sprocket and thespacer sleeves on leftand right are loose fits in thewheel. Make sure that theseparts are not damaged or lost onremoval.
Install the rear wheel
Threaded fasteners nottightened to the specifiedtorque can work loose or theirthreads can suffer damage.
Always have the security of thefasteners checked by a specialistworkshop, preferably an author-ised BMW Motorrad dealer.
Make sure that the brake cal-iper moves on guide6.
Roll the rear wheel into theswinging arm, making sure thatthe brake disc passes betweenthe brake pads.
Lift the rear wheel and workquick-release axle5throughthe swinging arm, the brakecaliper and the rear wheel.
8
81
zMaintenance
Page 111 of 136
Engine
Engine designSingle-cylinder four-stroke, double overhead cam-shafts driven by roller chain, 4 valves operated bybucket tappets, balancing shaft, liquid-cooled cyl-inder and cylinder head, integral water pump, 5-speed gearbox and dry sump lubrication.
Displacement652 cm3
Cylinder bore100 mm
Piston stroke83 mm
Compression ratio11.5:1
Nominal output37 kW, - at engine speed: 6500 min-1
with power reductionOA25 kW, - at engine speed: 5500 min-1
Torque60 Nm, - at engine speed: 4800 min-1
with power reductionOA51 Nm, - at engine speed: 4000 min-1
Maximum engine speedmax 7500 min-1
Idle speed1480 min-1
10
109
zTechnical data