Page 49 of 74

6-49
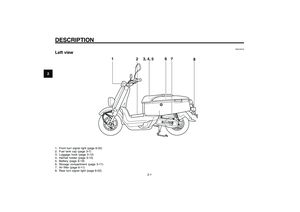
1
2
3
4
5
6
7
8
9
EAU1722A
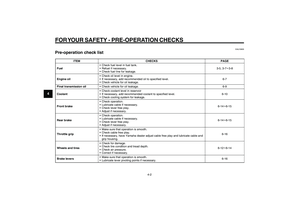
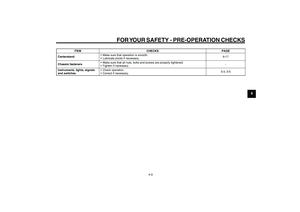
PERIODIC MAINTENANCE AND ADJUSTMENT
6-14
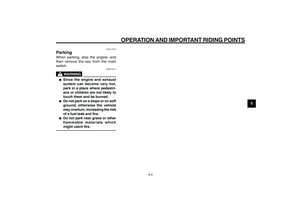
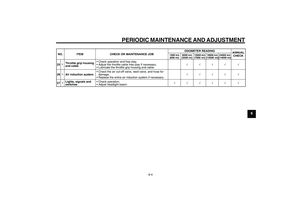
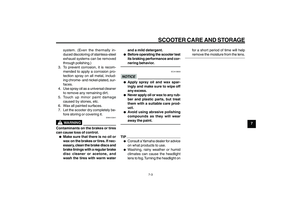
being illegal, operating the ve-
hicle with excessively worn tires
decreases riding stability and
can lead to loss of control.
8 88 8
8The replacement of all wheel and
brake related parts, including the
tires, should be left to a Yamaha
dealer, who has the necessary
professional knowledge and ex-
perience.
EAU21960
Cast wheelsTo maximize the performance, durabil-
ity, and safe operation of your motor-
cycle, note the following points regard-
ing the specified wheels.●
The wheel rims should be checked
for cracks, bends or warpage be-
fore each ride. If any damage is
found, have a Yamaha dealer re-
place the wheel. Do not attempt
even the smallest repair to the
wheel. A deformed or cracked
wheel must be replaced.
●
The wheel should be balanced
whenever either the tire or wheel
has been changed or replaced. An
unbalanced wheel can result in
poor performance, adverse han-
dling characteristics, and a short-
ened tire life.
●
Ride at moderate speeds after
changing a tire since the tire sur-
face must first be “broken in” for it
to develop its optimal characteris-
tics. Wheels
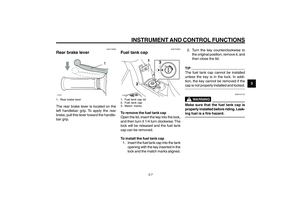
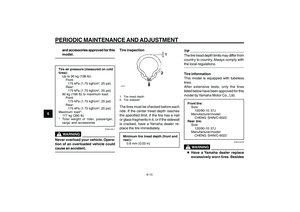
Front and rear brake lever free play, adjusting
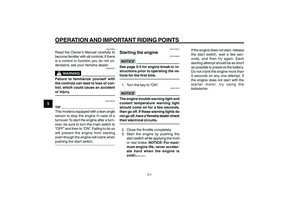
EAU22151
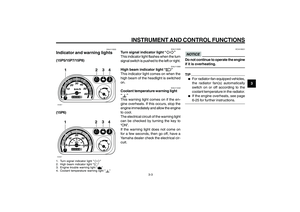
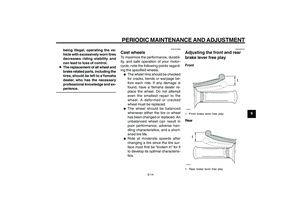
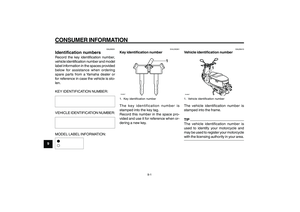
Adjusting the front and rear
brake lever free playFront
1
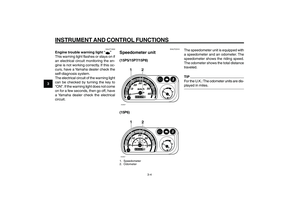
ZAUM00**1. Front brake lever free playRear
1
ZAUM00**1. Rear brake lever free play
Page 50 of 74
6-50
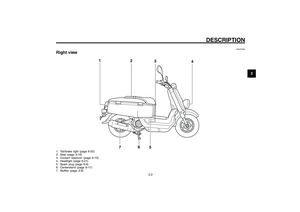
1
2
3
4
5
6
7
8
9
EAU1722A
PERIODIC MAINTENANCE AND ADJUSTMENT
6-15
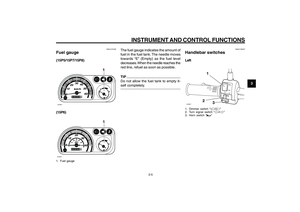
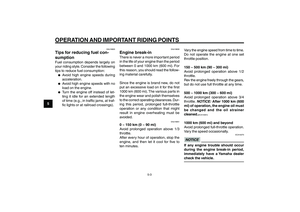
The front and rear brake lever free play
should be measured at the positions as
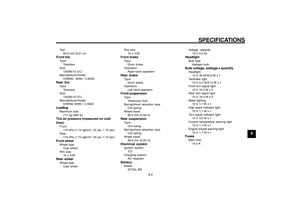
shown.Front brake lever free play:
10 ~ 20 mm (0.4 ~ 0.8 in)
Rear brake lever free play:
10 ~ 20 mm (0.4 ~ 0.8 in)Periodically check the front and rear
brake lever free play and, if necessary,
adjust them as follows.
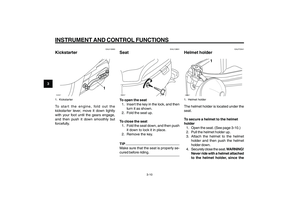
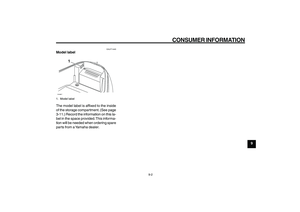
FrontZAUM00**
1
(b)
(a)
1. Adjusting nut
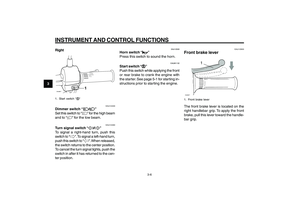
RearZAUM00**
1
(b)
(a)
1. Adjusting nutTo increase the brake lever free play,
turn the adjusting nut at the brake shoe
plate in direction (a). To decrease the
brake lever free play, turn the adjusting
nut in direction (b).
EWA10650
WARNING
If proper adjustment cannot be ob-
tained as described, have a Yamaha
dealer make this adjustment.
Brake shoes, checking
EAU22361
Checking the front and rear
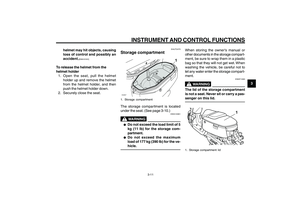
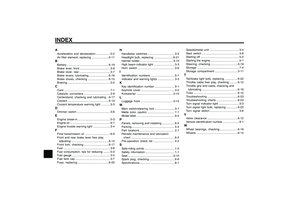
brake shoesFrontZAUM00**
2
1
1. Wear indicator
2. Wear limit line
Page 51 of 74

6-51
1
2
3
4
5
6
7
8
9
EAU1722A
PERIODIC MAINTENANCE AND ADJUSTMENT
6-16
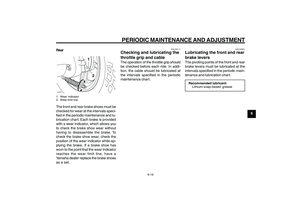
RearZAUM00**
1
2
1. Wear indicator
2. Wear limit lineThe front and rear brake shoes must be
checked for wear at the intervals speci-
fied in the periodic maintenance and lu-
brication chart. Each brake is provided
with a wear indicator, which allows you
to check the brake shoe wear without
having to disassemble the brake. To
check the brake shoe wear, check the
position of the wear indicator while ap-
plying the brake. If a brake shoe has
worn to the point that the wear indicator
reaches the wear limit line, have a
Yamaha dealer replace the brake shoes
as a set.
EAU23111
Checking and lubricating the
throttle grip and cableThe operation of the throttle grip should
be checked before each ride. In addi-
tion, the cable should be lubricated at
the intervals specified in the periodic
maintenance chart.
EAU43631
Lubricating the front and rear
brake leversThe pivoting points of the front and rear
brake levers must be lubricated at the
intervals specified in the periodic main-
tenance and lubrication chart.Recommended lubricant:
Lithium-soap-based grease
Throttle grip and cable, checking and lubricating
Brake levers, lubricating
Page 52 of 74

6-52
1
2
3
4
5
6
7
8
9
EAU1722A
PERIODIC MAINTENANCE AND ADJUSTMENT
6-17
Centerstand, checking and lubricating
Front fork, checking
EAU23192
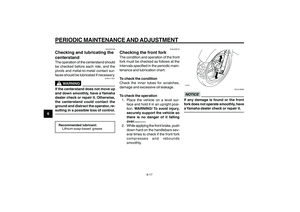
Checking and lubricating the
centerstandThe operation of the centerstand should
be checked before each ride, and the
pivots and metal-to-metal contact sur-
faces should be lubricated if necessary.
EWA11301
WARNING
If the centerstand does not move up
and down smoothly, have a Yamaha
dealer check or repair it. Otherwise,
the centerstand could contact the
ground and distract the operator, re-
sulting in a possible loss of control.Recommended lubricant:
Lithium-soap-based grease
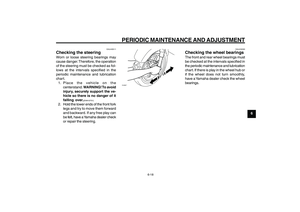
EAU23272
Checking the front forkThe condition and operation of the front
fork must be checked as follows at the
intervals specified in the periodic main-
tenance and lubrication chart.
To check the condition
Check the inner tubes for scratches,
damage and excessive oil leakage.
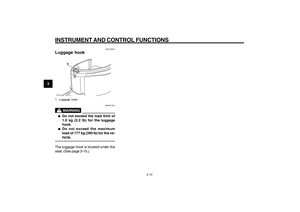
To check the operation
1. Place the vehicle on a level sur-
face and hold it in an upright posi-
tion. WARNING! To avoid injury,
securely support the vehicle so
there is no danger of it falling
over.
[EWA10751]
2. While applying the front brake, push
down hard on the handlebars sev-
eral times to check if the front fork
compresses and rebounds
smoothly.
ZAUM00**
ECA10590
NOTICEIf any damage is found or the front
fork does not operate smoothly, have
a Yamaha dealer check or repair it.
Page 53 of 74
6-53
1
2
3
4
5
6
7
8
9
EAU1722A
PERIODIC MAINTENANCE AND ADJUSTMENT
6-18
Steering, checking
Wheel bearings, checking
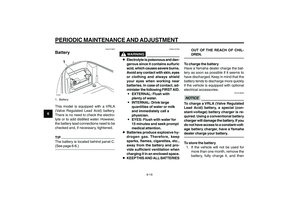
EAU45511
Checking the steeringWorn or loose steering bearings may
cause danger. Therefore, the operation
of the steering must be checked as fol-
lows at the intervals specified in the
periodic maintenance and lubrication
chart.
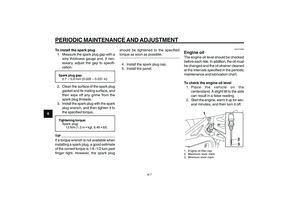
1. Place the vehicle on the
centerstand. WARNING! To avoid
injury, securely support the ve-
hicle so there is no danger of it
falling over.
[EWA10751]
2. Hold the lower ends of the front fork
legs and try to move them forward
and backward. If any free play can
be felt, have a Yamaha dealer check
or repair the steering.
ZAUM00**
EAU23290
Checking the wheel bearingsThe front and rear wheel bearings must
be checked at the intervals specified in
the periodic maintenance and lubrication
chart. If there is play in the wheel hub or
if the wheel does not turn smoothly,
have a Yamaha dealer check the wheel
bearings.
Page 54 of 74
 battery.
There is no need t")
6-54
1
2
3
4
5
6
7
8
9
EAU1722A
PERIODIC MAINTENANCE AND ADJUSTMENT
6-19
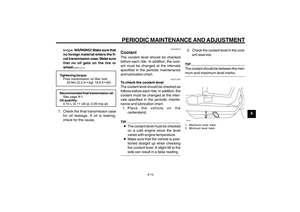
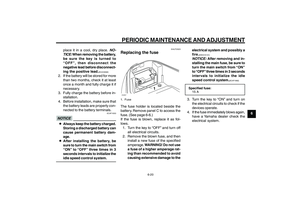
EAUT1857
BatteryZAUM00**
1
1. BatteryThis model is equipped with a VRLA
(Valve Regulated Lead Acid) battery.
There is no need to check the electro-
lyte or to add distilled water. However,
the battery lead connections need to be
checked and, if necessary, tightened.TIP
The battery is located behind panel C.
(See page 6-6.)Battery
EWA10760
WARNING
8 88 8
8Electrolyte is poisonous and dan-
gerous since it contains sulfuric
acid, which causes severe burns.
Avoid any contact with skin, eyes
or clothing and always shield
your eyes when working near
batteries. In case of contact, ad-
minister the following FIRST AID.
9 99 9
9EXTERNAL: Flush with
plenty of water.
9 99 9
9INTERNAL: Drink large
quantities of water or milk
and immediately call a
physician.
9 99 9
9EYES: Flush with water for
15 minutes and seek prompt
medical attention.
8 88 8
8Batteries produce explosive hy-
drogen gas. Therefore, keep
sparks, flames, cigarettes, etc.,
away from the battery and pro-
vide sufficient ventilation when
charging it in an enclosed space.
8 88 8
8KEEP THIS AND ALL BATTERIESOUT OF THE REACH OF CHIL-
DREN.
To charge the battery
Have a Yamaha dealer charge the bat-
tery as soon as possible if it seems to
have discharged. Keep in mind that the
battery tends to discharge more quickly
if the vehicle is equipped with optional
electrical accessories.
ECA16520
NOTICETo charge a VRLA (Valve Regulated
Lead Acid) battery, a special (con-
stant-voltage) battery charger is re-
quired. Using a conventional battery
charger will damage the battery. If you
do not have access to a constant-volt-
age battery charger, have a Yamaha
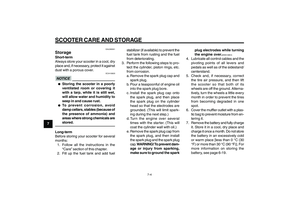
dealer charge your battery.To store the battery
1. If the vehicle will not be used for
more than one month, remove the
battery, fully charge it, and then
Page 55 of 74

6-55
1
2
3
4
5
6
7
8
9
EAU1722A
PERIODIC MAINTENANCE AND ADJUSTMENT
6-20
place it in a cool, dry place.
NO-
TICE:
When removing the battery,
be sure the key is turned to
“OFF”, then disconnect the
negative lead before disconnect-
ing the positive lead.
[ECA16302]
2. If the battery will be stored for more
than two months, check it at least
once a month and fully charge it if
necessary.
3. Fully charge the battery before in-
stallation.
4. Before installation, make sure that
the battery leads are properly con-
nected to the battery terminals.
ECAT1053
NOTICE8 88 8
8Always keep the battery charged.
Storing a discharged battery can
cause permanent battery dam-
age.
8 88 8
8After installing the battery, be
sure to turn the main switch from
“ON” to “OFF” three times in 3
seconds intervals to initialize the
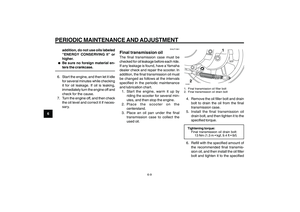
idle speed control system.Fuse, replacing
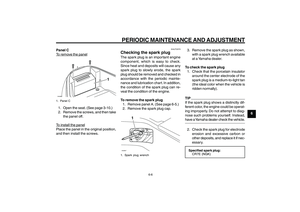
EAUT2023
Replacing the fuseZAUM00**
1
1. FuseThe fuse holder is located beside the
battery. Remove panel C to access the
fuse. (See page 6-6.)
If the fuse is blown, replace it as fol-
lows.
1. Turn the key to “OFF” and turn off
all electrical circuits.
2. Remove the blown fuse, and then
install a new fuse of the specified
amperage. WARNING! Do not use
a fuse of a higher amperage rat-
ing than recommended to avoid
causing extensive damage to theelectrical system and possibly a
fire.
[EWA15131]
NOTICE:
After removing and in-
stalling the main fuse, be sure to
turn the main switch from “ON”
to “OFF” three times in 3 seconds
intervals to initialize the idle
speed control system.
[ECAT1062]
Specified fuse:
15 A3. Turn the key to “ON” and turn on
the electrical circuits to check if the
devices operate.
4. If the fuse immediately blows again,
have a Yamaha dealer check the
electrical system.
Page 56 of 74

1. Headlight unit
2. Screw2. Disconnect the headlight c")
6-56
1
2
3
4
5
6
7
8
9
EAU1722A
PERIODIC MAINTENANCE AND ADJUSTMENT
6-21
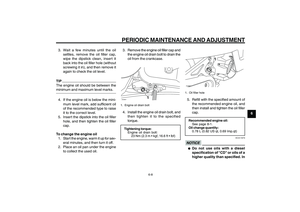
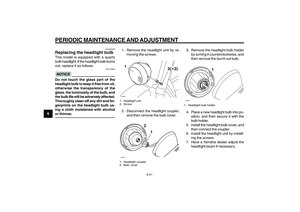
1. Remove the headlight unit by re-
moving the screws.ZAUM00**1
2(✕2)
1. Headlight unit
2. Screw2. Disconnect the headlight coupler,
and then remove the bulb cover.ZAUM00**
2
1
1. Headlight coupler
2. Bulb cover
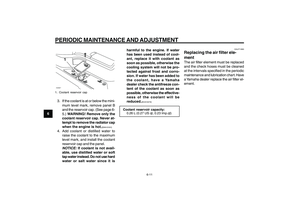
3. Remove the headlight bulb holder
by turning it counterclockwise, and
then remove the burnt-out bulb.ZAUM00**
1
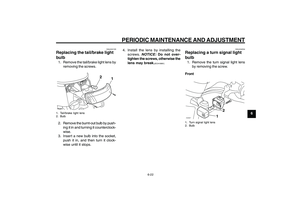
1. Headlight bulb holder4. Place a new headlight bulb into po-
sition, and then secure it with the
bulb holder.
5. Install the headlight bulb cover, and
then connect the coupler.
6. Install the headlight unit by install-
ing the screws.
7. Have a Yamaha dealer adjust the
headlight beam if necessary. Headlight bulb, replacing
EAU23782
Replacing the headlight bulbThis model is equipped with a quartz
bulb headlight. If the headlight bulb burns
out, replace it as follows.
ECA10660
NOTICEDo not touch the glass part of the
headlight bulb to keep it free from oil,
otherwise the transparency of the
glass, the luminosity of the bulb, and
the bulb life will be adversely affected.
Thoroughly clean off any dirt and fin-
gerprints on the headlight bulb us-
ing a cloth moistened with alcohol
or thinner.