2009 SUBARU TRIBECA light
[x] Cancel search: lightPage 3 of 2453

AB-4
General Description
AIRBAG SYSTEM
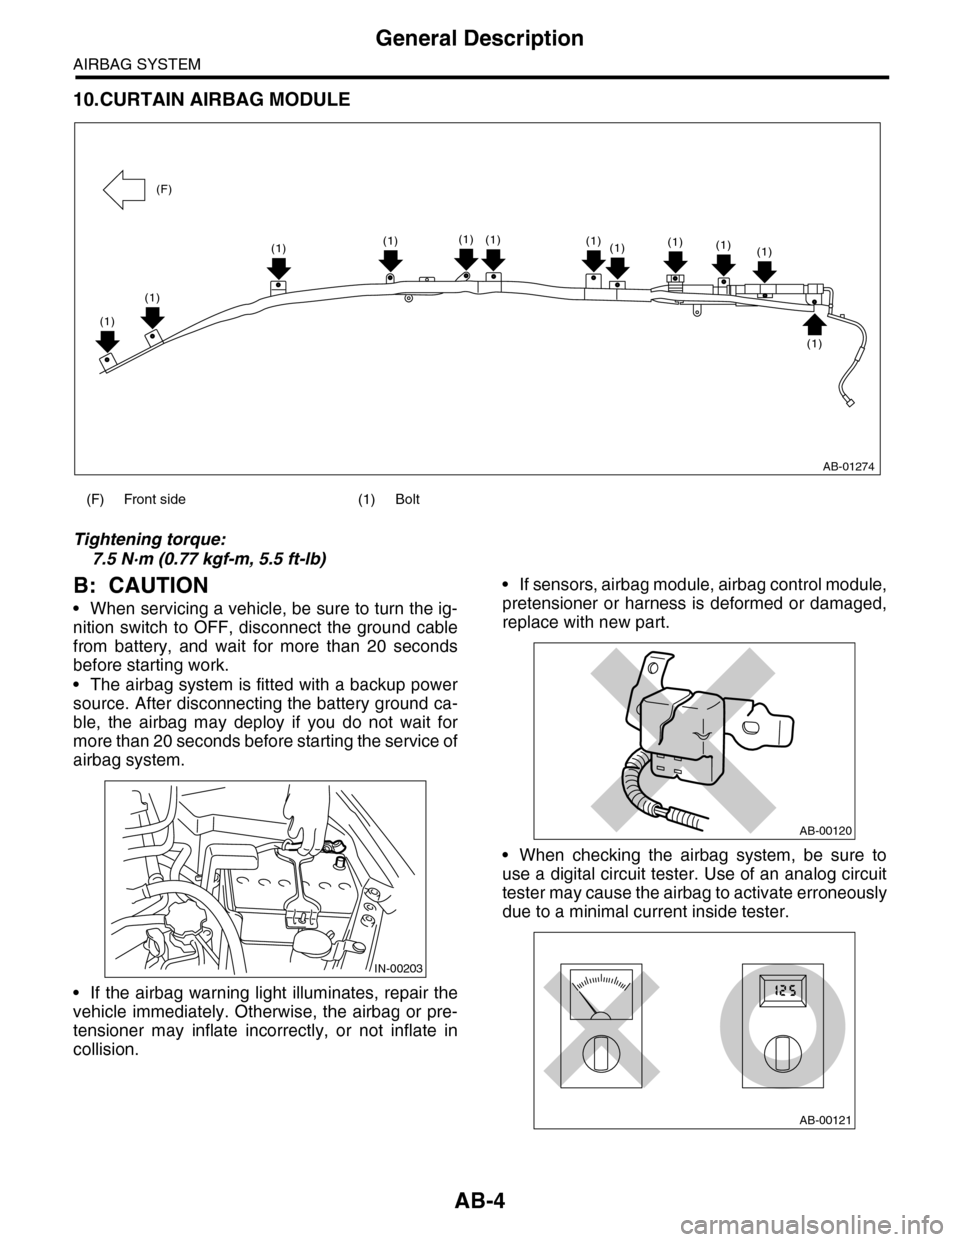
10.CURTAIN AIRBAG MODULE
Tightening torque:
7.5 N·m (0.77 kgf-m, 5.5 ft-lb)
B: CAUTION
•When servicing a vehicle, be sure to turn the ig-
nition switch to OFF, disconnect the ground cable
from battery, and wait for more than 20 seconds
before starting work.
•The airbag system is fitted with a backup power
source. After disconnecting the battery ground ca-
ble, the airbag may deploy if you do not wait for
more than 20 seconds before starting the service of
airbag system.
•If the airbag warning light illuminates, repair the
vehicle immediately. Otherwise, the airbag or pre-
tensioner may inflate incorrectly, or not inflate in
collision.
•If sensors, airbag module, airbag control module,
pretensioner or harness is deformed or damaged,
replace with new part.
•When checking the airbag system, be sure to
use a digital circuit tester. Use of an analog circuit
tester may cause the airbag to activate erroneously
due to a minimal current inside tester.
(F) Front side (1) Bolt
AB-01274
(1)(1)
(1)
(1)(1)(1)(1)(1)(1)(1)
(1)
(1)
(F)
IN-00203
AB-00120
AB-00121
Page 5 of 2453

AB-6
General Description
AIRBAG SYSTEM
•Do not discard the uninflated airbag or preten-
sioner.
•When airbag control module, front sub sensor,
side airbag sensor and curtain airbag sensor are
removed, do not reuse the bolts and nuts of them.
Always use new bolts and nuts for them.
•Do not drop each airbag module, airbag control
module and each sensor, or store these parts un-
der high temperature over 93°C (199°F), or let wa-
ter, oil or grease get on them; the internal parts may
be damaged or the reliability may be greatly low-
ered.
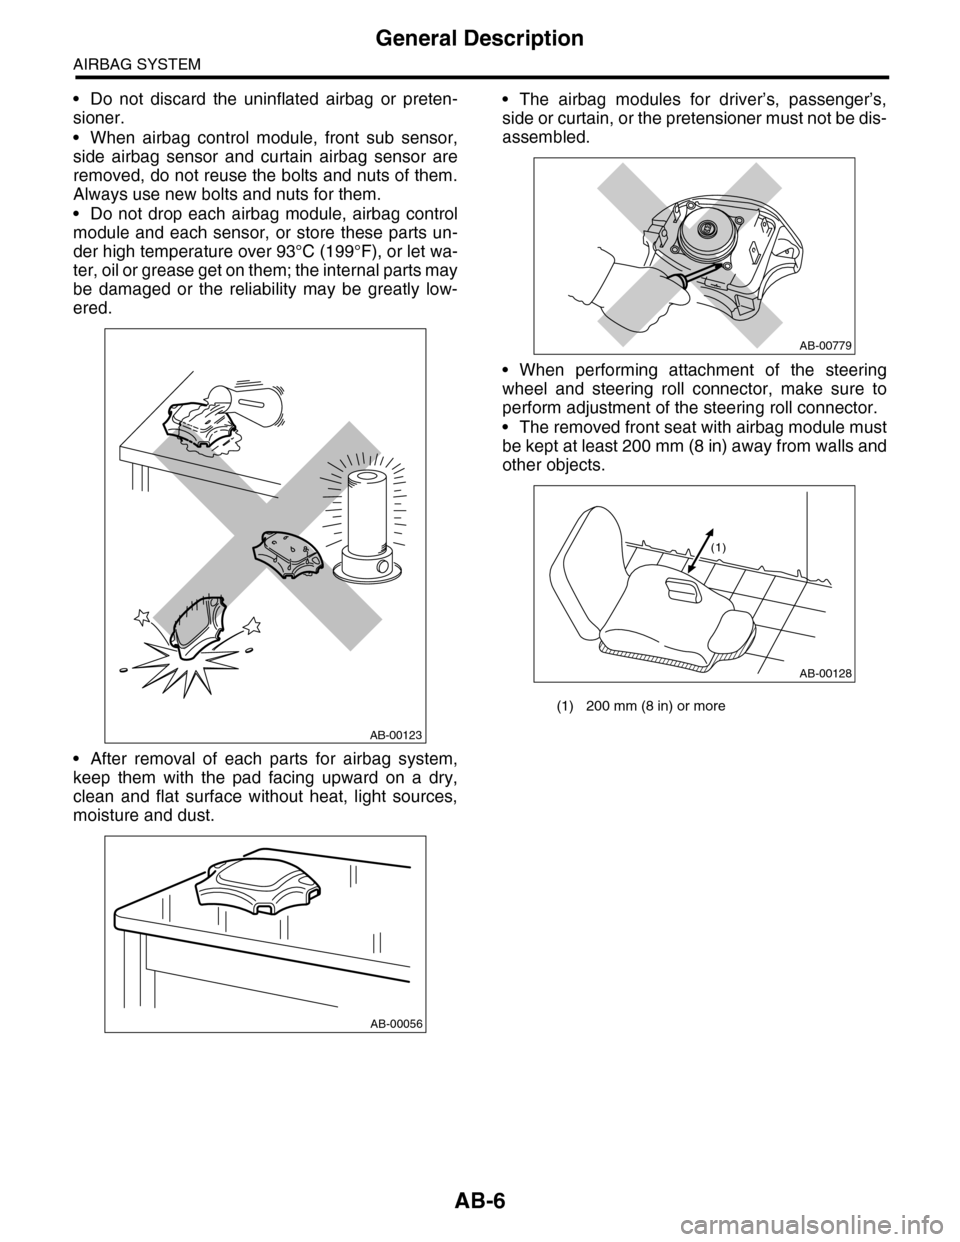
•After removal of each parts for airbag system,
keep them with the pad facing upward on a dry,
clean and flat surface without heat, light sources,
moisture and dust.
•The airbag modules for driver’s, passenger’s,
side or curtain, or the pretensioner must not be dis-
assembled.
•When performing attachment of the steering
wheel and steering roll connector, make sure to
perform adjustment of the steering roll connector.
•The removed front seat with airbag module must
be kept at least 200 mm (8 in) away from walls and
other objects.
AB-00123
AB-00056
(1) 200 mm (8 in) or more
AB-00779
AB-00128
(1)
Page 11 of 2453

AB-12
Inspection Locations After a Collision
AIRBAG SYSTEM
3. Inspection Locations After a
Collision
A: REPLACEMENT
Replace the following parts when the airbag is de-
ployed.
1. FRONT COLLISION
1) Driver’s airbag module
2) Passenger’s airbag module
3) Driver’s seat belt (Pretensioner)
4) Passenger’s seat belt (Pretensioner)
5) Airbag control module
6) Front sub sensor (L/R)
7) Roll connector
8) Instrument panel (for integrating with passen-
ger’s airbag module)
9) Passenger side seat cushion pad and frame as-
sembly
2. SIDE COLLISION
1) Airbag control module
2) Side airbag module (operating side seat back-
rest)
3) Side airbag sensor (operating side)
4) Curtain airbag module (operating side)
5) Curtain airbag sensor (operating side)
3. INSPECTION OF OTHER PARTS
Check for the following parts, and replace the dam-
aged parts with new parts.
1) Steering wheel and steering shaft
Check the steering shaft for mounting conditions
and deflection of front and rear, upward and down-
ward directions, and deflection of front and rear di-
rection with tilt lever released. (After a collision,
there is a good chance that the shock absorbing
part of steering shaft may have operated.)
2) Check the connectors of airbag module, preten-
sioner, etc. for damage, and also check each har-
ness for pinch and connector damage. Replace the
harness as a unit if damage is found.
3) Check the seat cushion frame, backrest, seat rail
and headrest for deformation, distortion, crack, and
installing condition and play.
4) For passengers seat, replace the seat cushion
frame assembly with new one if the seat cushion
frame is deformed or cracked.
5) If there are tears or loosening in the passenger
side seat cushion cover, it may interfere with the
proper operation of the passenger detection sys-
tem. Replace with a new cushion cover.
6) Be sure to perform the system calibration for the
occupant detection system after removing or re-
placing the passenger seat cushion cover. Failure
to do so may cause improper operation of the pas-
senger detection system.
TION, Subaru Select Monitor.>
7) Use the Subaru Select Monitor to check whether
the drivers seat position sensor and the drivers and
the front left/right seat belt buckle switches are op-
erating normally.
B: INSPECTION
If the vehicle is involved in a collision, even if it is a
slight collision, be sure to check the following sys-
tems.
1. DRIVER’S AIRBAG MODULE
1) Check for the following, and replace the dam-
aged parts with new parts.
•Airbag module is cracked or deformed.
•Harness and/or connector is cracked, deformed
or open. Harness wire is exposed.
•The module surface is fouled with grease, oil,
water or cleaning solvent.
2) When installing a new driver’s airbag module,
check for the following, and replace the damaged
parts with new parts.
•The steering wheel is in the way, making it diffi-
cult to install the airbag module.
•The clearance between the driver’s airbag mod-
ule and steering wheel is not constant.
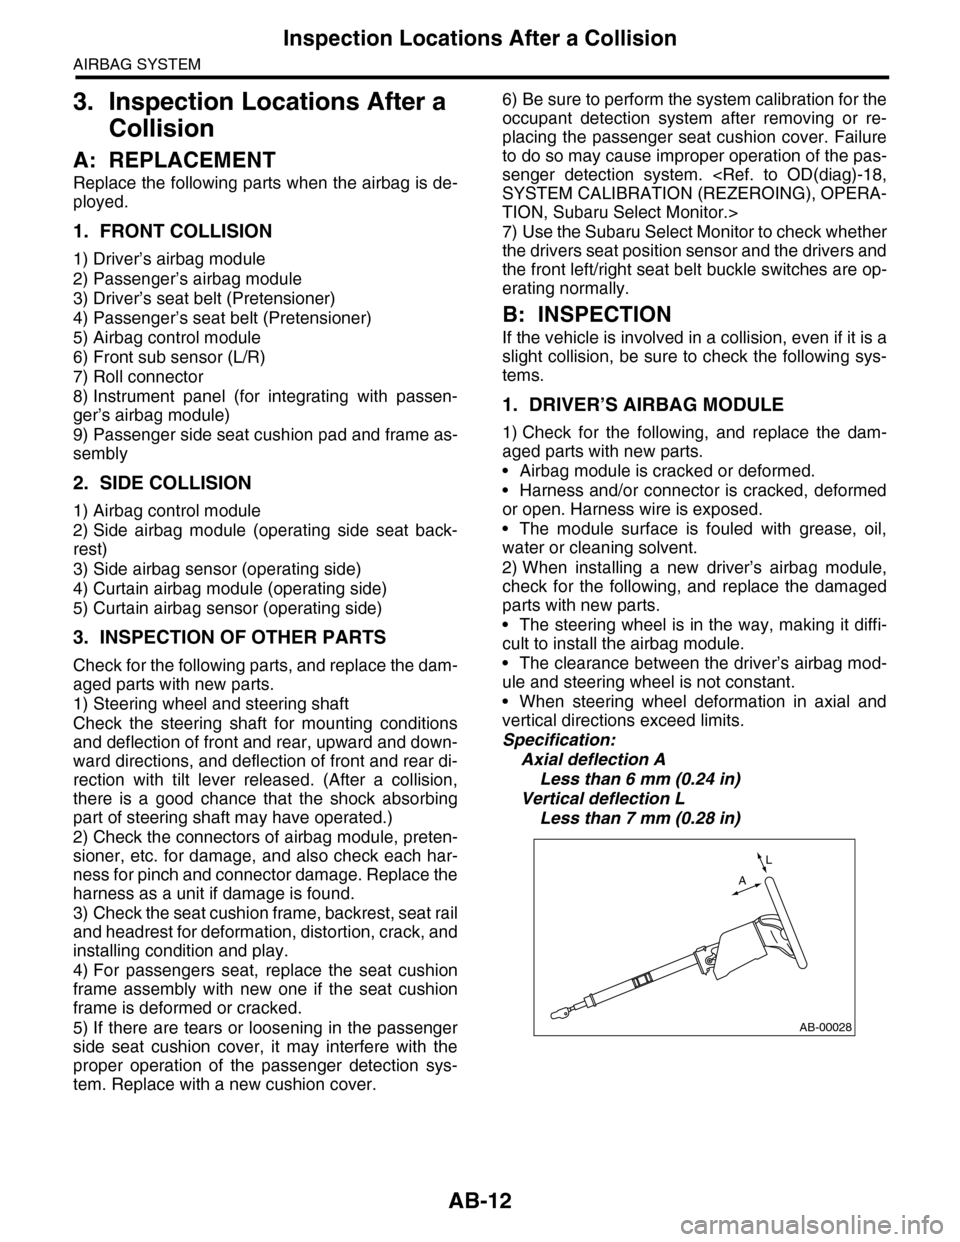
•When steering wheel deformation in axial and
vertical directions exceed limits.
Specification:
Axial deflection A
Less than 6 mm (0.24 in)
Vertical deflection L
Less than 7 mm (0.28 in)
AB-00028
L
A
Page 26 of 2453

AB(diag)-2
Basic Diagnostic Procedure
AIRBAG SYSTEM (DIAGNOSTICS)
1. Basic Diagnostic Procedure
A: PROCEDURE
Step Check Yes No
1CHECK WARNING LIGHT.
Check whether the airbag warning light in the
combination meter is lit.
Does the airbag warning light
illuminate?
Go to step 2.Perform the diag-
nosis according to
phenomenon of
the problem.
2READ DTC.
1) Turn the ignition switch to OFF.
2) Connect the Subaru Select Monitor to data
link connector.
3) Turn the ignition switch to ON, and the Sub-
aru Select Monitor power switch to ON.
4) Read the DTC.
(DTC).>
NOTE:If the communication function of the Subaru Se-
lect Monitor cannot be executed normally,
check the communication circuit.
TIALIZING IMPOSSIBLE, INSPECTION, Sub-
aru Select Monitor.>
5) Record all DTCs and freeze frame data.
Is DTC displayed? Go to step 3.
ing Light Fail-
ure.>Go to “Airbag
Wa r ni n g L ig h t Fa i l-
ure”.
3PERFORM DIAGNOSIS.
1) Judge the possible cause from “List of
Diagnostic Trouble Code”
2) Inspect the DTC using “List of Diagnostic
Tr o u b l e C o d e ( D T C ) ” .
3) Repair the trouble cause.
4) Perform the clear memory mode.
5) Perform the inspection mode.
6) Read any other DTCs displayed.
Is DTC displayed? Perform the proce-
dure 1) to 5) in
step 3.
Finish the diagno-
sis.
Page 27 of 2453

AB(diag)-3
Check List for Interview
AIRBAG SYSTEM (DIAGNOSTICS)
2. Check List for Interview
A: CHECK
Customer's name Inspector's name
Date vehicle brought in / / Registration No.
Odometer readingkm
milesV. I . N .
Date problem occurred / / Registration year / /
Weather
Fine
Cloudy
Rainy
Snowy
Others:
Te m p e r a t u r e ° C ( ° F )
Road condition
Flat road
Uphill
Downhill
Gravel road
Others:
Ve h i c l e o p e r a t i o n
Starting
Idling
Driving
Constant speed
Accelerating
Decelerating
Turning
Others:
Details of problem
Airbag warning light operation
Normal (After turning the ignition switch to ON, lit for approximately 6 seconds and goes off.)
Remains ON
Light OFF
DTC output OK code
DTC: (Code: )
Page 29 of 2453

AB(diag)-5
General Description
AIRBAG SYSTEM (DIAGNOSTICS)
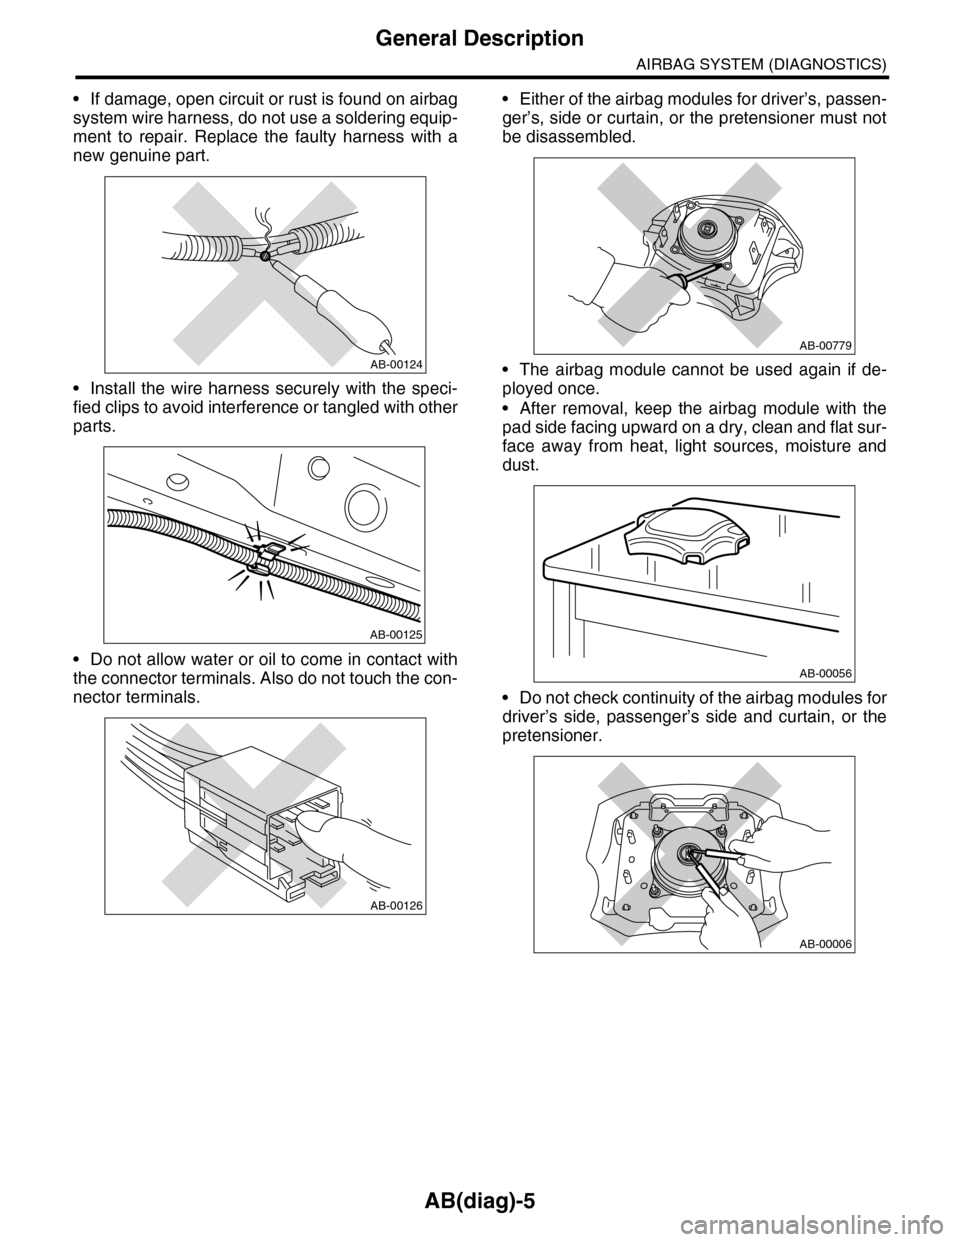
•If damage, open circuit or rust is found on airbag
system wire harness, do not use a soldering equip-
ment to repair. Replace the faulty harness with a
new genuine part.
•Install the wire harness securely with the speci-
fied clips to avoid interference or tangled with other
parts.
•Do not allow water or oil to come in contact with
the connector terminals. Also do not touch the con-
nector terminals.
•Either of the airbag modules for driver’s, passen-
ger’s, side or curtain, or the pretensioner must not
be disassembled.
•The airbag module cannot be used again if de-
ployed once.
•After removal, keep the airbag module with the
pad side facing upward on a dry, clean and flat sur-
face away from heat, light sources, moisture and
dust.
•Do not check continuity of the airbag modules for
driver’s side, passenger’s side and curtain, or the
pretensioner.
AB-00124
AB-00125
AB-00126
AB-00779
AB-00056
AB-00006
Page 53 of 2453

AB(diag)-29
Airbag Control Module I/O Signal
AIRBAG SYSTEM (DIAGNOSTICS)
6. Airbag Control Module I/O Signal
A: ELECTRICAL SPECIFICATION
•Terminal numbers in airbag control module connector are shown in the figure.
•Airbag warning light illuminates when the connector is removed from airbag control module.
Item Control module terminal No.
Line end check connector(1)-2
Diagnosis connector(1)-19
Data link connector(1)-12
Combination meter(1)-3
Battery power supply Common use fuse (1)-6
Dedicated fuse (1)-5
Passenger’s airbag module level one + (1)-10
–(1)-11
Passenger’s airbag module level two + (1)-8
–(1)-7
Driver’s airbag module level one + (1)-14
–(1)-13
Driver’s airbag module level two + (1)-16
–(1)-17
Fr o nt su b se ns or L H Powe r su p pl y a n d co mmu-
nication(1)-15
GND (1)-26
Fr o nt su b se ns or RH Powe r su p pl y a n d co mmu-
nication(1)-9
GND (1)-20
Ground line (GND)(1)-27
(1)-28
Passenger’s airbag OFF indicator (1)-1
Passenger’s airbag ON indicator (1)-18
Passenger’s seat belt war ning light (integrated module) (1)-24
Seat belt buckle switch LH + (2)-19
–(2)-2
Seat position sensor LH + (2)-3
–(2)-4
AB-00937
123456789101112
1314151617181920
123456789101112
1314151617181920
1234567891011121314151617
1819202122232425262728
(1)(2) (3)
Page 59 of 2453

AB(diag)-35
Subaru Select Monitor
AIRBAG SYSTEM (DIAGNOSTICS)
2. WITHOUT DTC
DETECTING CONDITION:
•Defective combination meter
•Open circuit of harness
TROUBLE SYMPTOM:
•Airbag warning light remains on.
•“NO TROUBLE CODE” will be displayed on the Subaru Select Monitor.
For detailed operation procedure, refer to “Airbag Warning Light Failure”.
NOTE:
•For detailed operation procedure, refer to “Airbag Warning Light Failure”.
•When the airbag warning light is OFF and “NO TROUBLE CODE” is displayed on Subaru Select Monitor,
the system is in normal condition.
9CHECK THE HARNESS BETWEEN THE AIR-
BAG CONTROL MODULE AND DATA LINK
CONNECTOR.
1) Turn the ignition switch to OFF, disconnect
the battery ground cable, and wait more than
20 seconds.
2) Disconnect the connector (AB6) from air-
bag control module.
3) Connect the connector (1U) in the test har-
ness U to connector (AB6).
4) Measure the resistance between connector
(4U) in the test harness U and the data link
connector.
Connector & terminal
(4U) No. 18 — (B40) No. 10:
Is the resistance less than 10
Ω?
Go to step 10.Repair the har-
ness between the
airbag control
module and the
data link connec-
tor. Or replace the
airbag main har-
ness with the bulk-
head harness.
10 CHECK POWER SUPPLY CIRCUIT.
1) Turn the ignition switch to ON.
2) Measure the voltage between connector
(2U) in the test harness U and chassis ground.
Connector & terminal
(2U) No. 1 — Chassis ground:
(2U) No. 6 — Chassis ground:
Is the voltage more than 10 V? Go to step 11.Repair the har-
ness between the
airbag control
module and the
battery. Or replace
the airbag main
harness with the
bulkhead harness.
11 CHECK BETWEEN THE AIRBAG CONTROL
MODULE AND CHASSIS GROUND.
1) Turn the ignition switch to OFF.
2) Measure the resistance between connector
(2U) in the test harness U and chassis ground.
Connector & terminal
(2U) No. 10 — Chassis ground:
(2U) No. 11 — Chassis ground:
Is the resistance less than 10
Ω?
Go to step 12.Repair the har-
ness between the
airbag control
module and the
chassis ground. Or
replace the airbag
main harness with
the bulkhead har-
ness.
12 CHECK POOR CONTACT OF CONNECTOR.Is there poor contact in the
control module power supply,
ground circuit and data link
connector?
Repair the con-
nector. (Replace
the harness with-
out repairing the
airbag system
connector.)
Replace the only
airbag control
module.
Airbag Control
Module.>
Step Check Yes No