2009 SUBARU OUTBACK battery
[x] Cancel search: batteryPage 26 of 447

24
Item Function Possible settings Default setting Page
Battery drainage prevention functionBattery drainage prevention function Operation/Non-operation Operation 2-6
Seatbelt warning Sounds a chime while driving Operation/Non-operation Operation 1-15
*1, *2: To have the map lights illuminate when the alarm system is triggered, it is necessary to set both *1 and *2 settings to “ON ”.
Page 33 of 447
injury or death.
. To retrieve the seat position,
make sure the hands, feet or
luggage of rear seat passengers
are clear of the seat adjustingmechanism.
NOTE . If a new position is registered for the
same button, the previous seat posi-
tion is deleted.. If the battery is disconnected, the
registered seat position is not deleted. & Head restraint adjustment
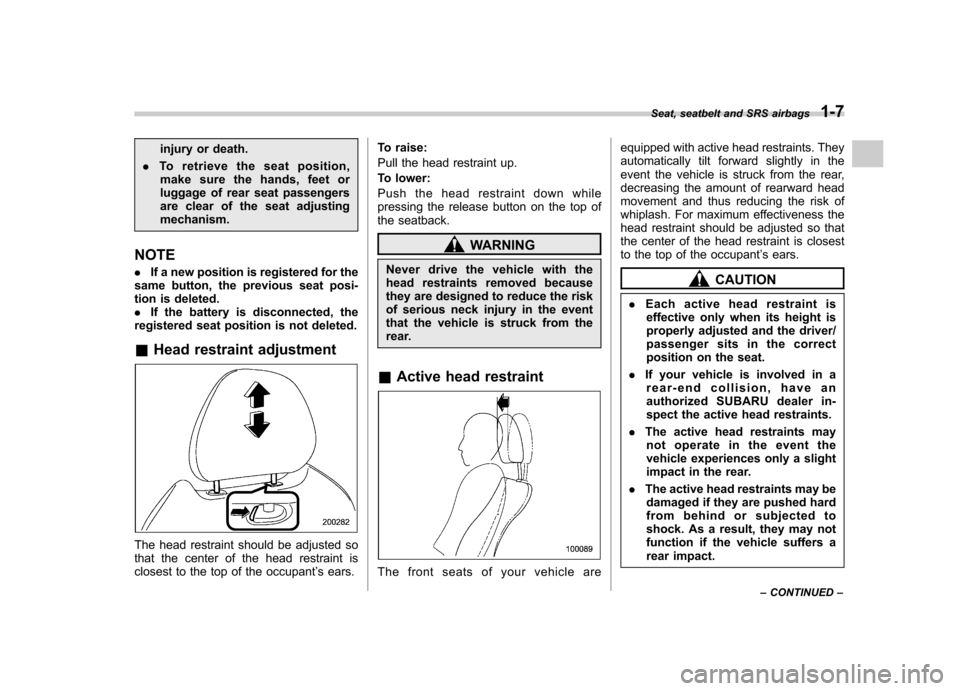
The head restraint should be adjusted so
that the center of the head restraint is
closest to the top of the occupant ’s ears. To raise:
Pull the head restraint up.
To lower:
Push the head restraint down while
pressing the release button on the top of
the seatback.
WARNING
Never drive the vehicle with the
head restraints removed because
they are designed to reduce the risk
of serious neck injury in the event
that the vehicle is struck from the
rear.
& Active head restraint
The front seats of your vehicle are equipped with active head restraints. They
automatically tilt forward slightly in the
event the vehicle is struck from the rear,
decreasing the amount of rearward head
movement and thus reducing the risk of
whiplash. For maximum effectiveness the
head restraint should be adjusted so that
the center of the head restraint is closest
to the top of the occupant
’s ears.
CAUTION
. Each active head restraint is
effective only when its height is
properly adjusted and the driver/
passenger sits in the correct
position on the seat.
. If your vehicle is involved in a
rear-end collision, have an
authorized SUBARU dealer in-
spect the active head restraints.
. The active head restraints may
not operate in the event the
vehicle experiences only a slight
impact in the rear.
. The active head restraints may be
damaged if they are pushed hard
from behind or subjected to
shock. As a result, they may not
function if the vehicle suffers a
rear impact. Seat, seatbelt and SRS airbags
1-7
– CONTINUED –
Page 34 of 447

1-8Seat, seatbelt and SRS airbags
&Lumbar support (if equipped)
Pull the lever forward or backward.
Pulling the lever forward will increase the
amount of support for your lower back. Seat heater (if equipped)The seat heater is equipped in the front seats.
The seat heater operates when the igni-
tion switch is either in the
“Acc ”or “ON ”
position.
Each seat heater has four levels of
adjustment. To use the heater in the
right-hand seat, turn the “R ” adjustment
dial forward until the “
”mark reaches the
desired position. To activate the heater in
the left-hand seat, turn the “L ” adjustment
dial forward until the “
”mark reaches the
desired position. Each heater warms the
seat most quickly with the “
”mark on the
adjustment dial in the furthest-forward
position. An indicator light next to the adjustment dial for each seat heater
illuminates when that seat heater isactivated.
When the vehicle
’s interior is warmed
enough or before you leave the vehicle,
be sure to turn the switch off.
CAUTION
. There is a possibility that people
with delicate skin may suffer
slight burns even at low tempera-
tures if they use the seat heater
for a long period of time. When
using the heater, always be sure
to warn the persons concerned.
. Do not put anything on the seat
which insulates against heat,
such as a blanket, cushion, or
similar items. This may cause the
seat heater to overheat.
NOTE
Use of the seat heater for a long period
of time while the engine is not running
can cause battery discharge.
Page 50 of 447
1-24Seat, seatbelt and SRS airbags
CAUTION
. Keep the belts free of polishes,
oils, chemicals and particularly
battery acid.
. Never attempt to make modifica-
tions or changes that will prevent
the seatbelt from operating prop-
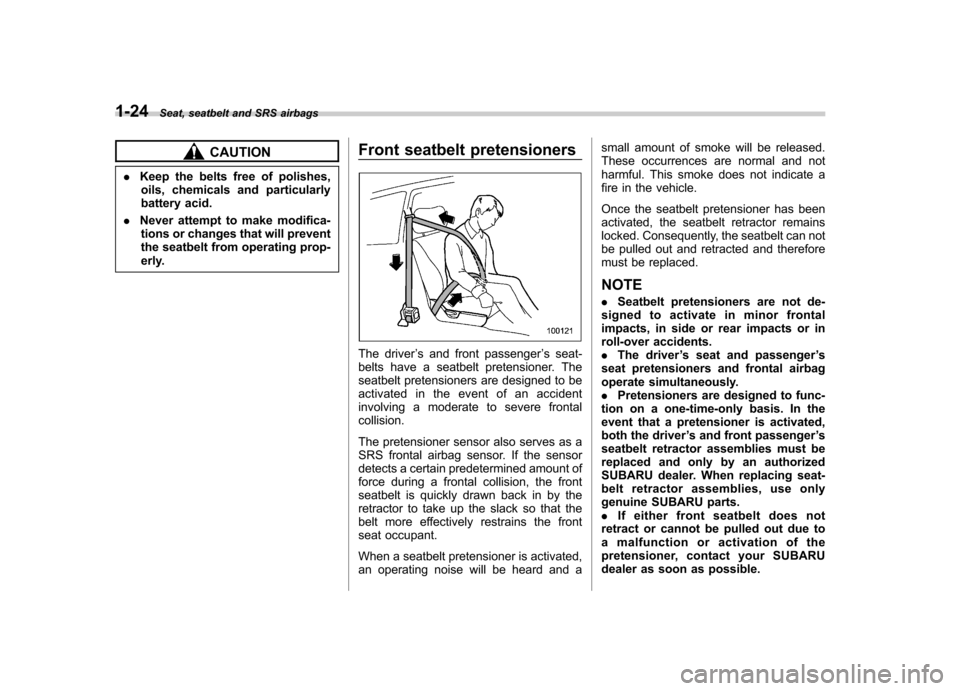
erly. Front seatbelt pretensioners
The driver
’s and front passenger ’s seat-
belts have a seatbelt pretensioner. The
seatbelt pretensioners are designed to be
activated in the event of an accident
involving a moderate to severe frontalcollision.
The pretensioner sensor also serves as a
SRS frontal airbag sensor. If the sensor
detects a certain predetermined amount of
force during a frontal collision, the front
seatbelt is quickly drawn back in by the
retractor to take up the slack so that the
belt more effectively restrains the front
seat occupant.
When a seatbelt pretensioner is activated,
an operating noise will be heard and a small amount of smoke will be released.
These occurrences are normal and not
harmful. This smoke does not indicate a
fire in the vehicle.
Once the seatbelt pretensioner has been
activated, the seatbelt retractor remains
locked. Consequently, the seatbelt can not
be pulled out and retracted and therefore
must be replaced. NOTE .
Seatbelt pretensioners are not de-
signed to activate in minor frontal
impacts, in side or rear impacts or in
roll-over accidents.. The driver ’s seat and passenger ’s
seat pretensioners and frontal airbag
operate simultaneously.. Pretensioners are designed to func-
tion on a one-time-only basis. In the
event that a pretensioner is activated,
both the driver ’s and front passenger ’s
seatbelt retractor assemblies must be
replaced and only by an authorized
SUBARU dealer. When replacing seat-
belt retractor assemblies, use only
genuine SUBARU parts.. If either front seatbelt does not
retract or cannot be pulled out due to
a malfunction or activation of the
pretensioner, contact your SUBARU
dealer as soon as possible.
Page 93 of 447
Keys..................................................................... 2-2
Key number ........................................................ 2-2
Immobilizer .......................................................... 2-3
Security ID plate .................................................. 2-3
Security indicator light ........................................ 2-4
Key replacement ................................................. 2-4
Door locks ........................................................... 2-5
Locking and unlocking from the outside .. ............ 2-5
Locking and unlocking from the inside ................ 2-6
Battery drainage prevention function ................... 2-6
Power door locking switches ............................. 2-7
Key lock-in prevention function ........................... 2-7
Remote keyless entry system ............................ 2-8
Locking the doors ............................................... 2-9
Unlocking the doors ........................................... 2-10
Unlocking the trunk lid/rear gate ......................... 2-10
Vehicle finder function ........................................ 2-10
Sounding a panic alarm ...................................... 2-11
Selecting audible signal operation ...................... 2-11
Replacing the battery ......................................... 2-11
Replacing lost transmitters ................................. 2-13 Alarm system
..................................................... 2-16
System alarm operation ..................................... 2-16
Activating and deactivating the alarm system ..... 2-16
If you have accidentally triggered the alarm system ............................................................ 2-17
Arming the system ............................................ 2-17
Disarming the system ........................................ 2-19
Valet mode ........................................................ 2-19
Passive arming .................................................. 2-19
Tripped sensor identification .............................. 2-20
Shock sensors (dealer option).. .......................... 2-20
Child safety locks .............................................. 2-21
Windows ............................................................. 2-21
Power windows ................................................. 2-21
Trunk lid (Sedan) ............................................... 2-24
To open and close the trunk lid from outside . ..... 2-24
To open the trunk lid from inside. ....................... 2-24
To lock and unlock the trunk lid release lever ................................................................ 2-25
Internal trunk lid release handle ......................... 2-25
Rear gate (Station wagon) ................................ 2-27
Moonroof (if equipped) ...................................... 2-28
Tilting/sliding moonroof (Sedan) ......................... 2-29
Moonroof (Station wagon) .................................. 2-30
Keys and doors
2
Page 98 of 447
2-6Keys and doors
&Locking and unlocking from
the inside
WARNING
Keep all doors locked when you
drive, especially when small chil-
dren are in your vehicle.
Along with the proper use of seat-
belts and child restraints, locking
the doors reduces the chance of
being thrown out of the vehicle in anaccident.
It also helps prevent passengers
from falling out if a door is acciden-
tally opened, and intruders from
unexpectedly opening doors and
entering your vehicle.
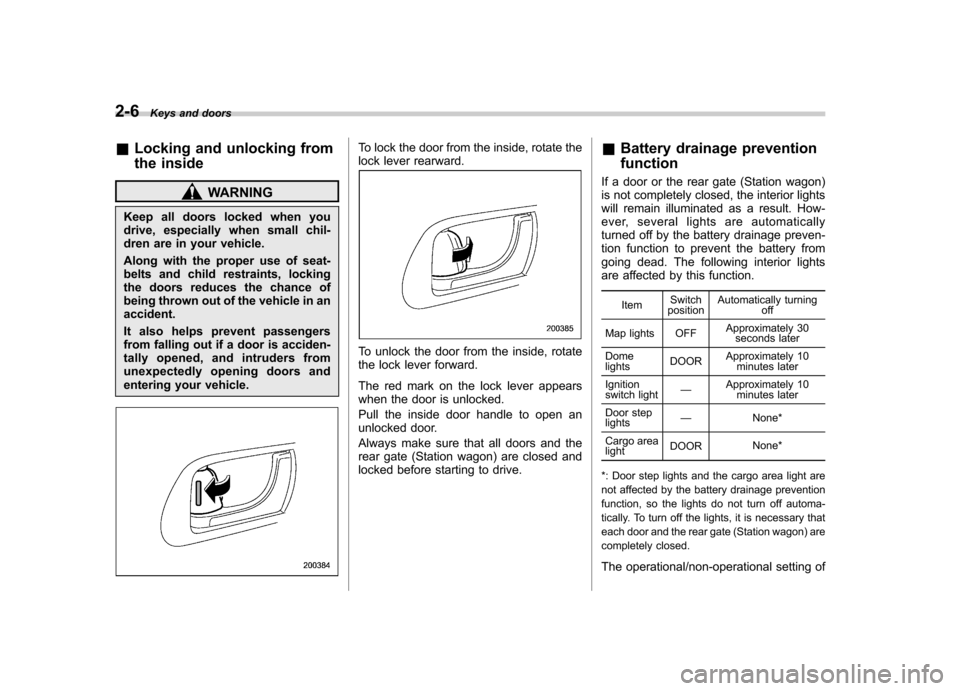
To lock the door from the inside, rotate the
lock lever rearward.
To unlock the door from the inside, rotate
the lock lever forward.
The red mark on the lock lever appears
when the door is unlocked.
Pull the inside door handle to open an
unlocked door.
Always make sure that all doors and the
rear gate (Station wagon) are closed and
locked before starting to drive. &
Battery drainage prevention function
If a door or the rear gate (Station wagon)
is not completely closed, the interior lights
will remain illuminated as a result. How-
ever, several lights are automatically
turned off by the battery drainage preven-
tion function to prevent the battery from
going dead. The following interior lights
are affected by this function.
Item Switch
position Automatically turning
off
Map lights OFF Approximately 30
seconds later
Dome lights DOOR
Approximately 10
minutes later
Ignition
switch light —
Approximately 10
minutes later
Door steplights —
None*
Cargo arealight DOOR
None*
*: Door step lights and the cargo area light are
not affected by the battery drainage prevention
function, so the lights do not turn off automa-
tically. To turn off the lights, it is necessary that
each door and the rear gate (Station wagon) are
completely closed.
The operational/non-operational setting of
Page 99 of 447

this function can be changed by a
SUBARU dealer. Contact the nearest
SUBARU dealer if you would like to
change the setting. NOTE .The factory setting (default setting)
for this function is set as “operational ”.
. When leaving the vehicle, please
make sure that all doors and the rear
gate (Station wagon) are completelyclosed.. The battery drainage prevention
function does not operate while the
key is in the ignition switch. Power door locking switches
Driver
’s switch
Front passenger ’s switch All doors and the rear gate (Station
wagon) can be locked and unlocked by
the power door locking switches located at
the driver
’s side and the front passenger ’s
side doors.
To lock all doors (including the rear gate of
a Station wagon), push the switch to the
front ( “LOCK ”) position.
To unlock all doors (including the rear gate
of a Station wagon), pull the switch to the
rear position.
When you close the doors after you set
the door locks, the doors remain locked.
NOTE
Make sure that you do not leave the key
inside the vehicle before locking the
doors from the outside using the power
door locking switches. & Key lock-in prevention func- tion
This function prevents the doors from
being locked with the key still in the
ignition switch. ! Behavior with key lock-in preven-
tion function operational
With the driver ’s door open, the doors are
automatically kept unlocked even if the
door locking switch is pushed to the front Keys and doors
2-7
– CONTINUED –
Page 103 of 447
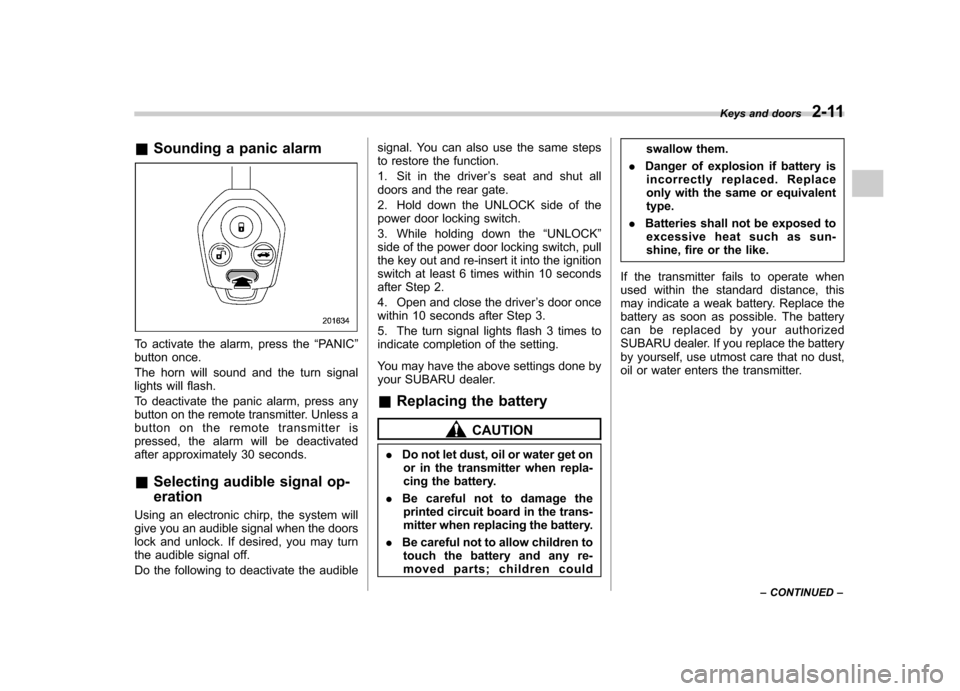
&Sounding a panic alarm
To activate the alarm, press the “PANIC ”
button once.
The horn will sound and the turn signal
lights will flash.
To deactivate the panic alarm, press any
button on the remote transmitter. Unless a
button on the remote transmitter is
pressed, the alarm will be deactivated
after approximately 30 seconds. & Selecting audible signal op- eration
Using an electronic chirp, the system will
give you an audible signal when the doors
lock and unlock. If desired, you may turn
the audible signal off.
Do the following to deactivate the audible signal. You can also use the same steps
to restore the function.
1. Sit in the driver
’s seat and shut all
doors and the rear gate.
2. Hold down the UNLOCK side of the
power door locking switch.
3. While holding down the “UNLOCK ”
side of the power door locking switch, pull
the key out and re-insert it into the ignition
switch at least 6 times within 10 seconds
after Step 2.
4. Open and close the driver ’s door once
within 10 seconds after Step 3.
5. The turn signal lights flash 3 times to
indicate completion of the setting.
You may have the above settings done by
your SUBARU dealer.
& Replacing the battery
CAUTION
. Do not let dust, oil or water get on
or in the transmitter when repla-
cing the battery.
. Be careful not to damage the
printed circuit board in the trans-
mitter when replacing the battery.
. Be careful not to allow children to
touch the battery and any re-
moved parts; children could swallow them.
. Danger of explosion if battery is
incorrectly replaced. Replace
only with the same or equivalenttype.
. Batteries shall not be exposed to
excessive heat such as sun-
shine, fire or the like.
If the transmitter fails to operate when
used within the standard distance, this
may indicate a weak battery. Replace the
battery as soon as possible. The battery
can be replaced by your authorized
SUBARU dealer. If you replace the battery
by yourself, use utmost care that no dust,
oil or water enters the transmitter. Keys and doors
2-11
– CONTINUED –