Page 175 of 384
5-10Audio
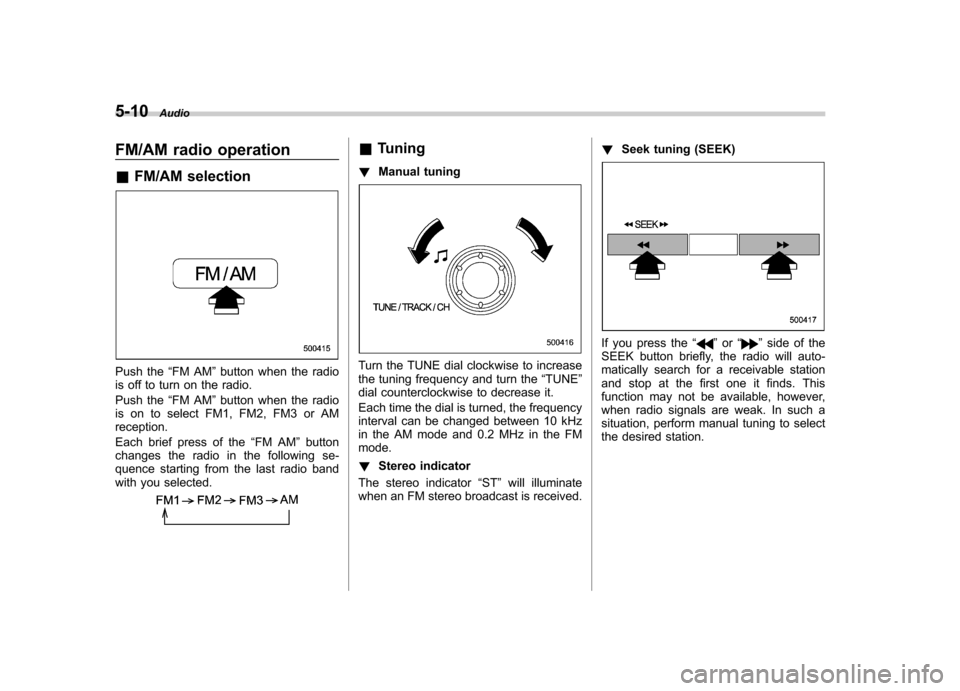
FM/AM radio operation &FM/AM selection
Push the “FM AM ”button when the radio
is off to turn on the radio.
Push the “FM AM ”button when the radio
is on to select FM1, FM2, FM3 or AM reception.
Each brief press of the “FM AM ”button
changes the radio in the following se-
quence starting from the last radio band
with you selected.
& Tuning
! Manual tuning
Turn the TUNE dial clockwise to increase
the tuning frequency and turn the “TUNE ”
dial counterclockwise to decrease it.
Each time the dial is turned, the frequency
interval can be changed between 10 kHz
in the AM mode and 0.2 MHz in the FMmode. ! Stereo indicator
The stereo indicator “ST ”will illuminate
when an FM stereo broadcast is received. !
Seek tuning (SEEK)
If you press the “”or “”side of the
SEEK button briefly, the radio will auto-
matically search for a receivable station
and stop at the first one it finds. This
function may not be available, however,
when radio signals are weak. In such a
situation, perform manual tuning to select
the desired station.
Page 176 of 384
!Scan tuning (SCAN)
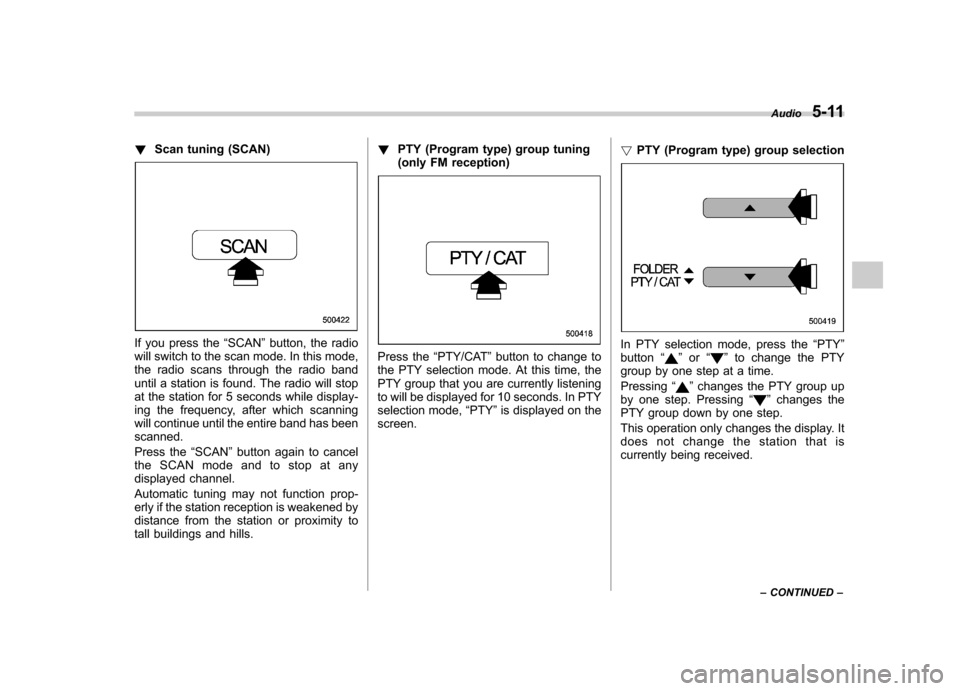
If you press the “SCAN ”button, the radio
will switch to the scan mode. In this mode,
the radio scans through the radio band
until a station is found. The radio will stop
at the station for 5 seconds while display-
ing the frequency, after which scanning
will continue until the entire band has beenscanned.
Press the “SCAN ”button again to cancel
the SCAN mode and to stop at any
displayed channel.
Automatic tuning may not function prop-
erly if the station reception is weakened by
distance from the station or proximity to
tall buildings and hills. !
PTY (Program type) group tuning
(only FM reception)
Press the “PTY/CAT ”button to change to
the PTY selection mode. At this time, the
PTY group that you are currently listening
to will be displayed for 10 seconds. In PTY
selection mode, “PTY ”is displayed on the
screen. !
PTY (Program type) group selectionIn PTY selection mode, press the “PTY ”
button “”or “”to change the PTY
group by one step at a time. Pressing “
”changes the PTY group up
by one step. Pressing “”changes the
PTY group down by one step.
This operation only changes the display. It
does not change the station that is
currently being received. Audio
5-11
– CONTINUED –
Page 180 of 384
!Skip channel selection
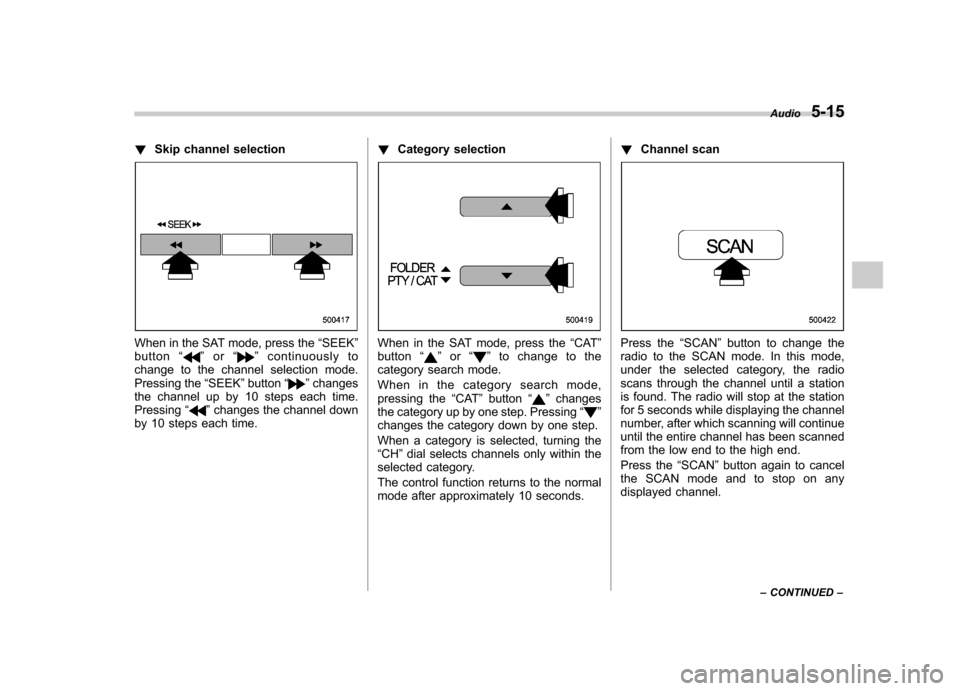
When in the SAT mode, press the “SEEK ”
button “”or “”continuously to
change to the channel selection mode.
Pressing the “SEEK ”button “
”changes
the channel up by 10 steps each time. Pressing “
”changes the channel down
by 10 steps each time. !
Category selection
When in the SAT mode, press the “CAT ”
button “”or “”to change to the
category search mode.
When in the category search mode,
pressing the “CAT ”button “
”changes
the category up by one step. Pressing “”
changes the category down by one step.
When a category is selected, turning the “ CH ”dial selects channels only within the
selected category.
The control function returns to the normal
mode after approximately 10 seconds. !
Channel scan
Press the “SCAN ”button to change the
radio to the SCAN mode. In this mode,
under the selected category, the radio
scans through the channel until a station
is found. The radio will stop at the station
for 5 seconds while displaying the channel
number, after which scanning will continue
until the entire channel has been scanned
from the low end to the high end.
Press the “SCAN ”button again to cancel
the SCAN mode and to stop on any
displayed channel. Audio
5-15
– CONTINUED –
Page 186 of 384

&Repeating
To repeat a track/file (track), briefly press the “RPT ”button while the track/file (track)
is playing.
Each time you briefly press the button, the
mode changes in the following se-quences.
Type A audio:
Type B audio:
NOTE . The “RPT ”indication refers to the
repeat playback of a single track. It
repeats the track that is playing.. The “F-RPT ”indication refers to the
repeat playback of a folder. It repeats
the all of the tracks in the folder. It is
possible to select the function when
the MP3/WMA format track is playing.. The “D-RPT ”indication refers to the
repeat playback of a disc. It repeats the
tracks on the CD. It is only possible to
select this function for type B audio.
To cancel the track/file (track) repeat-play
mode, briefly press the “RPT ”button
twice. The “RPT ”indication will turn off,
and the normal playback mode will beresumed.
NOTE
The repeat-play mode will be cancelled
if you perform any of the followingsteps: . Press the “RPT ”button and select
CANCEL . Press the “
”button
. Press the disc select button
. Press the “SCAN ”button
. Press the “LOAD ”button when
there is free space in the CD magazine. &
Random playback
To playback a track/file(s) at random,
press the “RPT ”button for 0.5 second or
longer while the track/file is playing.
Each time you press the button, the mode
changes in the following sequences.
NOTE . The “RDM ”indication refers to the
random playback of the tracks. It
randomly repeats the tracks on the
CD. It is possible to select the function
when formats other than the MP3/WMA Audio
5-21
– CONTINUED –
Page 191 of 384
5-26Audio
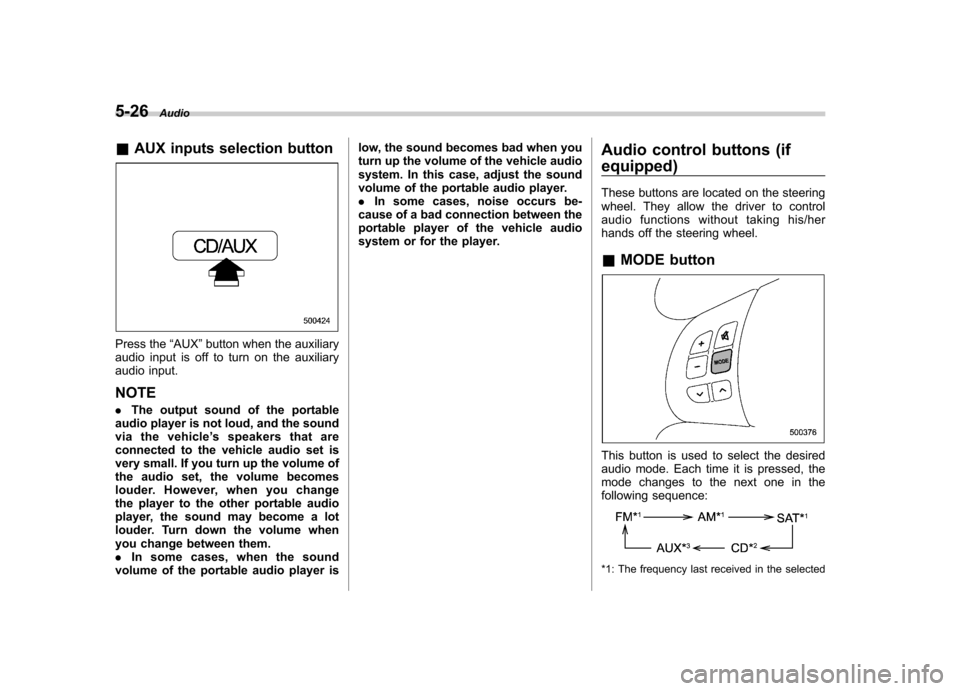
&AUX inputs selection button
Press the “AUX ”button when the auxiliary
audio input is off to turn on the auxiliary
audio input. NOTE . The output sound of the portable
audio player is not loud, and the sound
via the vehicle ’s speakers that are
connected to the vehicle audio set is
very small. If you turn up the volume of
the audio set, the volume becomes
louder. However, when you change
the player to the other portable audio
player, the sound may become a lot
louder. Turn down the volume when
you change between them.. In some cases, when the sound
volume of the portable audio player is low, the sound becomes bad when you
turn up the volume of the vehicle audio
system. In this case, adjust the sound
volume of the portable audio player..
In some cases, noise occurs be-
cause of a bad connection between the
portable player of the vehicle audio
system or for the player. Audio control buttons (if
equipped)
These buttons are located on the steering
wheel. They allow the driver to control
audio functions without taking his/her
hands off the steering wheel. &
MODE button
This button is used to select the desired
audio mode. Each time it is pressed, the
mode changes to the next one in the
following sequence:
*1: The frequency last received in the selected
Page 221 of 384
7-12Starting and operating
Pressing the brake pedal repeatedly will
toggle the feature ON or OFF each time.
7. To exit the remote transmitter and
feature programming mode, turn the igni-
tion switch to the “LOCK ”position, remove
the key from the ignition switch and test
operation of the remote transmitter(s) and
horn confirmation feature. & System maintenance
! Changing the remote control bat- teries
The two 3-volt lithium batteries (model
CR-1220) supplied in your remote control
should last approximately 3 years, de-
pending on usage. When the batteries
begin to weaken, you will notice a
decrease in range (distance from the
vehicle that your remote control operates).
Follow the instructions below to change
the remote control batteries.
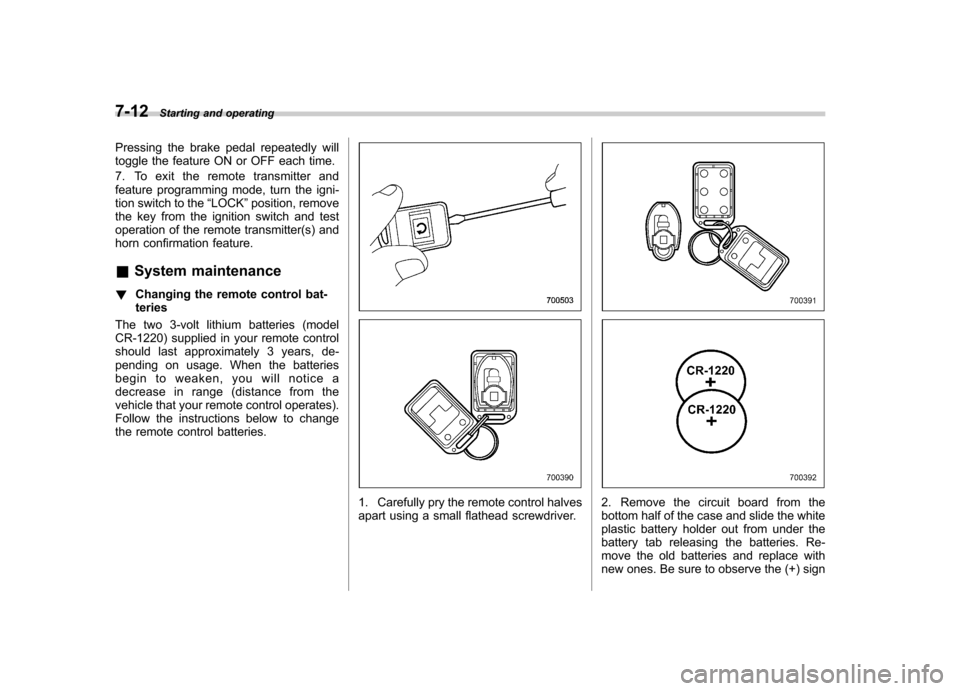
1. Carefully pry the remote control halves
apart using a small flathead screwdriver.2. Remove the circuit board from the
bottom half of the case and slide the white
plastic battery holder out from under the
battery tab releasing the batteries. Re-
move the old batteries and replace with
new ones. Be sure to observe the (+) sign
Page 245 of 384
7-36Starting and operating
only). . Shift the selector lever into the “N ”
position (AT vehicles only).. Shift the shift lever into neutral position
(MT vehicles only).The “
”indicator light on the combina-
tion meter turns off when the cruise control
is canceled.
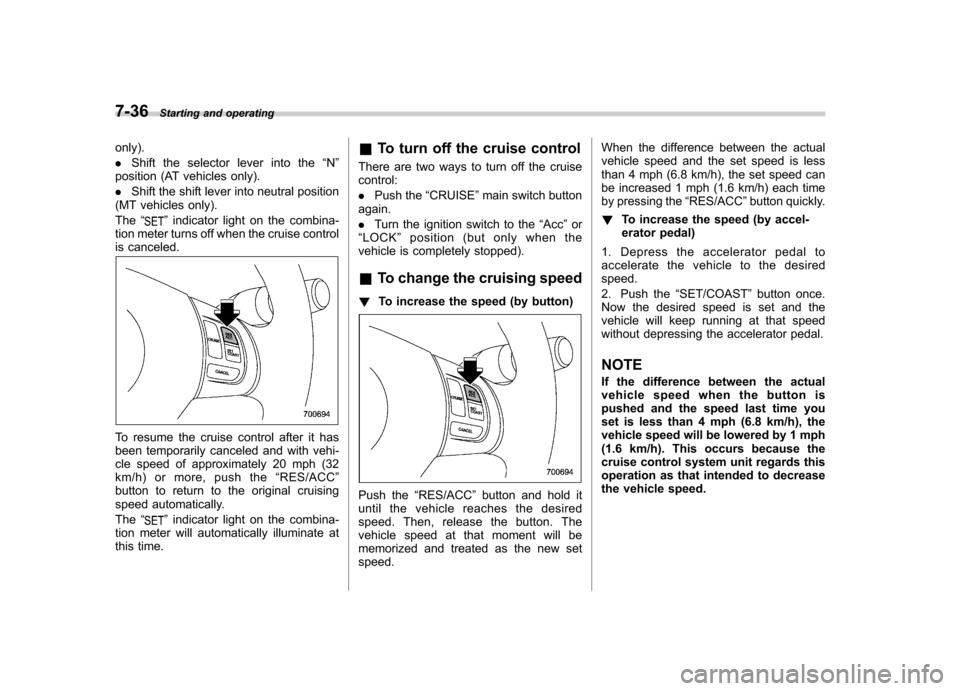
To resume the cruise control after it has
been temporarily canceled and with vehi-
cle speed of approximately 20 mph (32
km/h) or more, push the “RES/ACC ”
button to return to the original cruising
speed automatically. The “
”indicator light on the combina-
tion meter will automatically illuminate at
this time. &
To turn off the cruise control
There are two ways to turn off the cruisecontrol: . Push the “CRUISE ”main switch button
again.. Turn the ignition switch to the “Acc ”or
“ LOCK ”position (but only when the
vehicle is completely stopped). & To change the cruising speed
! To increase the speed (by button)
Push the “RES/ACC ”button and hold it
until the vehicle reaches the desired
speed. Then, release the button. The
vehicle speed at that moment will be
memorized and treated as the new setspeed. When the difference between the actual
vehicle speed and the set speed is less
than 4 mph (6.8 km/h), the set speed can
be increased 1 mph (1.6 km/h) each time
by pressing the
“RES/ACC ”button quickly.
! To increase the speed (by accel-
erator pedal)
1. Depress the accelerator pedal to
accelerate the vehicle to the desiredspeed.
2. Push the “SET/COAST ”button once.
Now the desired speed is set and the
vehicle will keep running at that speed
without depressing the accelerator pedal. NOTE
If the difference between the actual
vehicle speed when the button is
pushed and the speed last time you
set is less than 4 mph (6.8 km/h), the
vehicle speed will be lowered by 1 mph
(1.6 km/h). This occurs because the
cruise control system unit regards this
operation as that intended to decrease
the vehicle speed.
Page 264 of 384

ble.
! Total trailer weight
Total trailer weight
The total trailer weight (trailer weight plus
its cargo load) must never exceed the
maximum weight shown in the followingtable. Model Conditions
Maximum
total trailer
weight
MT models When towing a
trailer without brakes. 1,000 lbs
(453 kg)
When towing a
trailer with brakes. 2,400 lbs
(1,087 kg)
AT models When towing a
trailer without brakes. 1,000 lbs
(453 kg)
When towing a
trailer with brakes. 2,400 lbs
(1,087 kg)
When towing a
trailer on a long
uphill grade con-
tinuously for over
5 miles (8 km) with
an outside tem-
perature of 104 8F
(40 8C) or above. 1,000 lbs
(453 kg) !
Gross Vehicle Weight (GVW) and
Gross Vehicle Weight Rating(GVWR)Gross Vehicle Weight
The Gross Vehicle Weight (GVW) must
never exceed the Gross Vehicle Weight
Rating (GVWR).
Gross Vehicle Weight (GVW) is the
combined total of the weight of the vehicle,
driver, passengers, luggage, trailer hitch,
trailer tongue load and any other optional
equipment installed on your vehicle.
Therefore, the GVW changes depending
on the situation. Determine the GVW each
time before going on a trip by putting your
vehicle and trailer on a vehicle scale. Driving tips
8-17
– CONTINUED –