Page 234 of 273
DIESEL INJECTION
Fault finding – Fault Finding Chart13B
13B -234V3 MR-372-J84-13B250$855.mif
EDC16
PROGRAM No.: C1
Vdiag No.: 51
ALP7
CONTINUED
Check the connections and wiring of the injectors.
Check the connections and wiring of the engine management computer to the injectors.
Repair if necessary.
Check the high pressure circuit (external leaks) (see the end of ALP6 Fuel circuit external leaks)
Check the timing setting (and the position of the high pressure pump pinion)
Check the lower engine:
–Check the compressions using the Compression Test on the CLIP diagnostic tool or the special tool.
–Only check the engine stand if there is noise or excessive vibration when idling.
If the checks are correct, contact the Techline.
AFTER REPAIRcarry out a road test followed by a complete check with the diagnostic tool.
Page 235 of 273

DIESEL INJECTION
Fault finding – Fault Finding Chart13B
13B -235V3 MR-372-J84-13B250$855.mif
ALP8 Oil leaks from the turbocharger
NOTESBefore dealing with this customer complaint, check that there are no faults, and
the conformity (or otherwise) of the parameters and statuses using the
diagnostic tool.
If the customer complaint is not ironed out, perform the following checks:
Check the area around the turbocharger
Note:
An oil leak does not correspond always to a turbocharger fault, the oil leak can arise from the area around the
turbocharger.
According to the vehicle type, maximum visual access will either be from above or from below.
1Do not start the engine.
Check the area around the turbocharger and identify the origin of the leaks.
Clean the oil traces on the turbocharger.
2start the engine and let it warm up for several minutes.
IMPORTANT
If the air filter was removed previously, refit it before starting the engine (risks foreign matter entering the air inlet
circuit).
Accelerate with no load several times, progressively increasing the duration before releasing the accelerator pedal.
Visually inspect the exterior condition of the fuel supply pipes and the turbocharger oil return and the area around it.
Identify the origin of the leaks.
Is an oil leak present at the air compressor inlet or outlet?
YESNO
Check the air compressor inlet or outlet
Check for a loose interface (inlet or outlet) that is the cause of the air leak.
Note:
it is normal to find traces of oil inside the pipes at the turbocharger inlet or outlet as the air
passing into the compressor is laden with oil from the engine rebreathing circuit.
Is the suspected interface properly tightened?
YES NO
Replace the pipe concerned (see MR
364 (Mégane II) or 370 (Scénic II),
Mechanical systems, 12B,
turbocharging).Tighten the interface or the concerned
pipe.
End of procedure.
AFTER REPAIRCarry out a road test followed by a complete check with the diagnostic tool.
EDC16
PROGRAM No.: C1
Vdiag No.: 51
EDC16_V51_ALP8
Page 240 of 273
DIESEL INJECTION
Fault finding – Test13B
13B -240V3 MR-372-J84-13B250$900.mif
EDC16
PROGRAM No.: C1
Vdiag No.: 51DIESEL INJECTION
Fault finding – Test
EXHAUST SYSTEM CHECK
TEST1
LOW PRESSURE CIRCUIT TEST
TEST2
TURBOCHARGED AIR INLET CIRCUIT CHECK
TEST3
AIR FLOW SENSOR
TEST4
TURBOCHARGER CONTROL SOLENOID VALVE CHECK
TEST5
TURBOCHARGER
TEST6
POOR INJECTOR OPERATION
TEST8
AIR LINE AT THE TURBOCHARGER
TEST9
DIESEL FUEL CONFORMITY CHECK
TEST10
INCORRECT OPERATION OF THE OVERPRESSURE VALVE
TEST11
Page 243 of 273

DIESEL INJECTION
Fault finding – Test13B
13B -243V3 MR-372-J84-13B250$900.mif
EDC16
PROGRAM No.: C1
Vdiag No.: 51
TEST2 Low pressure circuit check
Check the fuel filter:
–Conformity of the fuel filter (correct part number and RENAULT filter).
–Positioning and amount of clogging in the filter element.
–Positioning and condition of the seals.
–If there is metal swarf in the filter:
Replace the fuel filter, bleed the circuit and continue the fault finding procedure.
Supplying the injection system with fuel from an additional tank.
This operation aims to detect possible faults in the low pressure supply system of a vehicle by replacing it entirely
with an additional tank.
Mode:
–Disconnect the diesel fuel supply pipe at the fuel filter inlet and seal it with a plug.
–Connect a pipe to the fuel filter inlet and insert the other end into a clean container which is approximately 5 litres
in volume.
–Disconnect the diesel fuel return pipe at the pump return and injector leak-off junction and seal it with a plug.
–Fill the container with clean diesel fuel.
–Start the engine and let the system drain itself of its air (there must not be any air bubbles in the return pipe).
Is the customer complaint still present?
NO
Are the low pressure circuit connections in order and
in good condition?
NO
Carry out the necessary repairs.
YESIf the low pressure circuit is in order,
reconnect the various pipes making up the
low pressure circuit and repeat the fault
finding procedure in the fault finding chart
or for the fault that referred you to this test.
YES
EDC16_V51_TEST2
Page 244 of 273
DIESEL INJECTION
Fault finding – Test13B
13B -244V3 MR-372-J84-13B250$900.mif
EDC16
PROGRAM No.: C1
Vdiag No.: 51
TEST2
CONTINUED
Check the condition of the priming bulb, and that it is working properly.
Perform repairs if necessary and continue the test.
If the fault is still present with a low fuel level, check the consistency of the actual fuel level and that indicated on
the instrument panel.
–The transfer pump is supplied via a venturi valve located beneath it.
Check that the opening of the venturi (6 to 8 mm in diameter) is not blocked by dirt contained in the fuel tank.
Check the priming of the low pressure diesel circuit.
Check the conformity of the fuel used by applying test 10 Diesel fuel conformity check.
If the diesel fuel is not correct:
–Replace the diesel fuel.
–Change the diesel filter.
–Bleed the low and high pressure diesel circuit.
Low pressure circuit correct.
END OF TEST2.
Page 257 of 273

DIESEL INJECTION
Fault finding – Test13B
13B -257V3 MR-372-J84-13B250$900.mif
EDC16
PROGRAM No.: C1
Vdiag No.: 51
TEST8 Incorrect injector operation
Section A: Fuel regulation balance check for each injector (individual correction):
–In the CLIP diagnostic tool, choose the Fuel circuit subfunction.
–With the engine idling and the fuel temperature > 50˚C, display the flow correction values of each injector
(individual correction), i.e.:
–PR364 Cylinder no. 1 fuel flow correction.
–PR405 Cylinder no. 2 fuel flow correction.
–PR406 Cylinder no. 3 fuel flow correction.
–PR365 Cylinder no. 4 fuel flow correction.
A flow correction value greater than or equal to 5 mg/st absolute value can indicate an injector fault or cylinder
sealing fault.
–If this has not already been carried out, check the injector connections and wiring.
–Check the connections and wiring of the engine management computer to the injectors.
–Repair if necessary.
–Check the IMA injector codes, comparing the IMA codes on the injectors (the IMA codes must be read from left
to right) and the IMA codes read in the CLIP diagnostic tool.
–If the IMA codes are correct, continue the fault finding procedure,
–If not, change the incorrect IMA codes using command SC002 Enter injector codes (see Interpretation of
commands).
To confirm the repair, consult part B of this test.
CASE No. 1: If at least one of the values is greater than or equal to + 5 mg/st
–Check the valve clearance.
–Check the condition of the engine and the compressions (using the Clip diagnostic tool or a compression
gauge).
–If the compression test reveals a cylinder fault, carry out the necessary repairs.
–If the compression is correct, check the fitting conformity of the injector (see MR 364 (Mégane II) or 370 (Scénic
II), 13B, Diesel injection, Diesel injector: Removal - Refitting)
In particular, check that each injector has one compression washer.
Check the fuel regulation again for each injector (individual correction).
–If not, replace the injector and check for the sealing washer. Modify the IMA code using command SC002 Enter
injector codes (see Interpretation of commands).
–Apply Part B of this test to confirm the fault finding.
CASE No. 2: If at least one of the values is less than or equal to - 5 mg/st
–Check the valve clearance.
–Check the level and condition of the engine oil.
–Remove the injector with the largest correction.
–If there is diesel fuel contamination, check the condition of the cylinder concerned (cylinder, piston, valves).
Use an endoscope if possible.
–Only replace the removed injector, and modify the IMA code using command SC002 Enter injector codes
(see Interpretation of commands).
–Apply Part B of this test to confirm the fault finding.
EDC16_V51_TEST8
Page 258 of 273
DIESEL INJECTION
Fault finding – Test13B
13B -258V3 MR-372-J84-13B250$900.mif
EDC16
PROGRAM No.: C1
Vdiag No.: 51
TEST8
CONTINUED 1
CASE No. 3: If at least one of these values does not stabilise (20 seconds after starting)
–Check the low pressure circuit with test 2 Low pressure circuit check.
–Check the conformity of the fuel used, apply test 10 Diesel fuel conformity check.
–Apply Part B of this test to confirm the fault finding procedure
CASE No. 4: If the fuel flow correction values are all correct (between - 5 mg/st and + 5 mg/st)
Apply Part C of this test (Fuel return flow measurement).
Page 259 of 273

DIESEL INJECTION
Fault finding – Test13B
13B -259V3 MR-372-J84-13B250$900.mif
TEST8
CONTINUED 2
IMPORTA NT
When removing and refitting an injector, follow the cleanliness guidelines and safety advice (seeMR 364 (Mégane
II) or 370 (Scénic II), Mechanical systems 13B, Diesel injector: Removal - R efitting).
Section B: Conf irmation of flow corre ction fault finding for each inje ctor (individua l c orre ction):
Cle ar the faultsandperform a test wi th theengine idlingfor at l east5minutes,fueltemperature>50˚C.
Ch eck th at n o fault a p p e a r s o n t heCLIPdiagnostic tooland that the corrective values do not reach±5mg/stroke
to confirm therepair.
Ifthecustomer complaint is still present and the fuel flow correction values are all between-5mg/stroke a nd + 5
mg/strok e,applyPartAFuel regulation balanc e che ck f or each injector (individual)of this test (CAS Eno. 4).
If one or more cylinders has injector flow correction values in excess of±5 mg/stroke,applyPart AFuel re gulation
ba lance c heck for each inj e c t or(individu a l ),asoneormoreadditional injectors may be defective.
Part C: Measuring fuelreturnflow
1-Fitting the tool:
Only carryout this pa rt if PR063 Fuel t empera ture is greater t han 50˚C (see step 2 of Part C of this test).
Remove the engine undertray
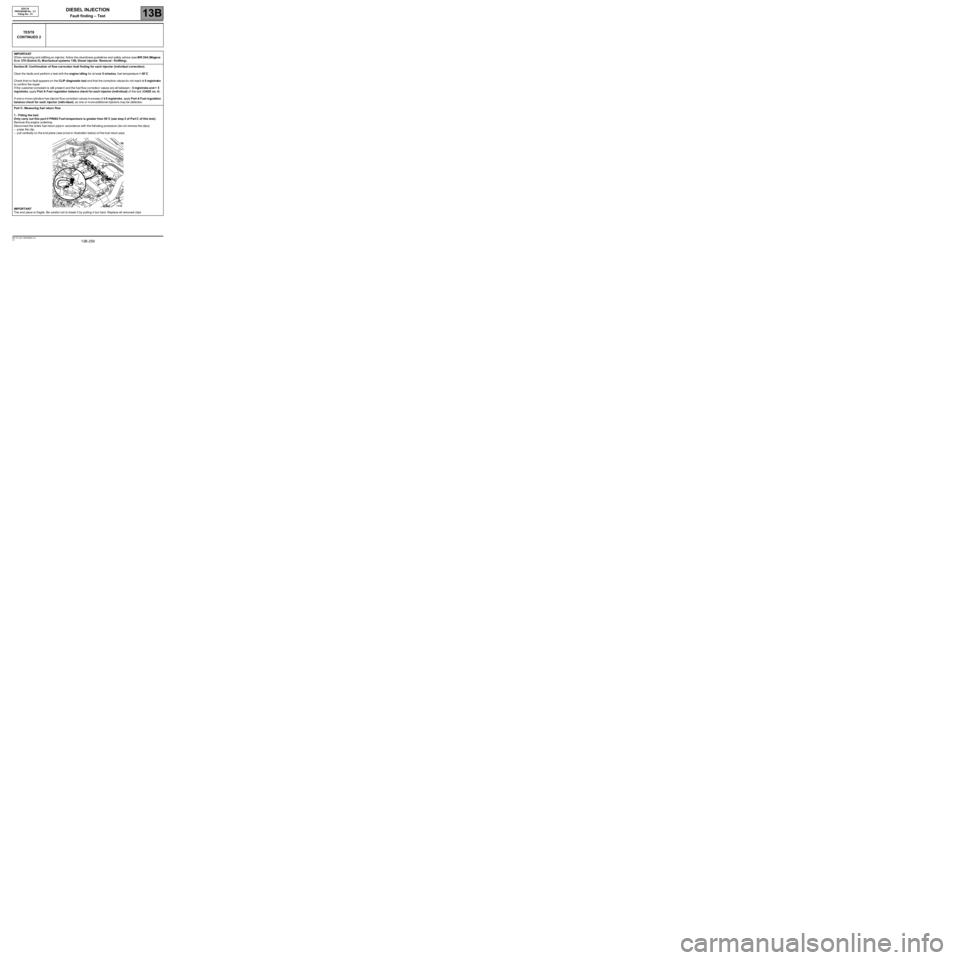
Disco nnect the entire fuel return pipe in accordance with the foll owing procedure (do not remove the clips):
–pressthe clip ,
–pullvertically on the end piece ( see arrow in i llustration below) of the fuel return pipe.
IMPORTANT
The end piece is fragile. Be careful not to break it by pulling it too hard. Replace all removed clips
EDC16
PROGRAM No.: C1
Vdiag No.: 51