Page 1072 of 4331
![NISSAN LATIO 2009 Service Repair Manual CVT-128< SERVICE INFORMATION >
[RE0F08A]
DTC P1701 TRANSMISSION CONT
ROL MODULE (POWER SUPPLY)
• 10 A fuse (No.49, located in the IPDM E/R)
• 20 A fuse (No.53, located in the IPDM E/R)
• Ignit NISSAN LATIO 2009 Service Repair Manual CVT-128< SERVICE INFORMATION >
[RE0F08A]
DTC P1701 TRANSMISSION CONT
ROL MODULE (POWER SUPPLY)
• 10 A fuse (No.49, located in the IPDM E/R)
• 20 A fuse (No.53, located in the IPDM E/R)
• Ignit](/manual-img/5/57359/w960_57359-1071.png)
CVT-128< SERVICE INFORMATION >
[RE0F08A]
DTC P1701 TRANSMISSION CONT
ROL MODULE (POWER SUPPLY)
• 10 A fuse (No.49, located in the IPDM E/R)
• 20 A fuse (No.53, located in the IPDM E/R)
• Ignition switch. Refer to PG-3 .
OK or NG OK >> GO TO 5.
NG >> Repair or replace damaged parts. 5.
CHECK TCM GROUND CIRCUIT
1. Turn ignition switch OFF.
2. Disconnect TCM connector.
3. Check continuity between TCM connector terminals and ground.
OK or NG OK >> GO TO 6.
NG >> Repair open circuit or short to ground or short to power in harness or connectors. 6.
CHECK DTC
Perform CVT-125, " DTC Confirmation Procedure " .
OK or NG OK >>
INSPECTION END
NG >> GO TO 7. 7.
CHECK TCM
1. Check TCM input/output signals. Refer to CVT-49, " TCM Terminal and Reference Value " .
2. If NG, re-check TCM pin terminals for damage or loose connection with harness connector.
OK or NG OK >>
INSPECTION END
NG >> Repair or replace damaged parts. Name Connector Terminal Continuity
Ground E32 25
Yes
48 SCIA2671E
Page 1078 of 4331
OK >> GO TO 3.
NG >> Repair or replace damaged parts. .
OK or NG OK >> GO TO 4.
NG >> Repair or replace damaged parts. Refer to EC-996, " Component Description " .
.
• The TCM pin terminals for damage or loose connection with harness connector.
OK or NG OK >> GO TO 5.
NG >> Repair or replace damaged parts. DTC Confirmation Procedure " .
OK or NG OK >>
INSPECTION END
NG >> Replace TCM or transaxle assembly. Refer to CVT-12, " Service After Replacing TCM and Tran-
saxle Assembly " ,
CVT-182, " Removal and Installation " .
Page 1079 of 4331

CVT
N
O P
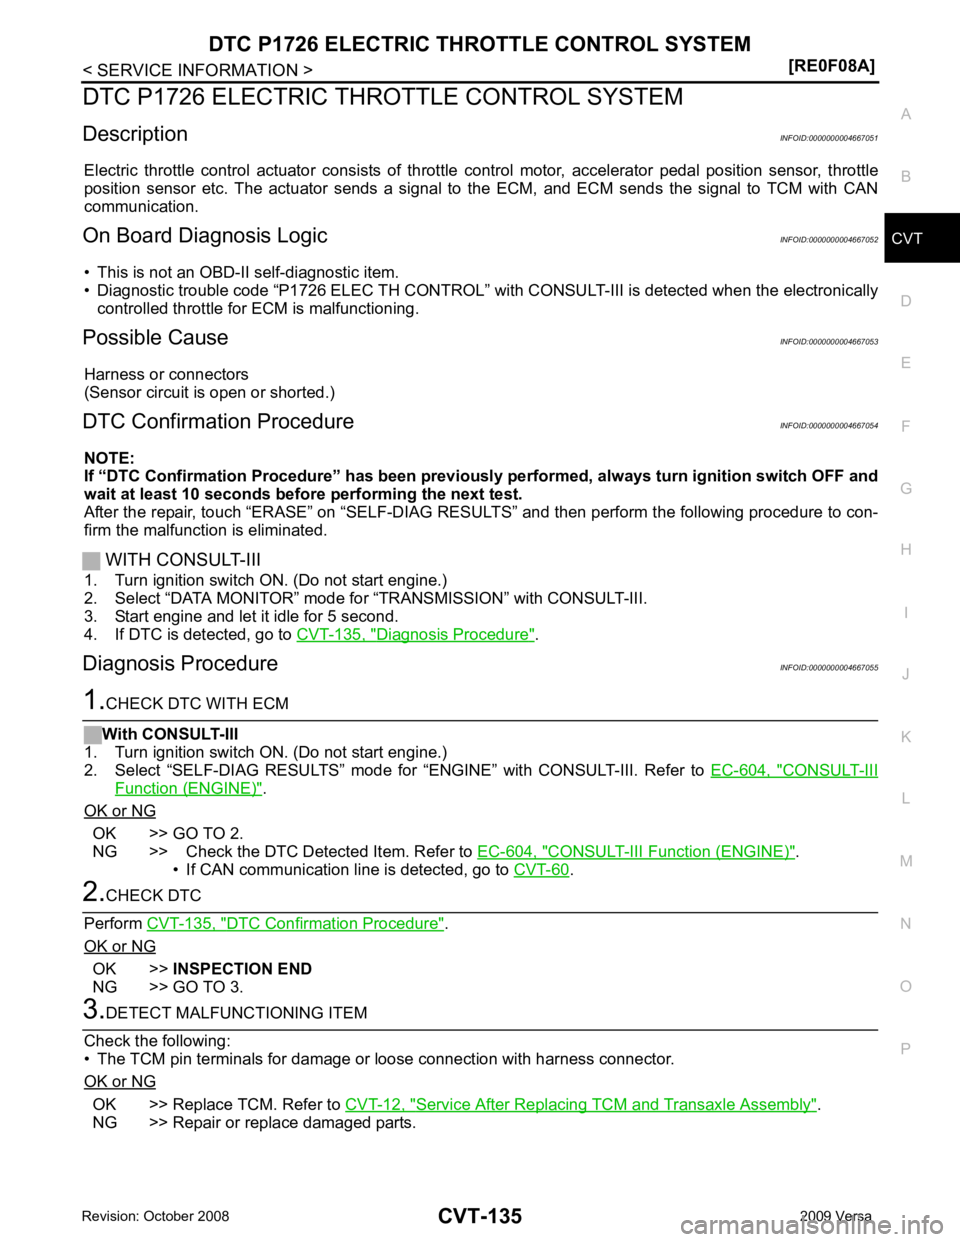
DTC P1726 ELECTRIC TH
ROTTLE CONTROL SYSTEM
Description INFOID:0000000004667051
Electric throttle control actuator consists of throttle control motor, accelerator pedal position sensor, throttle
position sensor etc. The actuator sends a signal to the ECM, and ECM sends the signal to TCM with CAN
communication.
On Board Diagnosis Logic INFOID:0000000004667052
• This is not an OBD-II self-diagnostic item.
• Diagnostic trouble code “P1726 ELEC TH CONTROL” wit h CONSULT-III is detected when the electronically
controlled throttle for ECM is malfunctioning.
Possible Cause INFOID:0000000004667053
Harness or connectors
(Sensor circuit is open or shorted.)
DTC Confirmation Procedure INFOID:0000000004667054
NOTE:
If “DTC Confirmation Procedure” has been previously performed, alw ays turn ignition switch OFF and
wait at least 10 seconds before performing the next test.
After the repair, touch “ERASE” on “SELF-DIAG RESU LTS” and then perform the following procedure to con-
firm the malfunction is eliminated.
WITH CONSULT-III
1. Turn ignition switch ON. (Do not start engine.)
2. Select “DATA MONITOR” mode for “TRANSMISSION” with CONSULT-III.
3. Start engine and let it idle for 5 second.
4. If DTC is detected, go to CVT-135, " Diagnosis Procedure " .
Diagnosis Procedure INFOID:0000000004667055 CONSULT-III
Function (ENGINE) " .
OK or NG OK >> GO TO 2.
NG >> Check the DTC Detected Item. Refer to EC-604, " CONSULT-III F
unction (ENGINE) " .
• If CAN communication line is detected, go to CVT-60 .
DTC Confirmation Procedure " .
OK or NG OK >>
INSPECTION END
NG >> GO TO 3. OK >> Replace TCM. Refer to
CVT-12, " Service After Replacing TCM and Transaxle Assembly " .
NG >> Repair or replace damaged parts.
Page 1083 of 4331

CVT
N
O P
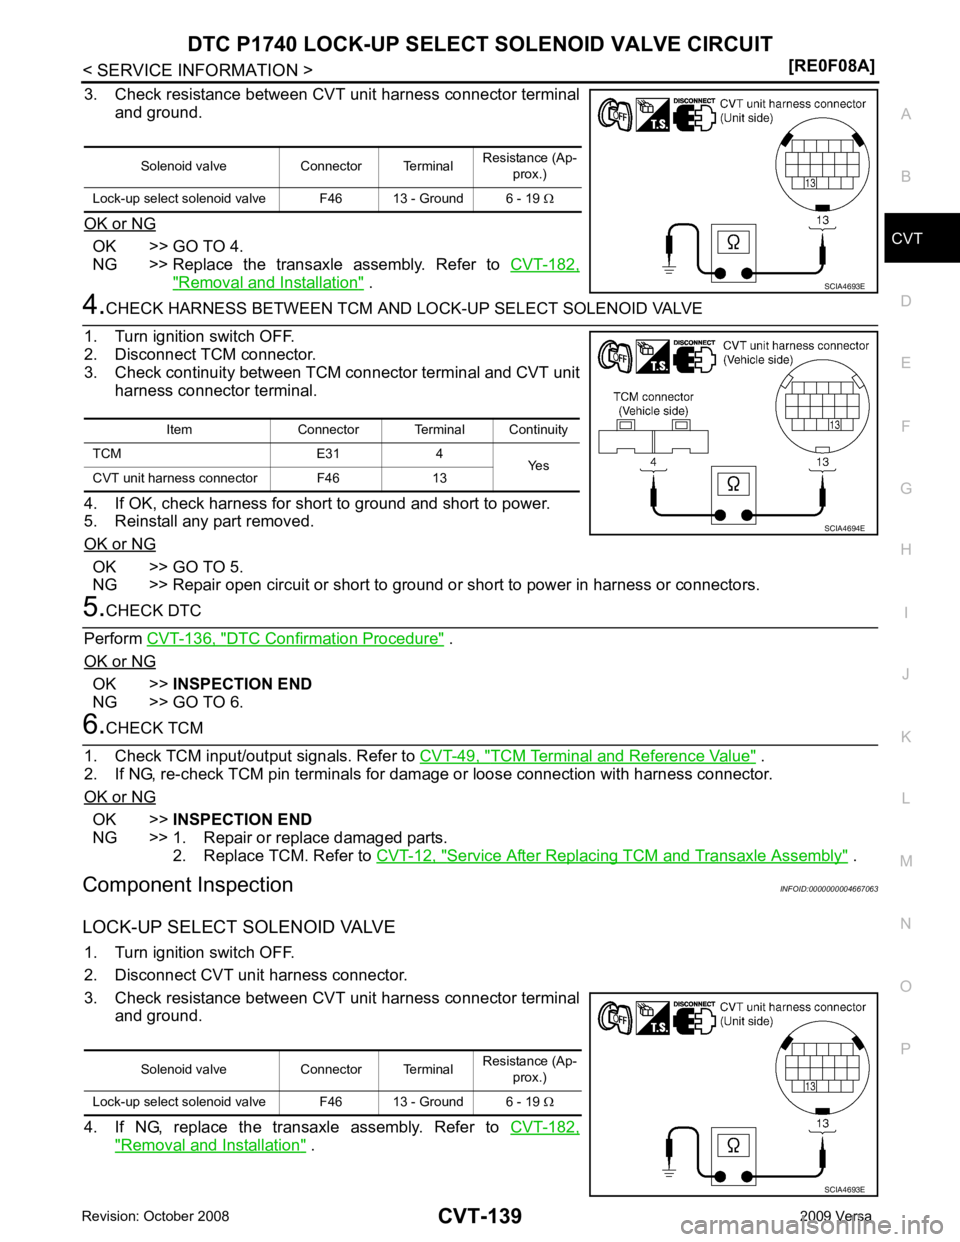
3. Check resistance between CVT unit harness connector terminal
and ground.
OK or NG OK >> GO TO 4.
NG >> Replace the transaxle assembly. Refer to CVT-182," Removal and Installation " .
OK >> GO TO 5.
NG >> Repair open circuit or short to ground or short to power in harness or connectors. DTC Confirmation Procedure " .
OK or NG OK >>
INSPECTION END
NG >> GO TO 6. TCM Terminal and Reference Value " .
2. If NG, re-check TCM pin terminals for dam age or loose connection with harness connector.
OK or NG OK >>
INSPECTION END
NG >> 1. Repair or replace damaged parts.
2. Replace TCM. Refer to CVT-12, " Service After Replacing TCM and Transaxle Assembly " .
Component Inspection INFOID:0000000004667063
LOCK-UP SELECT SOLENOID VALVE 1. Turn ignition switch OFF.
2. Disconnect CVT unit harness connector.
3. Check resistance between CVT unit harness connector terminal and ground.
4. If NG, replace the transaxle assembly. Refer to CVT-182," Removal and Installation " .
Solenoid valve Connector Terminal
Resistance (Ap-
prox.)
Lock-up select solenoid valve F46 13 - Ground 6 - 19 Ω
Page 1084 of 4331
Diagnosis Procedure " .
Diagnosis Procedure INFOID:0000000004667068OBD-II Diagnostic Trouble Code (DTC) " .
4. Turn ignition switch OFF, and wait for 10 seconds or more.
5. Start engine.
6. Confirm self-diagnostic results again. Refer to CVT-51, " CONSULT-III Function (TRANSMISSION) " .
Is the “ P1745 L/PRESS CONTROL ” displayed?
YES >> Replace TCM. Refer to
CVT-12, " Service After Replacing TCM and Transaxle Assembly " .
NO >> INSPECTION END
Page 1112 of 4331
![NISSAN LATIO 2009 Service Repair Manual CVT-168< SERVICE INFORMATION >
[RE0F08A]
CVT SHIFT LOCK SYSTEM
2. Check voltage between CVT device harness connector terminal 5 and ground.
OK or NG OK >> GO TO 9.
NG >> GO TO 6. 6.
CHECK STOP LAMP SW NISSAN LATIO 2009 Service Repair Manual CVT-168< SERVICE INFORMATION >
[RE0F08A]
CVT SHIFT LOCK SYSTEM
2. Check voltage between CVT device harness connector terminal 5 and ground.
OK or NG OK >> GO TO 9.
NG >> GO TO 6. 6.
CHECK STOP LAMP SW](/manual-img/5/57359/w960_57359-1111.png)
CVT-168< SERVICE INFORMATION >
[RE0F08A]
CVT SHIFT LOCK SYSTEM
2. Check voltage between CVT device harness connector terminal 5 and ground.
OK or NG OK >> GO TO 9.
NG >> GO TO 6. 6.
CHECK STOP LAMP SWITCH
1. Turn ignition switch OFF.
2. Disconnect stop lamp switch harness connector.
3. Check continuity between stop lamp switch harness connector
terminals 3 and 4.
Check stop lamp switch after adjusting brake pedal. Refer to
BR-6 .
OK or NG OK >> GO TO 7.
NG >> Repair or replace damaged parts. 7.
DETECT MALFUNCTIONING ITEM
Check the following. If any items are damaged, repair or replace damaged parts.
• Harness for short or open between ignition switch and stop lamp switch harness connector
• Harness for short or open between stop lamp switch harness connector and CVT device harness connector
• 10A fuse [No.3, located in the fuse block (J/B)]
• Ignition switch, Refer to PG-3 .
OK or NG OK >>
INSPECTION END
NG >> Repair or replace damaged parts. 8.
CHECK GROUND CIRCUIT
1. Turn ignition switch OFF.
2. Disconnect CVT device harness connector.
3. Check continuity between CVT device harness connector termi- nal 6 and ground.
4. Connect CVT device harness connector.
OK or NG OK >> Replace shift lock solenoid and park position switch
assembly.
NG >> Repair open circuit or short to ground or short to power in harness or connectors. 9.
CHECK GROUND CIRCUIT
1. Turn ignition switch OFF.
2. Disconnect CVT device harness connector. Voltage:
Brake pedal depressed: Battery voltage
Brake pedal released: 0V SCIA7935E
Condition Continuity
When brake pedal is depressed Yes
When brake pedal is released No SCIA2126E
Continuity should exist.
SCIA7936E
Page 1114 of 4331
CVT-170< SERVICE INFORMATION >
[RE0F08A]
TRANSMISSION CONTROL MODULE
TRANSMISSION CONTROL MODULE
Removal and Installation INFOID:0000000004667103
COMPONENTS
REMOVAL
1. Disconnect the battery negative terminal.
2. Disconnect the TCM harness connector (1) from the TCM (2). • Instrument lower finisher (3)
3. Remove the TCM (2).
INSTALLATION
Installation is in the reverse order of removal. 1. TCM SCIA6963E
SCIA7167E
Page 1115 of 4331
SHIFT CONTROL SYSTEM
CVT-171
< SERVICE INFORMATION >
[RE0F08A] D
E
F
G H
I
J
K L
M A
B CVT
N
O P
SHIFT CONTROL SYSTEM
Removal and Installation INFOID:0000000004667108
CONTROL DEVICE COMPONENTS
CONTROL CABLE COMPONENTS Refer to the figure below for control cable removal and installation procedure. 1. Selector lever knob 2. Knob cover 3. Lock pin
4. Overdrive control switch 5. Knob finisher 6. Selector button
7. Selector button return spring 8. Position indicator plate 9. Position lamp
10. Dust cover 11. Bracket 12. Shift lock solenoid and park position switch assembly
13. CVT device harness connector 14. Plate 15. Control device assembly WCIA0638E