2009 MITSUBISHI ASX stop start
[x] Cancel search: stop startPage 231 of 368

iPod control panel and display
E007562000941- AM/FM button
2-
CD (Mode change) button
3- PWR (On-Off) button
4- DISP (Title display) button
5- PAGE (Title scroll) button
6- RPT (Repeat) button
7- RDM (Random) button
8- (Fast-reverse) button
9- (Fast-forward) button
10-
i (iPod) indicator
11- TRACK indicator
12- RPT/RDM/D-RDM indicator
13- DISC UP button
14- FOLDER switch
15- TRACK (Track up/down) button
To play from an iPod E00756300170
1. Press
the PWR button to turn on the audio sys-
tem. The system turns on in the last mode used.
2. Connect your iPod to the USB input terminal. Refer to “How to connect an iPod” on page
5-57. 3. Press
the CD button several times to switch
to the iPod mode. The input mode changes ev-
ery time the CD button is pressed.
CD mode → iPod mode → Bluetooth ®
mode*
NOTE l If your vehicle is equipped with audio input
RCA terminals, pressing and holding the CD
button for 2 seconds or more switches the sys-
tem to the AUX mode.
4. Once the device is selected, playback starts and “i” appears on the display.
NOTE l Depending on the condition of your iPod, it
may take a longer time before the playback
starts.
5. To stop the playback, press the AM/FM but- ton or CD button to switch to a different mode.
NOTE l Buttons on the iPod are disabled while the
iPod is connected to the audio system.
l To adjust the volume and tone, refer to “To
adjust the volume” on page 5-11 and “To ad-
just the tone” on page 5-11.
To fast-forward/reverse the track E00756400083
To fast-forward/reverse the current track, press the button or button.Fast-forward
To
fast-forward the current track, press the but-
ton.
While the button is pressed, the track will be fast-
forwarded.
Fast-reverse
To fast-reverse the current track, press the but-
ton.
While the button is pressed, the track will be fast-
reversed.
To select a desired track E00756500068
Press the TRACK button to select the desired track
number.
Press : The track number increases by
one.
Press : The track number decreases by
one.
Press for a
long
period (ap-
prox. 2 seconds
or more) : The track number increases con-
tinuously while the button is
pressed.
Press for a
long
period (ap-
prox. 2 seconds
or more) : The track number decreases con-
tinuously while the button is
pressed.
If the side of the button is pressed once while a
track
is playing, playback returns to the start of that
track.
NOTE
l Every time the track selection button is press-
ed, the track number in the display changes. For pleasant driving
5-23 5
Page 235 of 368
NOTE
l If
the confirmation function is active, the
voice guide confirms if the genre is correct.
If the genre is correct, say “Yes”. If not, say
“No”. After the voice guide says “Genre not
found, please try again,” the system returns
to step 2.
Refer to “Confirmation function setting” on
page 5-43.
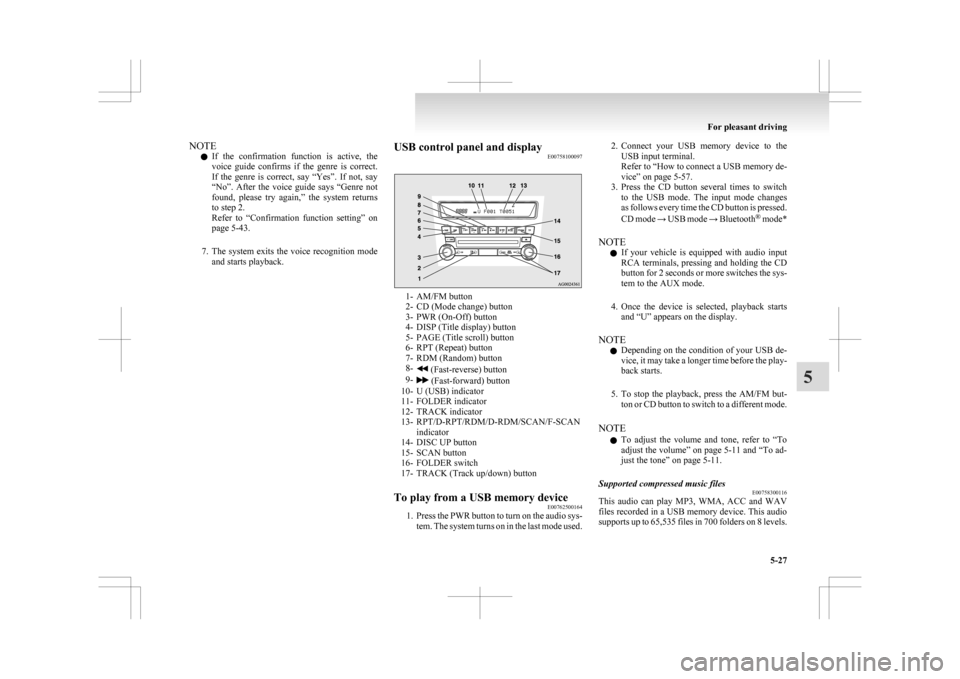
7. The system exits the voice recognition mode and starts playback. USB control panel and display
E00758100097 1- AM/FM button
2-
CD (Mode change) button
3- PWR (On-Off) button
4- DISP (Title display) button
5- PAGE (Title scroll) button
6- RPT (Repeat) button
7- RDM (Random) button
8- (Fast-reverse) button
9- (Fast-forward) button
10-
U (USB) indicator
11- FOLDER indicator
12- TRACK indicator
13- RPT/D-RPT/RDM/D-RDM/SCAN/F-SCAN indicator
14- DISC UP button
15- SCAN button
16- FOLDER switch
17- TRACK (Track up/down) button
To play from a USB memory device E00762500164
1. Press
the PWR button to turn on the audio sys-
tem. The system turns on in the last mode used. 2. Connect
your USB memory device to the
USB input terminal.
Refer to “How to connect a USB memory de-
vice” on page 5-57.
3. Press the CD button several times to switch to the USB mode. The input mode changes
as follows every time the CD button is pressed.
CD mode → USB mode → Bluetooth ®
mode*
NOTE l If your vehicle is equipped with audio input
RCA terminals, pressing and holding the CD
button for 2 seconds or more switches the sys-
tem to the AUX mode.
4. Once the device is selected, playback starts and “U” appears on the display.
NOTE l Depending on the condition of your USB de-
vice, it may take a longer time before the play-
back starts.
5. To stop the playback, press the AM/FM but- ton or CD button to switch to a different mode.
NOTE l To adjust the volume and tone, refer to “To
adjust the volume” on page 5-11 and “To ad-
just the tone” on page 5-11.
Supported compressed music files E00758300116
This audio can play MP3, WMA, ACC and WAV
files
recorded in a USB memory device. This audio
supports up to 65,535 files in 700 folders on 8 levels. For pleasant driving
5-27 5
Page 239 of 368
changes as follows every time the CD button
is pressed.
CD
mode → USB (iPod) mode → Blue-
tooth ®
mode
NOTE l For vehicles equipped with audio input RCA
terminals, pressing and holding the CD but-
ton for 2 seconds or more switches the sys-
tem to the AUX mode.
3. Connect your Bluetooth ®
device.
Refer to “Connecting the Bluetooth® 2.0 in-
terface and Bluetooth® device” on page
5-46.
4. Playback starts automatically.
To stop the playback (if supported by the device) E00762800040
To stop the playback, press the DISC DOWN button.
To restart the playback, press the DISC UP button.
To pause the playback (if supported by the device) E00762900054
To pause the playback, press the DISC DOWN but-
ton.
To restart the playback, press the DISC UP button.
To select a track (if supported by the device) E00763000052
Press the TRACK button to select the desired track
number. Press : The track number increases by
one.
Press : The track number decreases by
one.
Press for a
long period
(approx. 2 sec-
onds or more) : The track number increases
continuously while the button
is pressed.
Press for a
long period
(approx. 2 sec-
onds or more) : The track number decreases
continuouslywhile the button
is pressed.
If the side of the button is pressed once while a
track
is playing, playback returns to the start of that
track.
NOTE
l Every time the track selection button is press-
ed, the track number in the display changes.
To play the same track repeatedly (if supported by
the device) E00763100053
Press the RPT button during playback to show
“RPT” in the display.
To exit this mode, press the button again.
To play tracks in random order (if supported by
the device) E00763200054
Press the RDM button to show “RDM” in the dis-
play.
The
system randomly selects and plays tracks from
all tracks in the Bluetooth ®
device.
To exit this mode, press the button again. To find the start of each track for playback (if sup-
ported by the device)
E00763300042
Press
the SCAN button. “SCAN” is shown in the
display and all tracks in the Bluetooth ®
device are
played for approximately 10 seconds from the be-
ginning.
To exit this mode, press the button again.
To switch the display (if supported by the device) E00763400056
The system can display tag information.
1. Press
and hold the DISP button until you
hear a beep to show “TAG” in the display.
2. The display changes as follows every time the DISP button is pressed briefly:
Album title → Title name → Artist name →
Genre → Normal display
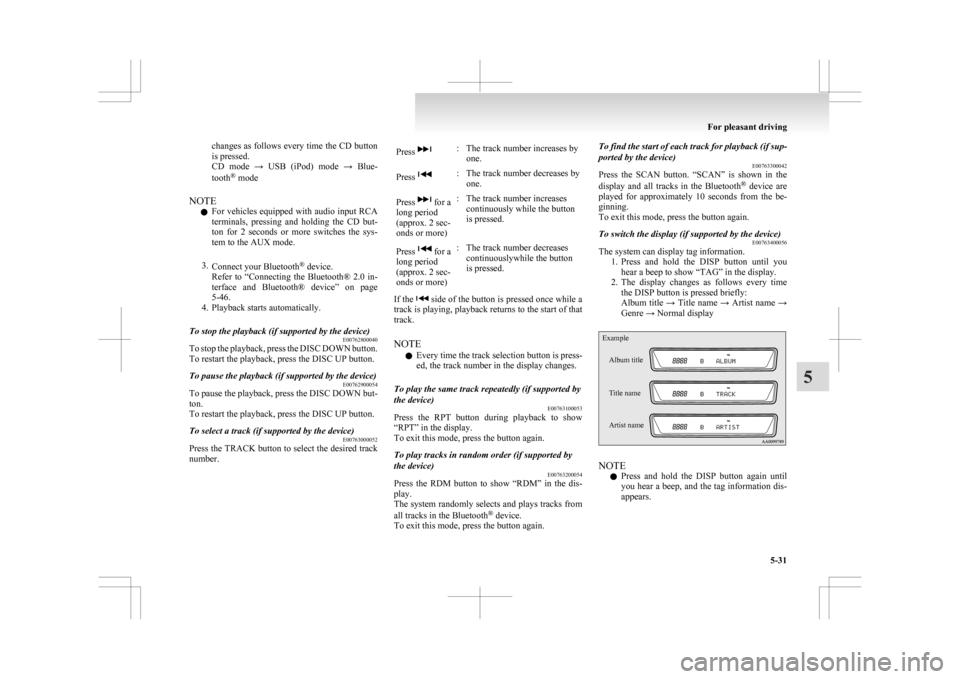
Example
Album title
Title name
Artist name NOTE
l Press
and hold the DISP button again until
you hear a beep, and the tag information dis-
appears. For pleasant driving
5-31 5
Page 246 of 368

Handling of compact discs
E00723000425
l Use
only the type of compact discs that have
the mark shown in the illustration below.
(Playback of CD-R or CD-RW discs may
cause problems.) l
The use of special shaped, damaged compact
discs (like cracked discs) or low-quality com-
pact discs (like warped discs or burrs on the
discs) such as those shown will damage the
CD player. l
In
the following circumstances, moisture can
form on discs and inside the audio system,
preventing normal operation. • When there is high humidity (for exam-ple, when it is raining). • When
the temperature suddenly rises,
such as right after the heater is turned on
in cold weather.
In this case, wait until the moisture has
had time to dry out.
l When the CD player is subjected to violent vi-
brations, such as during off-road driving, the
tracking may not work.
l When storing compact discs, always store
them in their separate cases. Never place com-
pact discs in direct sunlight, or in any place
where the temperature or humidity is high.
l Never touch the flat surface of the disc with-
out a label. This will damage the disc surface
and could affect the sound quality. When han-
dling a compact disc, always hold it by the
outer edge and the centre hole.
l To clean a disc, use a soft, clean, dry cloth.
Wipe directly from the centre hole towards
the outer edge. Do not wipe in a circle. Nev-
er use any chemicals such as benzine, paint
thinner, a disc spray cleaner, or an anti-static
agent on the disc.
l Do not use a ball point pen, felt pen, pencil,
etc. to write on the label surface of the disc.
l Do not put additional labels or stickers on
compact discs.
Also, do not use any compact disc on which
a label or sticker has started to peel off or
any compact disc that has stickiness or other
contamination left by a peeled-off label or
sticker. If you use such a compact disc, the
CD player may stop working properly and
you may not be able to eject the compact disc. For pleasant driving
5-38
5
Page 253 of 368
5. When the disabling of the password is
completed, the voice guide will say “Pass-
word is disabled” and the system will re-
turn to the main menu.
Speaker enrollment function E00727400238
The Bluetooth ®
2.0 interface can use the speaker en-
rollment function to create a voice model for one
person per language.
This makes it easier for the Bluetooth ®
2.0 inter-
face to recognise voice commands said by you.
You can turn a voice model registered with the
speaker enrollment function on and off whenever
you want.
Speaker enrollment E00727500200
It takes about 2 to 3 minutes to complete the speak-
er enrollment process.
To
ensure the best results, run through the process
while in the driver’s seat, in an environment that is
as quiet as possible (when there is no rain or strong
winds and the vehicle windows are closed). Please
turn off your phone while in speaker enrollment to
prevent interruption of the process.
Use the following procedure for speaker enrollment. 1. Stop your vehicle in a safe area, put the gear-shift lever in the “N” (Neutral) position
(M/T), or the selector lever in the “P”
(PARK) position (CVT), and pull the park-
ing brake lever.
NOTE l Speaker enrollment is not possible unless the
vehicle is parked. Make sure you park the ve-
hicle in a safe area before attempting speaker
enrollment. 2. Press the SPEECH button.
3.
Say “Voice training”.
4. The voice guide will say “This operation must be performed in a quiet environment
while the vehicle is stopped. See the owner’s
manual for the list of required training phra-
ses. Press and release the SPEECH button
when you are ready to begin. Press the HANG-
UP button to cancel at any time”.
Press the SPEECH button to start the speaker
enrollment process.
NOTE l If you do not start the speaker enrollment proc-
ess within 3 minutes of pressing the
SPEECH button, the speaker enrollment func-
tion will time out.
The voice guide will say “Speaker Enroll-
ment has timed out”. The system will then
beep and the voice recognition mode will be
deactivated.
5. The voice guide will prompt for phrase 1. Re- peat the corresponding phrase listed in table
“Enrollment commands” on page 5-56.
The system will register your voice and then
move on to the registration of the next com-
mand. Continue the process until all phrases
have been registered.
NOTE l To repeat the most recent voice training com-
mand, press and release the SPEECH button.
l If you press the HANG-UP button anytime
during the process, the system will beep and
stop the speaker enrollment process. 6. When all enrollment commands have been
read out, the voice guide will say “Speaker
enrollment is complete”.
The system will then end the speaker enroll-
ment process and return to the main menu.
NOTE l Completing the speaker enrollment process
will turn on the voice model automatically.
l The commands “Help” and “Cancel” will not
work in this mode.
Enabling and disabling the voice model and re-
training E00727600100
You can turn a voice model registered with the
speaker
enrollment function on and off whenever
you want.
You can also retrain the system.
Use the following procedure to perform these ac-
tions. 1. Press the SPEECH button.
2. Say “Voice training”.
3. If you have completed a speaker enrollmentprocess once already, the voice guide will
say either “Enrollment is enabled. Would
you like to disable or retrain?” or “Enroll-
ment is disabled. Would you like to enable
or retrain?”
4. When enrollment is “enabled”, the voice mod- el is on; when enrollment is “disabled”, the
voice model is off. Say the command that
fits your needs.
Say “Retrain” to start the speaker enrollment
process and recreate a new voice model. (Re-
fer to “Speaker enrollment” on page 5-45.) For pleasant driving
5-45 5
Page 254 of 368
Connecting the Bluetooth
®
2.0 inter-
face and Bluetooth ®
device
E00760600073
Before
you can make or receive hands-free calls or
play music using the Bluetooth ®
2.0 interface func-
tion, you must pair the Bluetooth ®
device and Blue-
tooth ®
2.0 interface.
NOTE l Pairing is required only when the device is
used for the first time. Once the device has
been paired with the Bluetooth ®
2.0 inter-
face, you only need to bring the device into
the vehicle next time and the device will au-
tomatically connect to the Bluetooth ®
2.0 in-
terface (if supported by the device). The de-
vice must have Bluetooth ®
turned ON to con-
nect.
Up to 7 Bluetooth ®
devices can be paired with the
Bluetooth ®
2.0 interface.
If multiple paired Bluetooth ®
devices are available
in the vehicle, the cellular phone or music player
most recently connected is automatically connected
to the Bluetooth ®
2.0 interface.
You can also change a Bluetooth ®
device to be con-
nected.
To pair
To pair a Bluetooth ®
device with the Bluetooth ®
2.0 interface, follow the steps below. 1. Stop your vehicle in a safe area, put the gear-shift lever in the “N” (Neutral) position
(M/T) or the selector lever in the “P”
(PARK) position (CVT) and pull the parking
brake lever. NOTE
l You
cannot pair Bluetooth ®
devices with the
Bluetooth ®
2.0 interface unless the vehicle is
parked. Before paring a Bluetooth ®
device
with the Bluetooth ®
2.0 interface, confirm
that the vehicle is parked in a safe location.
2. Press the SPEECH button.
3. Say “Setup”.
4. Say “Pairing options.”
5. The voice guide will say “Select one of the following: pair, edit, delete, or list.” Say
“Pair.”
NOTE l If 7 devices have already been paired, the
voice guide will say “Maximum devices
paired” and then the system will end the pair-
ing process. To register a new device, delete
one device and then repeat the pairing process.
(Refer to “Selecting a device: Deleting a de-
vice” on page 5-47.)
6. The voice guide will say “Please say a 4-dig- it pairing code.” Say a 4-digit number.
When the confirmation function is on, the sys-
tem will confirm whether the number said is
acceptable. Answer “Yes.”
Answer “No” to return to pairing code selec-
tion.
NOTE l Some Bluetooth ®
devices require a specific
pairing code.
Please refer to the device manual for pairing
code requirements. l
The pairing code entered here is only used
for the Bluetooth ®
connection certification.
It is any 4-digit number the user would like
to select.
Remember the pairing code as it needs to be
keyed into the Bluetooth ®
device later in the
pairing process.
Depending on the connection settings of the
Bluetooth ®
device, this code may have to be
entered each time you connect the Blue-
tooth ®
device to the Bluetooth ®
2.0 inter-
face. For the default connection settings, re-
fer to the instructions for the device.
7. The voice guide will say “Start pairing proce- dure on the device. See the device manual
for instructions.” Enter in the Bluetooth ®
de-
vice the 4-digit number you have registered
in Step 6.
NOTE l If the Bluetooth ®
2.0 interface cannot recog-
nize the Bluetooth ®
device, the voice guide
will say “Pairing has timed out” and the pair-
ing process will be cancelled.
Confirm that the device you are pairing sup-
ports Bluetooth ®
, and try pairing it again.
l If you enter the wrong number, the voice
guide will say “Pairing failed” and the pair-
ing process will be cancelled.
Confirm the number is right, and try pairing
it again.
8. The voice guide will say “Please say the name of the device after the beep.” You can
assign a desired name for the Bluetooth ®
de- For pleasant driving
5-46
5
Page 258 of 368
l
If the name you selected has matching data
in the mobile phone book but no telephone
number is registered under the selected loca-
tion, the voice guide will say “{home/work/
mobile/other} not found for
you like to try again?”
Answer “Yes,” and the system will return to
Step 3.
Answer “No,” and the call will be cancelled.
Start over again from Step 1.
6. The voice guide will say “Calling
telephone number.
NOTE l When the confirmation function is on, the sys-
tem will ask if the name and location of the
receiver are correct.
If the name is correct, answer “Yes.”
If you want to change the name or location to
call, answer “No.” The system will return to
Step 3.
Redialing
You can redial the last number called, based on the
history of dialed calls in the paired cellular phone.
Use the following procedure to redial. 1. Press the SPEECH button.
2. Say “Redial.”
SEND function E00761300035
During a call, press the SPEECH button to enter
voice
recognition mode, then say “
SEND” to generate DTMF tones. For example, if during a call you need to simulate
the
press of a phone button as a response to an auto-
mated system, press the SPEECH button and speak
“1 2 3 4 pound SEND” and the 1234# will be sent
on your cellular phone.
Receiving calls E00761600025
If an incoming phone call is received while the ig-
nition
switch or the operation mode is in ON or
ACC, the audio system will be automatically
turned on and switched to the incoming call, even
when the audio system was originally off.
The voice guide announcement for the incoming
call will be output from the front passenger’s seat
speaker.
If the CD player or radio was playing when the in-
coming call was received, the audio system will
mute the sound from the CD player or radio and out-
put only the incoming call.
To receive the call, press the PICK-UP button on
the steering wheel control switch.
When the call is over, the audio system will return
to its previous state.
MUTE function E00760300054
At any time during a call, you can mute the vehicle
microphone.
Pressing
the SPEECH button and then saying
“Mute” during a call will turn ON the MUTE func-
tion and mute the microphone.
Saying “Mute off” in the same way will turn off
the MUTE function and cancel the mute on the mi-
crophone. Switching between hands-free mode and private
mode
E00761400036
The
Bluetooth ®
2.0 interface can switch between
Hands-free mode (Hands-free calls) and private
mode (calls using cellular phone).
If you press the SPEECH button and say “Transfer
call” during a Hands-free call, you can stop the
Hands-free mode and talk in private mode.
To return to Hands-free mode, press the SPEECH
button again and say “Transfer call”.
Phone book function E00763700020
The Bluetooth ®
2.0 interface has 2 types of unique
phone books that are different from the phone book
stored in the cellular phone. They are the vehicle
phone book and the mobile phone book.
These phone books are used to register telephone
numbers and to make calls to desired numbers via
the voice recognition function.
NOTE
l Disconnecting the battery cable will not de-
lete information registered in the phone book.
Vehicle phone book E00763800050
This phone book is used when making calls with
the voice recognition function.
Up
to 32 names can be registered in the vehicle
phone book per language.
Also, each entry has 4 locations associated with:
home, work, mobile and other. You can register
one telephone number for each location.
You can register a desired name as a name for any
phone book entry registered in the vehicle phone
book. For pleasant driving
5-50
5
Page 280 of 368
If the vehicle breaks down
E00800101108
If
the vehicle breaks down on the road, move it to
the shoulder and turn on the hazard warning flash-
ers and set up a warning triangle, flashing lamp, etc.
Refer to “Hazard warning flasher switch” on page
3-50.
If the engine stops/fails
Vehicle operation and control are affected if the en-
gine stops.
Before moving the vehicle to a safe area, be aware
of the following:
l The brake booster becomes inoperative and
the pedal effort will increase. Press down the
brake pedal harder than usual.
l Since the power steering system is no longer
operative, the steering wheel feels heavy
when turning it. Emergency starting
E00800502503
If
the engine cannot be started because the battery
is weak or dead, the battery from another vehicle
can be used with jumper cables to start the engine. WARNING
l To
start the engine using jumper cables
connected to another vehicle, perform the
correct procedures according to the in-
struction below. Incorrect procedures
could result in a fire or explosion or dam-
age to the vehicles. CAUTION
l
Do
not attempt to start the engine by pull-
ing or pushing the vehicle.
It could damage your vehicle.
l Always wear protective eye goggles when
working near the battery.
l Keep the battery out of the reach of chil-
dren.
1. Get
the vehicles close enough so the jumper cables can reach, but be sure the vehicles
aren’t touching each other. CAUTION
l
Check
the other vehicle. It must have a 12-
volt battery.
If the other system isn’t 12-volt, shorting
can damage both vehicles. 2. Turn
off all lamps, heater and other electrical
loads.
3. Set the parking brake firmly on each vehicle. Put an A/T, CVT in “P” (PARK) or a M/T in
“N” (Neutral).
4. Turn the ignition switch to the “LOCK” posi- tion or put the operation mode in OFF. WARNING
l Perform
step 4 on both vehicles before-
hand.
Make sure that the cables or your clothes
cannot be caught by the fan or drive belt.
Personal injury could result.
5. Make
sure battery electrolyte is at the proper level.
Refer to “Battery” on page 8-08. WARNING
l If
electrolyte fluid is not visible, or ap-
pears to be frozen, Do Not Attempt Jump
Starting!
A battery might rupture or explode if the
temperature is below the freezing point
or if it is not filled to the proper level.
6. Connect
one end of one jumper cable to the positive (+) terminal of the discharged bat-
tery (A), and the other end to the positive (+)
terminal of the booster battery (B).
For emergencies
6-02
6