2009 MITSUBISHI ASX wheel
[x] Cancel search: wheelPage 127 of 368

Screen type 1 Screen type 2 Cause Solution (Reference)
–– l
There is a fault in the steering
wheel lock. l
Immediately stop the vehicle in a
safe place.
We recommend you to consult a
MITSUBISHI MOTORS Au-
thorized Service Point.
–– l
There
is a fault in the electrical
system. l
Immediately stop the vehicle in a
safe place.
We recommend you to consult a
MITSUBISHI MOTORS Au-
thorized Service Point. l
The engine is overheated.
lStop
the vehicle in a safe place
and take corrective measures.
Refer to “Engine overheating”
on page 6-04. l
The
automatic transmission
(CVT) fluid temperature is too
high. Refer to “Automatic transmission IN-
VECS-III Sports Mode 6CVT (Intelli-
gent & Innovative Vehicle Electronic
Control System III)” on page 4-24. l
You
turned the ignition switch to
the “ON” position or put the op-
eration mode in ON without fas-
tening your seat belt. l
Fasten your seat belt properly. Re-
fer to “Seat belt warning” on
page 2-11. Instruments and controls
3-33 3
Page 151 of 368

Rear window demister switch
E00507901186
The
rear window demister switch can be operated
when the engine is running.
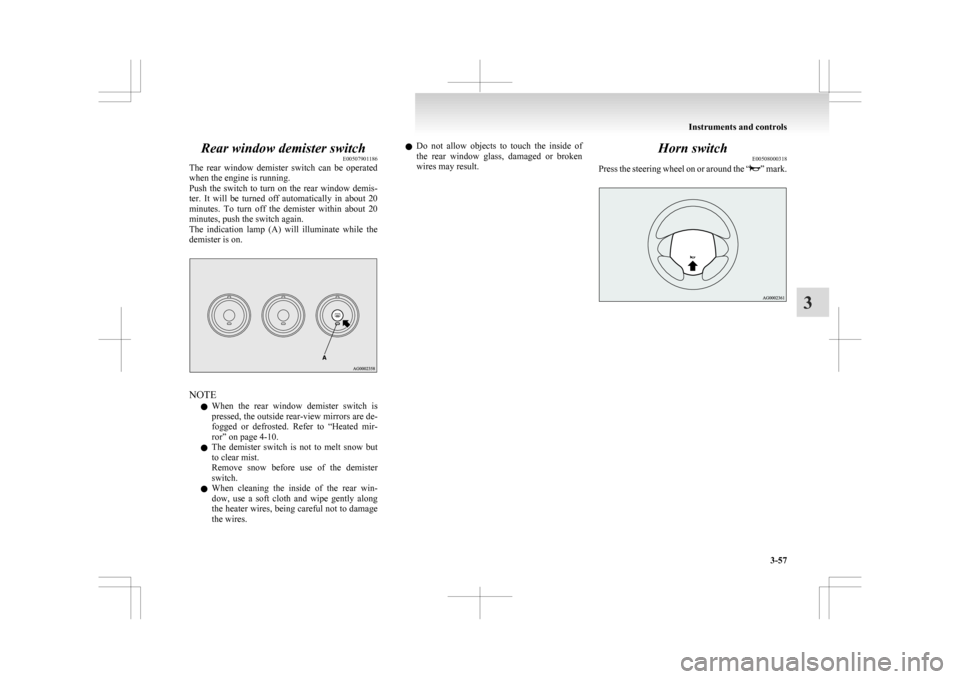
Push the switch to turn on the rear window demis-
ter. It will be turned off automatically in about 20
minutes. To turn off the demister within about 20
minutes, push the switch again.
The indication lamp (A) will illuminate while the
demister is on. NOTE
l When
the rear window demister switch is
pressed, the outside rear-view mirrors are de-
fogged or defrosted. Refer to “Heated mir-
ror” on page 4-10.
l The demister switch is not to melt snow but
to clear mist.
Remove snow before use of the demister
switch.
l When cleaning the inside of the rear win-
dow, use a soft cloth and wipe gently along
the heater wires, being careful not to damage
the wires. l
Do
not allow objects to touch the inside of
the rear window glass, damaged or broken
wires may result. Horn switch
E00508000318
Press
the steering wheel on or around the “ ”
mark.Instruments and controls
3-57 3
Page 153 of 368

Economical driving.......................................................................4-02
Driving, alcohol and drugs
........................................................... 4-02
Safe driving techniques ................................................................ 4-03
Running-in recommendations
.......................................................4-04
Parking brake................................................................................ 4-06
Parking.......................................................................................... 4-07
Steering wheel height and reach adjustment ................................4-08
Inside rear-view mirror ................................................................. 4-08
Outside rear-view mirrors ............................................................. 4-09
Ignition switch .............................................................................. 4-11
Steering wheel lock ...................................................................... 4-12
Starting..........................................................................................4-13
Diesel particulate filter (DPF)* .................................................... 4-15
Turbocharger operation* .............................................................. 4-16
Auto Stop & Go (AS&G) system*............................................... 4-17
Manual transmission* ................................................................... 4-21
Automatic transmission INVECS-III Sports Mode 6CVT (Intelligent & Innovative Vehicle Electronic
Control System III)*................................................................. 4-24
Electronically controlled 4WD system* .......................................4-29
4-wheel drive operation ................................................................ 4-31
Inspection and maintenance following rough road oper- ation.......................................................................................... 4-33
Cautions on handling of 4-wheel drive vehicles ..........................4-33
Braking......................................................................................... 4-34
Hill start assist* ............................................................................ 4-35
Brake assist system....................................................................... 4-36
Emergency stop signal system ...................................................... 4-37
Anti-lock brake system (ABS) ..................................................... 4-38
Electric power steering system (EPS) ..........................................4-40 Active stability control (ASC)*
.................................................... 4-40
Cruise control* ............................................................................. 4-43
Reversing sensor system*............................................................. 4-47
Rear-view camera* ....................................................................... 4-50
Cargo loads................................................................................... 4-52
Trailer towing ............................................................................... 4-54Starting and driving
4
Page 158 of 368

Parking brake
E00600501243
To
park the vehicle, first bring it to a complete
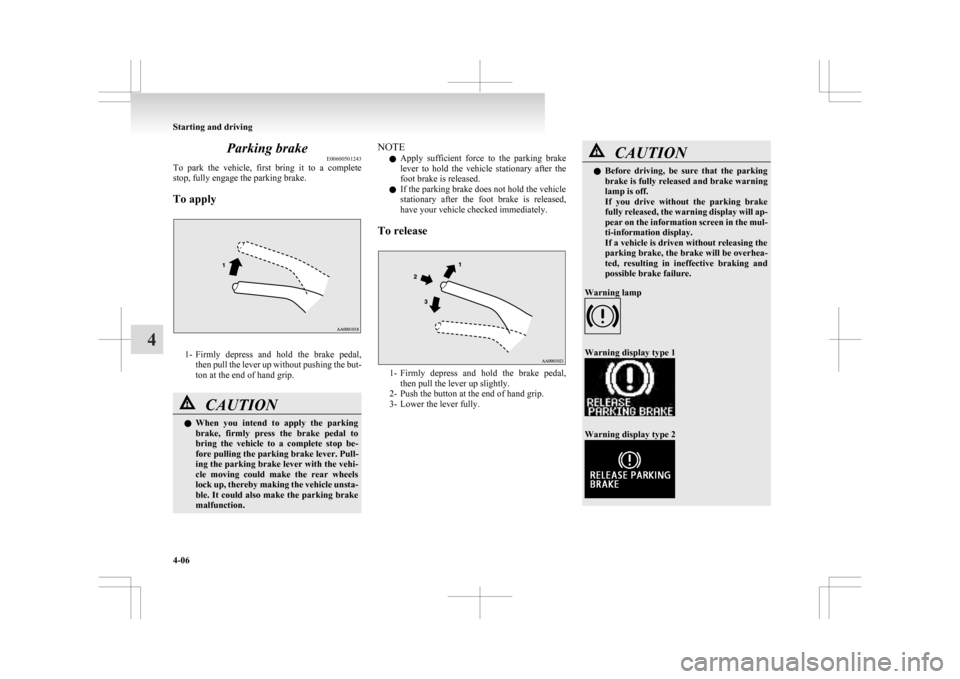
stop, fully engage the parking brake.
To apply 1- Firmly
depress and hold the brake pedal,
then pull the lever up without pushing the but-
ton at the end of hand grip. CAUTION
l
When
you intend to apply the parking
brake, firmly press the brake pedal to
bring the vehicle to a complete stop be-
fore pulling the parking brake lever. Pull-
ing the parking brake lever with the vehi-
cle moving could make the rear wheels
lock up, thereby making the vehicle unsta-
ble. It could also make the parking brake
malfunction. NOTE
l Apply
sufficient force to the parking brake
lever to hold the vehicle stationary after the
foot brake is released.
l If the parking brake does not hold the vehicle
stationary after the foot brake is released,
have your vehicle checked immediately.
To release 1- Firmly
depress and hold the brake pedal,
then pull the lever up slightly.
2- Push the button at the end of hand grip.
3- Lower the lever fully. CAUTION
l
Before
driving, be sure that the parking
brake is fully released and brake warning
lamp is off.
If you drive without the parking brake
fully released, the warning display will ap-
pear on the information screen in the mul-
ti-information display.
If a vehicle is driven without releasing the
parking brake, the brake will be overhea-
ted, resulting in ineffective braking and
possible brake failure.
Warning lamp Warning display type 1
Warning display type 2Starting and driving
4-06
4
Page 159 of 368

Parking
E00600601505
To
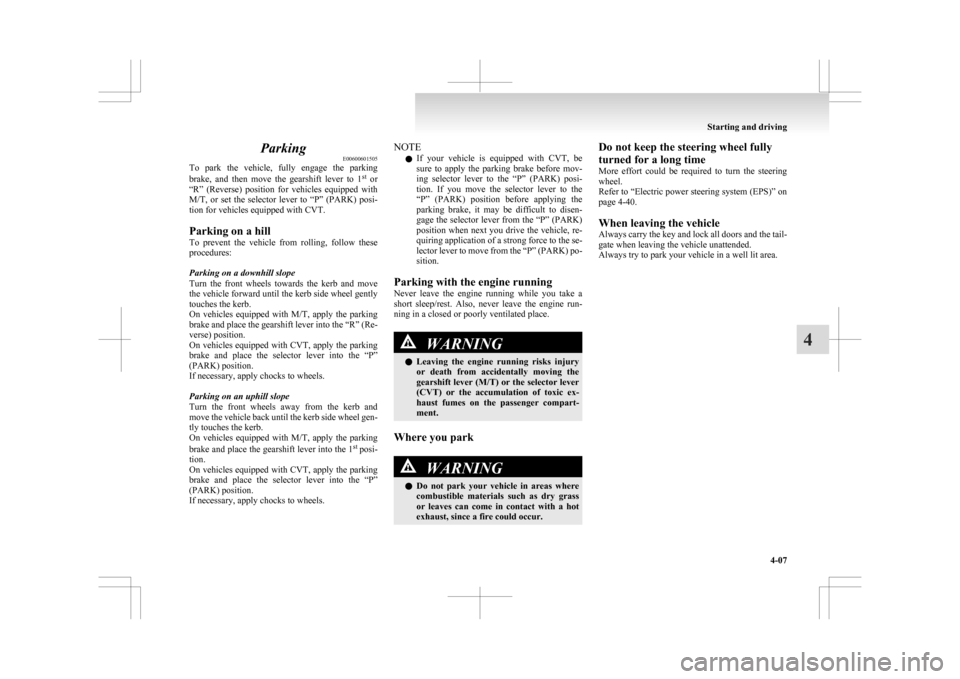
park the vehicle, fully engage the parking
brake, and then move the gearshift lever to 1 st
or
“R” (Reverse) position for vehicles equipped with
M/T, or set the selector lever to “P” (PARK) posi-
tion for vehicles equipped with CVT.
Parking on a hill
To prevent the vehicle from rolling, follow these
procedures:
Parking on a downhill slope
Turn the front wheels towards the kerb and move
the vehicle forward until the kerb side wheel gently
touches the kerb.
On vehicles equipped with M/T, apply the parking
brake and place the gearshift lever into the “R” (Re-
verse) position.
On vehicles equipped with CVT, apply the parking
brake and place the selector lever into the “P”
(PARK) position.
If necessary, apply chocks to wheels.
Parking on an uphill slope
Turn the front wheels away from the kerb and
move the vehicle back until the kerb side wheel gen-
tly touches the kerb.
On vehicles equipped with M/T, apply the parking
brake and place the gearshift lever into the 1 st
posi-
tion.
On vehicles equipped with CVT, apply the parking
brake and place the selector lever into the “P”
(PARK) position.
If necessary, apply chocks to wheels. NOTE
l If
your vehicle is equipped with CVT, be
sure to apply the parking brake before mov-
ing selector lever to the “P” (PARK) posi-
tion. If you move the selector lever to the
“P” (PARK) position before applying the
parking brake, it may be difficult to disen-
gage the selector lever from the “P” (PARK)
position when next you drive the vehicle, re-
quiring application of a strong force to the se-
lector lever to move from the “P” (PARK) po-
sition.
Parking with the engine running
Never leave the engine running while you take a
short sleep/rest. Also, never leave the engine run-
ning in a closed or poorly ventilated place. WARNING
l Leaving
the engine running risks injury
or death from accidentally moving the
gearshift lever (M/T) or the selector lever
(CVT) or the accumulation of toxic ex-
haust fumes on the passenger compart-
ment.
Where you park WARNING
l Do
not park your vehicle in areas where
combustible materials such as dry grass
or leaves can come in contact with a hot
exhaust, since a fire could occur. Do not keep the steering wheel fully
turned for a long time
More
effort could be required to turn the steering
wheel.
Refer to “Electric power steering system (EPS)” on
page 4-40.
When leaving the vehicle
Always carry the key and lock all doors and the tail-
gate when leaving the vehicle unattended.
Always try to park your vehicle in a well lit area. Starting and driving
4-07 4
Page 160 of 368

Steering wheel height and reach
adjustment E00600700512
1. Release
the lever while holding the steering
wheel up.
2. Adjust the steering wheel to the desired posi- tion.
3. Securely lock the steering wheel by pulling the lever fully upward. A- Locked
B-
Release WARNING
l Do
not attempt to adjust the steering
wheel while you are driving the vehicle. Inside rear-view mirror
E00600800366
Adjust
the rear-view mirror only after making any
seat adjustments so you have a clear view to the
rear of the vehicle. WARNING
l Do
not attempt to adjust the rear-view
mirror while driving. This can be danger-
ous.
Always adjust the mirror before driving.
Adjust the rear-view mirror to maximize the view
through the rear window.
To adjust the vertical mirror position
It
is possible to move the mirror up and down to ad-
just its position. To reduce the glare
The
lever (A) at the bottom of the mirror can be
used to adjust the mirror to reduce the glare from
the headlamps of vehicles behind you during night
driving. 1- Normal
2-
Anti-glare Starting and driving
4-08
4
Page 163 of 368
![MITSUBISHI ASX 2009 1.G Owners Manual The heater will be turned off automatically in about
20 minutes.
Ignition switch
E00601401845
[For
vehicles equipped with keyless op-
eration system]
For information on operations for vehicles MITSUBISHI ASX 2009 1.G Owners Manual The heater will be turned off automatically in about
20 minutes.
Ignition switch
E00601401845
[For
vehicles equipped with keyless op-
eration system]
For information on operations for vehicles](/manual-img/19/7566/w960_7566-162.png)
The heater will be turned off automatically in about
20 minutes.
Ignition switch
E00601401845
[For
vehicles equipped with keyless op-
eration system]
For information on operations for vehicles equip-
ped with the keyless operation system, refer to
“Keyless operation system: Engine switch” on
page 1-11.
[Except for vehicles equipped with key-
less operation system] LOCK
The
engine is stopped and the steering wheel
locked. The key can only be inserted and removed
in this position.
ACC
The engine is stopped, but the audio system and oth-
er electric devices can be operated.
ON
The engine is running, and all the vehicle’s electri-
cal devices can be operated. START
The
starter motor operates. After the engine has star-
ted, release the key and it will automatically return
to the “ON” position.
NOTE
l Your vehicle is equipped with an electronic
immobilizer.
To start the engine, the ID code transmitted
by the transponder inside the key must match
the code registered in the immobilizer com-
puter.
Refer to “Electronic immobilizer (Anti-theft
starting system)” on page 1-03.
ACC power auto-cutout function E00620300165
After about 30 minutes has elapsed with the igni-
tion
switch in the “ACC” position, the function au-
tomatically cuts out the power for the audio system
and other electric devices that can be operated with
that position.
When the ignition switch is turned from the “ACC”
position, the power is supplied again to those devi-
ces.
NOTE
l It is possible to modify functions as follows:
• The time until the power cuts out can bechanged to about 60 minutes.
• The ACC power auto-cutout function can be deactivated.
For details, we recommend you to consult a
MITSUBISHI MOTORS Authorized Service
Point.
On vehicles equipped with MITSUBISHI
Multi-Communication System (MMCS), Starting and driving
4-11 4
Page 164 of 368

screen operations can be used to make the ad-
justment.
Refer
to the separate owner’s manual for de-
tails.
To remove the key E00620400326
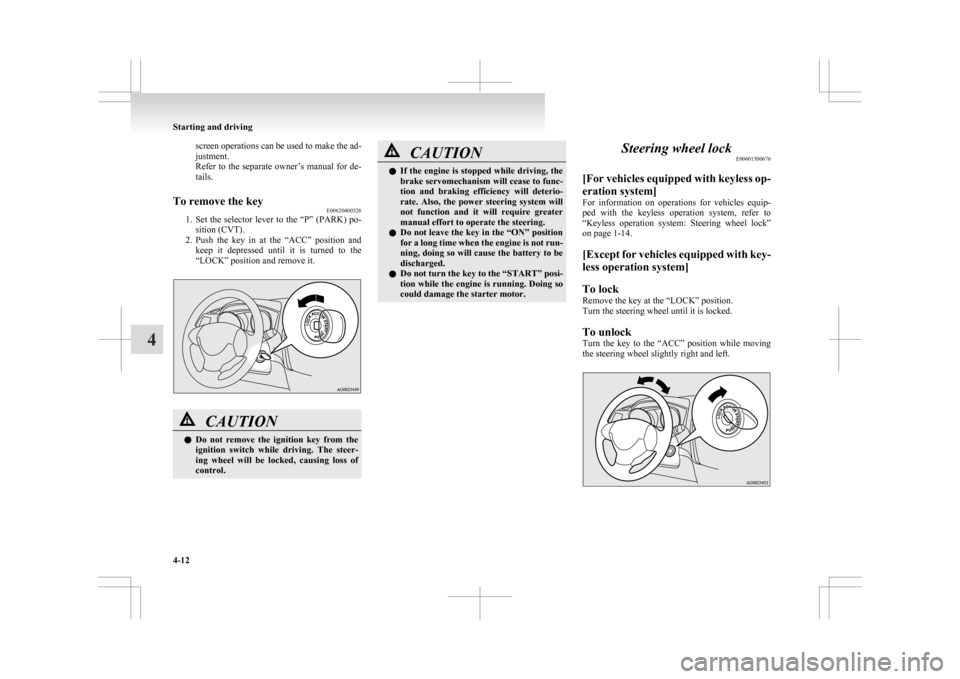
1. Set
the selector lever to the “P” (PARK) po-
sition (CVT).
2. Push the key in at the “ACC” position and keep it depressed until it is turned to the
“LOCK” position and remove it. CAUTION
l
Do
not remove the ignition key from the
ignition switch while driving. The steer-
ing wheel will be locked, causing loss of
control. CAUTION
l
If
the engine is stopped while driving, the
brake servomechanism will cease to func-
tion and braking efficiency will deterio-
rate. Also, the power steering system will
not function and it will require greater
manual effort to operate the steering.
l Do not leave the key in the “ON” position
for a long time when the engine is not run-
ning, doing so will cause the battery to be
discharged.
l Do not turn the key to the “START” posi-
tion while the engine is running. Doing so
could damage the starter motor. Steering wheel lock
E00601500676
[For
vehicles equipped with keyless op-
eration system]
For information on operations for vehicles equip-
ped with the keyless operation system, refer to
“Keyless operation system: Steering wheel lock”
on page 1-14.
[Except for vehicles equipped with key-
less operation system]
To lock
Remove the key at the “LOCK” position.
Turn the steering wheel until it is locked.
To unlock
Turn the key to the “ACC” position while moving
the steering wheel slightly right and left. Starting and driving
4-12
4