2009 MITSUBISHI ASX key battery
[x] Cancel search: key batteryPage 42 of 368

Each time the door and tailgate unlock function is
set,
a chime will sound to tell you the condition of
the door and tailgate unlock function. Number of
chimes Condition
One chime All doors and the tailgate unlock
Two chimes Driver’s door unlock only 1. Put the operation mode in OFF.
2. Place
the combination headlamps and dipper
switch in the “OFF” position, and leave the
driver’s door open.
3. Press and hold the LOCK switch (1) for 4 to 10 seconds and then also press the UNLOCK
switch (2) during this time.
4. Release in sequence the LOCK and UN- LOCK switches within 10 seconds of press-
ing the LOCK switch in step 3.
NOTE l On vehicles equipped with MITSUBISHI
Multi-Communication System (MMCS),
screen operations can be used to make the ad-
justment. Refer to the separate owner’s man-
ual for details.
Procedure for replacing the remote control switch
battery E00309600061
1. With
the MITSUBISHI mark facing you, in-
sert the cloth-covered tip of a straight blade (or minus) screwdriver into the notch in the
case and use it to open the case.
NOTE
l Be
sure to perform the procedure with the
MITSUBISHI mark facing you. If the
MITSUBISHI mark is not facing you when
you open the case, the transmitter may come
out.
2. Remove the old battery.
3. Install a new battery with the + side (A) up.
+ side
- side
Coin type battery
CR2032 4. Close the case firmly.
5. Check
the keyless operation function to see
that it works.
NOTE l You may purchase a replacement battery at
an electric appliance store.
l A MITSUBISHI MOTORS Authorized Serv-
ice Point can replace the battery for you if
you prefer. CAUTION
l
When
the remote control switch case is
opened, be careful to keep water, dust,
etc. out. Also, do not touch the internal
components. Locking and unlocking
1-20
1
Page 50 of 368
Security alarm system*
E00301500569
The
security alarm system is for alerting the sur-
rounding area of suspicious behaviour to prevent un-
lawful entry into the vehicle by operating an alarm
if a door, the tailgate or the bonnet is opened when
the vehicle has not been unlocked using the keyless
entry system or the keyless operation function.
Also, the alarm will be activated if any of the fol-
lowing occur.
l Attempt an unlawful moving of the vehicle.
(the vehicle inclination detection function)
l Detect a motion in the vehicle. (the interior
intrusion detection function)
l Disconnect the battery terminal.
The security alarm system is set to “active”.
When making changes to the settings, please fol-
low the procedure listed in the section titled “Chang-
ing the security alarm settings” on page 1-29.
On vehicles equipped with MITSUBISHI Multi-
Communication System (MMCS), screen opera-
tions can be used to make the adjustment. Refer to
the separate owner’s manual for details. CAUTION
l
Do
not modify or add parts to the securi-
ty alarm system.
Doing so could cause the security alarm
to malfunction. NOTE
l The
alarm system will not be activated if the
doors and the tailgate have been locked using
a key, the inside lock knob or the central
door lock switch (instead of the keyless entry
system or the keyless operation function).
l If the turn-signal lamps do not blink after the
locking and unlocking operation using the
keyless entry system or the keyless operation
function, the security alarm system may be
malfunctioning.
Have the vehicle inspected at a
MITSUBISHI MOTORS Authorized Service
Point.
If the confirmation function (blinking of the
turn-signal lamps by locking and unlocking
the doors and the tailgate) is deactivated, the
turn-signal lamps do not blink after the lock-
ing and unlocking operation.
For information on the confirmation func-
tion, refer to “Keyless entry system” on pa-
ges 1-04, 1-18 and “To operate using the key-
less operation function” on page 1-09.
l The security alarm system could be activated
in the following situations.
• Using a car wash
• Taking the vehicle on a ferry
• Parking in an automated car park
• Leaving someone or a pet in the vehicle
• Leaving a window open
• Leaving an unstable object such as a stuf-fed toy or accessory in the vehicle
• Suffering a continuous impact or vibra- tion by hail, thunder, etc.
According to the situations, deactivate the ve-
hicle inclination detection function and the in-
terior intrusion detection function. Refer to “To
deactivate the vehicle inclina-
tion detection function and the interior intru-
sion detection function” on page 1-31.
l The sensitivity of the interior intrusion detec-
tion function can be adjusted. For details,
please contact a MITSUBISHI MOTORS Au-
thorized Service Point.
The security alarm has four modes:
System preparation mode (approx. 20 seconds)
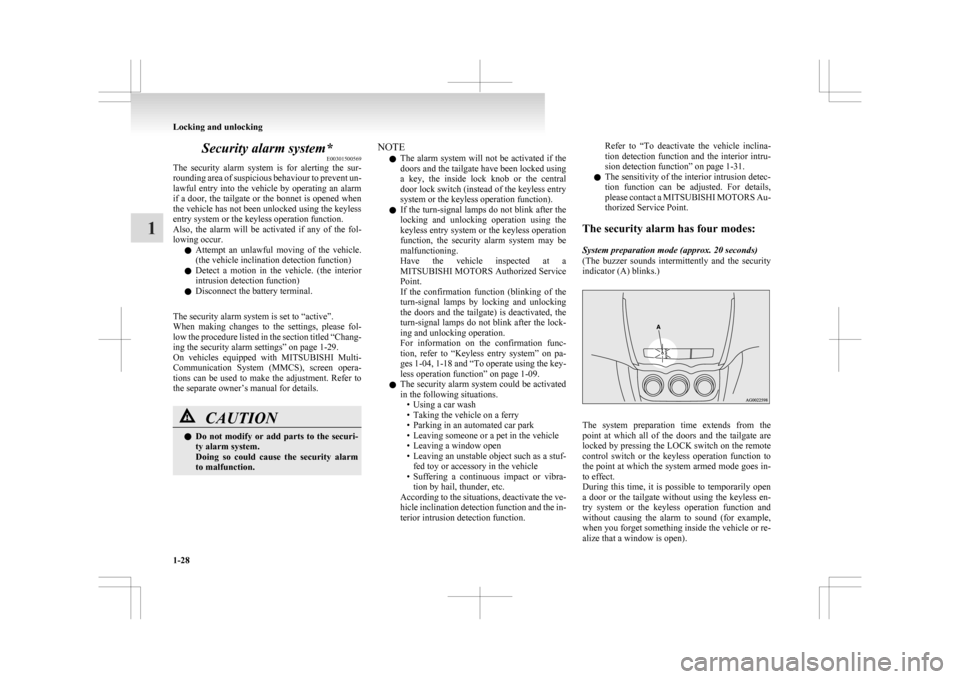
(The buzzer sounds intermittently and the security
indicator (A) blinks.) The system preparation time extends from the
point
at which all of the doors and the tailgate are
locked by pressing the LOCK switch on the remote
control switch or the keyless operation function to
the point at which the system armed mode goes in-
to effect.
During this time, it is possible to temporarily open
a door or the tailgate without using the keyless en-
try system or the keyless operation function and
without causing the alarm to sound (for example,
when you forget something inside the vehicle or re-
alize that a window is open). Locking and unlocking
1-28
1
Page 54 of 368
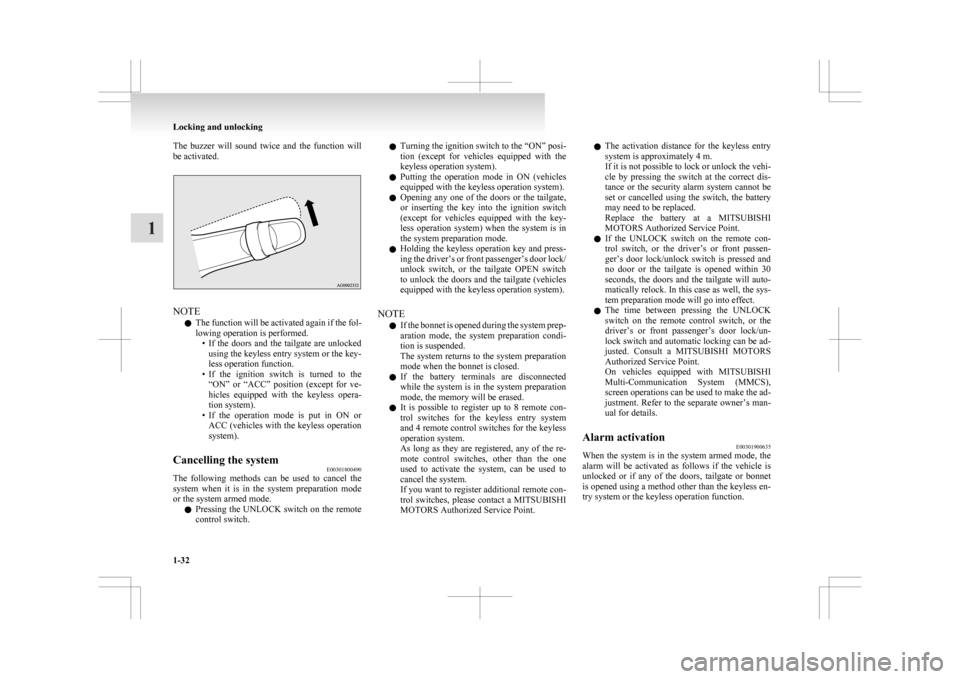
The buzzer will sound twice and the function will
be activated.
NOTE
l The
function will be activated again if the fol-
lowing operation is performed. • If the doors and the tailgate are unlockedusing the keyless entry system or the key-
less operation function.
• If the ignition switch is turned to the “ON” or “ACC” position (except for ve-
hicles equipped with the keyless opera-
tion system).
• If the operation mode is put in ON or ACC (vehicles with the keyless operation
system).
Cancelling the system E00301800490
The following methods can be used to cancel the
system
when it is in the system preparation mode
or the system armed mode.
l Pressing the UNLOCK switch on the remote
control switch. l
Turning
the ignition switch to the “ON” posi-
tion (except for vehicles equipped with the
keyless operation system).
l Putting the operation mode in ON (vehicles
equipped with the keyless operation system).
l Opening any one of the doors or the tailgate,
or inserting the key into the ignition switch
(except for vehicles equipped with the key-
less operation system) when the system is in
the system preparation mode.
l Holding the keyless operation key and press-
ing the driver’s or front passenger’s door lock/
unlock switch, or the tailgate OPEN switch
to unlock the doors and the tailgate (vehicles
equipped with the keyless operation system).
NOTE l If the bonnet is opened during the system prep-
aration mode, the system preparation condi-
tion is suspended.
The system returns to the system preparation
mode when the bonnet is closed.
l If the battery terminals are disconnected
while the system is in the system preparation
mode, the memory will be erased.
l It is possible to register up to 8 remote con-
trol switches for the keyless entry system
and 4 remote control switches for the keyless
operation system.
As long as they are registered, any of the re-
mote control switches, other than the one
used to activate the system, can be used to
cancel the system.
If you want to register additional remote con-
trol switches, please contact a MITSUBISHI
MOTORS Authorized Service Point. l
The activation distance for the keyless entry
system is approximately 4 m.
If it is not possible to lock or unlock the vehi-
cle by pressing the switch at the correct dis-
tance or the security alarm system cannot be
set or cancelled using the switch, the battery
may need to be replaced.
Replace the battery at a MITSUBISHI
MOTORS Authorized Service Point.
l If the UNLOCK switch on the remote con-
trol switch, or the driver’s or front passen-
ger’s door lock/unlock switch is pressed and
no door or the tailgate is opened within 30
seconds, the doors and the tailgate will auto-
matically relock. In this case as well, the sys-
tem preparation mode will go into effect.
l The time between pressing the UNLOCK
switch on the remote control switch, or the
driver’s or front passenger’s door lock/un-
lock switch and automatic locking can be ad-
justed. Consult a MITSUBISHI MOTORS
Authorized Service Point.
On vehicles equipped with MITSUBISHI
Multi-Communication System (MMCS),
screen operations can be used to make the ad-
justment. Refer to the separate owner’s man-
ual for details.
Alarm activation E00301900635
When the system is in the system armed mode, the
alarm
will be activated as follows if the vehicle is
unlocked or if any of the doors, tailgate or bonnet
is opened using a method other than the keyless en-
try system or the keyless operation function. Locking and unlocking
1-32
1
Page 55 of 368
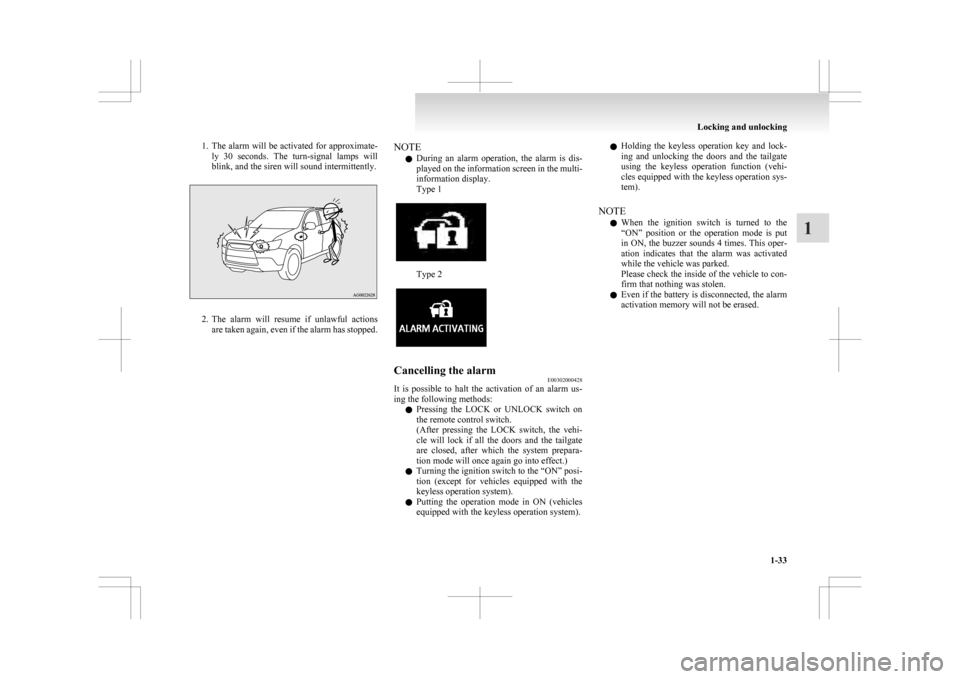
1. The alarm will be activated for approximate-
ly 30 seconds. The turn-signal lamps will
blink, and the siren will sound intermittently. 2. The
alarm will resume if unlawful actions
are taken again, even if the alarm has stopped. NOTE
l During
an alarm operation, the alarm is dis-
played on the information screen in the multi-
information display.
Type 1 Type 2
Cancelling the alarm
E00302000428
It is possible to halt the activation of an alarm us-
ing the following methods:
l Pressing
the LOCK or UNLOCK switch on
the remote control switch.
(After pressing the LOCK switch, the vehi-
cle will lock if all the doors and the tailgate
are closed, after which the system prepara-
tion mode will once again go into effect.)
l Turning the ignition switch to the “ON” posi-
tion (except for vehicles equipped with the
keyless operation system).
l Putting the operation mode in ON (vehicles
equipped with the keyless operation system). l
Holding
the keyless operation key and lock-
ing and unlocking the doors and the tailgate
using the keyless operation function (vehi-
cles equipped with the keyless operation sys-
tem).
NOTE l When the ignition switch is turned to the
“ON” position or the operation mode is put
in ON, the buzzer sounds 4 times. This oper-
ation indicates that the alarm was activated
while the vehicle was parked.
Please check the inside of the vehicle to con-
firm that nothing was stolen.
l Even if the battery is disconnected, the alarm
activation memory will not be erased. Locking and unlocking
1-33 1
Page 56 of 368
Electric window control
E00302200521
The electric windows can only be operated with the
ignition
switch in the “ON” position or the opera-
tion mode in ON. WARNING
l Before
operating the electric window con-
trol, make sure that nothing can get trap-
ped (head, hand, finger, etc.).
l Never leave the vehicle without removing
the key.
l Never leave a child (or other person who
might not be capable of safe operation of
the electric window control) in the vehicle
alone.
l The child may tamper with the switch at
the risk of its hands or head being trap-
ped in the window.
Electric window control switch E00302301558
Each door window opens or closes while the corre-
sponding switch is operated.
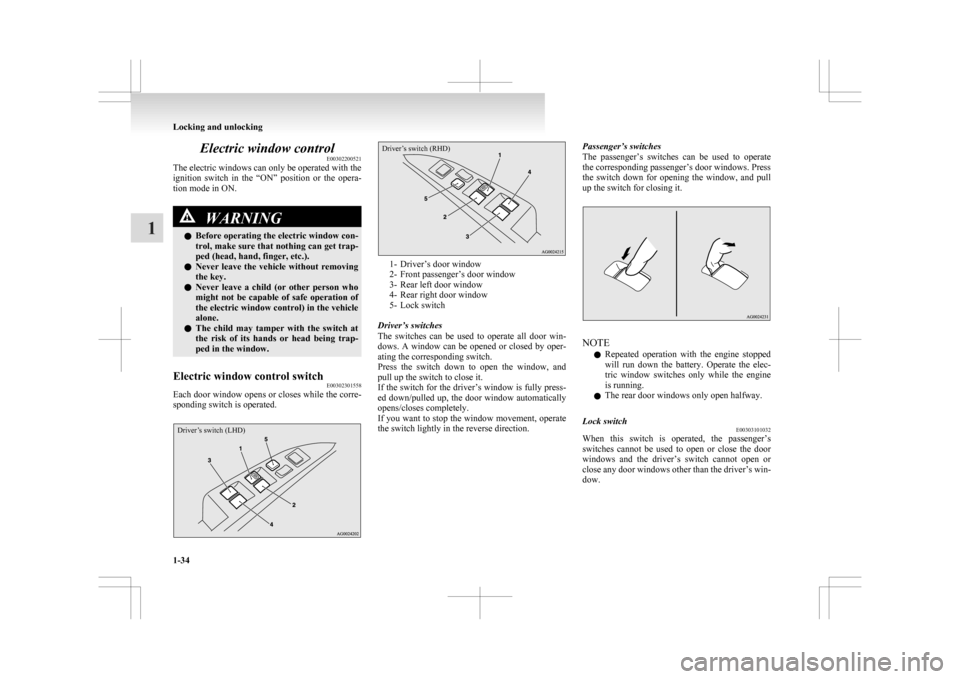
Driver’s switch (LHD)
Driver’s switch (RHD) 1- Driver’s door window
2-
Front passenger’s door window
3- Rear left door window
4- Rear right door window
5- Lock switch
Driver’s switches
The switches can be used to operate all door win-
dows. A window can be opened or closed by oper-
ating the corresponding switch.
Press the switch down to open the window, and
pull up the switch to close it.
If the switch for the driver’s window is fully press-
ed down/pulled up, the door window automatically
opens/closes completely.
If you want to stop the window movement, operate
the switch lightly in the reverse direction. Passenger’s switches
The
passenger’s switches can be used to operate
the corresponding passenger’s door windows. Press
the switch down for opening the window, and pull
up the switch for closing it. NOTE
l Repeated
operation with the engine stopped
will run down the battery. Operate the elec-
tric window switches only while the engine
is running.
l The rear door windows only open halfway.
Lock switch E00303101032
When this switch is operated, the passenger’s
switches
cannot be used to open or close the door
windows and the driver’s switch cannot open or
close any door windows other than the driver’s win-
dow. Locking and unlocking
1-34
1
Page 106 of 368

NOTE
l The
average speed display and the average
fuel consumption display can be reset individ-
ually for the auto reset mode and manual re-
set mode.
l “---” is displayed when the average speed can-
not be measured.
l The initial (default) setting is “Auto reset
mode”.
l The display setting can be changed to the pre-
ferred units (km/h or mph).
Refer to “Changing the function settings
(when the ignition switch or the operation
mode is ON)” on page 3-17.
l The memory of the auto reset mode or man-
ual reset mode for the average speed display
is erased if the battery is disconnected.
Average fuel consumption display E00521700628
This displays the average fuel consumption from
the last reset to the present time.
There are the following 2 mode settings. For information on how to change the average fuel
consumption
display setting, refer to “Changing
the function settings (when the ignition switch or
the operation mode is ON)” on page 3-17.
Type 1 Type 2 The “ ”
mark (A) in the momentary fuel gauge
shows the average fuel consumption. (Type 2)
Manual reset mode
l When the average fuel consumption is being
displayed, if you hold down the multi-infor-
mation meter switch, the average fuel con-
sumption displayed at that time is reset. l
When
the following operation is performed,
the mode setting is automatically switched
from manual to auto.
[Except for vehicles equipped with keyless
operation system]
Turn the ignition switch from the “ACC” or
“LOCK” position to the “ON” position.
[For vehicles equipped with keyless opera-
tion system]
Change the operation mode from ACC or
OFF to ON.
Switching to auto occurs automatically. If
switching to manual mode is done, however,
the data from the last reset is displayed.
Auto reset mode l When the average fuel consumption is being
displayed, if you hold down the multi-infor-
mation meter switch, the average fuel con-
sumption displayed at that time is reset.
l When the engine switch or the operation
mode is in the following conditions, the aver-
age fuel consumption display is automatical-
ly reset.
[Except for vehicles equipped with keyless
operation system]
The ignition switch is in the “ACC” or
“LOCK” position for about 4 hours or longer.
[For vehicles equipped with keyless opera-
tion system]
The operation mode is in ACC or OFF for
about 4 hours or longer. Instruments and controls
3-12
3
Page 113 of 368
l
When the engine switch or the operation
mode is in the following conditions, the aver-
age fuel consumption display and average
speed display are automatically reset.
[Except for vehicles equipped with keyless
operation system]
The ignition switch is in the “ACC” or
“LOCK” position for about 4 hours or longer.
[For vehicles equipped with keyless opera-
tion system]
The operation mode is in ACC or OFF for
about 4 hours or longer.
NOTE l The average fuel consumption display and
average speed display can be reset individual-
ly for the auto reset mode and manual reset
mode.
l The memory of the auto reset mode or man-
ual reset mode for the average fuel consump-
tion display and average speed display is
erased if the battery is disconnected.
l The initial (default) setting is “Auto reset
mode”.
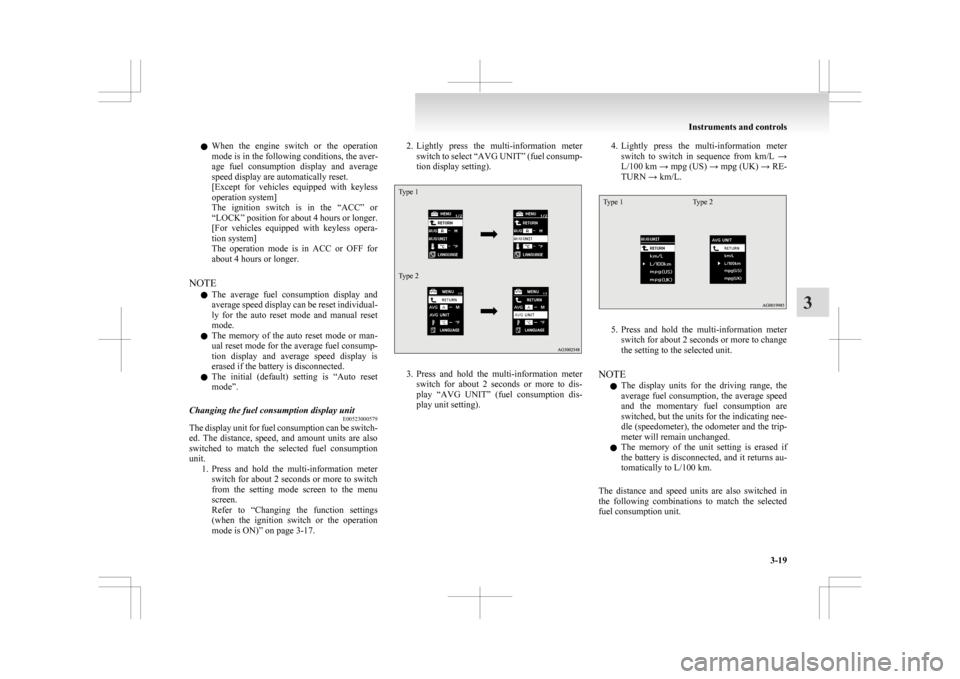
Changing the fuel consumption display unit E00523000579
The display unit for fuel consumption can be switch-
ed.
The distance, speed, and amount units are also
switched to match the selected fuel consumption
unit. 1. Press and hold the multi-information meterswitch for about 2 seconds or more to switch
from the setting mode screen to the menu
screen.
Refer to “Changing the function settings
(when the ignition switch or the operation
mode is ON)” on page 3-17. 2. Lightly
press the multi-information meter
switch to select “AVG UNIT” (fuel consump-
tion display setting).
Type 1
Type 2 3. Press
and hold the multi-information meter
switch for about 2 seconds or more to dis-
play “AVG UNIT” (fuel consumption dis-
play unit setting). 4. Lightly
press the multi-information meter
switch to switch in sequence from km/L →
L/100 km → mpg (US) → mpg (UK) → RE-
TURN → km/L.
Type 1 Type 2 5. Press
and hold the multi-information meter
switch for about 2 seconds or more to change
the setting to the selected unit.
NOTE l The display units for the driving range, the
average fuel consumption, the average speed
and the momentary fuel consumption are
switched, but the units for the indicating nee-
dle (speedometer), the odometer and the trip-
meter will remain unchanged.
l The memory of the unit setting is erased if
the battery is disconnected, and it returns au-
tomatically to L/100 km.
The distance and speed units are also switched in
the following combinations to match the selected
fuel consumption unit. Instruments and controls
3-19 3
Page 164 of 368
screen operations can be used to make the ad-
justment.
Refer
to the separate owner’s manual for de-
tails.
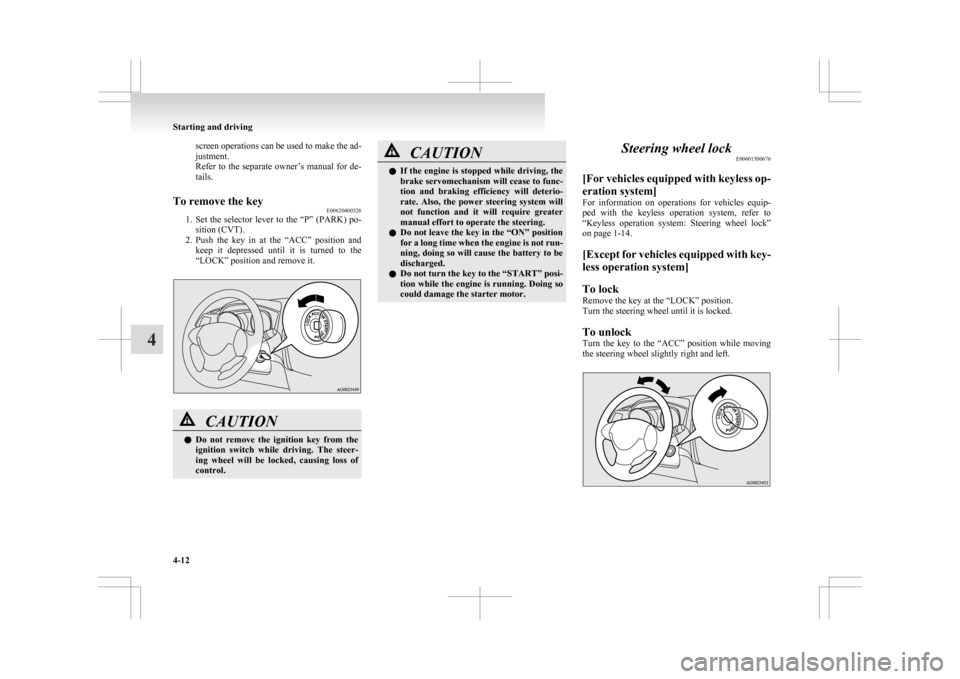
To remove the key E00620400326
1. Set
the selector lever to the “P” (PARK) po-
sition (CVT).
2. Push the key in at the “ACC” position and keep it depressed until it is turned to the
“LOCK” position and remove it. CAUTION
l
Do
not remove the ignition key from the
ignition switch while driving. The steer-
ing wheel will be locked, causing loss of
control. CAUTION
l
If
the engine is stopped while driving, the
brake servomechanism will cease to func-
tion and braking efficiency will deterio-
rate. Also, the power steering system will
not function and it will require greater
manual effort to operate the steering.
l Do not leave the key in the “ON” position
for a long time when the engine is not run-
ning, doing so will cause the battery to be
discharged.
l Do not turn the key to the “START” posi-
tion while the engine is running. Doing so
could damage the starter motor. Steering wheel lock
E00601500676
[For
vehicles equipped with keyless op-
eration system]
For information on operations for vehicles equip-
ped with the keyless operation system, refer to
“Keyless operation system: Steering wheel lock”
on page 1-14.
[Except for vehicles equipped with key-
less operation system]
To lock
Remove the key at the “LOCK” position.
Turn the steering wheel until it is locked.
To unlock
Turn the key to the “ACC” position while moving
the steering wheel slightly right and left. Starting and driving
4-12
4