Page 44 of 426

44 Getting startedAdjustingInterior rear view mirror�
Manually adjust the rear-view mirror.
For more information, see “Rear view mir-
rors” (
�page 181).
Exterior rear view mirrorsThe buttons are located on the lower part
of the center console.
1Driver’s side exterior rear view mirror
button
2Passenger-side exterior rear view
mirror button
3Adjustment button
�
Switch on the ignition (
�page 40).
�
Press button1 for the driver’s side
exterior rear view mirror or button2
for passenger-side exterior rear view
mirror.
�
Push adjustment button3 up, down,
left, or right according to the desired
setting.
For more information, see “Rear view mir-
rors” (
�page 181).
!
Electrolyte drops coming into contact with
the vehicle paint finish can be completely re-
moved only while in the liquid state and by
applying plenty of water.
Warning!
G
Exercise care when using the passen-
ger-side exterior rear view mirror. The mirror
surface is convex (outwardly curved surface
for a wider field of view). Objects in mirror
are closer than they appear. Check your in-
terior rear view mirror or glance over your
shoulder before changing lanes.
i
At low ambient temperatures, the exterior
rear view mirrors will be heated automatically.
Page 100 of 426
100 Controls in detailLocking and unlockingGlobal locking�
Press button‹.
With the trunk and all doors closed, all
turn signal lamps flash three times. The
anti-theft alarm system is armed.
Selective setting
If you frequently travel alone, you may wish
to reprogram the SmartKey so that
pressingŒ only unlocks the driver’s
door, interior storage compartments and
the fuel filler flap.
�
Press and hold buttonsŒ and‹
simultaneously for about 6 seconds un-
til battery check lamp5 flashes twice.
The SmartKey will then function as
follows:Unlocking driver’s door and fuel filler
flap
�
Press buttonΠonce.
All turn signal lamps flash once. The
anti-theft alarm system is disarmed.
Global unlocking
�
Press buttonΠtwice.
All turn signal lamps flash once. The
anti-theft alarm system is disarmed.
Global locking
�
Press button‹.
With the trunk and all doors closed, all
turn signal lamps flash three times. The
anti-theft alarm system is armed.
Restoring to factory setting
�
Press and hold buttonsŒ and‹
simultaneously for about 6 seconds un-
til battery check lamp5 (
�page 98)
flashes twice.Unlocking and opening the trunk
You can unlock the trunk separately.
A minimum height clearance of
5.5 ft (1.66 m) is required to open the
trunk lid.
�
Press and hold buttonŠ until the
trunk lid unlocks and opens slightly.
Checking the batteries
�
Press button ‹ or Œ.
Battery check lamp5 (
�page 98)
comes on briefly to indicate that the
SmartKey batteries are in order.
i
If battery check lamp5 does not come on
briefly during check, then the SmartKey
batteries are discharged.
Replace the batteries (
�page 359).
You can obtain the required batteries at any
authorized Mercedes-Benz Center.
i
If the batteries are checked within signal
range of the vehicle, pressing button‹
orΠwill lock or unlock the vehicle
accordingly.
Page 102 of 426
102 Controls in detailLocking and unlocking
Opening the trunk
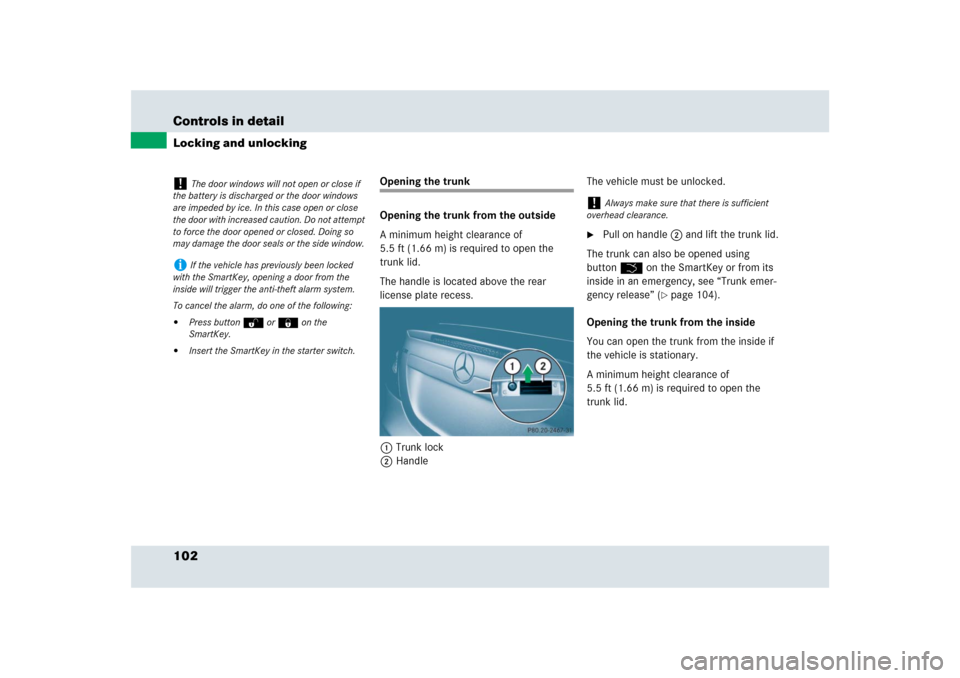
Opening the trunk from the outside
A minimum height clearance of
5.5 ft (1.66 m) is required to open the
trunk lid.
The handle is located above the rear
license plate recess.
1Trunk lock
2Handle The vehicle must be unlocked.
�
Pull on handle2 and lift the trunk lid.
The trunk can also be opened using
buttonŠ on the SmartKey or from its
inside in an emergency, see “Trunk emer-
gency release” (
�page 104).
Opening the trunk from the inside
You can open the trunk from the inside if
the vehicle is stationary.
A minimum height clearance of
5.5 ft (1.66 m) is required to open the
trunk lid.
!
The door windows will not open or close if
the battery is discharged or the door windows
are impeded by ice. In this case open or close
the door with increased caution. Do not attempt
to force the door opened or closed. Doing so
may damage the door seals or the side window.
i
If the vehicle has previously been locked
with the SmartKey, opening a door from the
inside will trigger the anti-theft alarm system.
To cancel the alarm, do one of the following:
�
Press buttonŒ or‹ on the
SmartKey.
�
Insert the SmartKey in the starter switch.
!
Always make sure that there is sufficient
overhead clearance.
Page 103 of 426
103 Controls in detail
Locking and unlocking
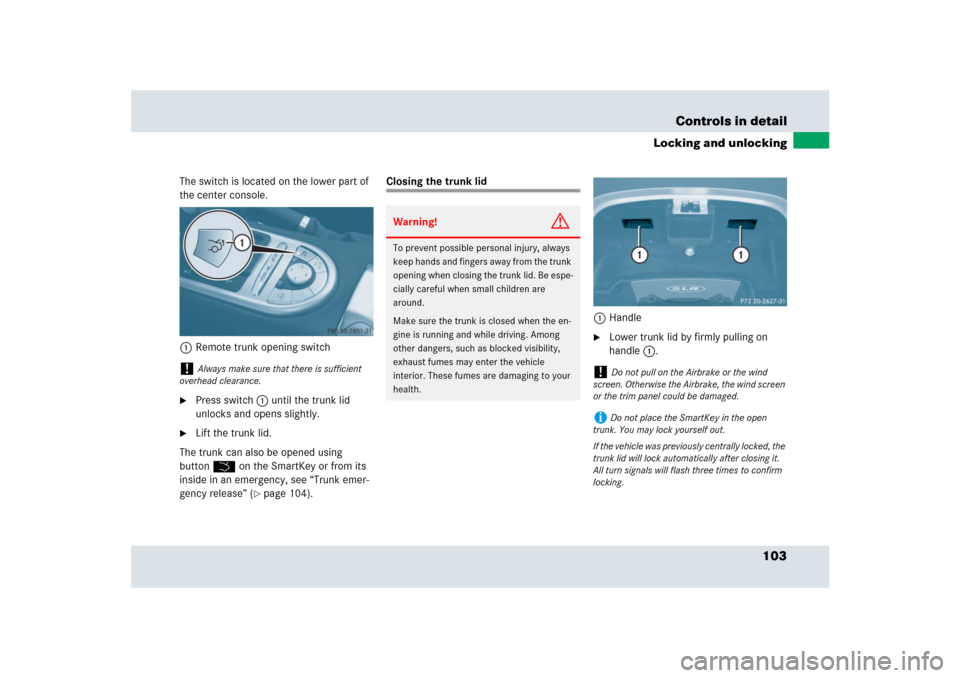
The switch is located on the lower part of
the center console.
1Remote trunk opening switch�
Press switch1 until the trunk lid
unlocks and opens slightly.
�
Lift the trunk lid.
The trunk can also be opened using
buttonŠ on the SmartKey or from its
inside in an emergency, see “Trunk emer-
gency release” (
�page 104).
Closing the trunk lid
1Handle
�
Lower trunk lid by firmly pulling on
handle1.
!
Always make sure that there is sufficient
overhead clearance.
Warning!
G
To prevent possible personal injury, always
keep hands and fingers away from the trunk
opening when closing the trunk lid. Be espe-
cially careful when small children are
around.
Make sure the trunk is closed when the en-
gine is running and while driving. Among
other dangers, such as blocked visibility,
exhaust fumes may enter the vehicle
interior. These fumes are damaging to your
health.
!
Do not pull on the Airbrake or the wind
screen. Otherwise the Airbrake, the wind screen
or the trim panel could be damaged.
i
Do not place the SmartKey in the open
trunk. You may lock yourself out.
If the vehicle was previously centrally locked, the
trunk lid will lock automatically after closing it.
All turn signals will flash three times to confirm
locking.
Page 118 of 426
118 Controls in detailControl systemMultifunction steering wheel
The displays in the multifunction display
and the settings in the control system are
controlled by the buttons on the multi-
function steering wheel (
�page 30).
1
Left multifunction display in the
speedometer
2
Right multifunction display in the
tachometerOperating the control system
3
Selecting the submenu or setting the
volume:
Press button
æup/to increase
çdown/to decrease
4
Telephone:
Press button
sto take a call
to dial
to redial
tto end a call
to reject an incoming call
5
Menu systems:
Press button
èfor next menu
ÿfor previous menu
6
Moving within a menu:
Press button
jfor next display
kfor previous display
Page 119 of 426
119 Controls in detail
Control system
Depending on the selected menu, pressing
the buttons on the multifunction steering
wheel will alter what appears in the
multifunction display.
The information available in the multifunc-
tion display are arranged in menus and
accompanying functions or submenus.
The individual functions are then found
within the relevant menu (radio or CD op-
erations under
AUDIO
, for example). These
functions serve to call up relevant informa-
tion or to customize the settings for your
vehicle.It is helpful to think of the menus, and the
functions within each menu, as being
arranged in a circular pattern.
�
If you press buttonè orÿ
repeatedly, you will pass through each
menu one after the other.
�
If you press buttonk orj
repeatedly, you will pass through each
function display, one after the other, in
the current menu.In the
Settings
menu, instead of functions
you will find a number of submenus for
calling up and changing settings. For
instructions on using these submenus, see
“Settings menu” (�page 129).
The number of menus available in the sys-
tem depends on which optional equipment
is installed in your vehicle.
The menus are described on the following
pages.
Page 123 of 426
123 Controls in detail
Control system
722 S menu
1
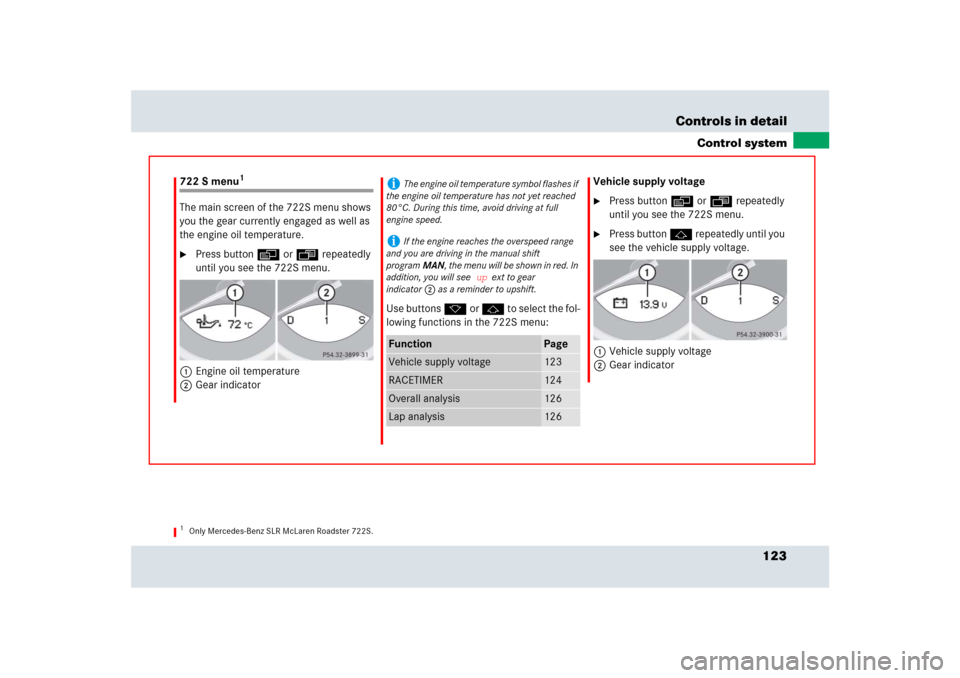
The main screen of the 722S menu shows
you the gear currently engaged as well as
the engine oil temperature.�
Press button è or ÿ repeatedly
until you see the 722S menu.
1Engine oil temperature
2Gear indicatorUse buttons k or j to select the fol-
lowing functions in the 722S menu:Vehicle supply voltage
�
Press button è or ÿ repeatedly
until you see the 722S menu.
�
Press button j repeatedly until you
see the vehicle supply voltage.
1Vehicle supply voltage
2Gear indicator
1Only Mercedes-Benz SLR McLaren Roadster 722S.
i
The engine oil temperature symbol flashes if
the engine oil temperature has not yet reached
80°C. During this time, avoid driving at full
engine speed.
i
If the engine reaches the overspeed range
and you are driving in the manual shift
programMAN, the menu will be shown in red. In
addition, you will see
up
ext to gear
indicator2 as a reminder to upshift.
Function
Page
Vehicle supply voltage
123
RACETIMER
124
Overall analysis
126
Lap analysis
126
Page 124 of 426
124 Controls in detailControl systemRACETIMER
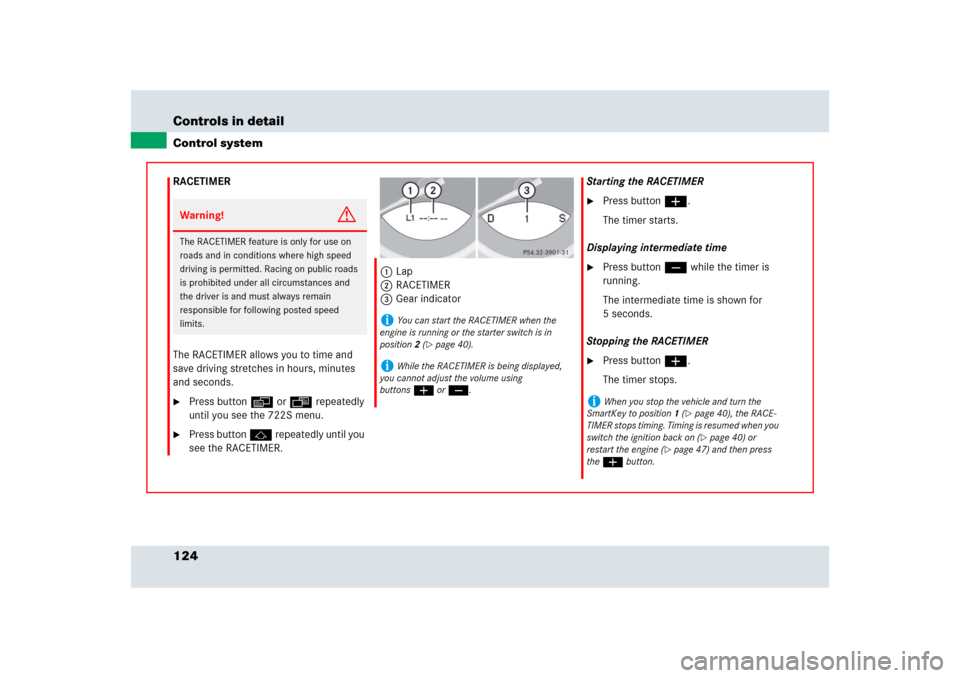
The RACETIMER allows you to time and
save driving stretches in hours, minutes
and seconds.�
Press button è or ÿ repeatedly
until you see the 722S menu.
�
Press button j repeatedly until you
see the RACETIMER.1Lap
2RACETIMER
3Gear indicatorStarting the RACETIMER
�
Press button æ.
The timer starts.
Displaying intermediate time
�
Press button ç while the timer is
running.
The intermediate time is shown for
5 seconds.
Stopping the RACETIMER
�
Press button æ.
The timer stops.
Warning!
G
The RACETIMER feature is only for use on
roads and in conditions where high speed
driving is permitted. Racing on public roads
is prohibited under all circumstances and
the driver is and must always remain
responsible for following posted speed
limits.
i
You can start the RACETIMER when the
engine is running or the starter switch is in
position2 (
�page 40).
i
While the RACETIMER is being displayed,
you cannot adjust the volume using
buttonsæ or ç.
i
When you stop the vehicle and turn the
SmartKey to position 1 (
�page 40), the RACE-
TIMER stops timing. Timing is resumed when you
switch the ignition back on (�page 40) or
restart the engine (
�page 47) and then press
the æbutton.