2009 MERCEDES-BENZ GL SUV clock
[x] Cancel search: clockPage 261 of 309

Changing the front bulbs
Dipped-beam headlamps (halogen
headlamps) X
Switch off the lights.
X Open the bonnet.
X Turn housing cover :anti-clockwise and
remove it.
X Turn bulb holder ;anti-clockwise and
remove it.
X Remove the bulb from bulb holder ;.
X Insert the new bulb into bulb holder ;.
X Insert bulb holder ;and turn it clockwise.
X Align housing cover :and turn it clock-
wise.
Main-beam headlamps X
Switch off the lights.
X Open the bonnet.
X Turn housing cover :anti-clockwise and
remove it. X
Turn bulb holder ;anti-clockwise and
remove it.
X Remove the bulb from bulb holder ;.
X Insert the new bulb into bulb holder ;.
X Insert bulb holder ;and turn it clockwise.
X Align housing cover :and turn it clock-
wise.
Side lamp/parking lamp X
Switch off the lights.
X Open the bonnet.
X Turn bulb holder :anti-clockwise and
remove it.
X Remove the bulb from bulb holder :.
X Insert the new bulb into bulb holder :.
X Insert bulb holder :and turn it clockwise.
Turn signal lamp X
Switch off the lights.
X Open the bonnet. 258
Changing bulbsPractical advice
X164_AKB; 2; 3, en-GB
wobuchh,
Version: 2.11.8.1 2009-03-31T14:14:58+02:00 - Seite 258
Dateiname: 6515431202_buchblock.pdf; erzeugt am 01. Apr 2009 00:18:06; WK
Page 262 of 309

X
Turn bulb holder :(WY 5 W)/;
(PY 21 W) anti-clockwise and pull it out.
X Remove the bulb from bulb holder :/;.
X Insert the new bulb into bulb
holder :/;.
X Insert bulb holder :/;and turn it clock-
wise. Changing the rear bulbs
Opening and closing the side trim pan-
els You must open the side trim panel in the lug-
gage compartment before you can change
the bulbs in the tail lamps.
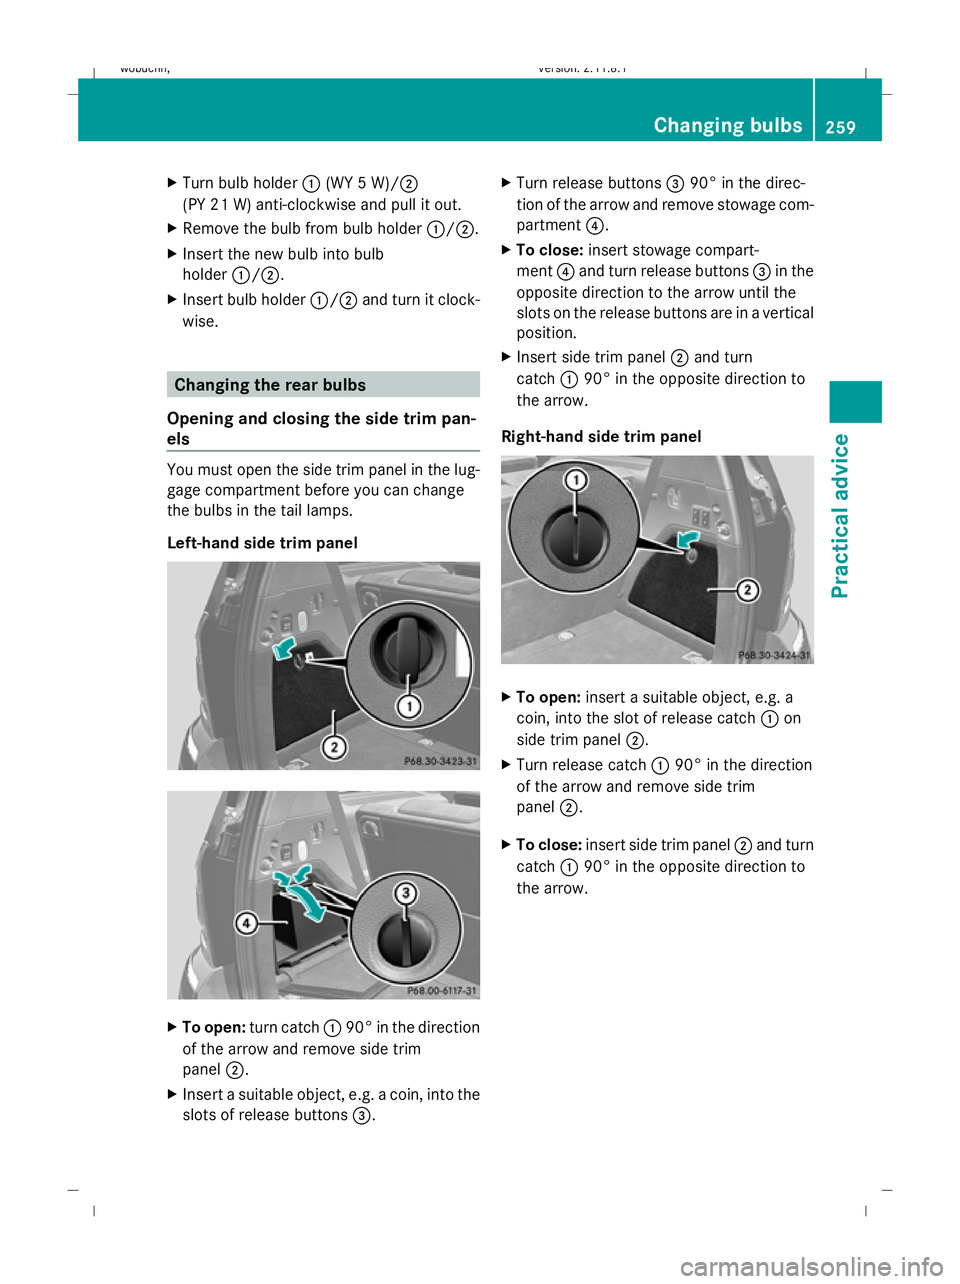
Left-hand side trim panel
X
To open: turn catch :90° in the direction
of the arrow and remove side trim
panel ;.
X Insert a suitable object, e.g. a coin, into the
slots of release buttons =.X
Turn release buttons =90° in the direc-
tion of the arrow and remove stowage com-
partment ?.
X To close: insert stowage compart-
ment ?and turn release buttons =in the
opposite direction to the arrow until the
slots on the release buttons are in a vertical
position.
X Insert side trim panel ;and turn
catch :90° in the opposite direction to
the arrow.
Right-hand side trim panel X
To open: insert a suitable object, e.g. a
coin, into the slot of release catch :on
side trim panel ;.
X Turn release catch :90° in the direction
of the arrow and remove side trim
panel ;.
X To close: insert side trim panel ;and turn
catch :90° in the opposite direction to
the arrow. Changing bulbs
259Practical advice
X164_AKB; 2; 3, en-GB
wobuchh, Version: 2.11.8.1 2009-03-31T14:14:58+02:00 - Seite 259 Z
Dateiname: 6515431202_buchblock.pdf; erzeugt am 01. Apr 2009 00:18:07; WK
Page 263 of 309

Tail lamps with LEDs
:
Rear foglamp
; Reversing lamp
X Switch off the lights.
X Open the luggage compartment.
X Open the side trim panel (Y page 259).
X Turn the corresponding bulb holder anti-
clockwise and remove it.
X Remove the bulb from the bulb holder.
X Insert the new bulb into the bulb holder.
X Insert the bulb holder and turn it clockwise.
X Close the side trim panel (Y page 259).
Tail lamp (exterior spare wheel
bracket*) On vehicles with an exterior spare wheel
bracket*, the following lamps are located in
the bumper:
R turn signal lamp
R tail lamp/parking lamp/brake lamp
R licence plate lamp X
Switch off the lights.
X Insert a plastic card into the gap between
the bumper and lamp cluster :.
X Push the plastic card in the direction of the
arrow.
Lamp cluster :pops out.
X Remove lamp cluster :. ;
Turn signal lamp
= Tail lamp/parking lamp/brake lamp
X Turn the corresponding bulb holder anti-
clockwise and remove it.
X Press the lamp slightly into the holder, turn
it anti-clockwise and pull it out.
X Insert the new bulb into the bulb holder and
turn it clockwise.
X Insert the corresponding bulb holder and
turn it clockwise.
X Insert lamp unit :and press in firmly.
Lamp unit :snaps into place.
Licence plate lamp 260
Changing bulbsPractical advice
* optional
X164_AKB; 2; 3, en-GB
wobuchh
,V ersion: 2.11.8.1
2009-03-31T14:14:58+02:00 - Seite 260
Dateiname: 6515431202_buchblock.pdf; erzeugt am 01. Apr 2009 00:18:08; WK
Page 279 of 309

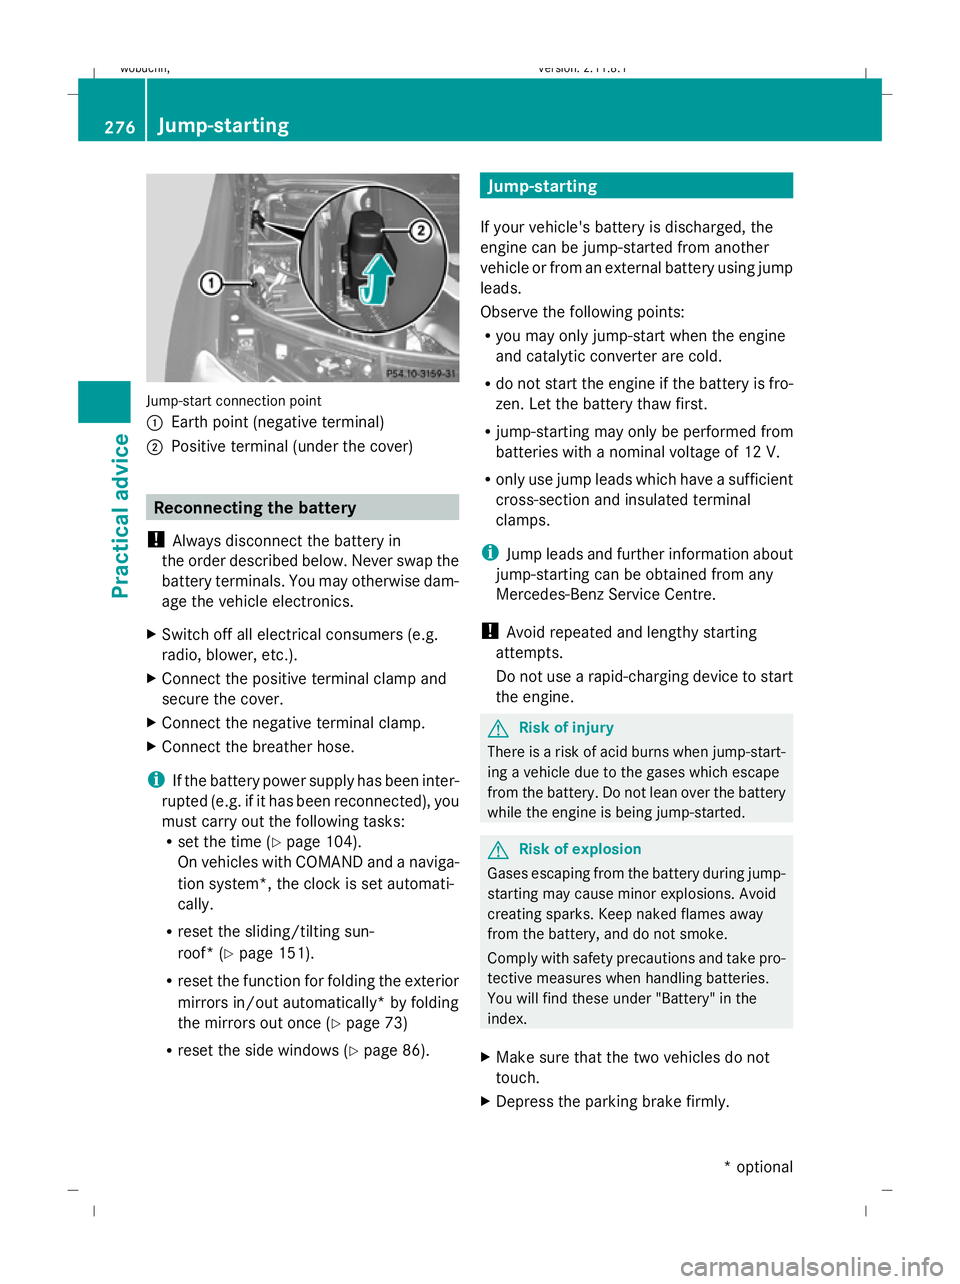
Jump-start connection point
:
Earth point (negative terminal)
; Positive terminal (under the cover) Reconnecting the battery
! Always disconnect the battery in
the order described below. Never swap the
battery terminals. You may otherwise dam-
age the vehicle electronics.
X Switch off all electrical consumers (e.g.
radio, blower, etc.).
X Connect the positive terminal clamp and
secure the cover.
X Connect the negative terminal clamp.
X Connect the breather hose.
i If the battery power supply has been inter-
rupted (e.g. if it has been reconnected), you
must carry out the following tasks:
R set the time (Y page 104).
On vehicles with COMAND and a naviga-
tion system*, the clock is set automati-
cally.
R reset the sliding/tilting sun-
roof* (Y page 151).
R reset the function for folding the exterior
mirrors in/out automatically* by folding
the mirrors out once (Y page 73)
R reset the side windows ( Ypage 86). Jump-starting
If your vehicle's battery is discharged, the
engine can be jump-started from another
vehicle or from an external battery using jump
leads.
Observe the following points:
R you may only jump-start when the engine
and catalytic converter are cold.
R do not start the engine if the battery is fro-
zen. Let the battery thaw first.
R jump-starting may only be performed from
batteries with a nominal voltage of 12 V.
R only use jump leads which have a sufficient
cross-section and insulated terminal
clamps.
i Jump leads and further information about
jump-starting can be obtained from any
Mercedes-Benz Service Centre.
! Avoid repeated and lengthy starting
attempts.
Do not use a rapid-charging device to start
the engine. G
Risk of injury
There is a risk of acid burns when jump-start-
ing a vehicle due to the gases which escape
from the battery. Do not lean over the battery
while the engine is being jump-started. G
Risk of explosion
Gases escaping from the battery during jump-
starting may cause minor explosions. Avoid
creating sparks. Keep naked flames away
from the battery, and do not smoke.
Comply with safety precautions and take pro-
tective measures when handling batteries.
You will find these under "Battery" in the
index.
X Make sure that the two vehicles do not
touch.
X Depress the parking brake firmly. 276
Jump-startingPractical advice
* optional
X164_AKB; 2; 3, en-GB
wobuchh,
Version: 2.11.8.1 2009-03-31T14:14:58+02:00 - Seite 276
Dateiname: 6515431202_buchblock.pdf; erzeugt am 01. Apr 2009 00:18:17; WK
Page 282 of 309

X
Press cover :inwards on the marking in
the direction of the arrow.
X Take cover :off the opening.
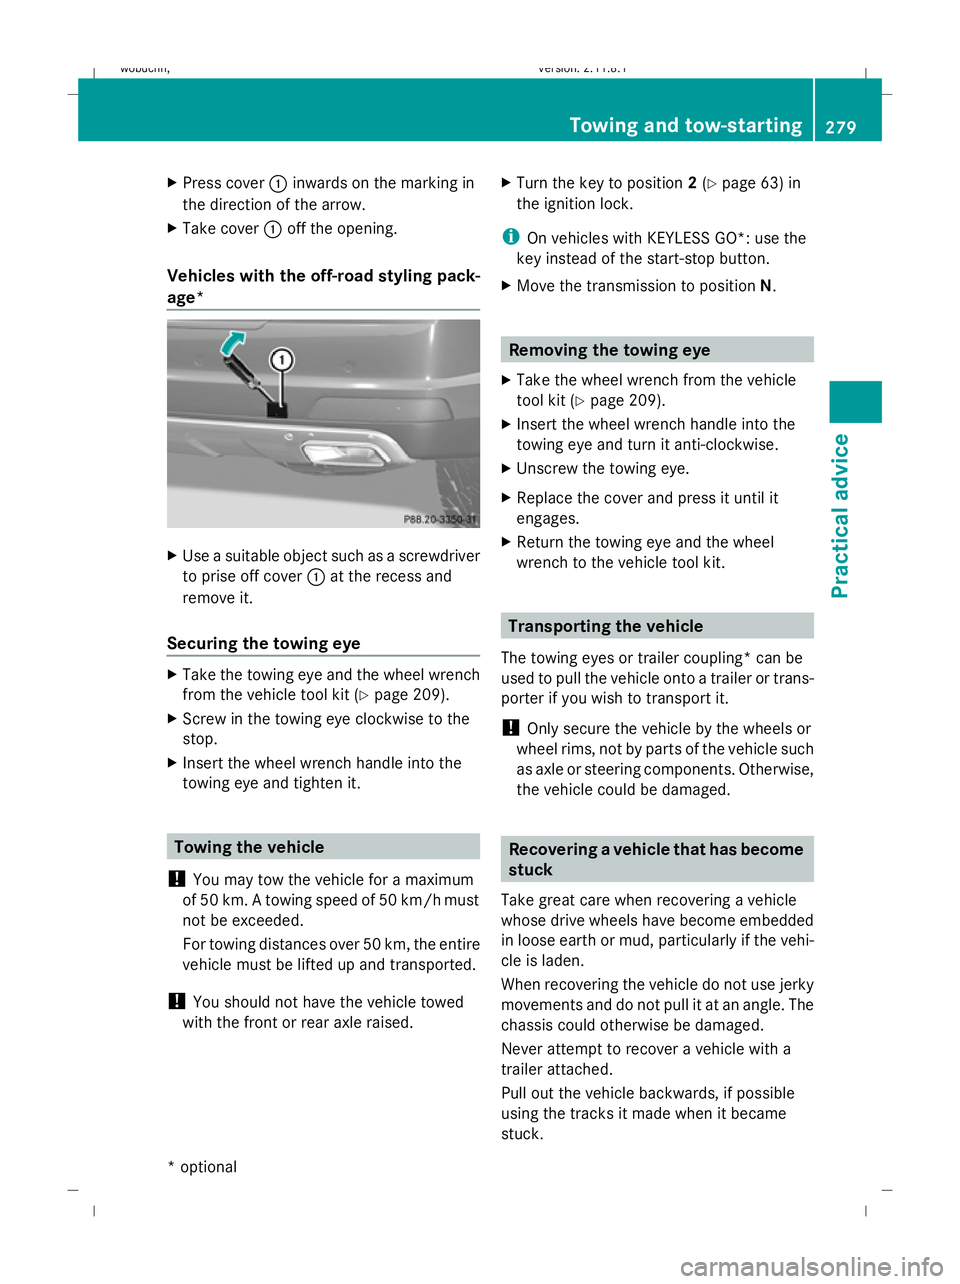
Vehicles with the off-road styling pack-
age* X
Use a suitable object such as a screwdriver
to prise off cover :at the recess and
remove it.
Securing the towing eye X
Take the towing eye and the wheel wrench
from the vehicle tool kit (Y page 209).
X Screw in the towing eye clockwise to the
stop.
X Insert the wheel wrench handle into the
towing eye and tighten it. Towing the vehicle
! You may tow the vehicle for a maximum
of 50 km. A towing speed of 50 km/hm ust
not be exceeded.
For towing distances over 50 km, the entire
vehicle must be lifted up and transported.
! You should not have the vehicle towed
with the front or rear axle raised. X
Turn the key to position 2(Y page 63) in
the ignition lock.
i On vehicles with KEYLESS GO*: use the
key instead of the start-stop button.
X Move the transmission to position N. Removing the towing eye
X Take the wheel wrench from the vehicle
tool kit (Y page 209).
X Insert the wheel wrench handle into the
towing eye and turn it anti-clockwise.
X Unscrew the towing eye.
X Replace the cover and press it until it
engages.
X Return the towing eye and the wheel
wrench to the vehicle tool kit. Transporting the vehicle
The towing eyes or trailer coupling* can be
used to pull the vehicle onto a trailer or trans-
porter if you wish to transport it.
! Only secure the vehicle by the wheels or
wheel rims, not by parts of the vehicle such
as axle or steering components. Otherwise,
the vehicle could be damaged. Recovering a vehicle that has become
stuck
Take great care when recovering a vehicle
whose drive wheels have become embedded
in loose earth or mud, particularly if the vehi-
cle is laden.
When recovering the vehicle do not use jerky
movements and do not pull it at an angle. The
chassis could otherwise be damaged.
Never attempt to recover a vehicle with a
trailer attached.
Pull out the vehicle backwards, if possible
using the tracks it made when it became
stuck. Towing and tow-starting
279Practical advice
* optional
X164_AKB; 2; 3, en-GB
wobuchh,
Version: 2.11.8.1 2009-03-31T14:14:58+02:00 - Seite 279 Z
Dateiname: 6515431202_buchblock.pdf; erzeugt am 01. Apr 2009 00:18:20; WK