2009 MERCEDES-BENZ GL SUV ESP
[x] Cancel search: ESPPage 239 of 309

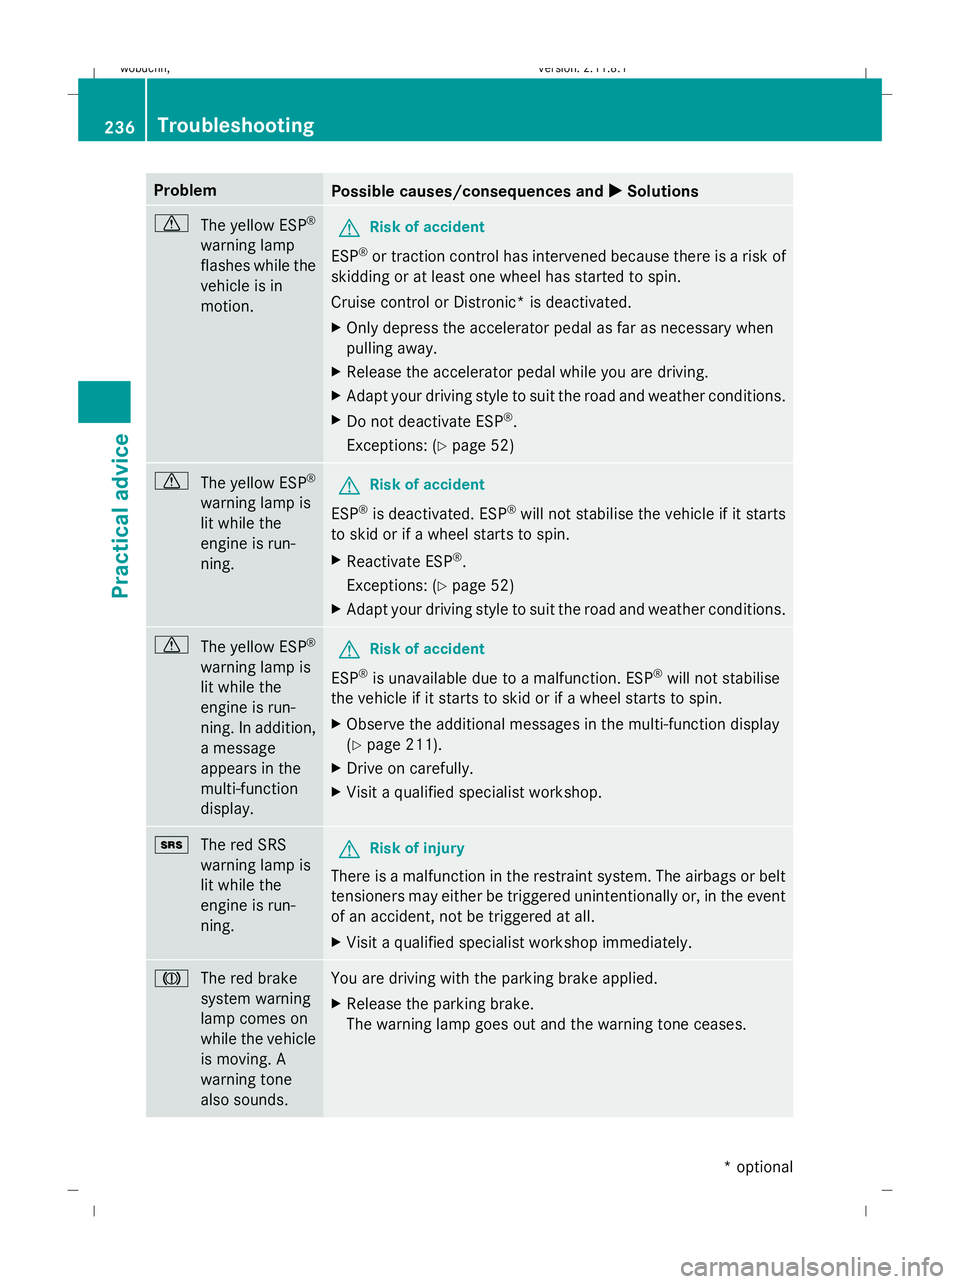
Problem
Possible causes/consequences and
X XSolutions d
The yellow ESP ®
warning lamp
flashes while the
vehicle is in
motion. G
Risk of accident
ESP ®
or traction control has intervened because there is a risk of
skidding or at least one wheel has started to spin.
Cruise control or Distronic* is deactivated.
X Only depress the accelerator pedal as far as necessary when
pulling away.
X Release the accelerator pedal while you are driving.
X Adapt your driving style to suit the road and weather conditions.
X Do not deactivate ESP ®
.
Exceptions: (Y page 52) d
The yellow ESP ®
warning lamp is
lit while the
engine is run-
ning. G
Risk of accident
ESP ®
is deactivated. ESP ®
will not stabilise the vehicle if it starts
to skid or if a wheel starts to spin.
X Reactivate ESP ®
.
Exceptions: (Y page 52)
X Adapt your driving style to suit the road and weather conditions. d
The yellow ESP ®
warning lamp is
lit while the
engine is run-
ning. In addition,
a message
appears in the
multi-function
display. G
Risk of accident
ESP ®
is unavailable due to a malfunction. ESP ®
will not stabilise
the vehicle if it starts to skid or if a wheel starts to spin.
X Observe the additional messages in the multi-function display
(Y page 211).
X Drive on carefully.
X Visit a qualified specialist workshop. +
The red SRS
warning lamp is
lit while the
engine is run-
ning. G
Risk of injury
There is a malfunction in the restraint system. The airbags or belt
tensioners may either be triggered unintentionally or, in the event
of an accident, not be triggered at all.
X Visit a qualified specialist workshop immediately. J
The red brake
system warning
lamp comes on
while the vehicle
is moving. A
warning tone
also sounds. You are driving with the parking brake applied.
X
Release the parking brake.
The warning lamp goes out and the warning tone ceases. 236
TroubleshootingPractical advice
* optional
X164_AKB; 2; 3, en-GB
wobuchh,
Version: 2.11.8.1 2009-03-31T14:14:58+02:00 - Seite 236
Dateiname: 6515431202_buchblock.pdf; erzeugt am 01. Apr 2009 00:18:01; WK
Page 245 of 309

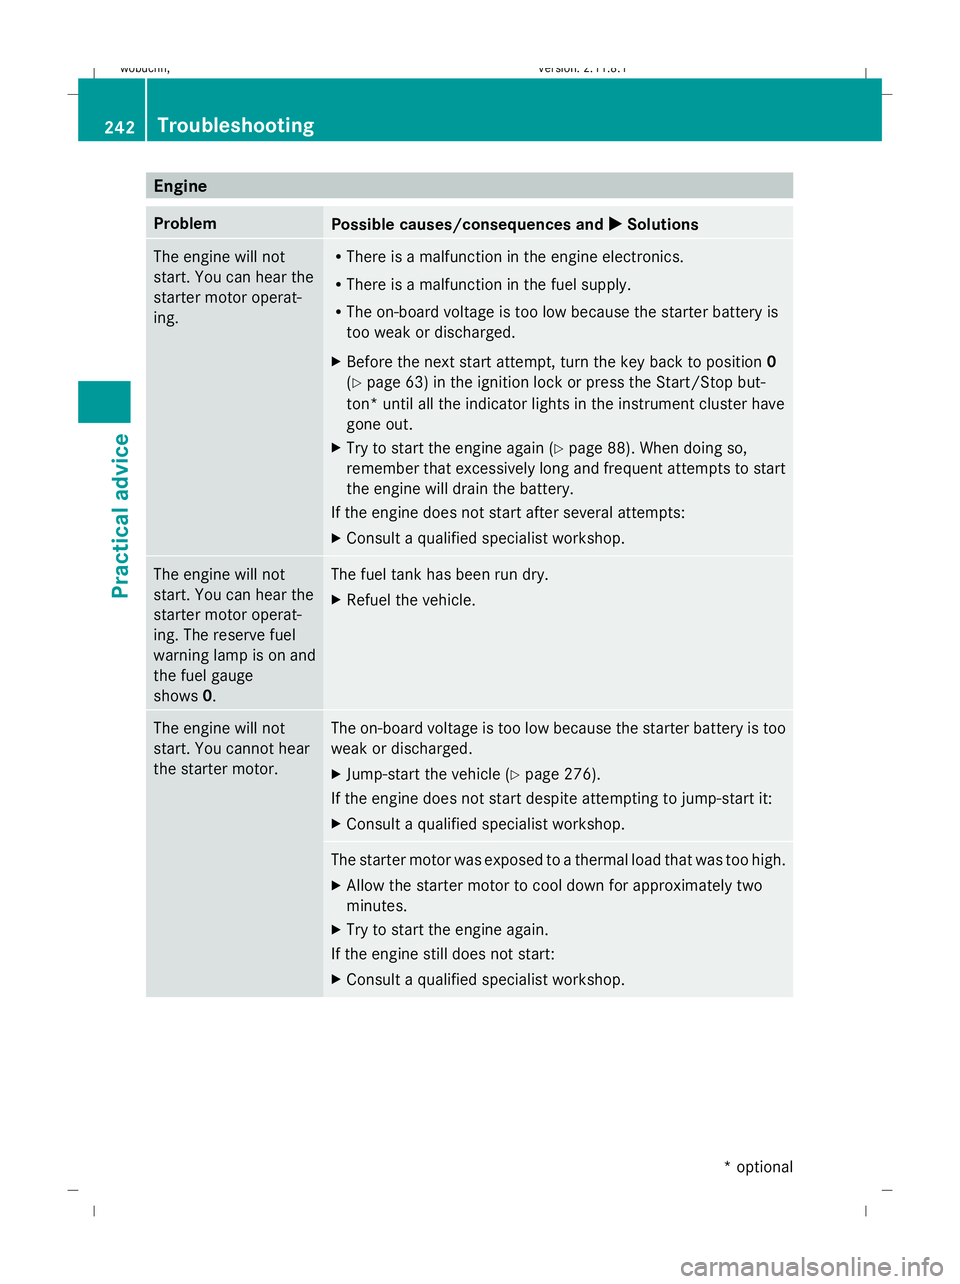
Engine
Problem
Possible causes/consequences and
X
X Solutions The engine will not
start. You can hear the
starter motor operat-
ing. R
There is a malfunction in the engine electronics.
R There is a malfunction in the fuel supply.
R The on-board voltage is too low because the starter battery is
too weak or discharged.
X Before the next start attempt, turn the key back to position 0
(Y page 63) in the ignition lock or press the Start/Stop but-
ton* until all the indicator lights in the instrument cluster have
gone out.
X Try to start the engine again (Y page 88). When doing so,
remember that excessively long and frequent attempts to start
the engine will drain the battery.
If the engine does not start after several attempts:
X Consult a qualified specialist workshop. The engine will not
start. You can hear the
starter motor operat-
ing. The reserve fuel
warning lamp is on and
the fuel gauge
shows
0. The fuel tank has been run dry.
X
Refuel the vehicle. The engine will not
start. You cannot hear
the starter motor. The on-board voltage is too low because the starter battery is too
weak or discharged.
X
Jump-start the vehicle (Y page 276).
If the engine does not start despite attempting to jump-start it:
X Consult a qualified specialist workshop. The starter motor was exposed to a thermal load that was too high.
X
Allow the starter motor to cool down for approximately two
minutes.
X Try to start the engine again.
If the engine still does not start:
X Consult a qualified specialist workshop. 242
TroubleshootingPractical advice
* optional
X164_AKB; 2; 3, en-GB
wobuchh,
Version: 2.11.8.1 2009-03-31T14:14:58+02:00 - Seite 242
Dateiname: 6515431202_buchblock.pdf; erzeugt am 01. Apr 2009 00:18:02; WK
Page 258 of 309

here. If the new bulb still does not light up,
consult a qualified specialist workshop.
Do not touch the glass tube of new bulbs with
your bare hands. Even minor contamination
can burn into the glass surface and reduce
the service life of the bulbs. Always use a lint-
free cloth or only touch the base of the bulb
when fitting. G
Risk of injury
Bulbs and lights can become very hot. For this
reason, allow them to cool down before
changing the bulb. Otherwise you could burn
yourself when you touch them.
Keep bulbs out of the reach of children. Oth-
erwise, they could damage them, for example,
and injure themselves.
Never use a bulb which has been dropped.
Such a bulb may explode and injure you.
Halogen bulbs are pressurised and could
explode when you change them, especially if they are very hot. You should therefore wear
eye protection and gloves when you are
changing them.
G
Risk of injury
Xenon bulbs are under high voltage. You could
get an electric shock and be seriously or even
fatally injured if you touch the electric con-
tacts on xenon bulbs. Therefore, do not
remove the cover on xenon bulbs.
Do not change xenon bulbs yourself, but have
them replaced at a qualified specialist work-
shop which has the necessary specialist
knowledge and tools to carry out the work
required.
Mercedes-Benz recommends that you use a
Mercedes-Benz Service Centre for this pur-
pose. In particular, work relevant to safety or
on safety-related systems must be carried out
at a qualified specialist workshop. Changing bulbs
255Practical advice
X164_AKB; 2; 3, en-GB
wobuchh, Version: 2.11.8.1 2009-03-31T14:14:58+02:00 - Seite 255 Z
Dateiname: 6515431202_buchblock.pdf; erzeugt am 01. Apr 2009 00:18:05; WK
Page 263 of 309

Tail lamps with LEDs
:
Rear foglamp
; Reversing lamp
X Switch off the lights.
X Open the luggage compartment.
X Open the side trim panel (Y page 259).
X Turn the corresponding bulb holder anti-
clockwise and remove it.
X Remove the bulb from the bulb holder.
X Insert the new bulb into the bulb holder.
X Insert the bulb holder and turn it clockwise.
X Close the side trim panel (Y page 259).
Tail lamp (exterior spare wheel
bracket*) On vehicles with an exterior spare wheel
bracket*, the following lamps are located in
the bumper:
R turn signal lamp
R tail lamp/parking lamp/brake lamp
R licence plate lamp X
Switch off the lights.
X Insert a plastic card into the gap between
the bumper and lamp cluster :.
X Push the plastic card in the direction of the
arrow.
Lamp cluster :pops out.
X Remove lamp cluster :. ;
Turn signal lamp
= Tail lamp/parking lamp/brake lamp
X Turn the corresponding bulb holder anti-
clockwise and remove it.
X Press the lamp slightly into the holder, turn
it anti-clockwise and pull it out.
X Insert the new bulb into the bulb holder and
turn it clockwise.
X Insert the corresponding bulb holder and
turn it clockwise.
X Insert lamp unit :and press in firmly.
Lamp unit :snaps into place.
Licence plate lamp 260
Changing bulbsPractical advice
* optional
X164_AKB; 2; 3, en-GB
wobuchh
,V ersion: 2.11.8.1
2009-03-31T14:14:58+02:00 - Seite 260
Dateiname: 6515431202_buchblock.pdf; erzeugt am 01. Apr 2009 00:18:08; WK
Page 266 of 309

X
Vehicles with the AIRMATIC package*
or Off-Road Pro engineering package*:
remove the Start/Stop button from the
ignition lock.
X Get out of the vehicle.
X Close the driver’s door.
X Place the warning triangle (Y page 208) at
a suitable distance. Observe legal require-
ments.
i Only operate the electric air pump using
the socket in the footwell of the second row
of seats (Y page 163), even if the ignition
is turned off.
An emergency cut-off ensures that the on-
board voltage does not drop too low. If the
on-board voltage is too low, power to the
sockets is automatically cut-off. This
ensures that there is sufficient power to
start the engine. Using the TIREFIT kit
You can use the TIREFIT kit to seal small
punctures, particularly those in the tyre tread.
You can use TIREFIT at outside temperatures
down to -20 †. G
Risk of accident
In the following cases your safety is especially
endangered, as tyre sealant is insufficient if:
R there are cuts or punctures in the tyre
greater than 4 mm.
R the wheel rim is damaged.
R you have driven at very low tyre pressures
or on a flat tyre.
Do not drive any further. Consult a qualified
specialist workshop which has the necessary
specialist knowledge and tools to carry out
the work required.
Mercedes-Benz recommends that you use a
Mercedes-Benz Service Centre for this pur-
pose. In particular, work relevant to safety or
on safety-related systems must be carried out
at a qualified specialist workshop. X
Do not remove any foreign objects which
have penetrated the tyre, e.g. screws or
nails.
X Remove the TIREFIT kit, the accompanying
"max. 80 km/h" sticker and the electric air
pump from the stowage well underneath
the luggage compartment floor
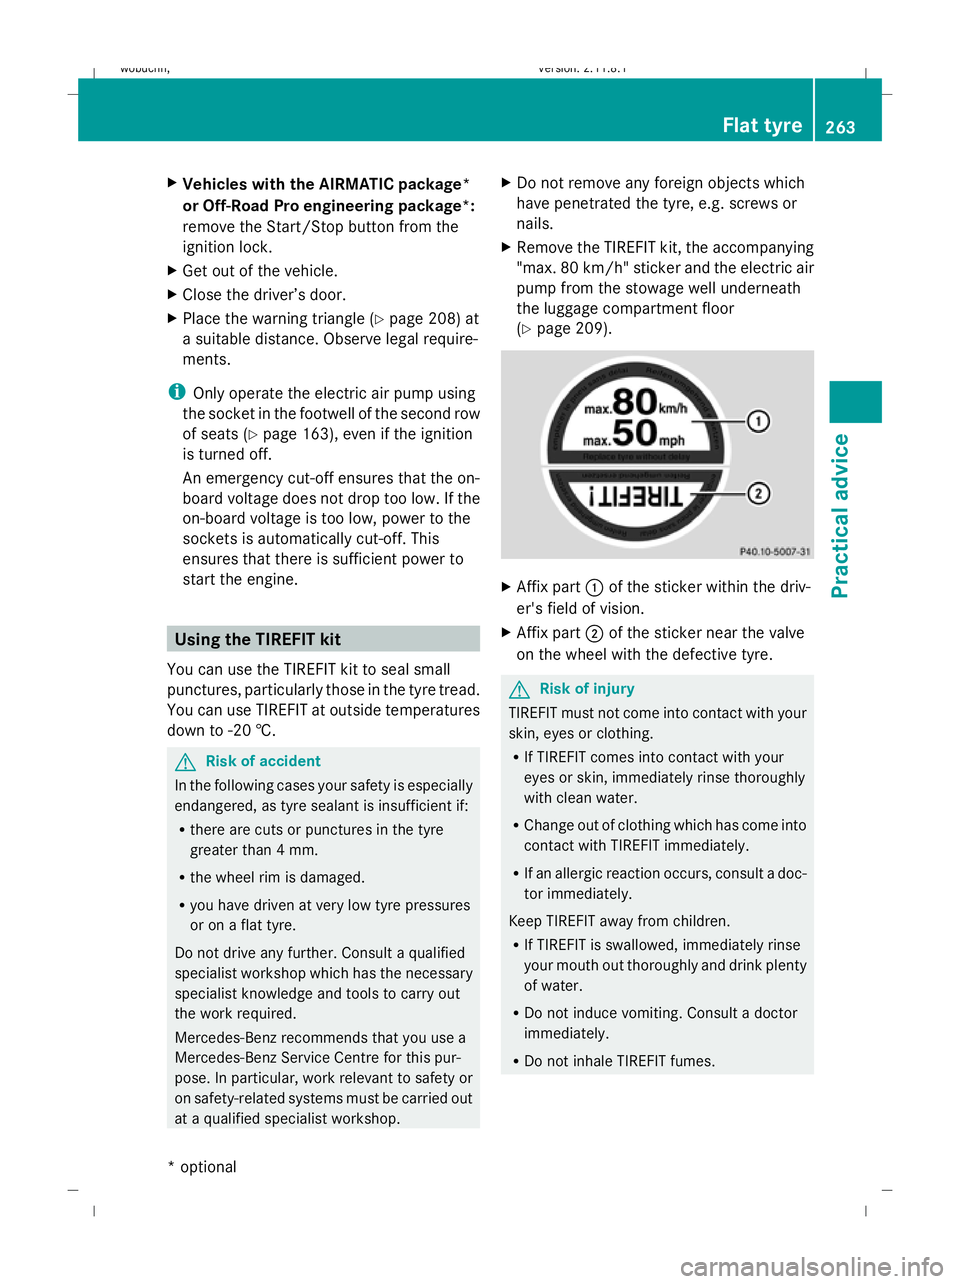
(Y page 209). X
Affix part :of the sticker within the driv-
er's field of vision.
X Affix part ;of the sticker near the valve
on the wheel with the defective tyre. G
Risk of injury
TIREFIT must not come into contact with your
skin, eyes or clothing.
R If TIREFIT comes into contact with your
eyes or skin, immediately rinse thoroughly
with clean water.
R Change out of clothing which has come into
contact with TIREFIT immediately.
R If an allergic reaction occurs, consult a doc-
tor immediately.
Keep TIREFIT away from children.
R If TIREFIT is swallowed, immediately rinse
your mouth out thoroughly and drink plenty
of water.
R Do not induce vomiting. Consult a doctor
immediately.
R Do not inhale TIREFIT fumes. Flat tyre
263Practical advice
* optional
X164_AKB; 2; 3, en-GB
wobuchh,
Version: 2.11.8.1 2009-03-31T14:14:58+02:00 - Seite 263 Z
Dateiname: 6515431202_buchblock.pdf; erzeugt am 01. Apr 2009 00:18:09; WK
Page 271 of 309

Changing a wheel and fitting the
spare wheel G
Risk of accident
The wheel dimensions and tyre size of the
"Minispare" emergency spare wheel *may dif-
fer from those of the damaged wheel.
Your vehicle's handling characteristics will
change when a "Minispare" emergency spare
wheel* is fitted. Adapt your style of driving
accordingly.
The "Minispare" emergency spare wheel*
may only be used for a short time. Do not
exceed the maximum speed of 80 km/h and
do not deactivate ESP ®
.
Never drive the vehicle with more than one
"Minispare" emergency spare wheel* fitted. G
Risk of accident
Have the "Minispare" emergency spare
wheel* or the spare wheel* replaced with a
new wheel as soon as possible at a qualified
specialist workshop which has the necessary
specialist knowledge and tools to carry out
the work required. Mercedes-Benz recom-
mends that you use a Mercedes-Benz Service
Centre for this purpose. In particular, work
relevant to safety or on safety-related sys-
tems must be carried out at a qualified spe-
cialist workshop.
Preparing the vehicle X
Prepare the vehicle as described
(Y page 262).
X If a trailer is coupled, uncouple it.
X Place the wheels in the straight-ahead posi-
tion.
X Remove the following items from the stow-
age well under the luggage compartment
floor:
R the wheel wrench
R the folding wheel chock
R the jack Use the folding wheel chock to prevent the
vehicle from rolling away.
X
Fold both plates :upwards.
X Fold out lower plate ;.
X Guide the lugs on the lower plate fully into
openings in base plate =. Securing the vehicle on level ground
X
On level ground: place the folding wheel
chock or similar under the wheel that is
diagonally opposite to the wheel you wish
to change. Securing the vehicle on slight downhill gradients268
Flat tyrePractical advice
* optional
X164_AKB; 2; 3, en-GB
wobuchh,
Version: 2.11.8.1 2009-03-31T14:14:58+02:00 - Seite 268
Dateiname: 6515431202_buchblock.pdf; erzeugt am 01. Apr 2009 00:18:11; WK
Page 272 of 309

X
On downhill gradients: place the folding
wheel chock or similar behind the wheels
of the front and rear axle. X
Using wheel wrench ?, loosen the bolts on
the wheel you wish to change by about one
full turn. Do not unscrew the bolts com-
pletely.
X Remove the spare wheel from the exterior
bracket* (Y page 210).
or
X Remove the "Minispare" emergency spare
wheel* from the stowage well under the
luggage compartment floor (Y page 210).
Raising the vehicle G
Risk of injury
The jack is designed only to raise the vehicle
for a short time while a wheel is being
changed.
The vehicle must be placed on stands if you
intend to work under it.
Make sure that the jack is placed on a firm,
non-slip, level surface. Do not use wooden
blocks or similar objects as a jack underlay.
The vehicle could otherwise fall off the jack
and seriously injure you.
Do not start the engine at any time while the
wheel is being changed.
Do not lie under the vehicle when it is being
supported by the jack. If you do not raise the
vehicle as described, it could slip off the jack (e.g. if the engine is started or a door or the
tailgate is opened or closed), and you could
be seriously injured.
G
Risk of accident
If you fail to position the jack correctly, the
vehicle may:
R slip off the jack
R injure you or others
R be damaged
Thus, it is important to make sure that the jack
is positioned correctly in the respective jack-
ing points. Before positioning the jack,
remove any dirt that may have collected in the
jacking points.
The jacking points for the jack are located
behind the wheel housings of the front wheels
and in front of the wheel housings of the rear
wheels (arrows). X
Position jack ;at jacking point :. Flat tyre
269Practical advice
* optional
X164_AKB; 2; 3, en-GB
wobuchh,
Version: 2.11.8.1 2009-03-31T14:14:58+02:00 - Seite 269 Z
Dateiname: 6515431202_buchblock.pdf; erzeugt am 01. Apr 2009 00:18:12; WK
Page 273 of 309

X
Make sure that the base of the jack is posi-
tioned directly under jacking point :.
X Take the socket wrench and ratchet ring
spanner =out of the vehicle tool kit.
X Insert the socket into ratchet ring spanner
= and place it on the jack so that the let-
tering AUFis visible.
X Raise the vehicle with ratchet ring spanner
= until the tyre is at most three centime-
tres off the ground. X
Unscrew the uppermost wheel bolt com-
pletely.
X In place of the wheel bolt, screw centring
pin ?from the vehicle tool kit into the
thread.
X Unscrew the remaining wheel bolts fully.
! Do not place wheel bolts in sand or on a
dirty surface. The bolt and wheel hub
threads could otherwise be damaged when
you screw them in.
X Remove the wheel. Fitting a new wheel G
Risk of accident
Replace damaged or corroded wheel bolts.
Never oil or grease wheel bolts. This could
cause the bolts to loosen in the wheel hub. G
Risk of accident
If a wheel hub thread is damaged, do not drive
the vehicle any further. Consult a qualified
specialist workshop which has the necessary
specialist knowledge and tools to carry out
the work required. Mercedes-Benz recom-
mends that you use a Mercedes-Benz Service
Centre or "Service 24". In particular, work rel-
evant to safety or on safety-related systems
must be carried out at a qualified specialist
workshop. G
Risk of accident
Only use wheel bolts that have been designed
for the wheel and the vehicle. For safety rea-
sons, Mercedes-Benz recommends that you
only use wheel bolts which have been
approved for Mercedes-Benz and the respec-
tive wheel. Other bolts may work loose or
damage the brake system.
Do not tighten the wheel bolts completely
while the vehicle is still jacked up. The vehicle
could topple off the jack. 1
Wheel bolts for 18", 19" and 20" wheels
2 Wheel bolts for the "Minispare" emer-
gency spare wheel* 270
Flat tyrePractical advice
* optional
X164_AKB; 2; 3, en-GB
wobuchh,
Version: 2.11.8.1 2009-03-31T14:14:58+02:00 - Seite 270
Dateiname: 6515431202_buchblock.pdf; erzeugt am 01. Apr 2009 00:18:13; WK