2009 MERCEDES-BENZ E-CLASS SALOON ECO mode
[x] Cancel search: ECO modePage 96 of 373

It should:
R
fit snugly across your body.
R be routed across the middle of your
shoulder.
R be routed in your pelvic area across the
hip joints. Lights
Exterior lighting
Notes on the exterior lighting For safety reasons, Mercedes-Benz recom-
mends that you drive with the lights switched
on even during the daytime. In some coun-
tries, daytime operation of headlamps varies
due to legal and voluntary requirements. In
these countries, daytime driving lights are
automatically switched on when the engine is
started.
The exterior lighting (except the side lamp/
parking lamp) switches off automatically if
you:
R remove the key from the ignition lock
R open the driver's door with the ignition
turned off (key in position 0in the ignition
lock).
! Switch off the side lamps and parking
lamp when you leave the vehicle. This pre-
vents the battery from discharging. Information about driving abroad Converting to symmetrical dipped beam
when driving abroad:
switch the headlamps
to symmetrical dipped beam in countries in
which traffic drives on the opposite side of the
road to the country where the vehicle is reg-
istered. This prevents oncoming traffic from
being dazzled.
Have the headlamps converted at a qualified
specialist workshop, e.g. a Mercedes-Benz
Service Centre, as close to the border as pos-
sible before driving in these countries. Sym-
metrical lights do not illuminate as large an
area of the edge of the carriageway.
Converting to asymmetrical dipped beam
after returning: have the headlamps conver-
ted back to asymmetrical dipped beam at a
qualified specialist workshop, e.g. a
Mercedes-Benz Service Centre, as soon as
possible after crossing the border when
returning.
Vehicles with Intelligent Light System*: if
the headlamps are converted to symmetrical
dipped beam, not all light functions are avail-
able. "Motorway mode" and the "extended
range foglamps" are deactivated
(Y page 133). Lights
93Controls
* optional
212_AKB; 2; 4, en-GB
mkalafa
,V ersion: 2.11.8.1
2009-05-05T14:17:16+02:00 - Seite 93 Z
Dateiname: 6515346702_buchblock.pdf; erzeugt am 07. May 2009 14:15:59; WK
Page 100 of 373

X
To switch on: press button:.
All turn signals flash.
X To switch on the hazard warning lamps
on one side: also push the combination
switch beyond the pressure point in the
direction of arrow EorG (Ypage 94).
The indicator lamp on the corresponding
side flashes.
X To switch off: press button:.
The hazard warning lamp switches off auto-
matically after full brake application if the
vehicle then reaches a speed of over
10 km/h again.
Intelligent Light System* (bi-xenon
headlamps*) The Intelligent Light System is a system which
adjusts the headlamps automatically to suit
the prevailing driving and weather conditions.
The bi-xenon headlamps offer enhanced func-
tions to improve illumination of the road sur-
face, e.g. depending on the vehicle speed or
weather conditions. The system includes the
active light function, cornering light function,
motorway mode and extended range fog-
lamps. The system is only active when it is
dark.
You can activate or deactivate the "Intelligent
Light System" using the on-board computer
(Y page 132).
Active light function The active light function is a system that
moves the headlamps according to the steer-
ing movements of the front wheels. In this way, relevant areas remain illuminated while
driving. This allows you to recognise pedes-
trians, cyclists and animals.
Cornering light function
The cornering light function improves the illu-
mination of the road surface in the broad
direction you are turning, e.g. making it easier
to see in tight corners. It can only be activated
when the dipped-beam headlamps are
switched on.
Active:
R
if you are driving at speeds below
40 km/h, the cornering light function is
activated either by the turn signal or by the
steering wheel being turned.
R if you are driving at speeds between
40 km/h and 70 km/h, the cornering light
function is activated by the steering wheel
being turned.
Not active: if you are driving at speeds above
70 km/h or you switch off the turn signal or
move the steering wheel to the straight-
ahead position.
The cornering lamp may remain lit for a short
time, but is automatically switched off after
no more than three minutes. Lights
97Controls
* optional
212_AKB; 2; 4, en-GB
mkalafa,
Version: 2.11.8.1 2009-05-05T14:17:16+02:00 - Seite 97 Z
Dateiname: 6515346702_buchblock.pdf; erzeugt am 07. May 2009 14:16:00; WK
Page 108 of 373
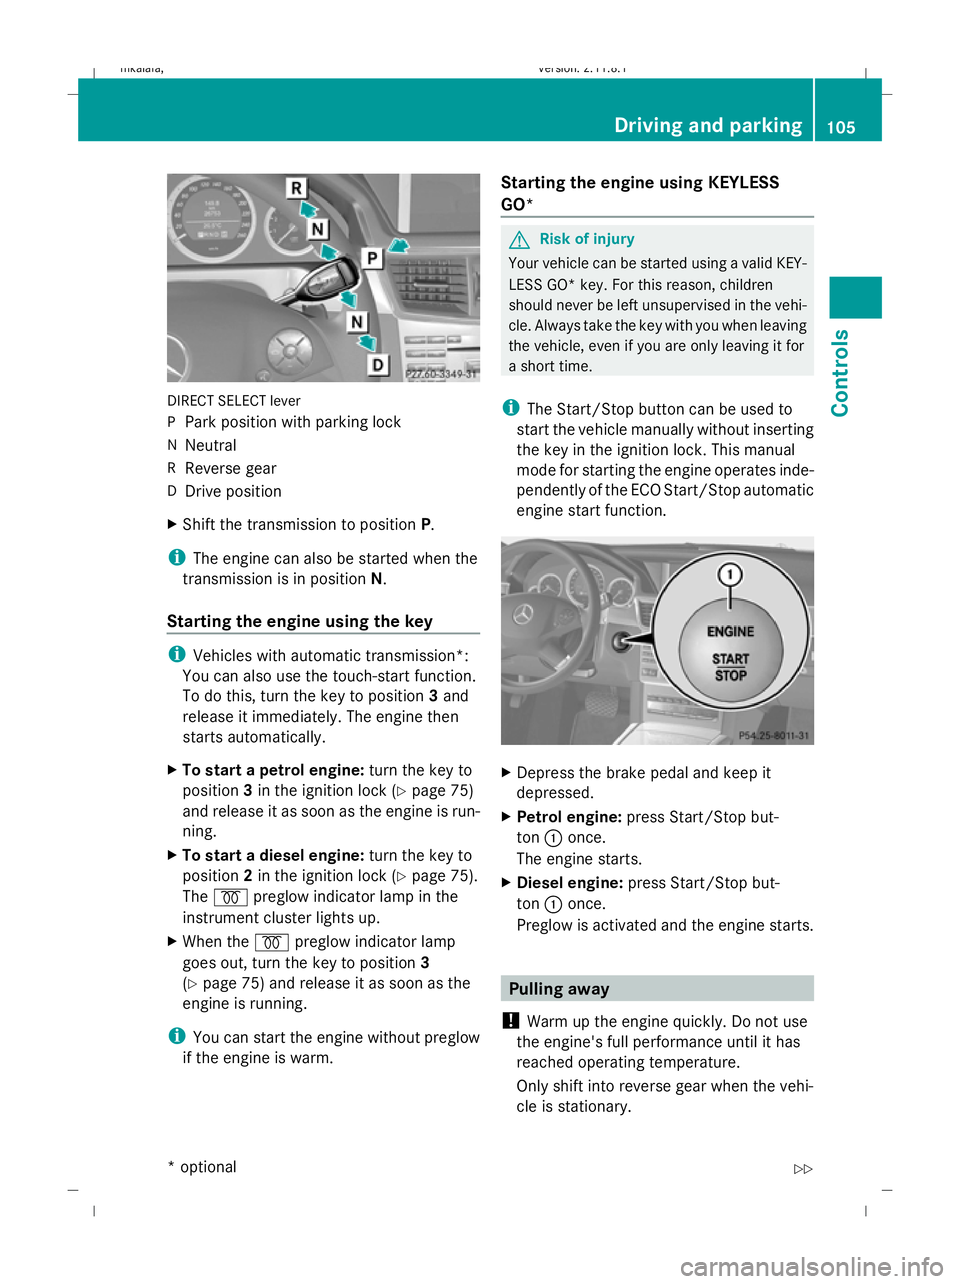
DIRECT SELECT lever
P
Park position with parking lock
N Neutral
R Reverse gear
D Drive position
X Shift the transmission to position P.
i The engine can also be started when the
transmission is in position N.
Starting the engine using the key i
Vehicles with automatic transmission*:
You can also use the touch-start function.
To do this, turn the key to position 3and
release it immediately. The engine then
starts automatically.
X To start a petrol engine: turn the key to
position 3in the ignition lock (Y page 75)
and release it as soon as the engine is run-
ning.
X To start a diesel engine: turn the key to
position 2in the ignition lock (Y page 75).
The % preglow indicator lamp in the
instrument cluster lights up.
X When the %preglow indicator lamp
goes out, turn the key to position 3
(Y page 75) and release it as soon as the
engine is running.
i You can start the engine without preglow
if the engine is warm. Starting the engine using KEYLESS
GO* G
Risk of injury
Your vehicle can be started using a valid KEY-
LESS GO* key. For this reason, children
should never be left unsupervised in the vehi-
cle. Always take the key with you when leaving
the vehicle, even if you are only leaving it for
a short time.
i The Start/Stop button can be used to
start the vehicle manually without inserting
the key in the ignition lock. This manual
mode for starting the engine operates inde-
pendently of the ECO Start/Stop automatic
engine start function. X
Depress the brake pedal and keep it
depressed.
X Petrol engine: press Start/Stop but-
ton :once.
The engine starts.
X Diesel engine: press Start/Stop but-
ton :once.
Preglow is activated and the engine starts. Pulling away
! Warm up the engine quickly. Do not use
the engine's full performance until it has
reached operating temperature.
Only shift into reverse gear when the vehi-
cle is stationary. Driving and parking
105Controls
* optional
212_AKB; 2; 4, en-GB
mkalafa,
Version: 2.11.8.1 2009-05-05T14:17:16+02:00 - Seite 105 Z
Dateiname: 6515346702_buchblock.pdf; erzeugt am 07. May 2009 14:16:04; WK
Page 111 of 373
Using the key
X
Turn the key to position 0(Y page 75) in
the ignition lock and remove it.
The immobiliser is activated.
i Vehicles with a selector lever: you can
only remove the key if the transmission is
in position P.
i Vehicles with a DIRECT SELECT lever:
if you switch off the engine with the trans-
mission in position Ror D, the automatic
transmission automatically shifts to N.
If you then open the driver's door or the
front-passenger door or remove the key
from the ignition, the automatic transmis-
sion shifts to P.
If you shift the automatic transmission to
N before switching off the engine, the auto-
matic transmission remains in Neven when
a door is opened.
Using KEYLESS GO*
X Press the Start/Stop button (Y page 75).
The engine stops and all the indicator
lamps in the instrument cluster go out
(Y page 27).
i Vehicles with a DIRECT SELECT lever:
if you switch off the engine using the Start/
Stop button, the automatic transmission
automatically shifts to N. If you open the
driver's or front-passenger door, the auto-
matic transmission shifts to P.
i The engine can be turned off while the
vehicle is in motion by pressing and holding
the Start/Stop button for three seconds.
This function operates independently from
the ECO Start/Stop automatic engine
switch-off function. ECO start/stop function
i The ECO Start/Stop function is only avail-
able for the A 200 CGI model with manual
transmission. The ECO Start/Stop function ensures that the
engine is switched off automatically under
certain conditions when the vehicle is moving
slowly.
The engine starts automatically when you pull
away again.
The ECO Start/Stop function thereby helps
you to reduce the fuel consumption and emis-
sions of your vehicle.
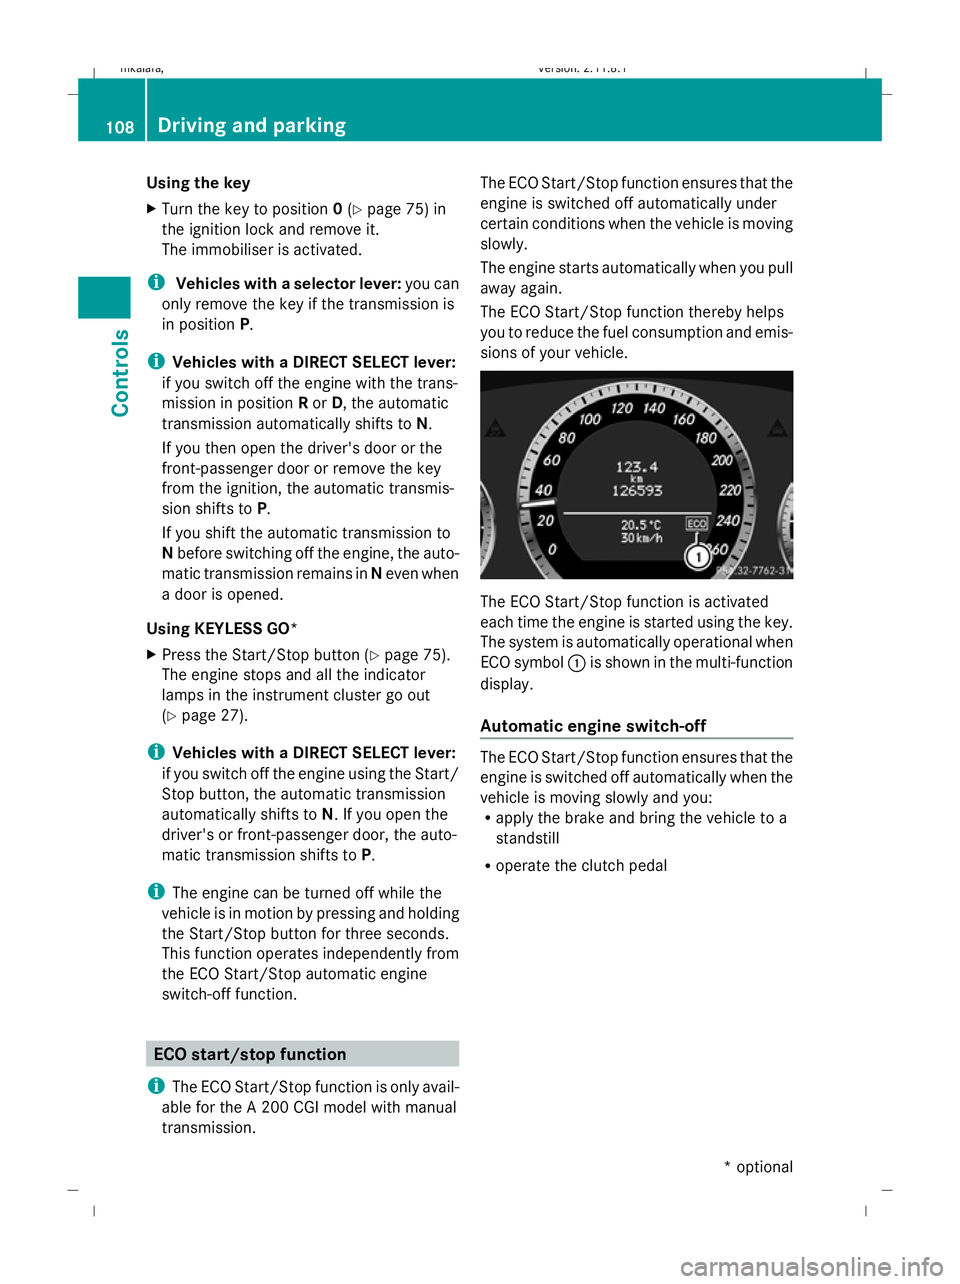
The ECO Start/Stop function is activated
each time the engine is started using the key.
The system is automatically operational when
ECO symbol
:is shown in the multi-function
display.
Automatic engine switch-off The ECO Start/Stop function ensures that the
engine is switched off automatically when the
vehicle is moving slowly and you:
R
apply the brake and bring the vehicle to a
standstill
R operate the clutch pedal 108
Driving and parkingControls
* optional
212_AKB; 2; 4, en-GB
mkalafa,
Version: 2.11.8.1 2009-05-05T14:17:16+02:00 - Seite 108
Dateiname: 6515346702_buchblock.pdf; erzeugt am 07. May 2009 14:16:05; WK
Page 120 of 373
Downshifting
G
Risk of accident
Do not shift down to brake on a slippery road
surface. This could cause the drive wheels to
lose their grip, and the vehicle could skid.
X Pull the left-hand paddle ( Ypage 114).
The automatic transmission shifts down to
the next gear.
i For maximum acceleration, pull the left-
hand steering wheel gearshift paddle until
the transmission selects the optimum gear
for the current speed.
Kickdown
i On vehicles with AMG engines, it is not
possible to use kickdown in manual drive
program M. Instrument cluster
Points to remember
You will find an illustration of the instrument
cluster in the "At a glance" section
(Y page 27). G
Risk of accident
If the instrument cluster or the multi-function
display fails, then no display messages can be
shown.
You will not then be able to see information
about the vehicle status, such as speed and
outside temperature, warning and indicator
lamps, display messages or the failure of sys-
tems. The vehicle’s handling characteristics
may be affected. Adapt your driving style and
speed accordingly.
Immediately consult a qualified specialist
workshop which has the necessary specialist
knowledge and tools to carry out the work
required. Mercedes-Benz recommends that
you use a Mercedes-Benz Service Centre for
this purpose. In particular, work relevant to
safety or on safety-related systems must be
carried out at a qualified specialist workshop. Coolant temperature display
The coolant temperature gauge is in the
instrument cluster on the right-hand side.
Under normal operating conditions and with
the specified coolant level, the coolant tem-
perature may rise to 120 †. The coolant tem-
perature may rise to the top end of the scale
at high outside temperatures and on long
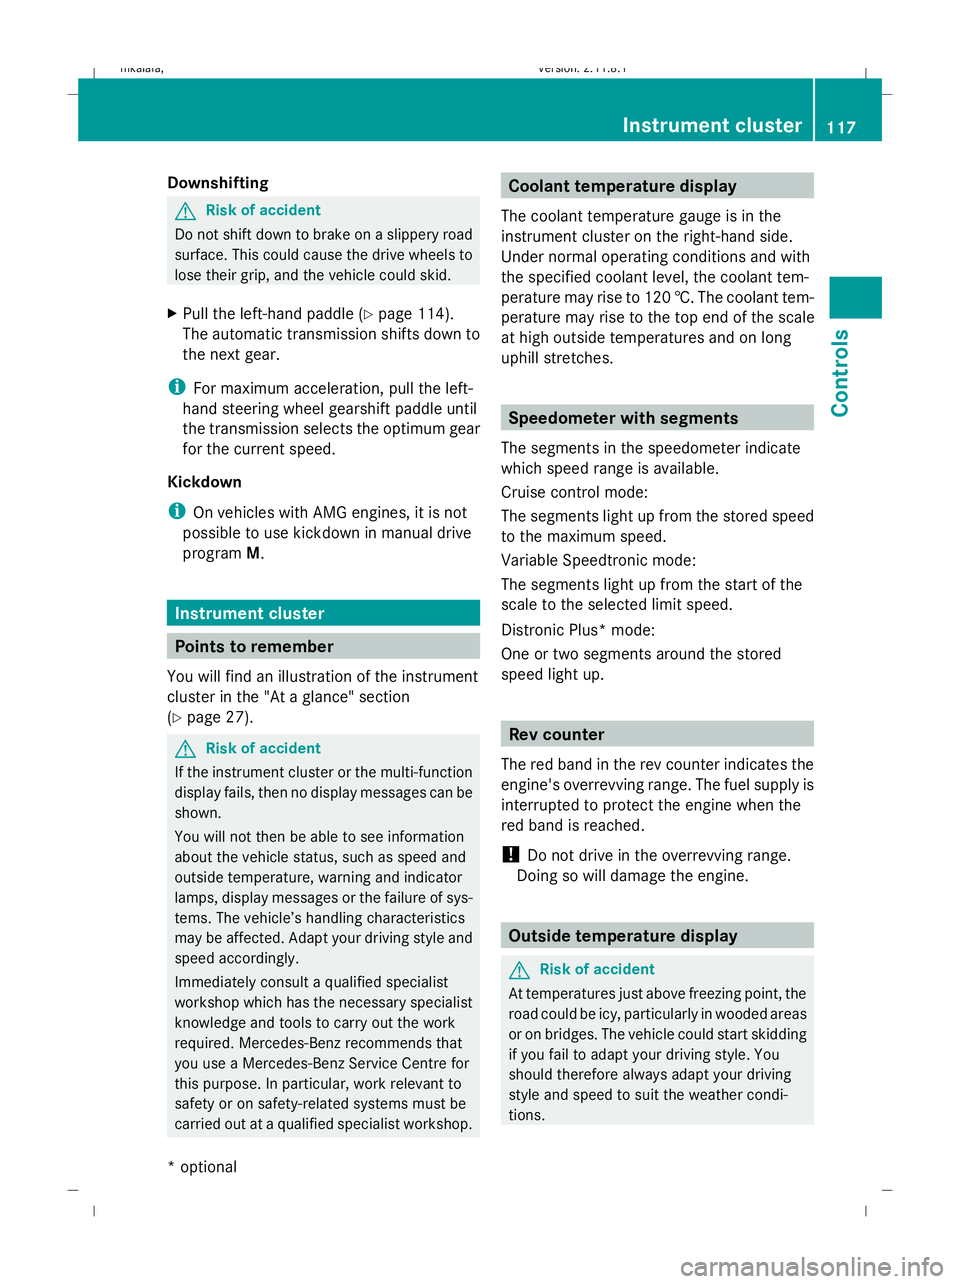
uphill stretches. Speedometer with segments
The segments in the speedometer indicate
which speed range is available.
Cruise control mode:
The segments light up from the stored speed
to the maximum speed.
Variable Speedtronic mode:
The segments light up from the start of the
scale to the selected limit speed.
Distronic Plus* mode:
One or two segments around the stored
speed light up. Rev counter
The red band in the rev counter indicates the
engine's overrevving range. The fuel supply is
interrupted to protect the engine when the
red band is reached.
! Do not drive in the overrevving range.
Doing so will damage the engine. Outside temperature display
G
Risk of accident
At temperatures just above freezing point, the
road could be icy, particularly in wooded areas
or on bridges. The vehicle could start skidding
if you fail to adapt your driving style. You
should therefore always adapt your driving
style and speed to suit the weather condi-
tions. Inst
rument cluster
117Controls
* optional
212_AKB; 2; 4, en-GB
mkalafa
,V ersion: 2.11.8.1
2009-05-05T14:17:16+02:00 - Seite 117 Z
Dateiname: 6515346702_buchblock.pdf; erzeugt am 07. May 2009 14:16:09; WK
Page 122 of 373
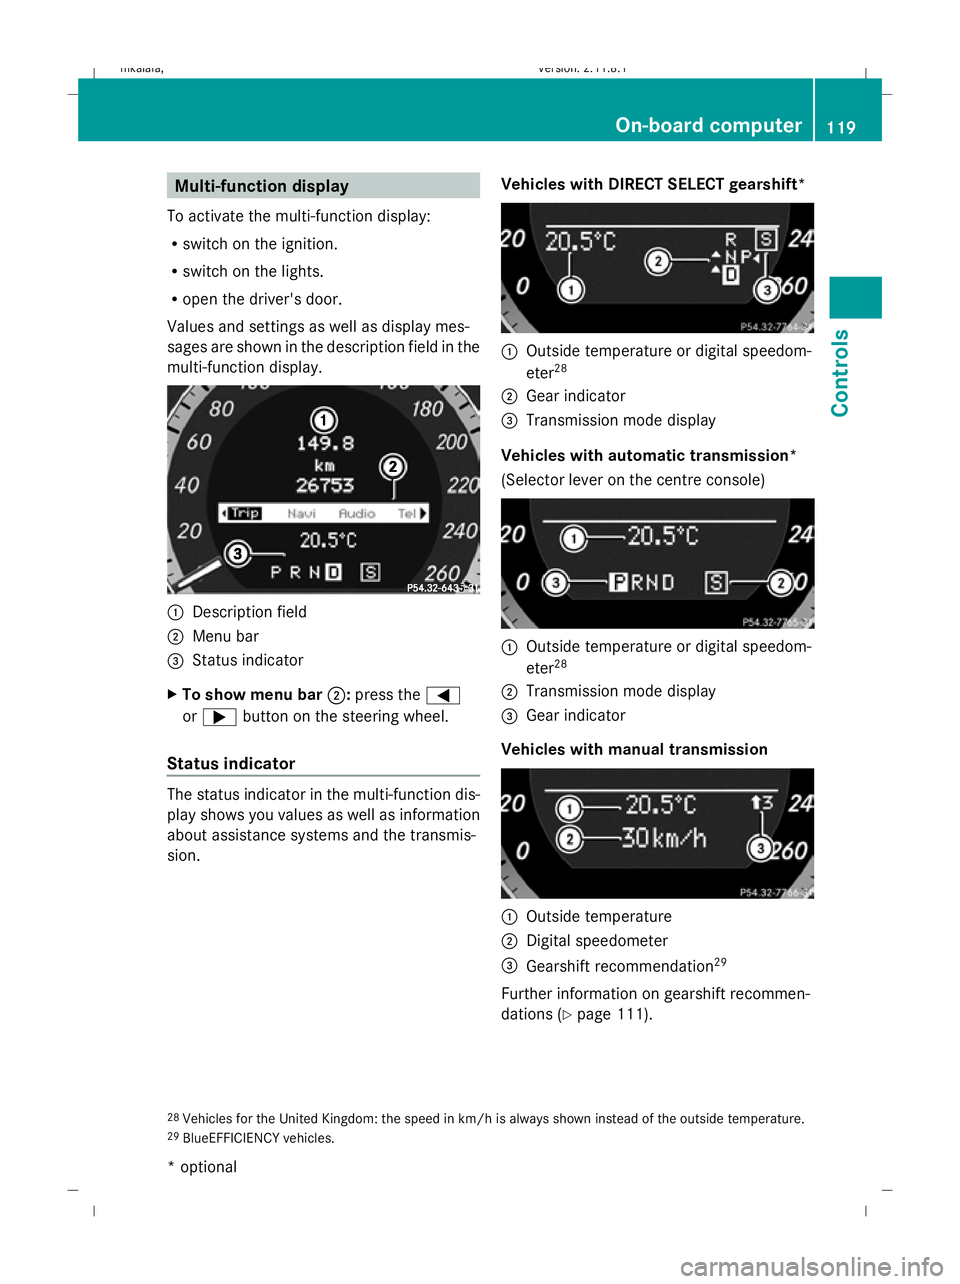
Multi-function display
To activate the multi-function display:
R switch on the ignition.
R switch on the lights.
R open the driver's door.
Values and settings as well as display mes-
sages are shown in the description field in the
multi-function display. :
Description field
; Menu bar
= Status indicator
X To show menu bar ;:press the =
or ; button on the steering wheel.
Status indicator The status indicator in the multi-function dis-
play shows you values as well as information
about assistance systems and the transmis-
sion. Vehicles with DIRECT SELECT gearshift* :
Outside temperature or digital speedom-
eter 28
; Gear indicator
= Transmission mode display
Vehicles with automatic transmission*
(Selector lever on the centre console) :
Outside temperature or digital speedom-
eter 28
; Transmission mode display
= Gear indicator
Vehicles with manual transmission :
Outside temperature
; Digital speedometer
= Gearshift recommendation 29
Further information on gearshift recommen-
dations (Y page 111).
28 Vehicles for the United Kingdom: the speed in km/h is always shown instead of the outside temperature.
29 BlueEFFICIENCY vehicles. On-board computer
119Controls
* optional
212_AKB; 2; 4, en-GB
mkalafa,
Version: 2.11.8.1 2009-05-05T14:17:16+02:00 - Seite 119 Z
Dateiname: 6515346702_buchblock.pdf; erzeugt am 07. May 2009 14:16:10; WK
Page 126 of 373
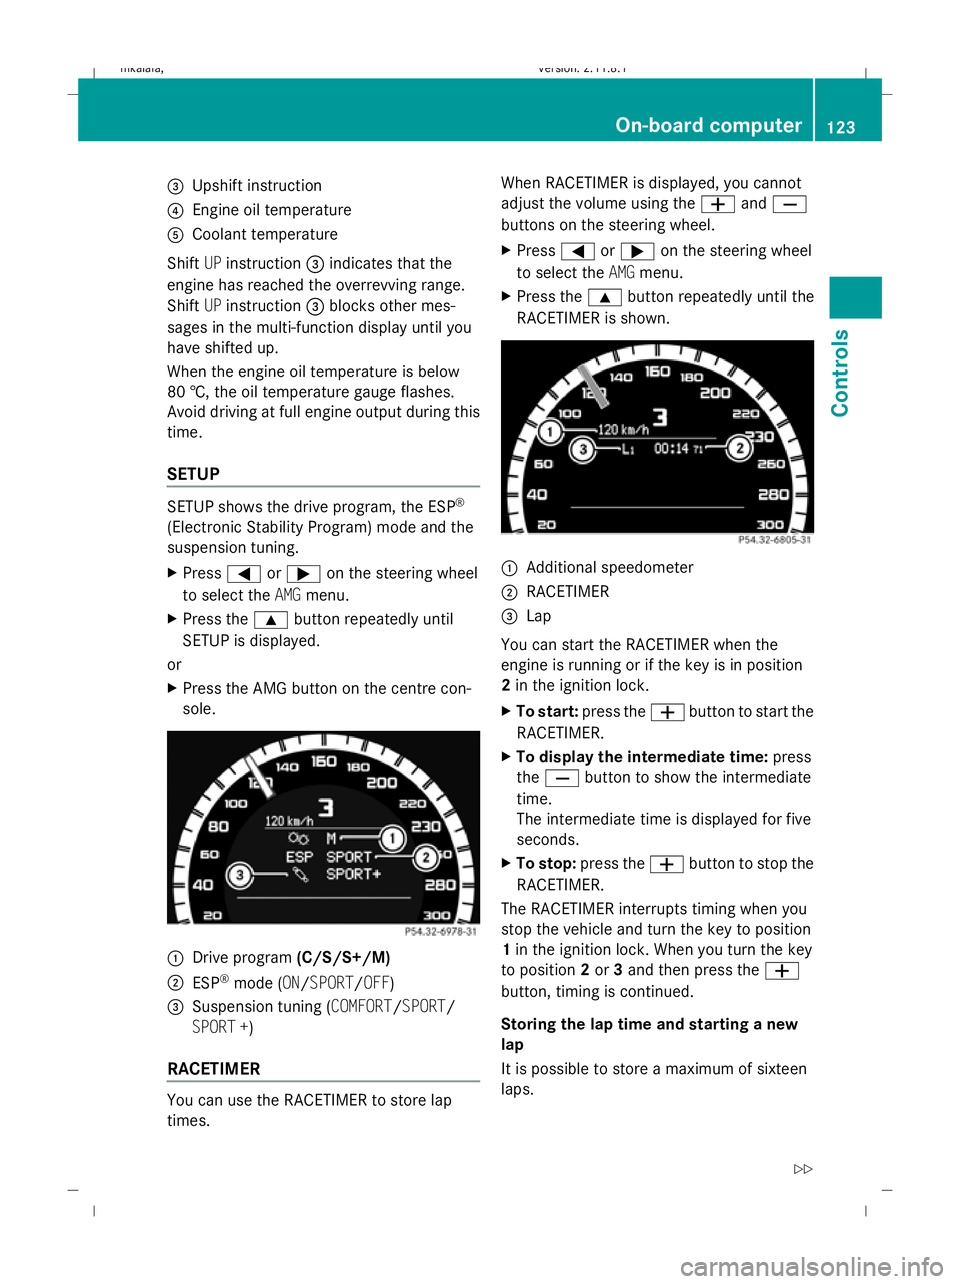
=
Upshift instruction
? Engine oil temperature
A Coolant temperature
Shift UPinstruction =indicates that the
engine has reached the overrevving range.
Shift UPinstruction =blocks other mes-
sages in the multi-function display until you
have shifted up.
When the engine oil temperature is below
80 †, the oil temperature gauge flashes.
Avoid driving at full engine output during this
time.
SETUP SETUP shows the drive program, the ESP
®
(Electronic Stability Program) mode and the
suspension tuning.
X Press =or; on the steering wheel
to select the AMGmenu.
X Press the 9button repeatedly until
SETUP is displayed.
or
X Press the AMG button on the centre con-
sole. :
Drive program (C/S/S+/M)
; ESP ®
mode (ON/SPORT/OFF)
3 Suspension tuning (COMFORT/SPORT/
SPORT +)
RACETIMER You can use the RACETIMER to store lap
times. When RACETIMER is displayed, you cannot
adjust the volume using the
WandX
buttons on the steering wheel.
X Press =or; on the steering wheel
to select the AMGmenu.
X Press the 9button repeatedly until the
RACETIMER is shown. :
Additional speedometer
; RACETIMER
= Lap
You can start the RACETIMER when the
engine is running or if the key is in position
2 in the ignition lock.
X To start: press the Wbutton to start the
RACETIMER.
X To display the intermediate time: press
the X button to show the intermediate
time.
The intermediate time is displayed for five
seconds.
X To stop: press the Wbutton to stop the
RACETIMER.
The RACETIMER interrupts timing when you
stop the vehicle and turn the key to position
1 in the ignition lock. When you turn the key
to position 2or 3and then press the W
button, timing is continued.
Storing the lap time and starting a new
lap
It is possible to store a maximum of sixteen
laps. On-board computer
123Controls
212_AKB; 2; 4, en-GB
mkalafa, Version: 2.11.8.1 2009-05-05T14:17:16+02:00 - Seite 123 Z
Dateiname: 6515346702_buchblock.pdf; erzeugt am 07. May 2009 14:16:12; WK
Page 156 of 373
message in the multi-function display goes
out. On vehicles with automatic transmis-
sion*, you can also select
P. This deactivates
the HOLD function. RACE START (E 63 AMG)
RACE START enables optimal acceleration
from a standing start with suitable high-grip
road surface conditions. G
Risk of accident
RACE START is only available when ESP ®
Sports mode is activated. ESP ®
Sport stabil-
ises the vehicle in a limited manner if the vehi-
cle starts to skid or when a wheel is spinning.
RACE START should only be used on closed
off circuits. Always adapt your driving style to
suit the prevailing road and weather condi-
tions.
Conditions for activation RACE START can be activated when:
R
the doors are closed
R the engine is running and it has reached an
operating temperature of approximately
80 †. This is the case when the engine oil
temperature lamp in the multi-function dis-
play stops flashing.
R ESP ®
Sport is activated (Y page 62)
R the steering wheel is in the straight-ahead
position
R the vehicle is at rest and the brake pedal is
depressed (left foot)
R the transmission is in position DActivating RACE START X
Depress the brake pedal with your left foot,
and keep it depressed.
X Turn the program selector switch clock-
wise (Y page 116), until the RSlamp lights
up.
The multi-function display shows the RACE
START Confirm: Paddle UP Cancel:
Paddle DOWN message.
i If the conditions for activation are no lon-
ger fulfilled, RACE START is cancelled. The
multi-function display shows the RACE
START cancelled message.
X To cancel: pull the left paddle
(Y page 114).
or
X To confirm: pull the right paddle
(Y page 114).
The multi-function display shows the RACE
START available Depress accelera‐
tor message.
i If you do not depress the accelerator
pedal fully within two seconds, RACE
START is cancelled. The multi-function dis-
play shows the RACE START not possi‐
ble See Owner's Manual message.
X Depress the accelerator pedal fully.
The engine speed rises to approximately
4,000 rpm.
The multi-function display shows the RACE
START Release brake to start mes-
sage.
i If you do not release the brake pedal
within seven seconds, RACE START is can-
celled. The multi-function display shows
the RACE START cancelled message.
X Take your foot off the brake, but keep the
accelerator pedal depressed.
The vehicle pulls away at maximum accel-
eration.
The multi-function display shows the RACE
START active message. Driving systems
153Controls
* optional
212_AKB; 2; 4, en-GB
mkalafa,
Version: 2.11.8.1 2009-05-05T14:17:16+02:00 - Seite 153 Z
Dateiname: 6515346702_buchblock.pdf; erzeugt am 07. May 2009 14:16:21; WK