2009 MERCEDES-BENZ CL COUPE boot
[x] Cancel search: bootPage 208 of 421
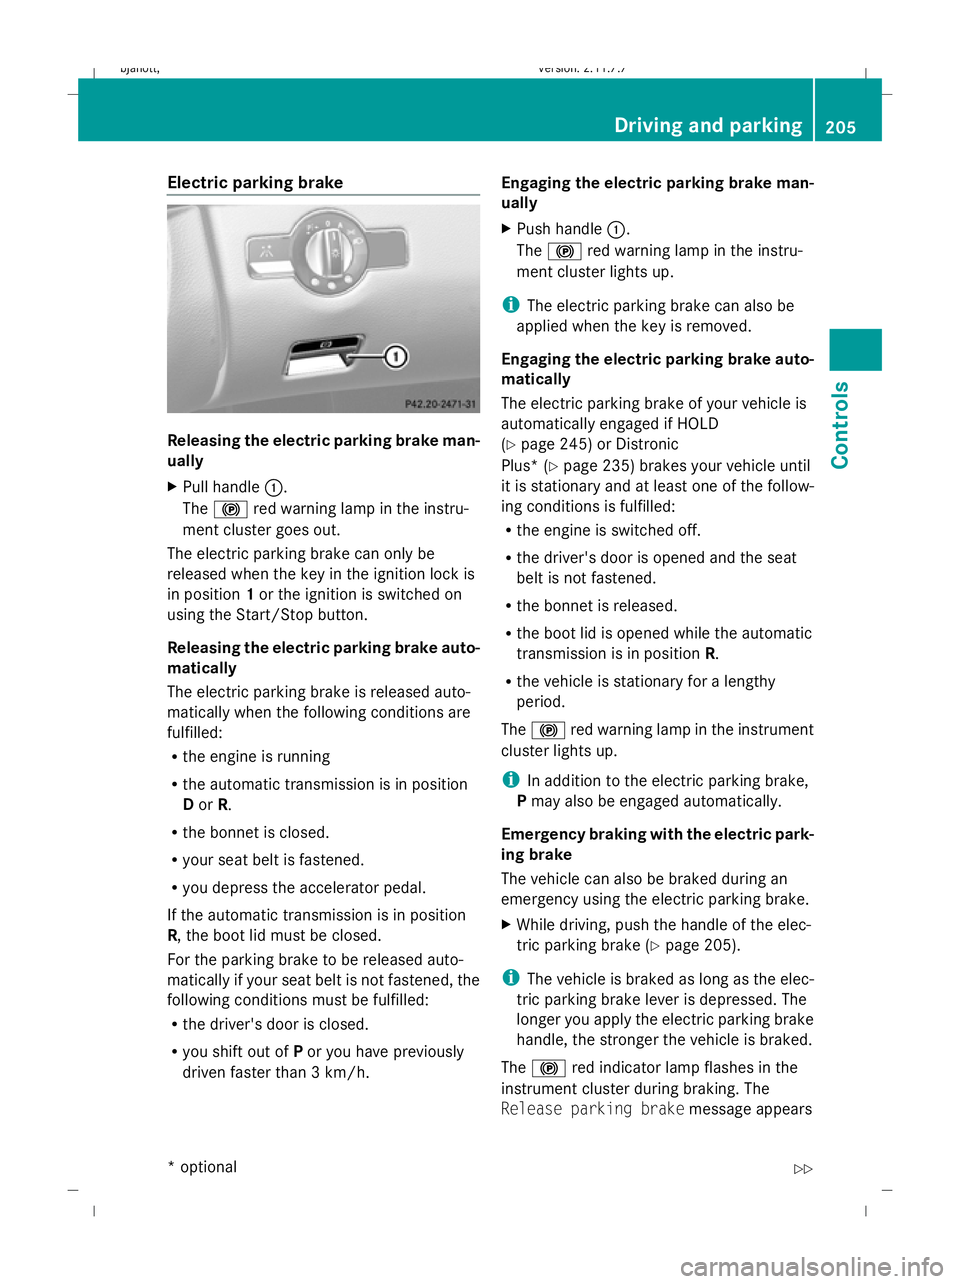
Electric parking brake
Releasing the electric parking brake man-
ually
X
Pull handle :.
The ! red warning lamp in the instru-
ment cluster goes out.
The electric parking brake can only be
released when the key in the ignition lock is
in position 1or the ignition is switched on
using the Start/Stop button.
Releasing the electric parking brake auto-
matically
The electric parking brake is released auto-
matically when the following conditions are
fulfilled:
R the engine is running
R the automatic transmission is in position
D or R.
R the bonnet is closed.
R your seat belt is fastened.
R you depress the accelerator pedal.
If the automatic transmission is in position
R, the boot lid must be closed.
For the parking brake to be released auto-
matically if your seat belt is not fastened, the
following conditions must be fulfilled:
R the driver's door is closed.
R you shift out of Por you have previously
driven faster than 3 km/h. Engaging the electric parking brake man-
ually
X
Push handle :.
The ! red warning lamp in the instru-
ment cluster lights up.
i The electric parking brake can also be
applied when the key is removed.
Engaging the electric parking brake auto-
matically
The electric parking brake of your vehicle is
automatically engaged if HOLD
(Y page 245) or Distronic
Plus* ( Ypage 235) brakes your vehicle until
it is stationary and at least one of the follow-
ing conditions is fulfilled:
R the engine is switched off.
R the driver's door is opened and the seat
belt is not fastened.
R the bonnet is released.
R the boot lid is opened while the automatic
transmission is in position R.
R the vehicle is stationary for a lengthy
period.
The ! red warning lamp in the instrument
cluster lights up.
i In addition to the electric parking brake,
P may also be engaged automatically.
Emergency braking with the electric park-
ing brake
The vehicle can also be braked during an
emergency using the electric parking brake.
X While driving, push the handle of the elec-
tric parking brake (Y page 205).
i The vehicle is braked as long as the elec-
tric parking brake lever is depressed. The
longer you apply the electric parking brake
handle, the stronger the vehicle is braked.
The ! red indicator lamp flashes in the
instrument cluster during braking. The
Release parking brake message appears Driving and parking
205Controls
* option al
216_AKB; 2; 3, en-GB
bjanott
,V ersion: 2.11.7.7
2009-02-27T14:54:17+01:00 - Seite 205 Z
Dateiname: 6515230602_buchblock.pdf; erzeugt am 04. Mar 2009 11:15:48; WK
Page 248 of 421

more than 20 km/h from the stored speed.
You will hear a warning tone if this is the case.
G
Risk of accident
It is not possible to deactivate variable Speed-
tronic by braking.
i The last speed stored is cleared when you
switch off the engine.
Permanent Speedtronic i
Permanent Speedtronic is only available
in certain countries.
You can use the on-board computer to limit
the speed permanently to a value between
160 km/h (e.g. for driving with winter tyres)
and the maximum speed.
Just before the stored speed is reached, it
appears in the multi-function display.
Permanent Speedtronic remains active, even
if variable Speedtronic is deactivated.
You cannot exceed the stored limit speed,
even if you depress the accelerator pedal
beyond the pressure point (kickdown).
Setting permanent Speedtronic
X Press the =or; button to select the
Settings menu.
X Press the :or9 button to select
SPEEDTRONIC.
X To change this, press a. X
Press the abutton again.
X Press the :or9 button to set per-
manent Speedtronic in increments of ten
(240 km/h to 160 km/h). Permanent Speedtronic is deactivated with the
off
setting.
X Press ato save the entry. HOLD
HOLD assists the driver in the following sit-
uations:
R when pulling away, especially on steep
slopes
R when manoeuvring on steep slopes
R when waiting in traffic
The vehicle is kept stationary without the
driver having to depress the brake pedal.
The braking effect is cancelled and HOLD
deactivated when you depress the accelera-
tor pedal to pull away.
Activation conditions You can activate HOLD if:
R
the vehicle is stationary.
R the engine is running.
R the driver's door is closed or your seat belt
is fastened.
R the electric parking brake is released.
R the bonnet is closed.
R the automatic transmission is in position
R, Nor D. If the automatic transmission is
in position R, the boot lid must be closed.
Activating HOLD X
Make sure that the activation conditions
are met.
X Depress the brake. Driving systems
245Controls
216_AKB; 2; 3, en-GB
bjanott, Version: 2.11.7.7 2009-02-27T14:54:17+01:00 - Seite 245 Z
Dateiname: 6515230602_buchblock.pdf; erzeugt am 04. Mar 2009 11:16:01; WK
Page 260 of 421

Driving to the final position
1
The lane turns green when the steering
wheel is turned in the right direction.
X Keep the steering wheel turned in that
direction and reverse carefully until you
have reached the final position.
The Parking guidance finished mes-
sage appears in the multi-function display
and a warning tone sounds.
If the rear gap is too small, Park Assist
emits an additional warning tone
(Y page 251). Final position
Depending on the size of the parking space,
you may now be in an angled position in the
parking space. If possible, Parking Guidance
will guide you as far back as possible towards
the rear limit of the parking space.
X
Manoeuvre, if necessary.
X Pay attention to the Park Assist display
(Y page 251). Cancelling Parking Guidance X
Press the Park Assist button in the dash-
board ( Ypage 253).
Parking Guidance is cancelled immediately
and Park Assist is deactivated. No message
appears in the multi-function display.
Parking Guidance is cancelled automatically
if it is no longer possible to guide you into the
parking space, or if a malfunction occurs.
The parking space symbol disappears and the
Parking guidance cancelled message
appears in the multi-function display. Reversing camera*
The reversing camera is an optical parking
aid. It shows the area behind your vehicle in
the COMAND display.
In addition to the camera function, it assists
you by providing guide lines when you are
reversing. G
Risk of injury
Make sure that no persons or animals are in
the manoeuvring range. Otherwise, they
could be injured.
The reversing camera is located in the handle
strip of the boot lid. :
Reversing camera
View through the camera The area behind the vehicle is displayed in a
mirrored fashion, as in the rear-view mirror. Driving syste
ms
257Controls
* option al
216_AKB; 2; 3, en-GB
bjanott
,V ersion: 2.11.7.7
2009-02-27T14:54:17+01:00 - Seite 257 Z
Dateiname: 6515230602_buchblock.pdf; erzeugt am 04. Mar 2009 11:16:06; WK
Page 261 of 421

G
Risk of accident
The reversing camera is only an aid and may
display obstacles in a distorted or incorrect
manner, or may not even display them at all.
The reversing camera does not relieve you of
the responsibility to pay attention. The cam-
era cannot show objects:
R very near to the rear bumper
R below the rear bumper
R in the area immediately above the boot lid
handle
You are always responsible for safety and
must continue to pay attention to your imme-
diate surroundings when parking and
manoeuvring. This applies to the areas
behind, in front of and next to the vehicle. You
could otherwise endanger yourself and oth-
ers. G
Risk of accident
Under the following circumstances, the
reversing camera will not function, or function
in a limited manner:
R if the boot lid is open
R in heavy rain, snow or fog
R at night or in very dark places
R if the camera is exposed to very bright light
R if the area is lit by fluorescent light (the dis-
play may flicker)
R if there is a sudden change in temperature,
e.g. when driving into a heated garage in
winter
R if the camera lens is dirty or obstructed
R if the rear of your vehicle is damaged. In this
event have the camera position and setting
checked at a qualified specialist workshop.
Mercedes-Benz recommends that you use
a Mercedes-Benz Service Centre for this
purpose.
Do not use the reversing camera in these
types of situation. You could otherwise injure others or damage objects and your vehicle
while you are parking.
Activating the reversing camera X
Make sure that the key is in position 2in
the ignition lock.
X Engage reverse gear.
The area behind the vehicle is shown in the
COMAND display with guide lines. G
Risk of accident
Please note that objects not on ground level
may appear to be further away than they
actually are. These include:
R the bumper of the vehicle parked behind
R trailer tow bars
R the tail-end of a lorry
R slanted posts
The lines are only guides, not accurate meas-
urements of the distance to an obstacle.
Therefore, you should never pass the red line
when approaching an obstacle. You could oth-
erwise cause an accident and injure yourself
and others. Red guide line
=, approximately 0.25 m, and
yellow guide line ;, approximately 1.0 m,
show the approximate distance from the rear
end of the vehicle. Blue line :depicts the
width required for the vehicle. It helps you to
position the vehicle at the side of the road,
e.g. at the kerb. 258
Driving systemsControls
216_AKB; 2; 3, en-GB
bjanott,
Version: 2.11.7.7 2009-02-27T14:54:17+01:00 - Seite 258
Dateiname: 6515230602_buchblock.pdf; erzeugt am 04. Mar 2009 11:16:07; WK
Page 282 of 421

Unfolding the skibag and loading skis
X
Fold down the rear seat armrest.
X Turn handle :and pull it upwards in the
direction of the arrow.
X Fold down cover ;. X
Pull skibag :into the vehicle interior and
unfold it. X
Open the boot lid.
X Pull handle :on the flap. X
Fold the flap to the side until it is held in
place by the magnet.
X Slide the skis into the skibag from the boot. X
Pull strap :tight by the loose end until the
skis are held firmly inside the skibag. X
Engage hook :in securing ring ;.
X Pull the strap tight by the loose end.
Removing the skis and folding up the
skibag X
Loosen the two straps.
X Remove hook :from securing ring ;.
X Take the skis out of the skibag.
X Close the flap in the boot.
X Smooth out the skibag and fold it up.
X Stow the skibag in the rear seat armrest.
X Fold the cover back up.
i You should always close the flap in the
boot if you do not require the skibag. This Loading and stowing
279Controls
216_AKB; 2; 3, en-GB
bjanott, Version: 2.11.7.7 2009-02-27T14:54:17+01:00 - Seite 279 Z
Dateiname: 6515230602_buchblock.pdf; erzeugt am 04. Mar 2009 11:16:19; WK
Page 283 of 421

will prevent access to the boot from the
vehicle interior.
Removing the skibag The skibag can be removed for cleaning or
drying. G
Risk of poisoning
When the skibag has been removed, always
drive with the boot lid closed. Otherwise,
exhaust fumes could enter the vehicle inte-
rior.
X Open the boot lid. X
Open flap ;.
X Press recess :to the left and pull out the
frame with the skibag. Boot
Stowage well beneath the boot floor Vehicles with TIREFIT or the "Minispare"
emergency spare wheel* feature a stowage
well under the cover of the boot floor. 1
Stowage well
2 Hook
3 Boot floor cover
X Attach boot floor cover 3to the upper
edge of the boot with hooks 2.
Hook !
Do not use the hook to lash down loads.
X Pull down hook 2by tab 1. Features
Sun visors
G
Risk of accident
Keep the mirrors in the sun visors covered
while driving. Otherwise, you could be daz-
zled, impairing your view of traffic conditions.
As a result, you could cause an accident. 280
FeaturesCont
rols
* option al
216_AKB; 2; 3, en-GB
bjanott
,V ersion: 2.11.7.7
2009-02-27T14:54:17+01:00 - Seite 280
Dateiname: 6515230602_buchblock.pdf; erzeugt am 04. Mar 2009 11:16:20; WK
Page 285 of 421

Cigarette lighter* (smoker's pack-
age) G
Risk of injury and fire
Only hold the hot cigarette lighter by its knob.
Otherwise, you might burn yourself.
Make sure that children travelling in the vehi-
cle are not able to injure themselves on the
hot cigarette lighter or cause a fire with it. Centre console, front
X
Make sure that the key is in position 2in
the ignition lock.
X Press in cigarette lighter :.
Cigarette lighter :will pop out automati-
cally when the heating element is red-hot. 12 V sockets
The sockets can be used for accessories with
a maximum power consumption of 180 watts.
X Make sure that the key is in position 2in
the ignition lock. Dashboard socket :
Socket in the glove compartment
A socket is fitted in the centre console on
vehicles with the non-smoker's package. :
Socket on the centre console
Socket in the boot :
Socket 282
FeaturesCont
rols
* option al
216_AKB; 2; 3, en-GB
bjanott
,V ersion: 2.11.7.7
2009-02-27T14:54:17+01:00 - Seite 282
Dateiname: 6515230602_buchblock.pdf; erzeugt am 04. Mar 2009 11:16:22; WK
Page 286 of 421

Coolbox*
G
Risk of fire
Do not cover the ventilation grille of the cool-
box in the boot and do not transport highly
flammable materials in the boot. Otherwise,
there is a risk of fire.
The cooling output of the coolbox depends on
the ambient temperature and the selected
cooling level.
Should numerous electrical consumers be
switched on or the battery not be sufficiently
charged, the coolbox will reduce its cooling
output or switch off. This is indicated by the
flashing indicator lamp in the switch. The
cooling function will automatically switch
back on as soon as there is sufficient voltage. X
To open: pull handle ;on the cover.
X Fold the cover out to the front.
X To switch on the cooling: press switch
= to ON.
The indicator lamp in the switch flashes for
approximately 30 seconds and then lights
up constantly.
X To switch off the cooling: press switch
= to OFF.
The indicator lamp in the switch goes out.
X To set the cooling level to low or high:
press the left-hand or right-hand side of
switch :respectively. Caring for the coolbox If you do not need to use the coolbox for an
extended period, you should switch it off,
defrost it and clean it. After doing so, leave
the lid open for a time.
Removing and fitting the coolbox You can remove the coolbox for maintenance
purposes or to fit the skibag (Y
page 278). X
To remove: switch off the coolbox.
X Pull mains plug :down and remove.
X Unscrew both screws ;.
X Pull out the coolbox.
X Close flap =.
X To install: swing flap=to the side until it
is locked in place by the magnets.
X Insert the coolbox.
X Tighten both screws ;.
X Connect plug :. Mobile phone*
G
Risk of accident
Observe the legal requirements of the country
in which you are currently driving regarding
operating mobile communications equipment
in a vehicle.
If it is permitted by law to operate communi-
cations equipment while the vehicle is in
motion, you may only do so when the traffic
situation allows. Otherwise, you could be dis- Features
283Controls
* optional
216_AKB; 2; 3, en-GB
bjanott,
Version: 2.11.7.7 2009-02-27T14:54:17+01:00 - Seite 283 Z
Dateiname: 6515230602_buchblock.pdf; erzeugt am 04. Mar 2009 11:16:22; WK