2009 KIA SOUL reset
[x] Cancel search: resetPage 17 of 328
Safety features of your vehicle
4
3
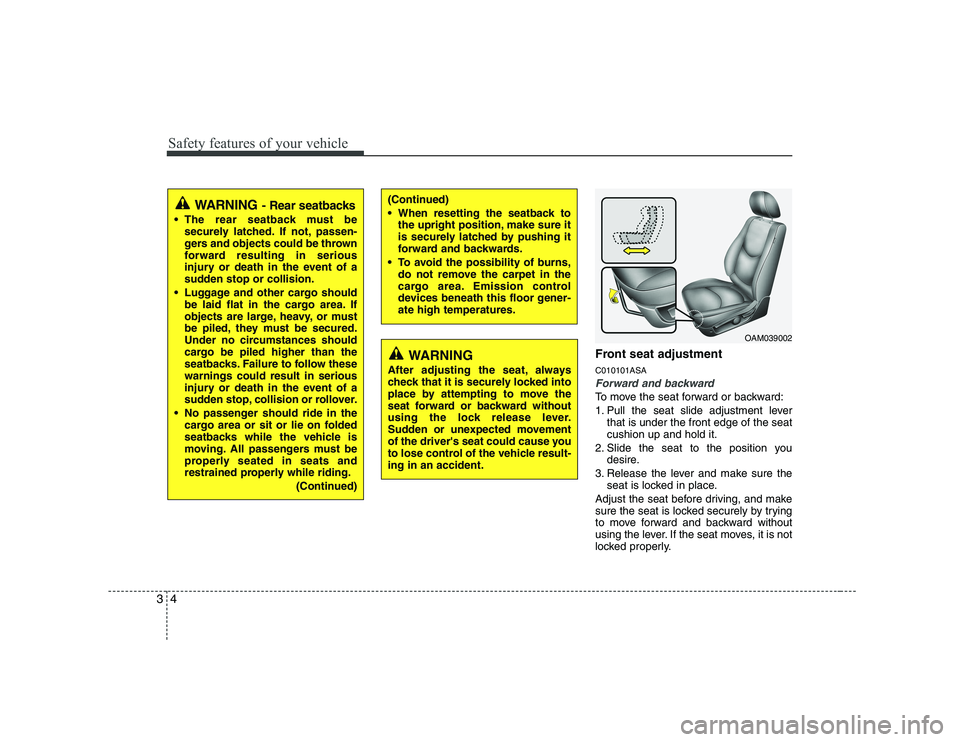
Front seat adjustment C010101ASA
Forward and backward
To move the seat forward or backward:
1. Pull the seat slide adjustment lever
that is under the front edge of the seat cushion up and hold it.
2. Slide the seat to the position you desire.
3. Release the lever and make sure the seat is locked in place.
Adjust the seat before driving, and make
sure the seat is locked securely by trying
to move forward and backward without
using the lever. If the seat moves, it is not
locked properly.
OAM039002
(Continued)
When resetting the seatback to the upright position, make sure it
is securely latched by pushing it
forward and backwards.
To avoid the possibility of burns, do not remove the carpet in the
cargo area. Emission control
devices beneath this floor gener-ate high temperatures.WARNING - Rear seatbacks
The rear seatback must be securely latched. If not, passen-
gers and objects could be thrown
forward resulting in serious
injury or death in the event of a
sudden stop or collision.
Luggage and other cargo should be laid flat in the cargo area. If
objects are large, heavy, or must
be piled, they must be secured.
Under no circumstances should
cargo be piled higher than the
seatbacks. Failure to follow thesewarnings could result in serious
injury or death in the event of a
sudden stop, collision or rollover.
No passenger should ride in the cargo area or sit or lie on folded
seatbacks while the vehicle is
moving. All passengers must be
properly seated in seats and
restrained properly while riding.
(Continued)
WARNING
After adjusting the seat, always
check that it is securely locked into
place by attempting to move the
seat forward or backward without
using the lock release lever.
Sudden or unexpected movement
of the driver's seat could cause you
to lose control of the vehicle result-ing in an accident.
Page 96 of 328
Features of your vehicle
24
4
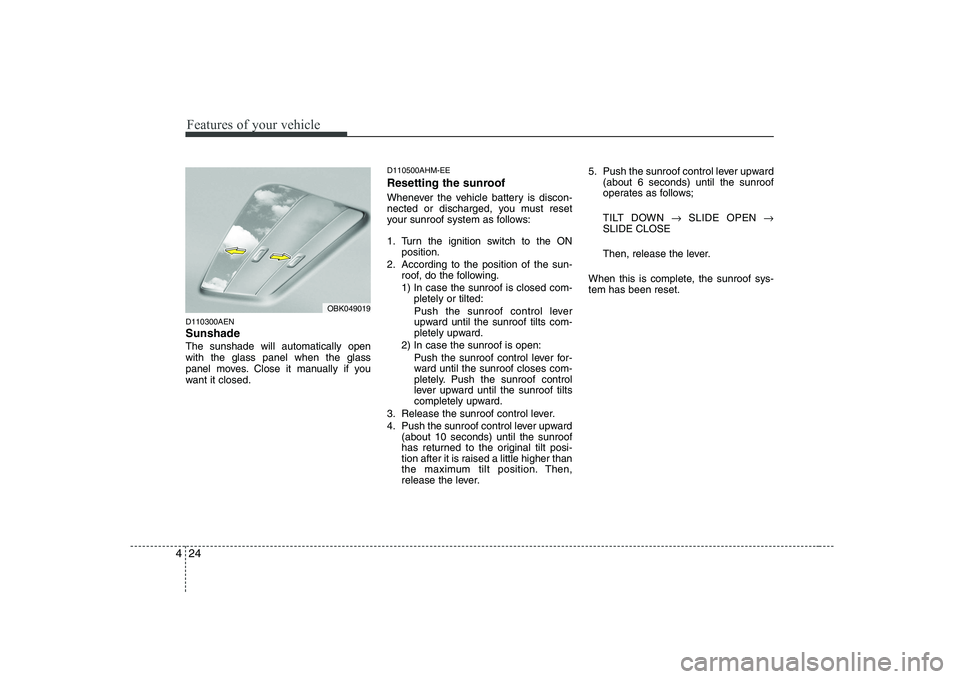
D110300AEN Sunshade The sunshade will automatically open with the glass panel when the glass
panel moves. Close it manually if you
want it closed. D110500AHM-EE
Resetting the sunroof
Whenever the vehicle battery is discon-
nected or discharged, you must reset
your sunroof system as follows:
1. Turn the ignition switch to the ON
position.
2. According to the position of the sun- roof, do the following.
1) In case the sunroof is closed com-pletely or tilted:
Push the sunroof control lever
upward until the sunroof tilts com-
pletely upward.
2) In case the sunroof is open:
Push the sunroof control lever for-
ward until the sunroof closes com-
pletely. Push the sunroof control
lever upward until the sunroof tilts
completely upward.
3. Release the sunroof control lever.
4. Push the sunroof control lever upward (about 10 seconds) until the sunroof
has returned to the original tilt posi-
tion after it is raised a little higher than
the maximum tilt position. Then,
release the lever. 5. Push the sunroof control lever upward
(about 6 seconds) until the sunroof
operates as follows;
TILT DOWN �SLIDE OPEN �
SLIDE CLOSE
Then, release the lever.
When this is complete, the sunroof sys- tem has been reset.
OBK049019
Page 107 of 328
435
Features of your vehicle
D150205AUN-C1
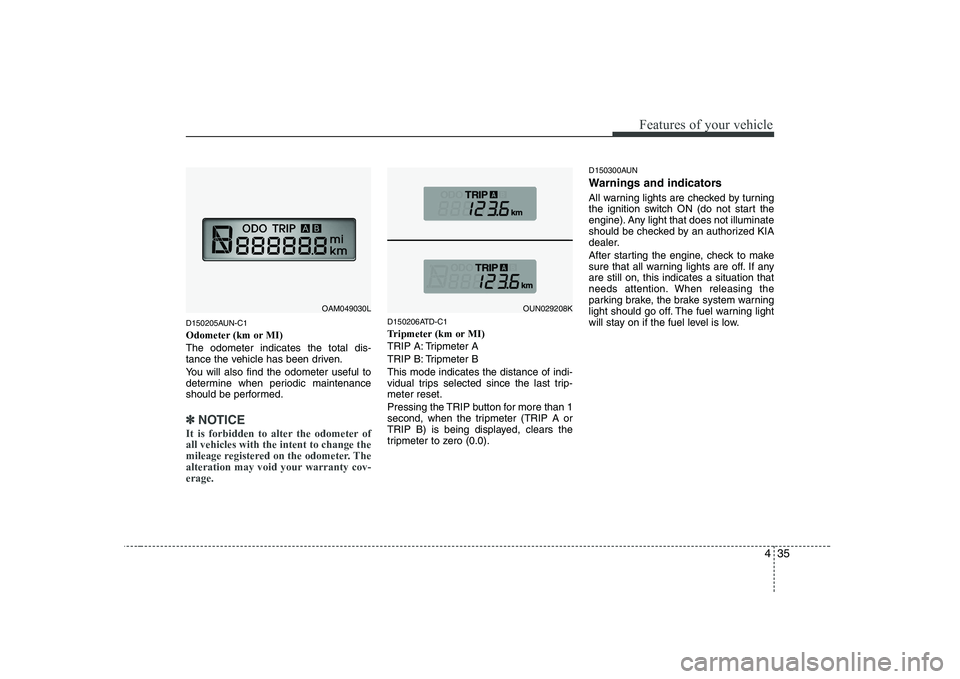
Odometer (km or MI)The odometer indicates the total dis-
tance the vehicle has been driven.
You will also find the odometer useful to
determine when periodic maintenance
should be performed.
✽✽NOTICE
It is forbidden to alter the odometer of all vehicles with the intent to change the
mileage registered on the odometer. The
alteration may void your warranty cov-erage.
D150206ATD-C1
Tripmeter (km or MI)
TRIP A: Tripmeter A
TRIP B: Tripmeter BThis mode indicates the distance of indi-
vidual trips selected since the last trip-meter reset.
Pressing the TRIP button for more than 1
second, when the tripmeter (TRIP A or
TRIP B) is being displayed, clears the
tripmeter to zero (0.0). D150300AUN
Warnings and indicators
All warning lights are checked by turning
the ignition switch ON (do not start the
engine). Any light that does not illuminate
should be checked by an authorized KIA
dealer.
After starting the engine, check to make
sure that all warning lights are off. If anyare still on, this indicates a situation that
needs attention. When releasing the
parking brake, the brake system warning
light should go off. The fuel warning light
will stay on if the fuel level is low.
OAM049030LOUN029208K
Page 141 of 328
469
Features of your vehicle
D250102AUN-C1
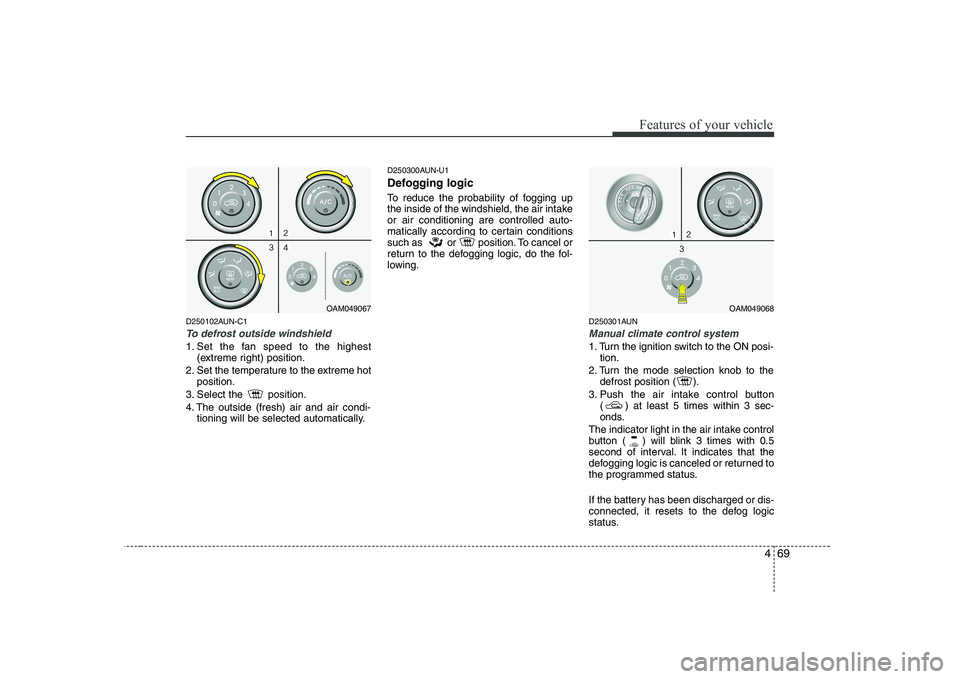
To defrost outside windshield
1. Set the fan speed to the highest(extreme right) position.
2. Set the temperature to the extreme hot position.
3. Select the position.
4. The outside (fresh) air and air condi- tioning will be selected automatically. D250300AUN-U1
Defogging logic
To reduce the probability of fogging up
the inside of the windshield, the air intakeor air conditioning are controlled auto-
matically according to certain conditions
such as or position. To cancel or
return to the defogging logic, do the fol-
lowing.
D250301AUN
Manual climate control system
1. Turn the ignition switch to the ON posi-tion.
2. Turn the mode selection knob to the defrost position ( ).
3. Push the air intake control button ( ) at least 5 times within 3 sec-
onds.
The indicator light in the air intake control
button ( ) will blink 3 times with 0.5
second of interval. It indicates that the
defogging logic is canceled or returned to
the programmed status.
If the battery has been discharged or dis-
connected, it resets to the defog logic
status.
OAM049067OAM049068
Page 151 of 328
479
Features of your vehicle
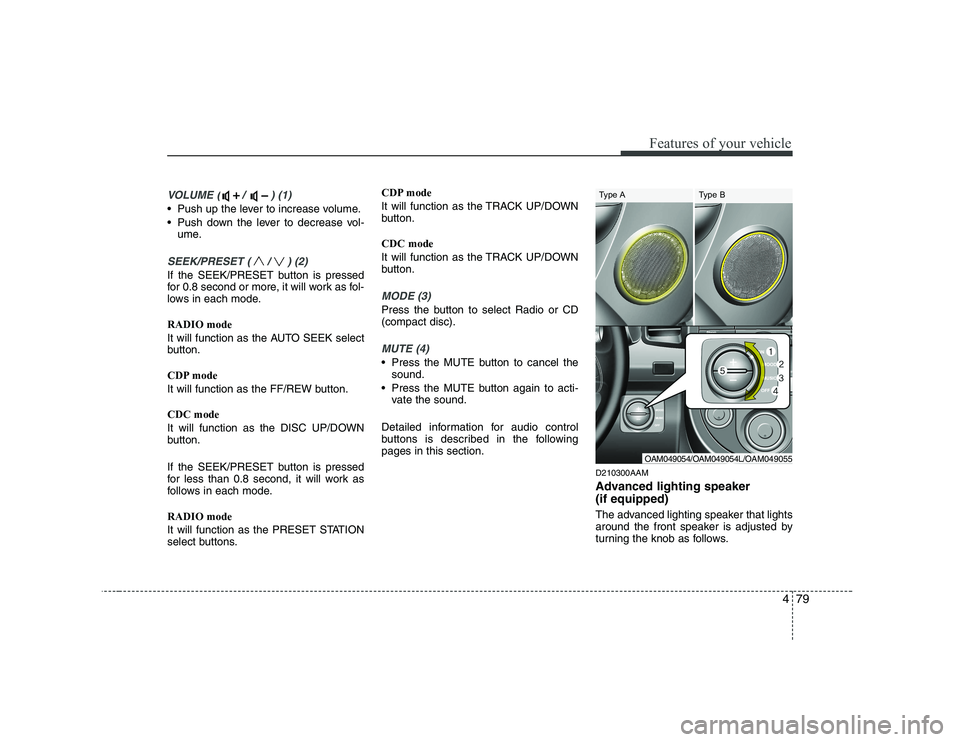
VOLUME ( / ) (1)
• Push up the lever to increase volume.
Push down the lever to decrease vol-ume.
SEEK/PRESET ( / ) (2)
If the SEEK/PRESET button is pressed
for 0.8 second or more, it will work as fol-
lows in each mode. RADIO mode
It will function as the AUTO SEEK select
button.
CDP mode
It will function as the FF/REW button. CDC mode
It will function as the DISC UP/DOWN
button.
If the SEEK/PRESET button is pressed
for less than 0.8 second, it will work as
follows in each mode. RADIO mode
It will function as the PRESET STATION
select buttons. CDP mode
It will function as the TRACK UP/DOWN
button. CDC mode
It will function as the TRACK UP/DOWN
button.
MODE (3)
Press the button to select Radio or CD (compact disc).
MUTE (4)
Press the MUTE button to cancel the
sound.
Press the MUTE button again to acti- vate the sound.
Detailed information for audio control
buttons is described in the followingpages in this section. D210300AAM
Advanced lighting speaker (if equipped)
The advanced lighting speaker that lights
around the front speaker is adjusted by
turning the knob as follows.
OAM049054/OAM049054L/OAM049055
Type A Type B
Page 155 of 328
483
Features of your vehicle
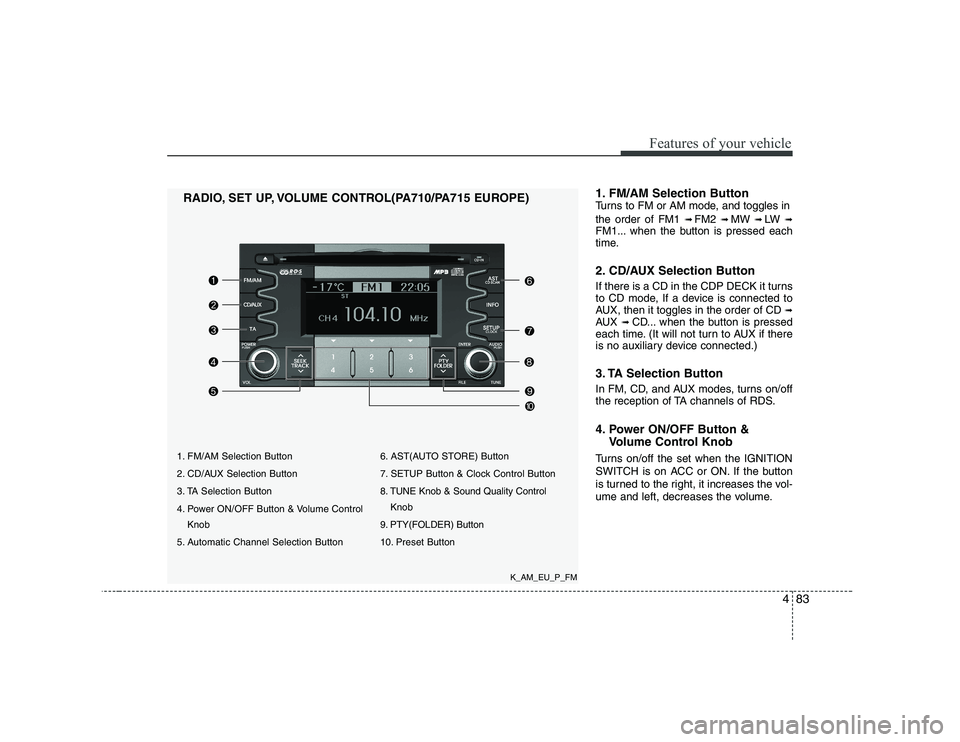
1. FM/AM Selection Button
2. CD/AUX Selection Button
3. TA Selection Button
4. Power ON/OFF Button & Volume ControlKnob
5. Automatic Channel Selection Button 6. AST(AUTO STORE) Button
7. SETUP Button & Clock Control Button
8. TUNE Knob & Sound Quality Control
Knob
9. PTY(FOLDER) Button
10. Preset Button
RADIO, SET UP, VOLUME CONTROL(PA710/PA715 EUROPE)
1. FM/AM Selection Button
Turns to FM or AM mode, and toggles in the order of FM1
➟ FM2 ➟ MW ➟ LW ➟
FM1... when the button is pressed each
time.
2. CD/AUX Selection Button
If there is a CD in the CDP DECK it turns
to CD mode, If a device is connected to
AUX, then it toggles in the order of CD ➟
AUX ➟CD... when the button is pressed
each time. (It will not turn to AUX if there
is no auxiliary device connected.)
3. TA Selection Button
In FM, CD, and AUX modes, turns on/off
the reception of TA channels of RDS.
4. Power ON/OFF Button &
Volume Control Knob
Turns on/off the set when the IGNITION
SWITCH is on ACC or ON. If the button
is turned to the right, it increases the vol-
ume and left, decreases the volume.
K_AM_EU_P_FM
Page 156 of 328
![KIA SOUL 2009 Owners Manual Features of your vehicle
84
4
5. Automatic Channel Selection
Button
] button is pressed, it reduces the band frequency by 50kHz
to automatically select a channel. Stops
at the previous frequency if KIA SOUL 2009 Owners Manual Features of your vehicle
84
4
5. Automatic Channel Selection
Button
] button is pressed, it reduces the band frequency by 50kHz
to automatically select a channel. Stops
at the previous frequency if](/manual-img/2/40388/w960_40388-155.png)
Features of your vehicle
84
4
5. Automatic Channel Selection
Button
] button is pressed, it reduces the band frequency by 50kHz
to automatically select a channel. Stops
at the previous frequency if no channel
is found.
] button is pressed, it increases the band frequency by50kHz to automatically select a chan-
nel. Stops at the previous frequency if
no channel is found.
6. AST(AUTO STORE) Button When AST is pressed, frequency is stored
on the preset memory [1]~[6] and auto-
matically plays the channel stored on the
Preset [1]. If no channels have been stored
because there was no channel received,
will return to the previous channel.
7. SETUP Button & Clock Control Button
Press this button to turn to the RDS
option and the other adjustment mode.
If no action is taken for 5 seconds after
pressing the button, it will return to the
play mode. (After entering SETUP mode,
move between items using the left, right
and PUSH functions of the [TUNE] knob.) ■
PA710 MODEL
The setup changes in the order of TIME ↔
RDS ↔ SCROLL ↔ P.BASS ↔ TEMP ↔
SDVC... ■ PA715 MODEL
The setup changes in the order of TIME ↔ RDS ↔ SCROLL ↔ RETURN ↔TEMP
↔ SDVC...
If the vehicle has a center speaker and
woofer, then the AUDIO is PA715.
If the vehicle does not, then the AUDIO is
PA710.
Press the [SETUP] button for longer than 0.8 second to adjust the hour/min setting
on the clock. Adjust the hour and press the [ENTER]
button to set. Use the same method to
adjust the minute and press the [ENTER]
button to complete and exit from clock
adjustment mode.
The clock setting can be changed to dis-
play in 12 hour or 24 hour settings.
RDS OPTION (NEWS, AF, REGION,
TIME, TA VOL) can be selected.
This function is used to display charac-
ters longer than the LCD text display and
can be turned ON/OFF through the vol-
ume controller.
This function displays the previous MODE screen. This function is used to change the tem-
perature display setting.
This function automatically adjusts the
volume level according to the speed of
the vehicle and can be turned ON/OFF
through the volume controller.
Based on psychoacoustic technology, this
technology overcomes BASS limitations
which may occur due to the limited num-
ber and size of speakers to offer dynamic
BASS sound quality. It is possible to adjust
in 3 levels of LOW/MID/HIGH. OFF
➟
LOW ➟MID ➟HIGH
Modes: CD/FM/AUX/IPOD/USB (exclud-
ing MW, LW Mode)
Page 157 of 328
485
Features of your vehicle
8. TUNE Knob & Sound QualityControl Knob
Rotate the knob clockwise by one notch
to increase frequency by 50kHz from cur-
rent frequency.
Rotate the knob counterclockwise by one
notch to decrease frequency by 50kHz
from current frequency.
MIDDLE, TREBLE, FADER and BAL-
ANCE TUNE mode. The mode selected
is shown on the display. After selecting
each mode, rotate the Audio control
knob clockwise or counterclockwise.
(Sound Quality Control will operate in
FM, MW, LW, CD, AUX, USB and iPod
modes.)
To increase the BASS, rotate the knob
clockwise, while to decrease the BASS,
rotate the knob counterclockwise.
To increase the MIDDLE, rotate the knob
clockwise, while to decrease the MID-
DLE, rotate the knob counterclockwise. Control
To increase the TREBLE, rotate the knob
clockwise, while to decrease the TRE-
BLE, rotate the knob counterclockwise.
Turn the control knob clockwise to empha-
size rear speaker sound(front speaker
sound will be attenuated). When the con-
trol knob is turned counterclockwise, front
speaker sound will be emphasized(rear
speaker sound will be attenuated).
Rotate the knob clockwise to emphasize
right speaker sound(left speaker sound
will be attenuated). When the control
knob is turned counter clockwise, left
speaker sound will be emphasized(right
speaker sound will be attenuated).
9. PTY(FOLDER) Button
Press [PTY ] button when searching
PTY in RDS Broadcasting Program
Type selection.
Press [PTY ] button when searching PTY in RDS Broadcasting Program
Type selection. 10. Preset Button
Push [1]~[6] buttons less than 0.8 second
to play the channel saved in each button.
Push Preset button for 0.8 second or
longer to save current channel to the
respective button with a beep.