Page 74 of 457
 —
If Equipped........................... 109
▫Voice Recognition System (VR) Operation . . . 109
▫Commands..........................111
▫Voice Training...........")
�Voice Recognition System (VR) —
If Equipped........................... 109
▫Voice Recognition System (VR) Operation . . . 109
▫Commands..........................111
▫Voice Training....................... 114
�Seats............................... 114
▫Front Seat Adjustment................. 114
▫Manual Seat Height Adjustment —
If Equipped......................... 115
▫Manual Lumbar — If Equipped.......... 116
▫Driver’s Seatback Recline............... 116
▫Adjustable Head Restraints.............. 117
▫Heated Seats — If Equipped............. 117
▫Fold-Flat Front Passenger Seat........... 119▫Folding Rear Seat.................... 120
�To Open And Close The Hood............. 121
�Lights.............................. 123
▫Multifunction Lever................... 123
▫Headlights, Parking Lights And Instrument
Panel Lights........................ 123
▫Lights-On Reminder.................. 124
▫Fog Lights — If Equipped.............. 124
▫Daytime Running Lights (DRL) —
If Equipped......................... 125
▫Turn Signals........................ 126
▫High Beam/Low Beam Select Switch....... 126
▫Flash-To-Pass....................... 127
▫Off-Road Lights — If Equipped.......... 127
72 UNDERSTANDING THE FEATURES OF YOUR VEHICLE
Page 116 of 457
Voice Training
For users experiencing difficulty with the system recog-
nizing their voice commands or numbers, the UConnect�
system Voice Training feature may be used.
1. Press the VR hard-key, say “System Setup” and once
you are in that menu then say “Voice Training.” This will
train your own voice to the system and will improve
recognition.
2. Repeat the words and phrases when prompted by the
UConnect�System. For best results, the Voice Training
session should be completed when the vehicle is parked,
engine running, all windows closed, and the blower fan
switched off. This procedure may be repeated with a new
user. The system will adapt to the last trained voice only.
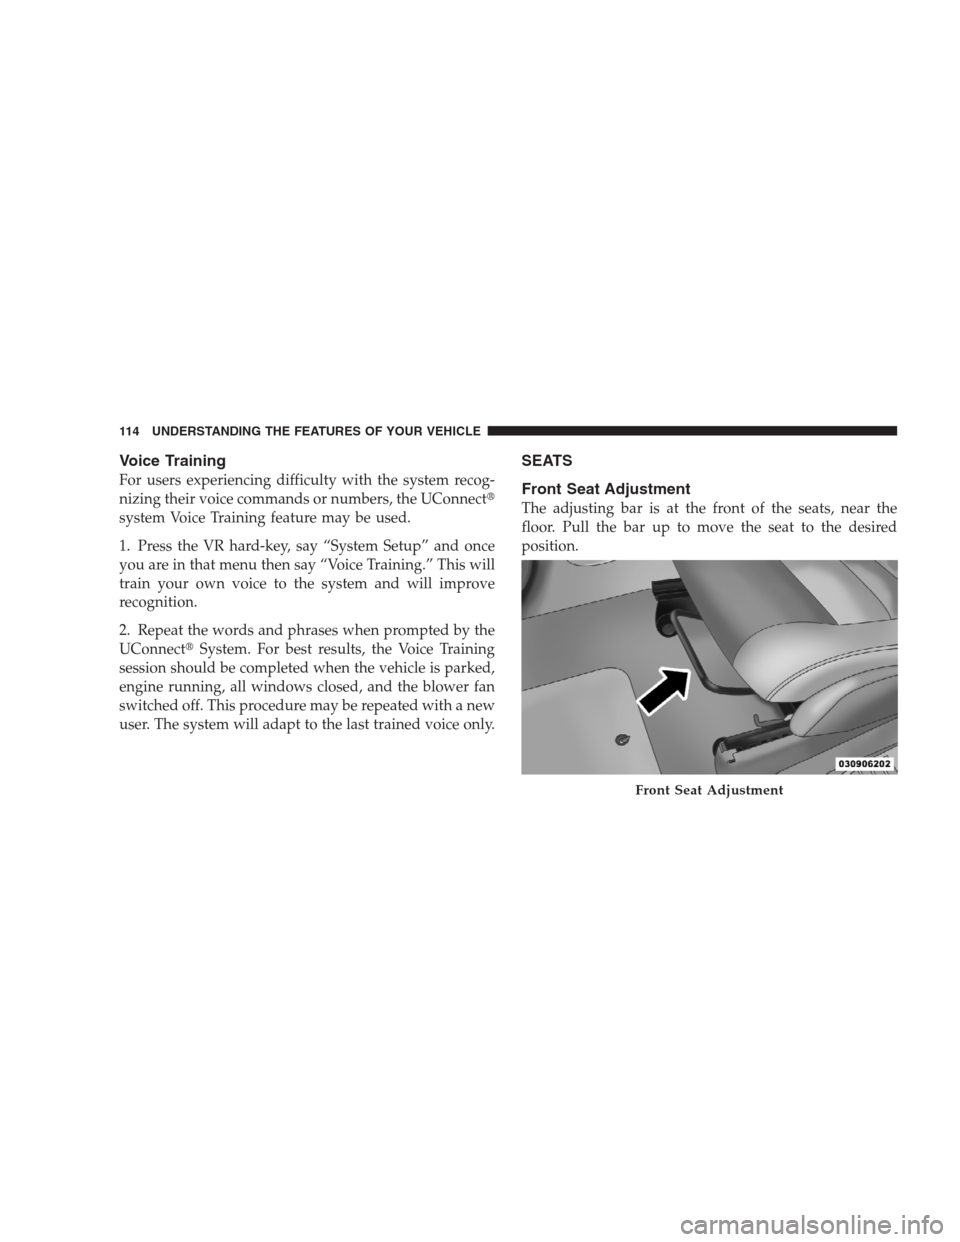
SEATS
Front Seat Adjustment
The adjusting bar is at the front of the seats, near the
floor. Pull the bar up to move the seat to the desired
position.
Front Seat Adjustment
114 UNDERSTANDING THE FEATURES OF YOUR VEHICLE
Page 119 of 457
Adjustable Head Restraints
Head restraints can reduce the risk of whiplash injury in
the event of impact from the rear. Pull up or push down
on the head restraints so that the upper edge is as high as
practical. To raise the head restraint, pull up on the head
restraint. To lower the head restraint, depress the button
and push down on the head restraint.
Heated Seats — If Equipped
This feature heats the front driver and passenger seats.
The heaters provide the same heat level for both cushion
and back. The controls for the front heated seats are
located on the center instrument panel area.
Head Restraint Adjustment
UNDERSTANDING THE FEATURES OF YOUR VEHICLE 117
3
Page 122 of 457
Folding Rear Seat
To provide additional storage area, each rear seatback can
be folded forward. Pull the strap forward to move the
seat forward and flat.
Reclining Rear Seat — If Equipped
For additional comfort, pull the strap forward just
enough to release the seatback latch. Then push the
seatback to a reclined position, approximately 35 degrees
maximum, and release the strap.
Folding Rear Seat
Rear Seats Folded Flat
120 UNDERSTANDING THE FEATURES OF YOUR VEHICLE
Page 123 of 457
WARNING!
•It is extremely dangerous to ride in a cargo area,
inside or outside of a vehicle. In a collision, people
riding in these areas are more likely to be seri-
ously injured or killed.
•Do not allow people to ride in any area of your
vehicle that is not equipped with seats and seat
belts.
•Be sure that everyone in your vehicle is in a seat
and using a seat belt properly.
TO OPEN AND CLOSE THE HOOD
To open the hood, two latches must be released.
1. Pull the hood release lever located on the left kick
panel.
Hood Release Lever
UNDERSTANDING THE FEATURES OF YOUR VEHICLE 121
3
Page 159 of 457

•Place as much cargo as possible in front of the rear
axle. Too much weight or improperly placed
weight over or behind the rear axle can cause the
rear of the vehicle to sway.
�")
WARNING! (Continued)
•Place as much cargo as possible in front of the rear
axle. Too much weight or improperly placed
weight over or behind the rear axle can cause the
rear of the vehicle to sway.
•Do not pile luggage or cargo higher than the top of
the seatback. This could impair visibility or be-
come a dangerous projectile in a sudden stop or
collision.
•To help protect against personal injury, passengers
should not be seated in the rear cargo area. The
rear cargo space is intended for load carrying
purposes only, not for passengers, who should sit
in seats and use seat belts.
Fold Down Speakers — If Equipped
When the liftgate is open, the speakers can swing down
off the trim panel to face rearward, for tailgating and
other activities.
REAR WINDOW FEATURES
Rear Window Wiper/Washer
A switch on the right side of the steering column controls
operation of the rear wiper/washer function. Rotating
the center of the switch forward to the on position will
Fold-Down Speakers
UNDERSTANDING THE FEATURES OF YOUR VEHICLE 157
3
Page 393 of 457

YES Essentials�Fabric Cleaning Procedure – If
Equipped
YES Essentials�seats may be cleaned in the following
manner:
•Remove as much of the stain as possible by blotting
with a clean, dry towel.
•Blot any remaining stain with a clean, damp towel.
•For tough stains, apply MOPAR�Total Clean or a mild
soap solution to a clean, damp cloth and remove stain.
Use a fresh, damp towel to remove soap residue.
•For grease stains, apply MOPAR�Multi-Purpose
Cleaner to a clean, damp cloth and remove the stain.
Use a fresh, damp towel to remove soap residue.
•Do not use any solvents or protectants on Yes Essen-
tials�products.
Interior Care
Use MOPAR�Total Clean to clean fabric upholstery and
carpeting.
Use MOPAR�Total Clean to clean vinyl upholstery.
MOPAR�Total Clean is specifically recommended for
leather upholstery.
Your leather upholstery can be best preserved by regular
cleaning with a damp, soft cloth. Small particles of dirt
can act as an abrasive and damage the leather upholstery
and should be removed promptly with a damp cloth.
Stubborn soils can be removed easily with a soft cloth
and MOPAR�Total Clean. Care should be taken to avoid
soaking your leather upholstery with any liquid. Please
do not use polishes, oils, cleaning fluids, solvents, deter-
gents, or ammonia based cleaners to clean your leather
upholstery. Application of a leather conditioner is not
required to maintain the original condition.
MAINTAINING YOUR VEHICLE 391
7
Page 396 of 457
FUSES
Integrated Power Module (IPM)
The Integrated Power Module (IPM) is located in the
engine compartment near the air cleaner assembly. This
center contains cartridge fuses and mini-fuses. A label
that identifies each component may be printed on the
inside of the cover. Refer to “Engine Compartment” in
this section of the Owner’s Manual for the underhood
location of the IPM.
Cavity Cartridge
FuseMini-
FuseDescription
1 Empty Empty
2 15 Amp
Lt BlueAWD/4WD ECU
Feed
3 10 Amp
RedCHMSL Brake Switch
Feed
4 10 Amp
RedIgnition Switch Feed/
OCM
Cavity Cartridge
FuseMini-
FuseDescription
5 20 Amp
YellowTrailer Tow
6 10 Amp
RedIOD Sw/Pwr Mir/
Steering Cntrl Sdar/
Hands-Free Phone
7 30 Amp
GreenIOD Sense1
8 30 Amp
GreenIOD Sense2
9 40 Amp
GreenPower Seats
10 20 Amp
YellowCCN Power Locks/
Interior Lighting
11 15 Amp
Lt BluePower Outlet
12 20 Amp
YellowIgn Run/Acc Inverter
394 MAINTAINING YOUR VEHICLE


The Integrated Power Module (IPM) is located in the
engine compartment near the air cleaner assembly. This
center contains cartridge fuses and mini-fuses. A label
t")