Page 137 of 506
To Raise the Rear Seat
NOTE:If interference from the cargo area prevents the
seatback from fully locking, you will have difficulty
returning the seat to its proper position.
1. If locked in the folded position, pull the release strap
(toward the front of the vehicle).
2. Raise the seatback and lock it into place.
WARNING!
Be certain that the seatback is securely locked into
position. If the seatback in not securely locked into
position the seat will not provide the proper stability
for child seats and/or passengers. An improperly
latched seat could cause serious injury.
Recliner Adjustment
The rear seatback also reclines for additional passenger
comfort. Pull the release strap while sitting in the rear
seat to recline the seatback.
Rear Seatback Release Strap
UNDERSTANDING THE FEATURES OF YOUR VEHICLE 135
3
Page 149 of 506

High Beam/Low Beam Select Switch
Push the multifunction lever away from you to switch
the headlights to high beam. Pull the multifunction lever
toward you, to switch the headlights back to low beam.
Flash-To-Pass
You can signal another vehicle with your headlights by
lightly pulling the multifunction lever toward you. This will
turn on the high beam headlights until the lever is released.
NOTE:If the multifunction lever is held in the flash-to-
pass position for more than 15 seconds, the high beams
will shut off. If this occurs, wait 30 seconds before
activating the flash-to-pass function again.
Interior Lights
Map/Reading Lights
These lights are mounted between the sun visors on the
overhead console and above the rear doors by the grab
handles. Each light is turned on by pressing the lens.
Press the lens a second time to turn off the light. These
lights also turn on when a door is opened, or when the
UNLOCK button on the Remote Keyless Entry (RKE)
transmitter is pressed, or when the dimmer control is
turned completely upward to the second detent.
High Beam Functions
UNDERSTANDING THE FEATURES OF YOUR VEHICLE 147
3
Page 156 of 506

Windshield Washers
To use the washer, pull the windshield wiper/washer
control lever toward you and hold it for as long as
washer spray is desired.
If you activate the washer while the wiper control is in
the delay range, the wipers will operate in low-speed for
two wipe cycles after releasing the lever and then resume
the intermittent interval previously selected.
If you activate the washer while the wiper control is in
the off position, the wipers will operate for two wipe
cycles and then turn off.
TILT STEERING COLUMN
This feature allows you to tilt the steering column
upward or downward. The tilt control handle is located
below the steering wheel at the end of the steering
column.To unlock the steering column, push the control handle
downward. To tilt the steering column, move the steering
wheel upward or downward as desired. To lock the
steering column in position, pull the control handle
upward until it is fully engaged.
Tilt Steering Control Handle
154 UNDERSTANDING THE FEATURES OF YOUR VEHICLE
Page 159 of 506
, or normal brake
or clutch pressure while slowing the vehicle will deacti-
vate the speed")
To Deactivate
A soft tap on the brake pedal, or pulling the Electronic
Speed Control lever toward you (cancel), or normal brake
or clutch pressure while slowing the vehicle will deacti-
vate the speed control without erasing the set speed from
memory. Pressing the ON/OFF button or turning off the
ignition erases the set speed from memory.
NOTE:For vehicles equipped with a manual transmis-
sion, pressing the clutch pedal will disengage the speed
control. A slight increase in engine RPM before the
Electronic Speed Control disengages is normal.
To Resume Speed
If you deactivated the Electronic Speed Control without
erasing the set speed from memory and your vehicle
speed is above 20 mph (32 km/h) you can resume the
previous set speed. To do so, push the lever up and
release (Resume Accel), and then remove your foot from
the accelerator pedal.
To Vary the Speed Setting
When the Electronic Speed Control is set, you can in-
crease speed by pushing up and holding the RESUME
ACCEL lever. Release the lever when the desired speed is
reached and the new set speed will be established.
Tapping RESUME ACCEL once will result i na1mph
(2 km/h) speed increase. Each time the lever is tapped,
speed increases so that tapping the lever three times will
increase speed by 3 mph (5 km/h), etc.
To decrease speed while the Electronic Speed Control is
set, push down and hold the SET DECEL lever. Release
the lever when the desired speed is reached, and the new
set speed will be established.
Tapping the SET DECEL button once will result in a
1 mph (2 km/h) speed decrease. Each time the button is
tapped, speed decreases.
UNDERSTANDING THE FEATURES OF YOUR VEHICLE 157
3
Page 163 of 506

•Before using the Rear Park Assist System, it is
strongly recommended that the ball mount and
hitch ball assembly is disconnected from the ve-
hicle when the vehicle is not used")
WARNING! (Continued)
•Before using the Rear Park Assist System, it is
strongly recommended that the ball mount and
hitch ball assembly is disconnected from the ve-
hicle when the vehicle is not used for towing.
Failure to do so can result in injury or damage to
vehicles or obstacles because the hitch ball will be
much closer to the obstacle than the rear fascia
when the warning display turns the red LEDs ON.
Also, the sensors could detect the ball mount and
hitch ball assembly, depending on its size and
shape, giving a false indication that an obstacle is
behind the vehicle.
Enabling and Disabling the System
There are times when you may want to disable the Rear
Park Assist System, such as when towing a trailer.
Vehicles Equipped With the Electronic Vehicle
Information Center (EVIC)
You can turn the Rear Park Assist System on or off
through the EVIC. For details, refer to “Personal Settings
(Customer-Programmable Features)” under “Electronic
Vehicle Information Center (EVIC)” in Section 4 of this
manual.
UNDERSTANDING THE FEATURES OF YOUR VEHICLE 161
3
Page 175 of 506

position. The sunroof will close fully and stop automati-
cally. This is called “Express Close”. During Express
Close operation, any movement of the switch will stop
the sunroof.
Closing Sunroof — Manual Mode
To close the sunroof, press and hold the switch in the
forward position. Any release of the switch will stop the
movement and the sunroof will remain in a partially
closed condition until the switch is pushed and held
forward again.
Pinch Protect Feature
This feature will detect an obstruction in the opening of
the sunroof during Express Close operation. If an ob-
struction in the path of the sunroof is detected, the
sunroof will automatically retract. Remove the obstruc-
tion if this occurs. Next, press the switch forward and
release to Express Close.
Pinch Protect Override
If a known obstruction (ice, debris, etc.) prevents closing,
press the switch forward and hold. This allows the
sunroof to move towards the closed position.
NOTE:Pinch protection is disabled while the switch is
pressed.
Venting Sunroof — Express
Press and release the �Vent�button within one-half sec-
ond and the sunroof will open to the vent position. This
is called “Express Vent”, and it will occur regardless of
sunroof position. During Express Vent operation, any
movement of the switch will stop the sunroof.
Sunshade Operation
The sunshade can be opened manually. However, the
sunshade will open automatically as the sunroof opens.
NOTE: The sunshade cannot be closed if the sunroof is
open.
UNDERSTANDING THE FEATURES OF YOUR VEHICLE 173
3
Page 179 of 506
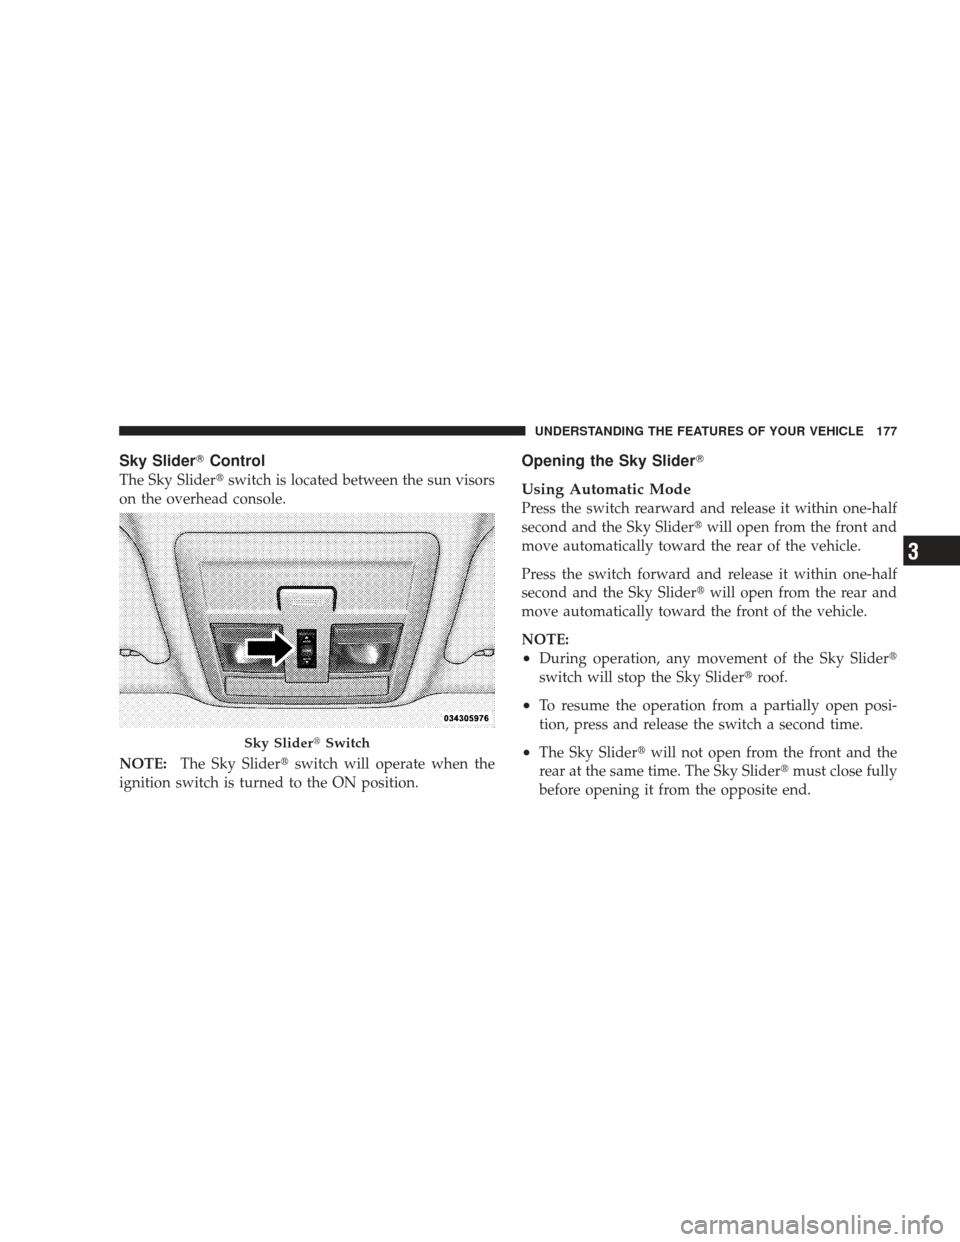
Sky Slider�Control
The Sky Slider� switch is located between the sun visors
on the overhead console.
NOTE: The Sky Slider� switch will operate when the
ignition switch is turned to the ON position.
Opening the Sky Slider�
Using Automatic Mode
Press the switch rearward and release it within one-half
second and the Sky Slider� will open from the front and
move automatically toward the rear of the vehicle.
Press the switch forward and release it within one-half
second and the Sky Slider� will open from the rear and
move automatically toward the front of the vehicle.
NOTE:
•During operation, any movement of the Sky Slider�
switch will stop the Sky Slider� roof.
•To resume the operation from a partially open posi-
tion, press and release the switch a second time.
•The Sky Slider�will not open from the front and the
rear at the same time. The Sky Slider� must close fully
before opening it from the opposite end.Sky Slider� Switch
UNDERSTANDING THE FEATURES OF YOUR VEHICLE 177
3
Page 180 of 506

Using Operator Mode
Press the switch rearward and hold it, the Sky Slider�
will open from the front and move toward the rear of the
vehicle.
Press the switch forward and hold it, the Sky Slider�will
open from the rear and move toward the front of the
vehicle.
NOTE: During operation, any movement of the Sky
Slider� switch will stop the Sky Slider� roof.
Closing the Sky Slider�
Using Automatic Mode
Press and release the button in the center of the switch
and the Sky Slider�will close automatically from any
position.
Using Operator Mode
If the Sky Slider� is open from the front, press the switch
forward and hold it, the Sky Slider� will move forward.
Release the switch to stop the Sky Slider �travel at any
point.
If the Sky Slider� is open from the rear, press the switch
rearward and hold it and the Sky Slider� will move
rearward. Release the switch to stop the Sky Slider�
travel at any point.
Manual Override
The Sky Slider� drive motors are mounted to the roof
above the cargo lamp. In the event that your vehicle
losses battery power, you can close the Sky Slider� by
turning the drive gears in the appropriate motor with a
6 mm Allen wrench. To do so, you must first remove the
cargo lamp from the headliner. Then, insert the wrench
into the “Allen” shaped hole in the appropriate motor
and turn the wrench clockwise until the top closes
178 UNDERSTANDING THE FEATURES OF YOUR VEHICLE