2009 INFINITI QX56 air condition
[x] Cancel search: air conditionPage 3569 of 4171

B1209 – B1211 COLLISION DETECTIONSRC-71
< COMPONENT DIAGNOSIS >
C
DE
F
G
I
J
K L
M A
B
SRC
N
O P
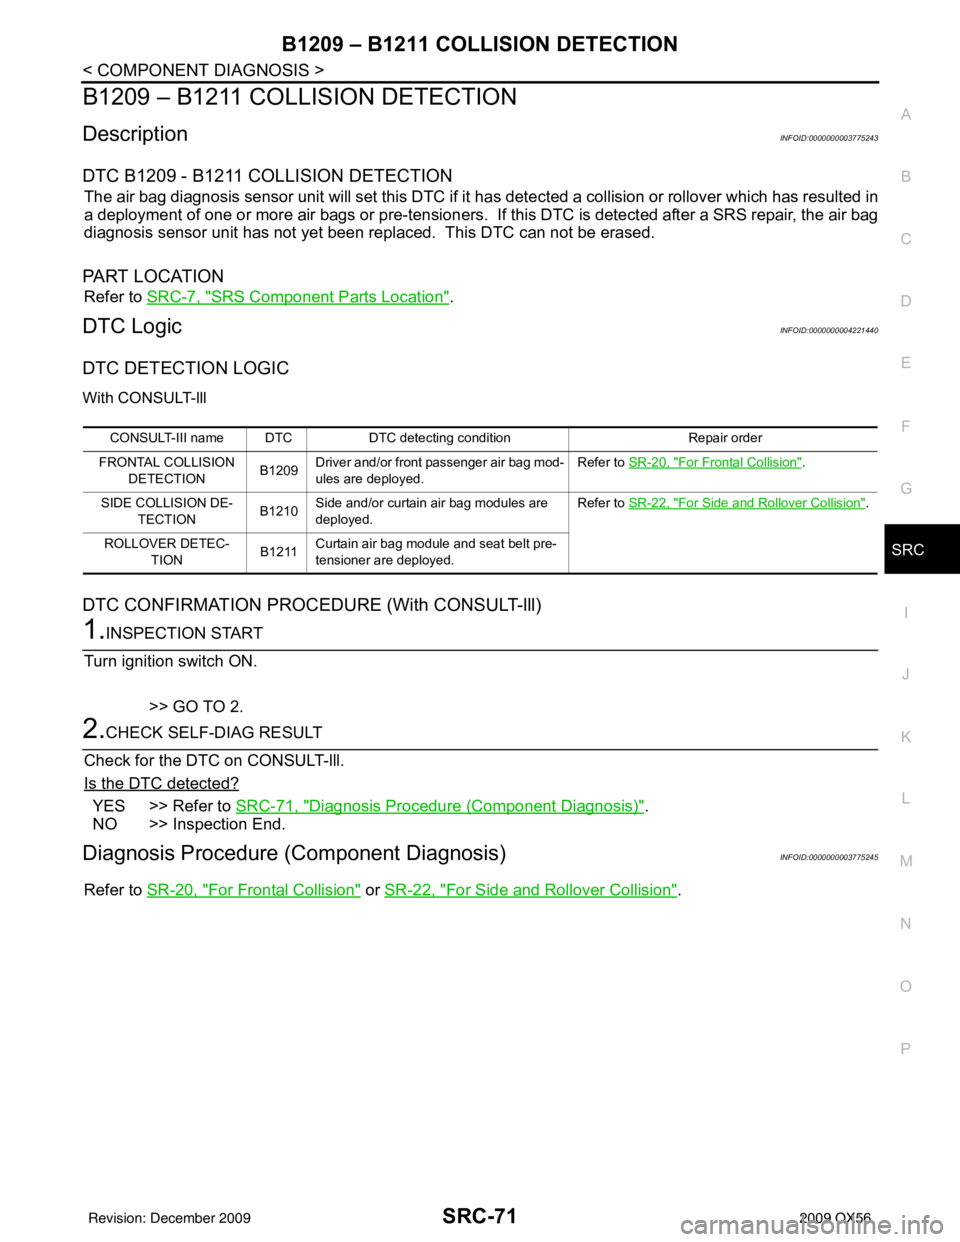
B1209 – B1211 COLLISION DETECTION
DescriptionINFOID:0000000003775243
DTC B1209 - B1211 COLLISION DETECTION
The air bag diagnosis sensor unit will set this DTC if it has detected a collision or rollover which has resulted in
a deployment of one or more air bags or pre-tensioners. If this DTC is detected after a SRS repair, the air bag
diagnosis sensor unit has not yet been replaced. This DTC can not be erased.
PA R T L O C AT I O N
Refer to SRC-7, "SRS Component Parts Location".
DTC LogicINFOID:0000000004221440
DTC DETECTION LOGIC
With CONSULT-lll
DTC CONFIRMATION PROCEDURE (With CONSULT-lll)
1.INSPECTION START
Turn ignition switch ON.
>> GO TO 2.
2.CHECK SELF-DIAG RESULT
Check for the DTC on CONSULT-lll.
Is the DTC detected?
YES >> Refer to SRC-71, "Diagnosis Procedure (Component Diagnosis)".
NO >> Inspection End.
Diagnosis Procedure (C omponent Diagnosis)INFOID:0000000003775245
Refer to SR-20, "For Frontal Collision" or SR-22, "For Side and Rollover Collision".
CONSULT-III name DTC DTC detecting condition Repair order
FRONTAL COLLISION DETECTION B1209Driver and/or front passenger air bag mod-
ules are deployed. Refer to SR-20, "
For Frontal Collision".
SIDE COLLISION DE- TECTION B1210
Side and/or curtain air bag modules are
deployed. Refer to SR-22, "
For Side and Rollover Collision".
ROLLOVER DETEC- TION B1211Curtain air bag module and seat belt pre-
tensioner are deployed.
Revision: December 20092009 QX56
Page 3580 of 4171
![INFINITI QX56 2009 Factory Service Manual SRC-82
< ECU DIAGNOSIS >
DIAGNOSIS SENSOR UNIT
CONSULT-III name DTCDTC detecting condition Repair order
DRIVER AIRBAG MODULE [OPEN] B1049
Driver air bag module circuit (DR1) is
open
(including the s INFINITI QX56 2009 Factory Service Manual SRC-82
< ECU DIAGNOSIS >
DIAGNOSIS SENSOR UNIT
CONSULT-III name DTCDTC detecting condition Repair order
DRIVER AIRBAG MODULE [OPEN] B1049
Driver air bag module circuit (DR1) is
open
(including the s](/manual-img/42/57031/w960_57031-3579.png)
SRC-82
< ECU DIAGNOSIS >
DIAGNOSIS SENSOR UNIT
CONSULT-III name DTCDTC detecting condition Repair order
DRIVER AIRBAG MODULE [OPEN] B1049
Driver air bag module circuit (DR1) is
open
(including the spiral cable). 1. Visually check the wiring harness connection.
2. Replace the harness if it has visible damage.
3. Replace the driver air bag module.
4. Replace the spiral cable.
5. Replace the air bag diagnosis sensor unit.
6. Replace the related harness.
B1054 Driver air bag module circuit (DR2) is
open
(including the spiral cable).
DRIVER AIRBAG MODULE [VB-SHORT] B1050
Driver air bag module circuit (DR1) is
shorted to a power supply circuit
(including the spiral cable).
B1055 Driver air bag module circuit (DR2) is
shorted to a power supply circuit
(including the spiral cable).
DRIVER AIRBAG MODULE [GND-SHORT] B1051
Driver air bag module circuit (DR1) is
shorted to ground
(including the spiral cable).
B1056 Driver air bag module circuit (DR2) is
shorted to ground
(including the spiral cable).
DRIVER AIRBAG MODULE [SHORT] B1052
Driver air bag module
circuits (DR1) are
shorted to each other
(including the spiral cable).
B1057 Driver air bag module
circuits (DR2) are
shorted to each other
(including the spiral cable).
ASSIST A/B MODULE [OPEN] B1065
Front passenger air bag module circuit
(AS1) is open. 1. Visually check the wiring harness connection.
2. Replace the harness if it has visible damage.
3. Replace the front passenger air bag module.
4. Replace the air bag diagnosis sensor unit.
5. Replace the related harness.
B1070
Front passenger air bag module circuit
(AS2) is open.
ASSIST A/B MODULE [VB-SHORT] B1066
Front passenger air bag module circuit
(AS1) is shorted to a power supply cir-
cuit.
B1071 Front passenger air bag module circuit
(AS2) is shorted to a power supply cir-
cuit.
ASSIST A/B MODULE [GND-SHORT] B1067
Front passenger air bag module circuit
(AS1) is shorted to ground.
B1072 Front passenger air bag module circuit
(AS2) is shorted to ground.
ASSIST A/B MODULE [SHORT] B1068
Front passenger air bag module circuits
(AS1) are shorted to each other.
B1073 Front passenger air bag module circuits
(AS2) are shorted to each other.
SIDE MODULE LH [OPEN] B1134Front LH side air bag module circuit is
open. 1. Visually check the wiring harness connection.
2. Replace the harness if it has visible damage.
3. Replace the front LH seat back assembly.
4. Replace the air bag diagnosis sensor unit.
5. Replace the related harness.
SIDE MODULE LH
[VB-SHORT] B1135Front LH side air bag module circuit is
shorted to a power supply circuit.
SIDE MODULE LH [GND-SHORT] B1136
Front LH side air bag module circuit is
shorted to ground.
SIDE MODULE LH [SHOR
T] B1137Front LH side air bag module circuits are
shorted to each other.
Revision: December 20092009 QX56
Page 3581 of 4171
![INFINITI QX56 2009 Factory Service Manual DIAGNOSIS SENSOR UNITSRC-83
< ECU DIAGNOSIS >
C
DE
F
G
I
J
K L
M A
B
SRC
N
O P
SIDE MODULE RH [OPEN] B1129Front RH side air bag module circuit is
open. 1. Visually check the wiring harness connectio INFINITI QX56 2009 Factory Service Manual DIAGNOSIS SENSOR UNITSRC-83
< ECU DIAGNOSIS >
C
DE
F
G
I
J
K L
M A
B
SRC
N
O P
SIDE MODULE RH [OPEN] B1129Front RH side air bag module circuit is
open. 1. Visually check the wiring harness connectio](/manual-img/42/57031/w960_57031-3580.png)
DIAGNOSIS SENSOR UNITSRC-83
< ECU DIAGNOSIS >
C
DE
F
G
I
J
K L
M A
B
SRC
N
O P
SIDE MODULE RH [OPEN] B1129Front RH side air bag module circuit is
open. 1. Visually check the wiring harness connection.
2. Replace the harness if it has visible damage.
3. Replace the front RH seat back assembly.
4. Replace the air bag diagnosis sensor unit.
5. Replace the related harness.
SIDE MODULE RH
[VB-SHORT] B1130Front RH side air bag module circuit is
shorted to a power supply circuit.
SIDE MODULE RH [GND-SHORT] B1131
Front RH side air bag module circuit is
shorted to ground.
SIDE MODULE RH [SHORT] B1132Front RH side air bag module circuits
are shorted to each other.
FR CURTN MODULE LH [OPEN] B1198LH side curtain air bag module (front)
circuit is open. 1. Visually check the wiring harness connection.
2. Replace the harness if it has visible damage.
3. Replace the LH side curtain air bag module.
4. Replace the air bag diagnosis sensor unit.
5. Replace the related harness.
FR CURTN MODULE LH
[VB-SHORT] B1199LH side curtain air bag module (front)
circuit is shorted to a power supply cir-
cuit.
FR CURTN MODULE LH [GND-SHORT] B1200LH side curtain air bag module (front)
circuit is shorted to ground.
FR CURTN MODULE LH [SHORT] B1201
LH side curtain air bag module (front)
circuits are shorted to each other.
FR CURTN MODULE RH [OPEN] B1193RH side curtain air bag module (front)
circuit is open. 1. Visually check the wiring harness connection.
2. Replace the harness if it has visible damage.
3. Replace the RH side curtain air bag module.
4. Replace the air bag diagnosis sensor unit.
5. Replace the related harness.
FR CURTN MODULE RH
[VB-SHORT] B1194RH side curtain air bag module (front)
circuit is shorted to a power supply cir-
cuit.
FR CURTN MODULE RH [GND-SHORT] B1195RH side curtain air bag module (front)
circuit is shorted to ground.
FR CURTN MODULE RH [SHORT] B1196RH side curtain air bag module (front)
circuits are shorted to each other.
CURTAIN MODULE LH [OPEN] B1150
LH side curtain air bag module (rear) cir-
cuit is open. 1. Visually check the wiring harness connection.
2. Replace the harness if it has visible damage.
3. Replace the LH side curtain air bag module.
4. Replace the air bag diagnosis sensor unit.
5. Replace the related harness.
CURTAIN MODULE LH
[VB-SHORT] B1151LH side curtain air bag module (rear) cir-
cuit is shorted to a power supply circuit.
CURTAIN MODULE LH [GND-SHORT] B1152LH side curtain air bag module (rear) cir-
cuit is shorted to ground.
CURTAIN MODULE LH [SHORT] B1153
LH side curtain air bag module (rear) cir-
cuits are shorted to each other.
CURTAIN MODULE RH [OPEN] B1145
RH side curtain air bag module (rear)
circuit is open. 1.
V
isually check the wiring harness connection.
2. Replace the harness if it has visible damage.
3. Replace the RH side curtain air bag module.
4. Replace the air bag diagnosis sensor unit.
5. Replace the related harness.
CURTAIN MODULE RH
[VB-SHORT] B1146RH side curtain air bag module (rear)
circuit is shorted to a power supply cir-
cuit.
CURTAIN MODULE RH [GND-SHORT] B1147
RH side curtain air bag module (rear)
circuit is shorted to ground.
CURTAIN MODULE RH [SHORT] B1148RH side curtain air bag module (rear)
circuits are shorted to each other.
PRE-TEN FRONT LH [OPEN] B1086LH seat belt pre-tensioner circuit is
open. 1. Visually check the wiring harness connection.
2. Replace the harness if it has visible damage.
3. Replace the front LH seat belt pre-tensioner.
4. Replace the air bag diagnosis sensor unit.
5. Replace the related harness.
PRE-TEN FRONT LH
[VB-SHORT] B1087
LH seat belt pre-tensioner circuit is
shorted to a power supply circuit.
PRE-TEN FRONT LH [GND-SHORT] B1088LH seat belt pre-tensioner circuit is
shorted to ground.
PRE-TEN FRONT LH [SHORT] B1089LH seat belt pre-tensioner circuits are
shorted to each other.
CONSULT-III name DTC
DTC detecting condition Repair order
Revision: December 20092009 QX56
Page 3582 of 4171
![INFINITI QX56 2009 Factory Service Manual SRC-84
< ECU DIAGNOSIS >
DIAGNOSIS SENSOR UNIT
PRE-TEN FRONT RH [OPEN] B1081RH seat belt pre-tensioner circuit is
open. 1. Visually check the wiring harness connection.
2. Replace the harness if it h INFINITI QX56 2009 Factory Service Manual SRC-84
< ECU DIAGNOSIS >
DIAGNOSIS SENSOR UNIT
PRE-TEN FRONT RH [OPEN] B1081RH seat belt pre-tensioner circuit is
open. 1. Visually check the wiring harness connection.
2. Replace the harness if it h](/manual-img/42/57031/w960_57031-3581.png)
SRC-84
< ECU DIAGNOSIS >
DIAGNOSIS SENSOR UNIT
PRE-TEN FRONT RH [OPEN] B1081RH seat belt pre-tensioner circuit is
open. 1. Visually check the wiring harness connection.
2. Replace the harness if it has visible damage.
3. Replace the front RH seat belt pre-tensioner.
4. Replace the air bag diagnosis sensor unit.
5. Replace the related harness.
PRE-TEN FRONT RH
[VB-SHORT] B1082RH seat belt pre-tensioner circuit is
shorted to a power supply circuit.
PRE-TEN FRONT RH [GND-SHORT] B1083
RH seat belt pre-tensioner circuit is
shorted to ground.
PRE-TEN FRONT RH [SHORT] B1084RH seat belt pre-tensioner circuits are
shorted to each other.
PRE-TEN2 FRONT LH [OPEN] B1182LH seat belt buckle pre-tensioner circuit
is open. 1. Visually check the wiring harness connection.
2. Replace the harness if it has visible damage.
3. Replace the front LH seat belt buckle pre-ten-
sioner.
4. Replace the air bag diagnosis sensor unit.
5. Replace the related harness.
PRE-TEN2 FRONT LH
[VB-SHORT] B1183
LH seat belt buckle pre-tensioner circuit
is shorted to a power supply circuit.
PRE-TEN2 FRONT LH [GND-SHORT] B1184LH seat belt buckle pre-tensioner circuit
is shorted to ground.
PRE-TEN2 FRONT LH [SHORT] B1185LH seat belt buckle pre-tensioner cir-
cuits are shorted to each other.
PRE-TEN2 FRONT RH [OPEN] B1177
RH seat belt buckle pre-tensioner circuit
is open. 1. Visually check the wiring harness connection.
2. Replace the harness if it has visible damage.
3. Replace the front RH seat belt buckle pre-ten-
sioner.
4. Replace the air bag diagnosis sensor unit.
5. Replace the related harness.
PRE-TEN2 FRONT RH
[VB-SHORT] B1178RH seat belt buckle pre-tensioner circuit
is shorted to a power supply circuit.
PRE-TEN2 FRONT RH [GND-SHORT] B1179RH seat belt buckle pre-tensioner circuit
is shorted to ground.
PRE-TEN2 FRONT RH [SHORT] B1180
RH seat belt buckle pre-tensioner cir-
cuits are shorted to each other.
CRASH ZONE SEN [UNIT FAIL] B1033 Crash zone sensor has malfunctioned. 1. Visually check the wiring harness connection.
2. Replace the harness if it has visible damage.
3. Replace the crash zone sensor.
4. Replace the air bag diagnosis sensor unit.
5. Replace the related harness.
B1034
CRASH ZONE SEN [COMM FAIL] B1035Crash zone sensor communication er-
ror.
SATELLITE SENS LH [UNIT FAIL] B1118 LH side air bag satellite sensor has mal-
functioned. 1. Visually check the wiring harness connection.
2. Replace the harness if it has visible damage.
3. Replace the LH side air bag satellite sensor.
4. Replace the air bag diagnosis sensor unit.
5. Replace the related harness.
B 111 9
SATELLITE SENS LH [COMM FAIL] B1120LH side air bag satellite sensor commu-
nication error.
SATELLITE SENS RH [UNIT FAIL] B1
1
13 RH side air bag satellite sensor has mal-
functioned. 1. Visually check the wiring harness connection.
2. Replace the harness if it has visible damage.
3. Replace the RH side air bag satellite sensor.
4. Replace the air bag diagnosis sensor unit.
5. Replace the related harness.
B 111 4
SATELLITE SENS RH [COMM FAIL] B 111 5RH side air bag satellite sensor commu-
nication error.
CONTROL UNIT B1XXX Air bag diagnosis sensor unit is malfunc-
tioning.
1. Visually check the wiring harness connection.
2. Replace the harness if it has visible damage.
3. Replace the air bag diagnosis sensor unit.
4. Replace the related harness.
PASS A/B INDCTR CKT B1023 Front passenger air bag OFF indicator is
malfunctioning.
1. Visually check the wiring harness connection.
2. Replace the harness if it has visible damage.
3. Replace the front passenger air bag OFF in-
dicator.
4. Replace the air bag diagnosis sensor unit.
5. Replace the related harness.
OCCUPANT SENS C/U [UNIT FAIL] B1017 The OCS control unit is malfunctioning. 1. Replace the RH front seat cushion assembly.
Do not disassemble the seat cushion assem-
bly.
B1020
B1021
OCCUPANT SENS [UNIT FAIL] B1018The OCS sensor is malfunctioning.
CONSULT-III name DTC
DTC detecting condition Repair order
Revision: December 20092009 QX56
Page 3583 of 4171

DIAGNOSIS SENSOR UNITSRC-85
< ECU DIAGNOSIS >
C
DE
F
G
I
J
K L
M A
B
SRC
N
O P
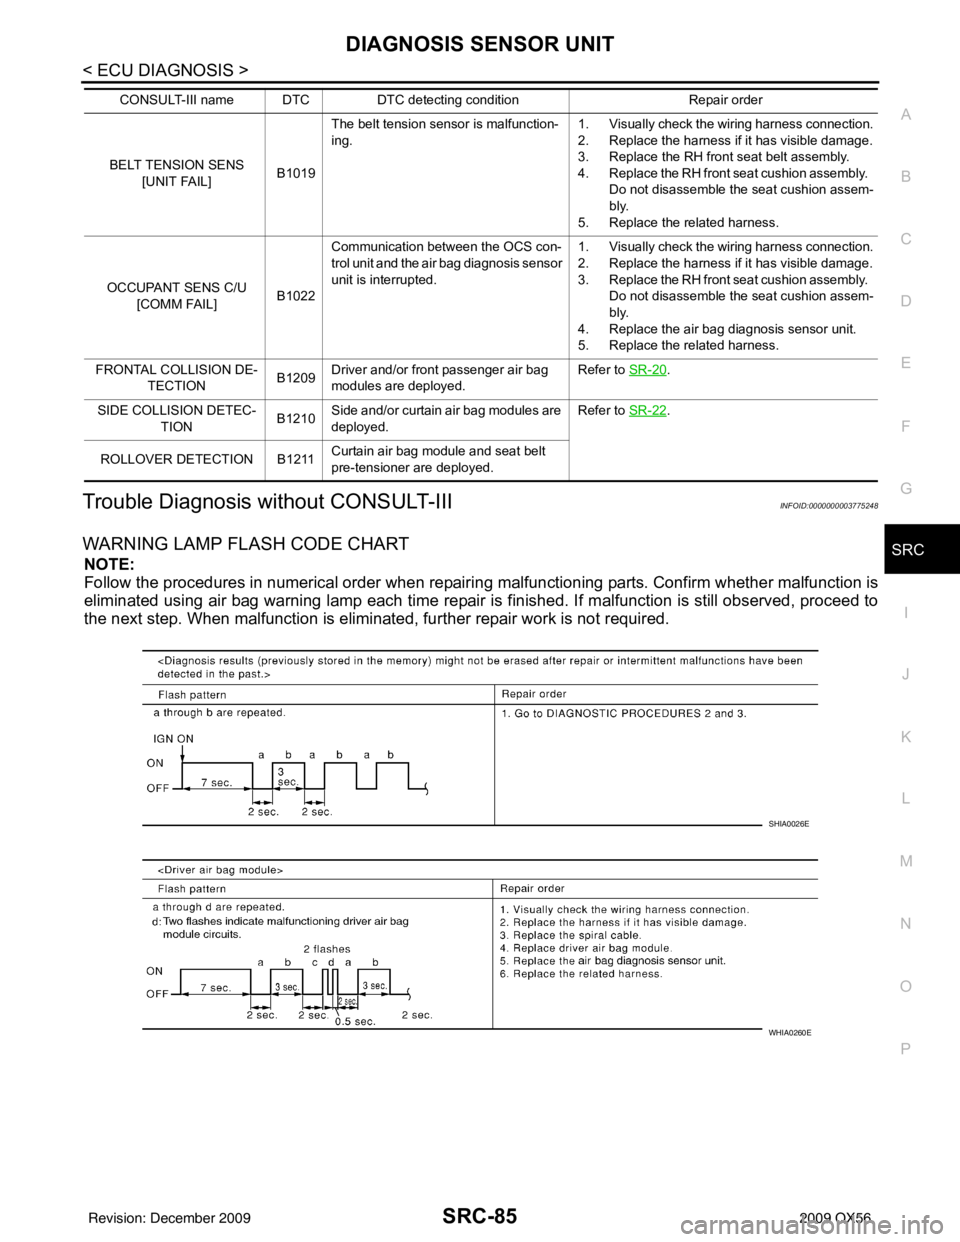
Trouble Diagnosis without CONSULT-IIIINFOID:0000000003775248
WARNING LAMP FLASH CODE CHART
NOTE:
Follow the procedures in numerical order when repairi ng malfunctioning parts. Confirm whether malfunction is
eliminated using air bag warning lamp each time repair is finished. If malfunction is still observed, proceed to
the next step. When malfunction is eliminated, fu rther repair work is not required.
BELT TENSION SENS
[UNIT FAIL] B1019The belt tension sensor is malfunction-
ing.
1. Visually check the wiring harness connection.
2. Replace the harness if it has visible damage.
3. Replace the RH front seat belt assembly.
4. Replace the RH front seat cushion assembly.
Do not disassemble the seat cushion assem-
bly.
5. Replace the related harness.
OCCUPANT SENS C/U [COMM FAIL] B1022Communication between the OCS con-
trol unit and the air bag diagnosis sensor
unit is interrupted.
1. Visually check the wiring harness connection.
2. Replace the harness if it has visible damage.
3. Replace the RH front seat cushion assembly.
Do not disassemble the seat cushion assem-
bly.
4. Replace the air bag diagnosis sensor unit.
5. Replace the related harness.
FRONTAL COLLISION DE- TECTION B1209Driver and/or front passenger air bag
modules are deployed. Refer to SR-20
.
SIDE COLLISION DETEC- TION B1210Side and/or curtain air bag modules are
deployed. Refer to SR-22
.
ROLLOVER DETECTION B1211 Curtain air bag module and seat belt
pre-tensioner are deployed.
CONSULT-III name DTC
DTC detecting condition Repair order
SHIA0026E
WHIA0260E
Revision: December 20092009 QX56
Page 3588 of 4171

SRC-90
< SYMPTOM DIAGNOSIS >
SRS AIR BAG SYSTEM
SYMPTOM DIAGNOSIS
SRS AIR BAG SYSTEM
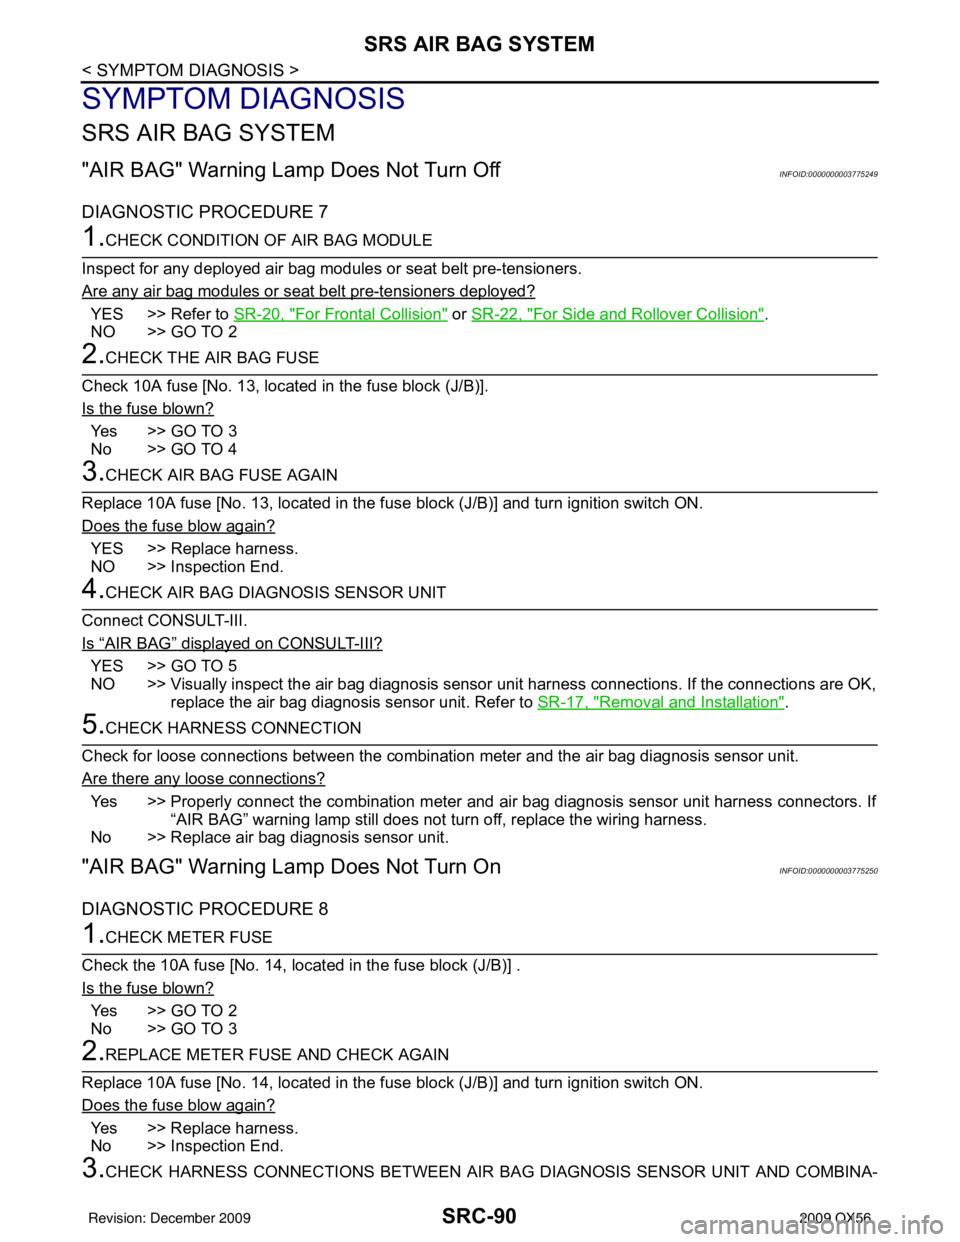
"AIR BAG" Warning Lamp Does Not Turn OffINFOID:0000000003775249
DIAGNOSTIC PROCEDURE 7
1.CHECK CONDITION OF AIR BAG MODULE
Inspect for any deployed air bag modules or seat belt pre-tensioners.
Are any air bag modules or s eat belt pre-tensioners deployed?
YES >> Refer to SR-20, "For Frontal Collision" or SR-22, "For Side and Rollover Collision".
NO >> GO TO 2
2.CHECK THE AIR BAG FUSE
Check 10A fuse [No. 13, locat ed in the fuse block (J/B)].
Is the fuse blown?
Ye s > > G O T O 3
No >> GO TO 4
3.CHECK AIR BAG FUSE AGAIN
Replace 10A fuse [No. 13, located in the fu se block (J/B)] and turn ignition switch ON.
Does the fuse blow again?
YES >> Replace harness.
NO >> Inspection End.
4.CHECK AIR BAG DIAGNOSIS SENSOR UNIT
Connect CONSULT-III.
Is
“AIR BAG” displayed on CONSULT-III?
YES >> GO TO 5
NO >> Visually inspect the air bag diagnosis sensor unit harness connections. If the connections are OK,
replace the air bag diagnosis sensor unit. Refer to SR-17, "
Removal and Installation".
5.CHECK HARNESS CONNECTION
Check for loose connections between the combination meter and the air bag diagnosis sensor unit.
Are there any loose connections?
Yes >> Properly connect the combination meter and air bag diagnosis sensor unit harness connectors. If
“AIR BAG” warning lamp still does not turn off, replace the wiring harness.
No >> Replace air bag diagnosis sensor unit.
"AIR BAG" Warning La mp Does Not Turn OnINFOID:0000000003775250
DIAGNOSTIC PROCEDURE 8
1.CHECK METER FUSE
Check the 10A fuse [No. 14, located in the fuse block (J/B)] .
Is the fuse blown?
Ye s > > G O T O 2
No >> GO TO 3
2.REPLACE METER FUSE AND CHECK AGAIN
Replace 10A fuse [No. 14, located in the fu se block (J/B)] and turn ignition switch ON.
Does the fuse blow again?
Yes >> Replace harness.
No >> Inspection End.
3.CHECK HARNESS CONNECTIONS BET WEEN AIR BAG DIAGNOSIS SENSOR UNIT AND COMBINA-
Revision: December 20092009 QX56
Page 3606 of 4171

STEERING WHEELST-15
< ON-VEHICLE REPAIR >
C
DE
F
H I
J
K L
M A
B
ST
N
O P
ON-VEHICLE REPAIR
STEERING WHEEL
On-Vehicle Inspection and ServiceINFOID:0000000004187602
CHECKING CONDITION OF INSTALLATION
Check installation condition of steering gear assemb ly, front suspension, axle and steering column.
Check if movement exists when steering wheel is mo ved up and down, to the left and right and to the axial
direction.
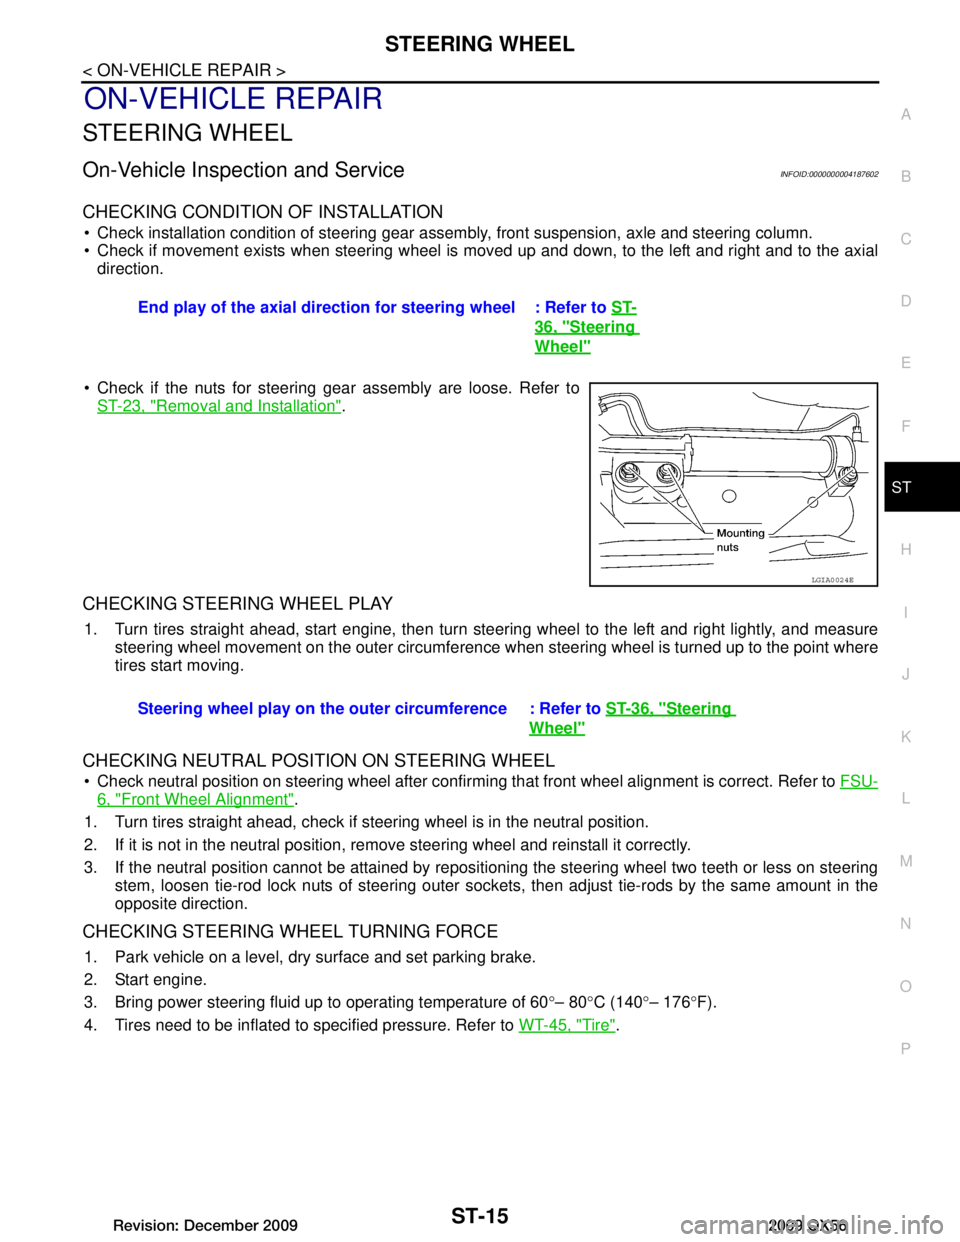
Check if the nuts for steering gear assembly are loose. Refer to ST-23, "Removal and Installation"
.
CHECKING STEERING WHEEL PLAY
1. Turn tires straight ahead, start engine, then turn steer ing wheel to the left and right lightly, and measure
steering wheel movement on the outer circumference when steering wheel is turned up to the point where
tires start moving.
CHECKING NEUTRAL POSITION ON STEERING WHEEL
Check neutral position on steering wheel after confirming that front wheel alignment is correct. Refer to FSU-
6, "Front Wheel Alignment".
1. Turn tires straight ahead, check if st eering wheel is in the neutral position.
2. If it is not in the neutral position, remo ve steering wheel and reinstall it correctly.
3. If the neutral position cannot be attained by repositi oning the steering wheel two teeth or less on steering
stem, loosen tie-rod lock nuts of steering outer socket s, then adjust tie-rods by the same amount in the
opposite direction.
CHECKING STEERING WHEEL TURNING FORCE
1. Park vehicle on a level, dry surface and set parking brake.
2. Start engine.
3. Bring power steering fluid up to operating temperature of 60 °– 80 °C (140 °– 176 °F).
4. Tires need to be inflated to specified pressure. Refer to WT-45, "Tire"
.
End play of the axial direction for steering wheel : Refer to
ST-
36, "Steering
Wheel"
LGIA0024E
Steering wheel play on the outer circumference : Refer to ST-36, "Steering
Wheel"
Revision: December 20092009 QX56
Page 3632 of 4171

PRECAUTIONSSTR-3
< PRECAUTION >
C
DE
F
G H
I
J
K L
M A
STR
NP
O
5. When the repair work is completed, return the ignition switch to the
″LOCK ″ position before connecting
the battery cables. (At this time, the steering lock mechanism will engage.)
6. Perform a self-diagnosis check of al l control units using CONSULT-III.
Precaution for Power Generation Variable Voltage Control SystemINFOID:0000000003771784
CAUTION:
For this model, the battery current sensor that is installed to the negative battery cable measures the
charging/discharging current of the battery and performs various engine controls. If an electrical com-
ponent is connected directly to the negative battery terminal, the current flowing through that compo-
nent will not be measured by the battery current sensor. This condition may cause a malfunction of
the engine control system and battery discharge m ay occur. Do not connect an electrical component
or ground wire directly to the battery terminal.
Revision: December 20092009 QX56