Page 3612 of 4171
STEERING COLUMNST-21
< REMOVAL AND INSTALLATION >
C
DE
F
H I
J
K L
M A
B
ST
N
O P
4. Remove lock nut and bolt, then separate upper shaft from upper joint.
5. Remove two nuts and two bolts, then remove steering column assembly from steering member.
6. Remove hole cover seal and clamp.
7. Remove mounting nuts, then remove hole cover from dash panel.
8. Raise vehicle, then remove mounting bolt (lower side) of lower joint shaft and remove lower joint shaft and upper shaft as an
assembly.
INSPECTION AFTER REMOVAL
Check for damage to steering column jacket tube. If damage is found, replace steering column with new
one.
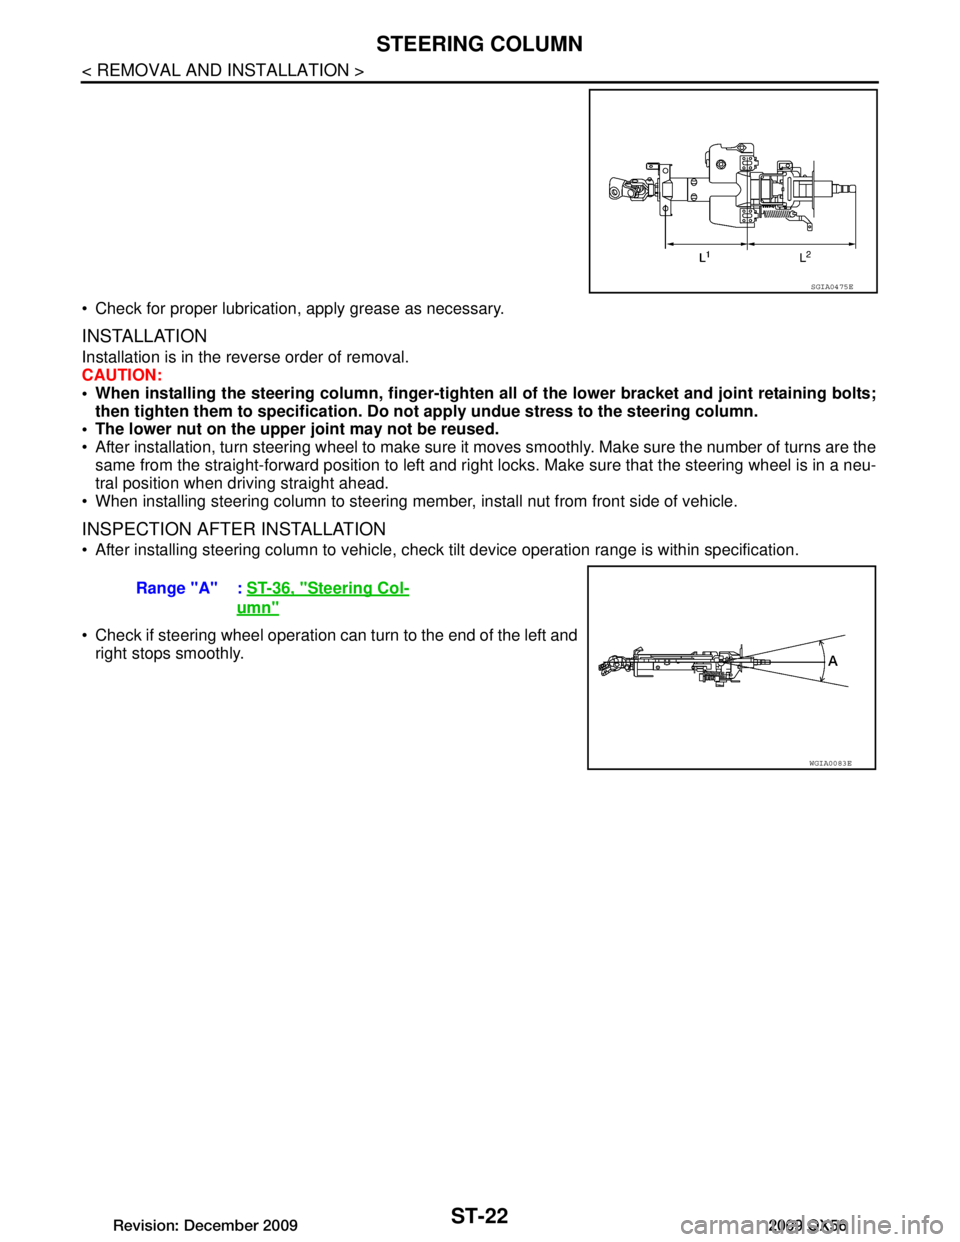
If vehicle has been in a collision, check column length (L), (L
1) and L2) as shown. If out of specification,
replace steering column with new one.
LGIA0027E
LGIA0028E
LGIA0029E
Steering column length
L : Refer to ST-36, "Steering
Wheel"
L1: Refer to ST-36, "Steering
Wheel"
L2: Refer to ST-36, "Steering
Wheel"
WGIA0080E
Revision: December 20092009 QX56
Page 3613 of 4171

ST-22
< REMOVAL AND INSTALLATION >
STEERING COLUMN
Check for proper lubrication, apply grease as necessary.
INSTALLATION
Installation is in the reverse order of removal.
CAUTION:
When installing the steering column, finger-tighten all of the lower bracket and joint retaining bolts;
then tighten them to specifi cation. Do not apply undue st ress to the steering column.
The lower nut on the upper joint may not be reused.
After installation, turn steering wheel to make sure it moves smoothly. Make sure the number of turns are the
same from the straight-forward position to left and right locks. Make sure that the steering wheel is in a neu-
tral position when driving straight ahead.
When installing steering column to steering mem ber, install nut from front side of vehicle.
INSPECTION AFTER INSTALLATION
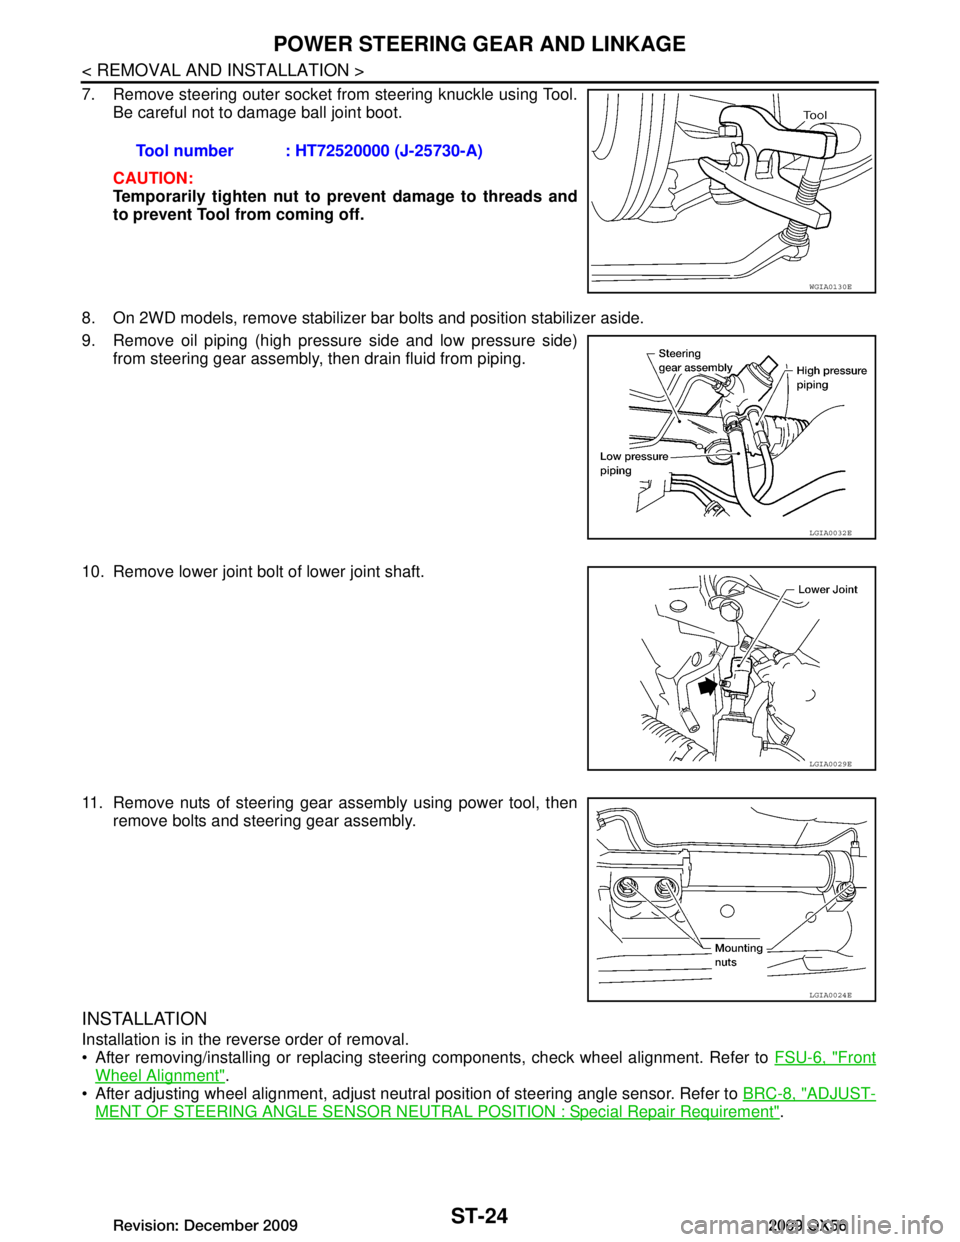
After installing steering column to vehicle, check tilt device operation range is within specification.
Check if steering wheel operation can turn to the end of the left and right stops smoothly.
SGIA0475E
Range "A" : ST-36, "Steering Col-
umn"
WGIA0083E
Revision: December 20092009 QX56
Page 3614 of 4171

POWER STEERING GEAR AND LINKAGEST-23
< REMOVAL AND INSTALLATION >
C
DE
F
H I
J
K L
M A
B
ST
N
O P
POWER STEERING GEAR AND LINKAGE
Removal and InstallationINFOID:0000000004187596
CAUTION:
Spiral cable may snap due to steering operation if steering column is separated from steering gear
assembly. Therefore secure steer ing wheel to avoid turning.
REMOVAL
1. Turn wheels to the straight-ahead position.
2. Remove tires from vehicle using power tool.
3. Remove undercover using power tool.
4. On 4WD models, remove front final drive, then support drive shafts with wire. Refer to DLN-215,
"Removal and Installation".
5. Make sure slit of lower joint fits with the projection on rear cover cap, while checking that mark on steering gear assembly aligns
with mark on rear cover cap.
6. Remove cotter pin at steering outer socket and discard, then loosen nut.
1. Cotter pin 2. Steering Gear Bracket 3. Steering gear insulator
4. Steering gear assembly 5. Washer Front
AWGIA0114GB
SST491C
Revision: December 20092009 QX56
Page 3615 of 4171

ST-24
< REMOVAL AND INSTALLATION >
POWER STEERING GEAR AND LINKAGE
7. Remove steering outer socket from steering knuckle using Tool.Be careful not to damage ball joint boot.
CAUTION:
Temporarily tighten nut to prevent damage to threads and
to prevent Tool from coming off.
8. On 2WD models, remove stabilizer bar bolts and position stabilizer aside.
9. Remove oil piping (high pressure side and low pressure side) from steering gear assembly, then drain fluid from piping.
10. Remove lower joint bolt of lower joint shaft.
11. Remove nuts of steering gear assembly using power tool, then remove bolts and steering gear assembly.
INSTALLATION
Installation is in the reverse order of removal.
After removing/installing or replacing steering components, check wheel alignment. Refer to FSU-6, "Front
Wheel Alignment".
After adjusting wheel alignment, adjust neutral position of steering angle sensor. Refer to BRC-8, "ADJUST-
MENT OF STEERING ANGLE SENSOR NEUTRAL POSITION : Special Repair Requirement".
Tool number : HT72520000 (J-25730-A)
WGIA0130E
LGIA0032E
LGIA0029E
LGIA0024E
Revision: December 20092009 QX56
Page 3616 of 4171
POWER STEERING GEAR AND LINKAGEST-25
< REMOVAL AND INSTALLATION >
C
DE
F
H I
J
K L
M A
B
ST
N
O P
With steering wheel in straight ahead position, make sure slit of lower joint "A" fits with the projection on rear cover cap "B", while
checking that mark on steering gear assembly aligns with mark on
rear cover cap
After installation, bleed the air from the steering hydraulic system. Refer to ST-13, "Air Bleeding Hydraulic
System".
INSPECTION AFTER INSTALLATION
Check if steering wheel turns smoothly when it is turned several times fully to the left and right lock positions.
SST491C
Revision: December 20092009 QX56
Page 3617 of 4171
ST-26
< REMOVAL AND INSTALLATION >
POWER STEERING OIL PUMP
POWER STEERING OIL PUMP
Removal and InstallationINFOID:0000000004187597
REMOVAL
1. Drain power steering fluid from reservoir tank.
2. Remove engine room cover. Refer to EM-24, "Removal and Installation"
.
3. Remove air duct assembly. Refer to EM-25, "Removal and Installation"
.
4. Remove power steering reservoir tank.
5. Remove serpentine drive belt belt from auto tensioner and power steering pump. Refer to EM-13,
"Removal and Installation".
6. Disconnect pressure sensor electrical connector.
7. Remove high pressure and low pressure piping from power steering oil pump. Refer to ST-27
.
8. Remove bolts, then remove power steering pump.
INSTALLATION
Installation is in the reverse order of removal. Refer to ST-27 for tightening torque.
After installation, bleed air. Refer to ST-13, "Air Bleeding Hydraulic System"
.
NOTE:
Belt tension is automatic and requires no adjustment.
Revision: December 20092009 QX56
Page 3618 of 4171
HYDRAULIC LINEST-27
< REMOVAL AND INSTALLATION >
C
DE
F
H I
J
K L
M A
B
ST
N
O P
HYDRAULIC LINE
Removal and InstallationINFOID:0000000004187598
Refer to the following illustration for hydraulic line removal.
Installation is in the reverse order of removal.
1. Reservoir tank 2. Suction hose 3. High pressure hose
4. Oil cooler 5. Steering gear assembly 6. Reservoir tank bracket
7. Eye bolt 8. O-rings Front
AWGIA0115GB
Revision: December 20092009 QX56
Page 3619 of 4171
ST-28
< REMOVAL AND INSTALLATION >
HYDRAULIC LINE
Confirm mating marks are aligned with hose and clamp, then cor-rect if needed.
To install eye joint, align projection of eye joint with notch of power steering pump, and attach eye joint to power steering pump prop-
erly. Tighten eye bolt by hand fully, then torque to specification.
SGIA0563E
WGIA0089E
Revision: December 20092009 QX56