2009 Hyundai Sonata ECU
[x] Cancel search: ECUPage 42 of 286
1
FEATURES OF YOUR HYUNDAI
29
!For vehicles with adjustable headrests,
route the tether strap under the head-
rest and between the headrest posts,
otherwise route the tether strap over the
top of the seatback.
3. Connect the tether strap hook to the
child restraint hook holder and tighten
to secure the seat.
WARNING:
o A child can be seriously injured or
killed in a collision if the child restraint
is not properly anchored. Always
follow the child seat manufacturer’s
instructions for installation and use.
o Never mount more than one child re-
straint to a single tether or to a single
lower anchorage point. The increased
load caused by multiple seats may
cause the tethers or anchorage points
to break, causing serious injury or
death.
B230D06E-AATSecuring the Child Restraint Seat
with the "ISOFIX" systemSome child seat manufacturers make
safety seats that are labeled as ISOFIX or
ISOFIX-compatible child seats. These
seats include two rigid or webbing mounted
attachments that connect to two ISOFIX
anchors at specific seating positions in
your vehicle. This type of child seat
eliminates the need to use seat belts to
attach the child seat.
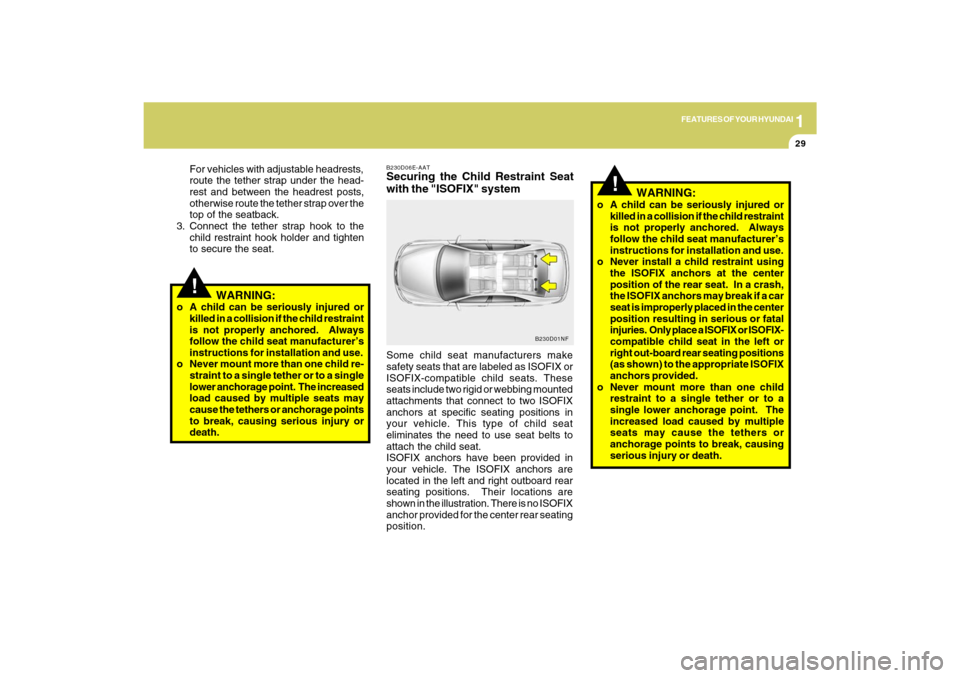
ISOFIX anchors have been provided in
your vehicle. The ISOFIX anchors are
located in the left and right outboard rear
seating positions. Their locations are
shown in the illustration. There is no ISOFIX
anchor provided for the center rear seating
position.
B230D01NF
!
WARNING:
o A child can be seriously injured or
killed in a collision if the child restraint
is not properly anchored. Always
follow the child seat manufacturer’s
instructions for installation and use.
o Never install a child restraint using
the ISOFIX anchors at the center
position of the rear seat. In a crash,
the ISOFIX anchors may break if a car
seat is improperly placed in the center
position resulting in serious or fatal
injuries. Only place a ISOFIX or ISOFIX-
compatible child seat in the left or
right out-board rear seating positions
(as shown) to the appropriate ISOFIX
anchors provided.
o Never mount more than one child
restraint to a single tether or to a
single lower anchorage point. The
increased load caused by multiple
seats may cause the tethers or
anchorage points to break, causing
serious injury or death.
Page 44 of 286
1
FEATURES OF YOUR HYUNDAI
31
B230G04Y-AATChild Restraint System Installation
on Rear Seats
B230G01NF-B
On outboard rear seats
B235G02NF
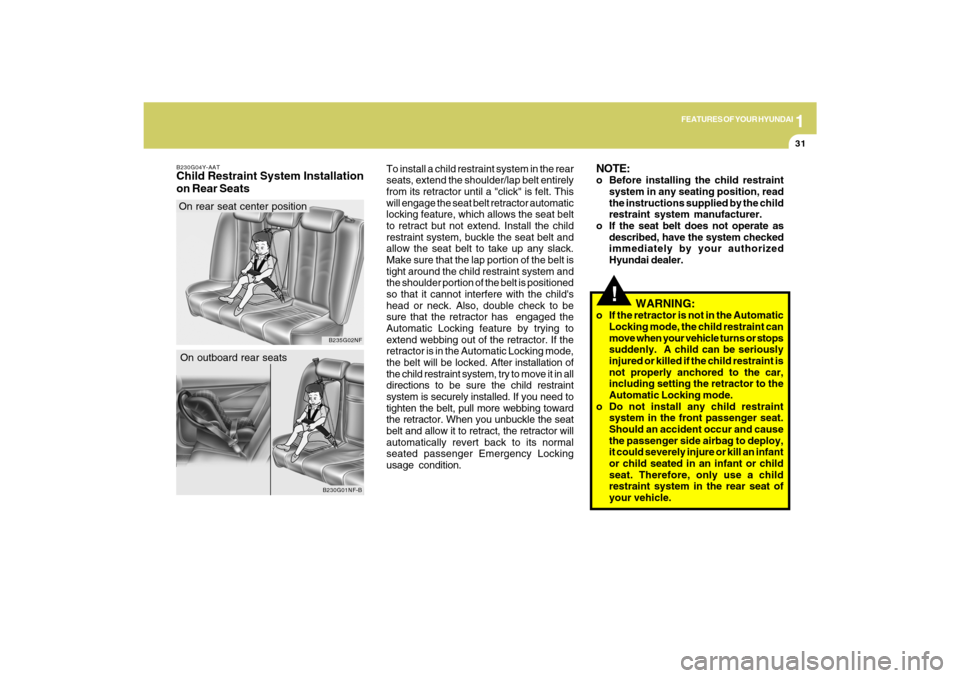
On rear seat center positionTo install a child restraint system in the rear
seats, extend the shoulder/lap belt entirely
from its retractor until a "click" is felt. This
will engage the seat belt retractor automatic
locking feature, which allows the seat belt
to retract but not extend. Install the child
restraint system, buckle the seat belt and
allow the seat belt to take up any slack.
Make sure that the lap portion of the belt is
tight around the child restraint system and
the shoulder portion of the belt is positioned
so that it cannot interfere with the child's
head or neck. Also, double check to be
sure that the retractor has engaged the
Automatic Locking feature by trying to
extend webbing out of the retractor. If the
retractor is in the Automatic Locking mode,
the belt will be locked. After installation of
the child restraint system, try to move it in all
directions to be sure the child restraint
system is securely installed. If you need to
tighten the belt, pull more webbing toward
the retractor. When you unbuckle the seat
belt and allow it to retract, the retractor will
automatically revert back to its normal
seated passenger Emergency Locking
usage condition.
!
WARNING:
o If the retractor is not in the Automatic
Locking mode, the child restraint can
move when your vehicle turns or stops
suddenly. A child can be seriously
injured or killed if the child restraint is
not properly anchored to the car,
including setting the retractor to the
Automatic Locking mode.
o Do not install any child restraint
system in the front passenger seat.
Should an accident occur and cause
the passenger side airbag to deploy,
it could severely injure or kill an infant
or child seated in an infant or child
seat. Therefore, only use a child
restraint system in the rear seat of
your vehicle.NOTE:o Before installing the child restraint
system in any seating position, read
the instructions supplied by the child
restraint system manufacturer.
o If the seat belt does not operate as
described, have the system checked
immediately by your authorized
Hyundai dealer.
Page 57 of 286
1FEATURES OF YOUR HYUNDAI44
!
WARNING:
o Even though your vehicle is equipped
with the occupant classification sys-
tem, never install a child restraint
system in the front passenger's seat.
A deploying air bag can forcefully
strike a child resulting in serious
injuries or death. Any child age 12 and
under should ride in the rear seat.
Children too large for child restraints
should use the available lap/shoulder
belts. No matter what type of crash,
children of all ages are safer when
restrained in the rear seat.
o If the "PASSENGER AIR BAG OFF"
indicator is illuminated when the front
passenger's seat is occupied by an
adult and he/she sits properly (sitting
upright with the seatback in an upright
position, centered on the seat cushion
with their seat belt on, legs comfortably
extended and their feet on the floor),
have that person sit in the rear seat.
o Do not modify or replace the front
passenger seat. Don't place anything
on or attach anything such as a blanket
or after market seat heater to the
front passenger seat. This can
adversely affect the occupant
classification system.
o Do not sit on sharp objects such as tools
when occupying the front passenger
seat. This can adversely affect the occu-
pant classification system.
o Do not use accessory seat covers on
the front seats.
o Accident statistics show that children
are safer if they are restrained in the
rear, as opposed to the front seat. It is
recommended that child restraints be
secured in a rear seat, including an infant
riding in a rear-facing infant seat, a child
riding in a forward-facing child seat and
an older child riding in a booster seat.
o Air bags can only be used once – have
an authorized Hyundai dealer replace
the air bag immediately after
deployment.
o A smaller-stature adult who is not seated
correctly (for example: seat excessively
reclined, leaning on the center console,
or hips shifted forward in the seat) can
cause a condition where the advanced
frontal air bag system senses less
weight than if the occupant were seated
properly (sitting upright with the seatback
in an upright position, centered on the
seat cushion with their seat belt on, legs
comfortably extended and their feet on
the floor). This condition can result in an
adult potentially being misclassified and
illumination of the "PASSENGER AIR
BAG OFF" indicator.
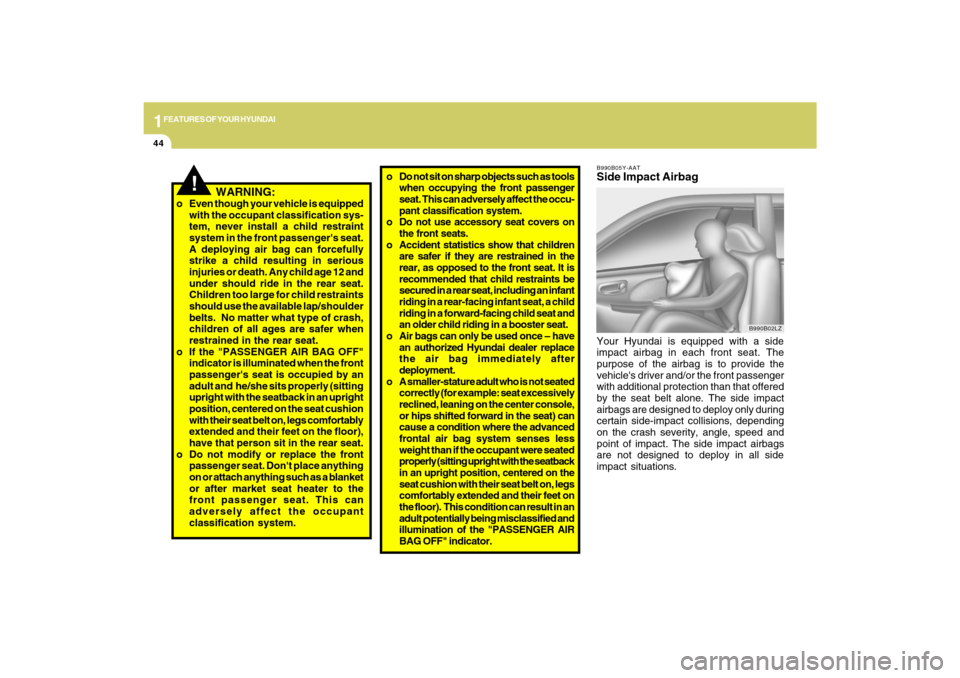
B990B05Y-AATSide Impact AirbagYour Hyundai is equipped with a side
impact airbag in each front seat. The
purpose of the airbag is to provide the
vehicle's driver and/or the front passenger
with additional protection than that offered
by the seat belt alone. The side impact
airbags are designed to deploy only during
certain side-impact collisions, depending
on the crash severity, angle, speed and
point of impact. The side impact airbags
are not designed to deploy in all side
impact situations.
B990B02LZ
Page 93 of 286
1FEATURES OF YOUR HYUNDAI80
!
Integrated HomeLink
® Wireless
Control System
The HomeLink
® Wireless Control System
provides a convenient way to replace up to
three hand-held radio-frequency (RF)
transmitters with a single built-in device.
This innovative feature will learn the radio
frequency codes of most current
transmitters to operate devices such as
gate operators, garage door openers, entry
door locks, security systems, even home
lighting. Both standard and rolling code-
equipped transmitters can be programmed
by following the outlined procedures.
Additional HomeLink
® information can be
found at: www.homelink.com or by calling
1-800-355-3515.
CAUTION:
Before programming HomeLink
® to a
garage door opener or gate operator,
make sure that people and objects are
out of the way of the device to prevent
potential harm or damage. Do not use
HomeLink
® with any garage door opener
that lacks the safety stop and reverse
features as required by U.S. federal
safety standards (this includes any
garage door opener model manufactured
before April 1, 1982). A garage door that
cannot detect an object - signaling the
door to stop and reverse - does not meet
current U.S. federal safety standards.
Using a garage door opener without these
features increases the risk of serious
injury or death.Programming HomeLink
®
NOTE:o When programming a garage door
opener, it is advised to park the vehicle
outside of the garage.
o It is recommended that a new battery
be placed in the hand-held transmitter
of the device being programmed to
HomeLink
® for quicker training and
accurate transmission of the radio-
frequency signal.
o Some vehicles may require the ignition
switch to be turned to the second (or
"accessories") position for program-
ming and/or operation of HomeLink.
o In the event that there are still pro-
gramming difficulties or questions
after following the programming steps
listed below, contact HomeLink
® at:
www.homelink.com or 1-800-355-
3515.
Retain the original transmitter of the RF
device you are programming for use in
other vehicles as well as for future
HomeLink
® programming. It is also
suggested that upon the sale of the vehicle,
the programmed HomeLink
® buttons be
erased for security purposes.
Page 95 of 286
1FEATURES OF YOUR HYUNDAI82
!
handheld transmitter every two seconds
until the frequency signal has been learned.
The indicator light will flash slowly and
then rapidly after several seconds upon
successful training.
Operating HomeLink
®
To operate, simply press and release the
programmed HomeLink
® button. Activation
will now occur for the trained device (i.e.
garage door opener, gate operator, security
system, entry door lock, home/office
lighting, etc.). For convenience, the hand-
held transmitter of the device may also be
used at any time.
Reprogramming a Single HomeLink
® But-
ton
To program a new device to a previously
trained HomeLink
® button, follow these
steps:
1. Press and hold the desired HomeLink
®
button. Do NOT release until step 4 has
been completed.
2. When the indicator light begins to flash
slowly (after 20 seconds), position the
handheld transmitter 1 to 3 inches away
from the HomeLink
® surface.
3. Press and hold the handheld transmitter
button. The HomeLink
® indicator light
will flash, first slowly and then rapidly.4. When the indicator light begins to flash
rapidly, release both buttons.
5. Press and hold the just-trained
HomeLink
® button and observe the red
Status Indicator LED. If the indicator
light stays on constantly, programming
is complete and your new device should
activate.
Erasing HomeLink
® Buttons
Individual buttons cannot be erased.
However, to erase all three programmed
buttons:
1. Press and hold the two outer HomeLink
®
buttons until the indicator light begins to
flash-after 20 seconds.
2. Release both buttons. Do not hold for
longer than 30 seconds.
The Integrated HomeLink
® Wireless
Control System is now in the training (learn)
mode and can be programmed at any time
following the appropriate steps in the
Programming sections above.
FCC ID: NZLZTVHL3
IC: 4112A-ZTVHL3This device complies with Part 15 FCC
Rules. Operation is subject to the following
two conditions: (1) this device may not
cause harmful interference, and (2) this
device must accept any interference
received, including interference that may
cause undesired operation.
WARNING:
The transceiver has been tested and
complies with FCC and Industry Canada
rules. Changes or modifications not
expressly approved by the party
responsible for compliance could void
the user's authority to operate the
device.
NVS
® is a registered trademark and Z-
Nav™ is a trademark of the Gentex
Corporation, Zeeland, Michigan.
HomeLink
® is a registered trademark
owned by Johnson Controls, Incorporated,
Milwaukee, Wisconsin.
Page 97 of 286
1FEATURES OF YOUR HYUNDAI84
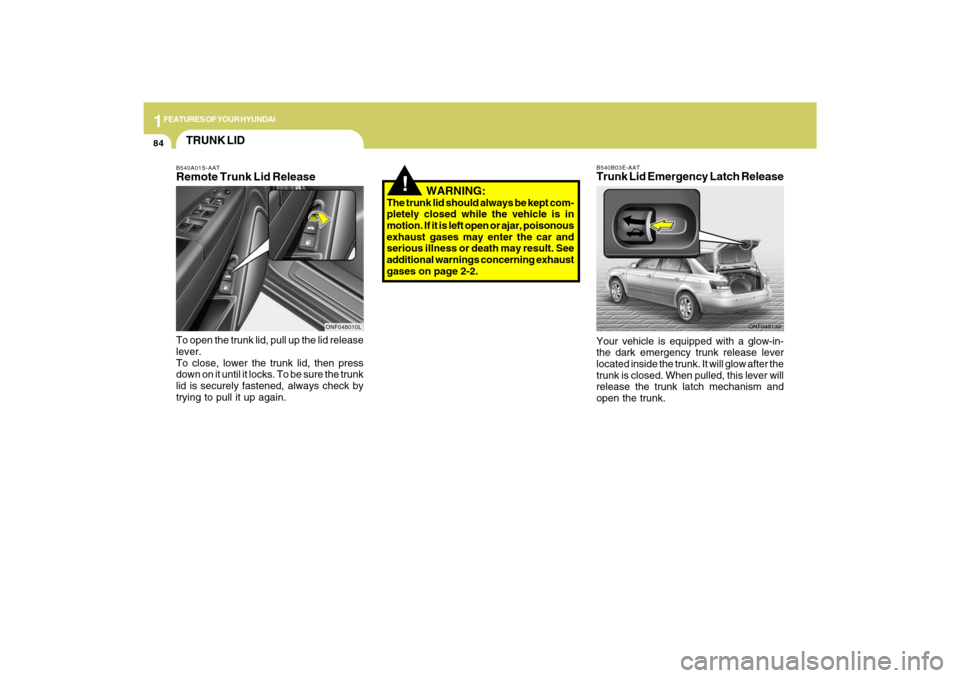
ONF048132 B540B03E-AAT
Trunk Lid Emergency Latch ReleaseYour vehicle is equipped with a glow-in-
the dark emergency trunk release lever
located inside the trunk. It will glow after the
trunk is closed. When pulled, this lever will
release the trunk latch mechanism and
open the trunk.
!
WARNING:
The trunk lid should always be kept com-
pletely closed while the vehicle is in
motion. If it is left open or ajar, poisonous
exhaust gases may enter the car and
serious illness or death may result. See
additional warnings concerning exhaust
gases on page 2-2.
TRUNK LIDB540A01S-AATRemote Trunk Lid ReleaseTo open the trunk lid, pull up the lid release
lever.
To close, lower the trunk lid, then press
down on it until it locks. To be sure the trunk
lid is securely fastened, always check by
trying to pull it up again.
ONF048010L
Page 99 of 286
1FEATURES OF YOUR HYUNDAI86
!
WARNING:
- When using a portable fuel container,
be sure to place the container on the
ground while refueling. Static elec-
tricity discharge from the container
can ignite fuel vapors causing a fire.
While starting refueling, contact
should be maintained until the filling
is complete.
- Do not use cellular phones around a
gas station. The electric current or
electronic interference from cellular
phones can ignite fuel vapors caus-
ing a fire.
- When refueling, always turn the en-
gine off. Sparks by engine compart-
ment electrical equipment can ignite
fuel vapors causing a fire. After re-
fueling, check to make sure the fuel
filler cap is securely closed, and
then start the engine.
- Do not smoke or try to light cigarettes
around a gas station. Automotive
fuels are flammable.
o After refueling, make sure the fuel
cap is installed securely to prevent
fuel spillage in the event of an accident
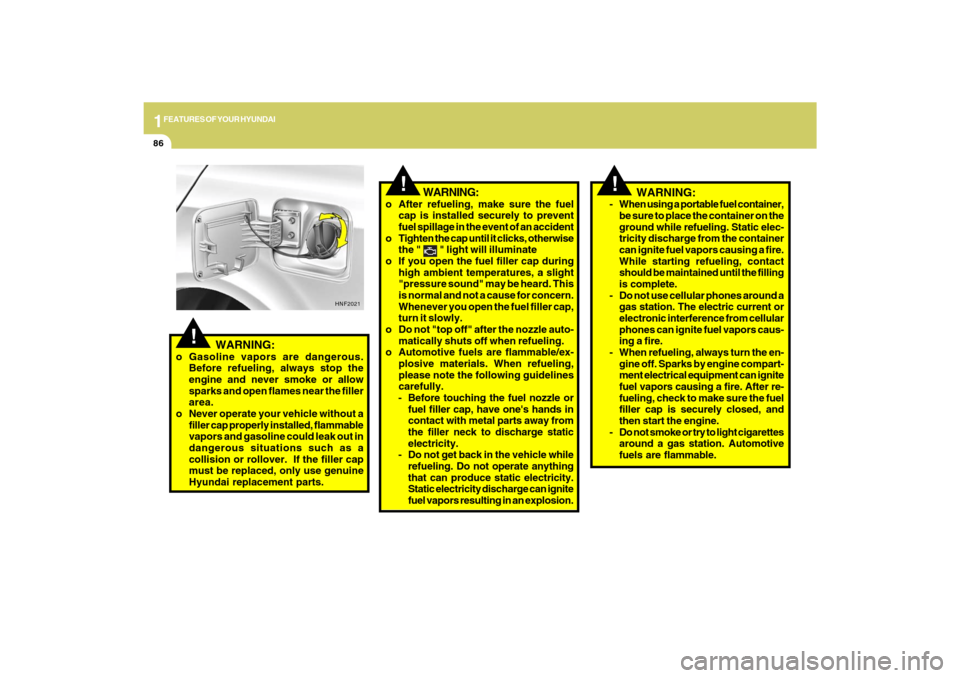
o Tighten the cap until it clicks, otherwise
the "
" light will illuminate
o If you open the fuel filler cap during
high ambient temperatures, a slight
"pressure sound" may be heard. This
is normal and not a cause for concern.
Whenever you open the fuel filler cap,
turn it slowly.
o Do not "top off" after the nozzle auto-
matically shuts off when refueling.
o Automotive fuels are flammable/ex-
plosive materials. When refueling,
please note the following guidelines
carefully.
- Before touching the fuel nozzle or
fuel filler cap, have one's hands in
contact with metal parts away from
the filler neck to discharge static
electricity.
- Do not get back in the vehicle while
refueling. Do not operate anything
that can produce static electricity.
Static electricity discharge can ignite
fuel vapors resulting in an explosion.
!
!
WARNING:
o Gasoline vapors are dangerous.
Before refueling, always stop the
engine and never smoke or allow
sparks and open flames near the filler
area.
o Never operate your vehicle without a
filler cap properly installed, flammable
vapors and gasoline could leak out in
dangerous situations such as a
collision or rollover. If the filler cap
must be replaced, only use genuine
Hyundai replacement parts.
HNF2021
WARNING:
Page 102 of 286
1
FEATURES OF YOUR HYUNDAI
89
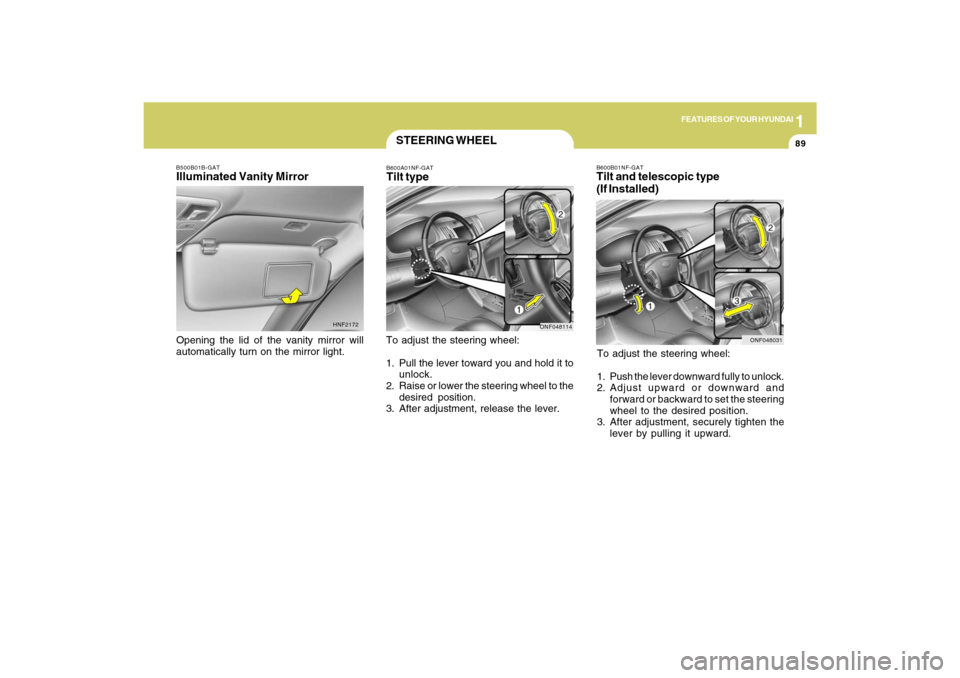
B600B01NF-GATTilt and telescopic type
(If Installed)To adjust the steering wheel:
1. Push the lever downward fully to unlock.
2. Adjust upward or downward and
forward or backward to set the steering
wheel to the desired position.
3. After adjustment, securely tighten the
lever by pulling it upward.
ONF048031
STEERING WHEELB600A01NF-GATTilt typeTo adjust the steering wheel:
1. Pull the lever toward you and hold it to
unlock.
2. Raise or lower the steering wheel to the
desired position.
3. After adjustment, release the lever.
ONF048114
B500B01B-GATIlluminated Vanity MirrorOpening the lid of the vanity mirror will
automatically turn on the mirror light.
HNF2172