2009 Hyundai Sonata change time
[x] Cancel search: change timePage 1 of 286

F1
All information in this Owner's Manual is current at the time of publication.
However, Hyundai reserves the right to make changes at any time so that our
policy of continual product improvement may be carried out.
This manual applies to all Hyundai models and includes descriptions and expla-
nations of optional as well as standard equipment. As a result, you may find
material in this manual that does not apply to your specific vehicle.
OWNER'S MANUAL
Operation
Maintenance
Specifications
Page 20 of 286
1
FEATURES OF YOUR HYUNDAI
7
!
WARNING:
Be careful not to pull the inside door
handle while driving. If you pull the inside
door handle, the door can be opened and
you may be ejected from the vehicle and
can be injured or killed. o The driver's and front passenger's
doors can be opened by pulling the
inside door handle even if the front
portion of the driver's or front
passenger's central door locking
switch has been depressed to lock
the doors.
o If the door is locked/unlocked mul-
tiple times in rapid succession with
either the vehicle key or door lock
switch, the system may stop operat-
ing temporarily in order to protect the
circuit and prevent damage to sys-
tem components.
D050400ANFAuto door lock/unlock feature
(If Installed)o All doors will be automatically locked
when shifting the transaxle shift lever
out of P(Park).
o All doors will be automatically unlocked
when shifting the transaxle shift lever
into P(Park).NOTE:An authorized Hyundai dealer can acti-
vate or deactivate the auto door lock/
unlock features.
If you want to activate or deactivate the
auto door lock/unlock features, consult
an authorized Hyundai dealer.
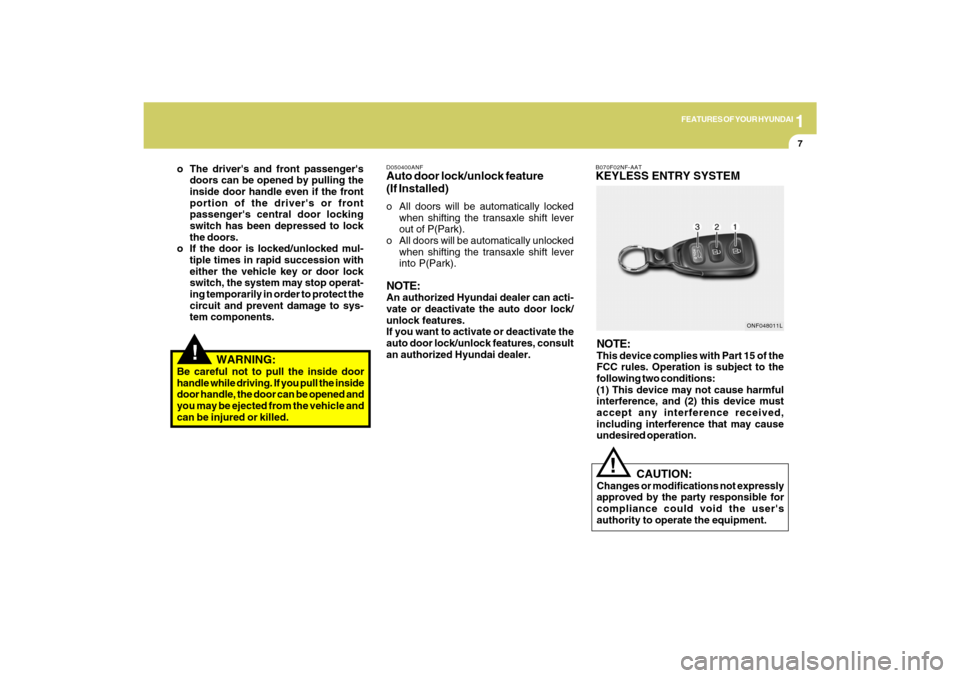
B070F02NF-AATKEYLESS ENTRY SYSTEM
CAUTION:Changes or modifications not expressly
approved by the party responsible for
compliance could void the user's
authority to operate the equipment.
!
ONF048011L
NOTE:This device complies with Part 15 of the
FCC rules. Operation is subject to the
following two conditions:
(1) This device may not cause harmful
interference, and (2) this device must
accept any interference received,
including interference that may cause
undesired operation.
Page 32 of 286
1
FEATURES OF YOUR HYUNDAI
19
!
WARNING:
Riding with a reclined seatback
increases your chance of serious or
fatal injuries in the event of a collision or
sudden stop. The protection of your
restraint system (seat belts and airbags)
is greatly reduced by reclining your seat.
Seat belts must be snug against your
hips and chest to work properly. The
more the seatback is reclined, the greater
the chance that an occupant's hips will
slide under the lap belt or the occupant's
neck will strike the shoulder belt. Drivers
and passengers should always sit well
back in their seats, properly belted, and
with the seatbacks upright.
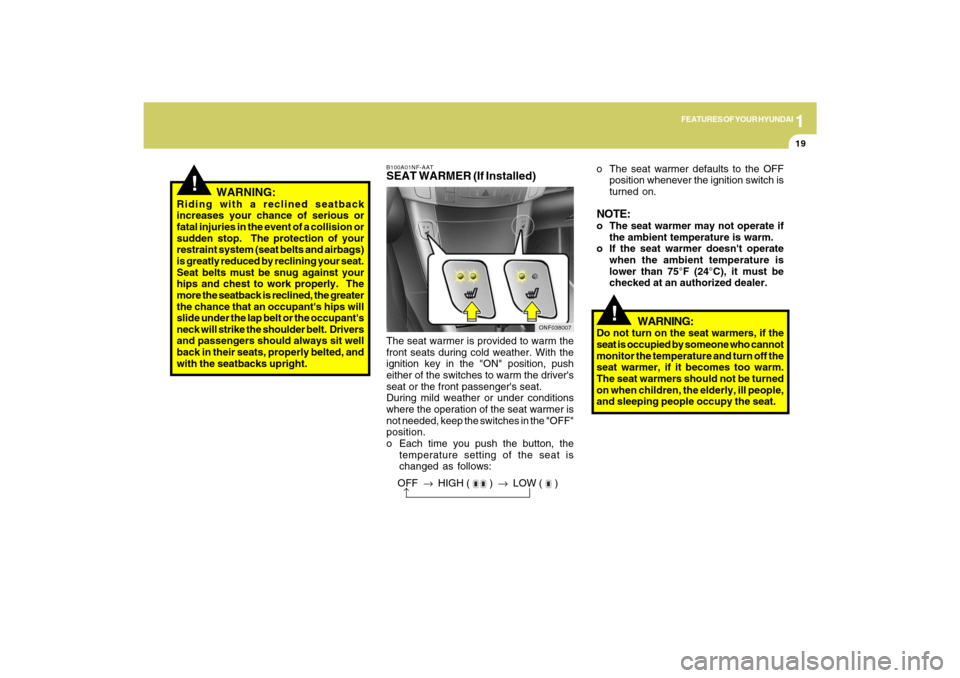
B100A01NF-AATSEAT WARMER (If Installed)The seat warmer is provided to warm the
front seats during cold weather. With the
ignition key in the "ON" position, push
either of the switches to warm the driver's
seat or the front passenger's seat.
During mild weather or under conditions
where the operation of the seat warmer is
not needed, keep the switches in the "OFF"
position.
o Each time you push the button, the
temperature setting of the seat is
changed as follows:
ONF038007
o The seat warmer defaults to the OFF
position whenever the ignition switch is
turned on.NOTE:o The seat warmer may not operate if
the ambient temperature is warm.
o If the seat warmer doesn't operate
when the ambient temperature is
lower than 75°F (24°C), it must be
checked at an authorized dealer.
OFF → HIGH (
) → LOW (
)
→
!
WARNING:
Do not turn on the seat warmers, if the
seat is occupied by someone who cannot
monitor the temperature and turn off the
seat warmer, if it becomes too warm.
The seat warmers should not be turned
on when children, the elderly, ill people,
and sleeping people occupy the seat.
Page 66 of 286
1
FEATURES OF YOUR HYUNDAI
53
!
B260P02Y-GAT
ABS Service Reminder
Indicator (SRI) (If Installed)
When the key is turned to the "ON" position,
the Anti-Lock Brake System indicator will
come on and then go off in a few seconds.
If the ABS SRI remains on, comes on while
driving, or does not come on when the key
is turned to the "ON" position, this indicates
that there may be a problem with the ABS.
If this occurs, have your vehicle checked
by your Hyundai dealer as soon as
possible. The normal braking system will
still be operational, but without the
assistance of the anti-lock brake system.
WARNING:
If both the ABS SRI and Parking Brake/
Brake fluid level warning lights remain
"ON" or come on while driving, there
may be a problem with E.B.D. (Electronic
Brake Force Distribution).
If this occurs, avoid sudden stops and
have your vehicle checked by your
Hyundai dealer as soon as possible.
B265C01NF-AAT
Electronic Stability Control
(ESC) Indicator Lights
(If Installed)
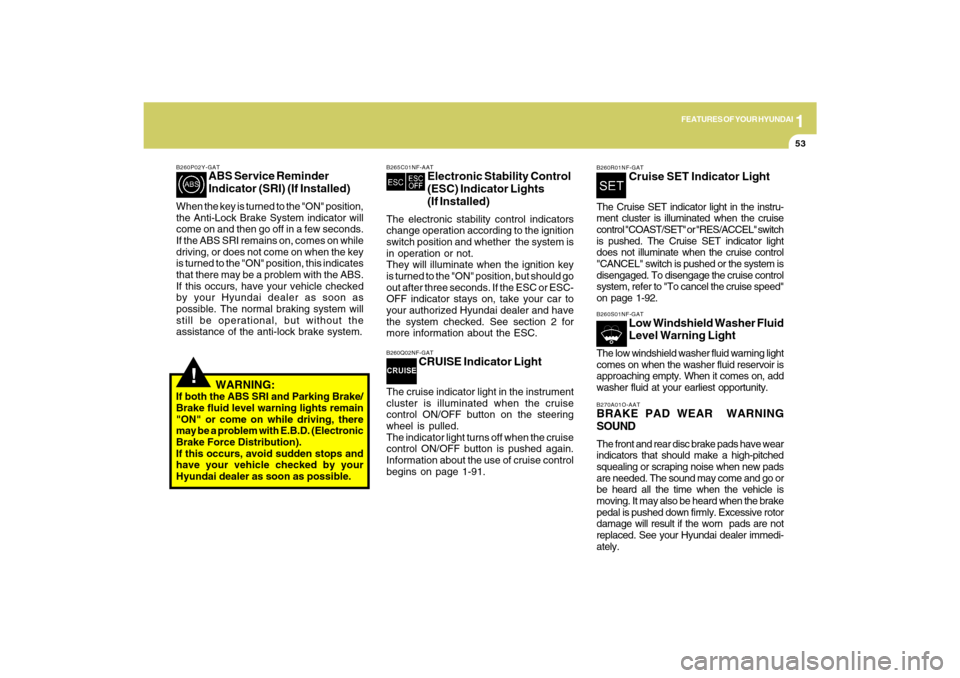
The electronic stability control indicators
change operation according to the ignition
switch position and whether the system is
in operation or not.
They will illuminate when the ignition key
is turned to the "ON" position, but should go
out after three seconds. If the ESC or ESC-
OFF indicator stays on, take your car to
your authorized Hyundai dealer and have
the system checked. See section 2 for
more information about the ESC.B260Q02NF-GAT
CRUISE Indicator Light
The cruise indicator light in the instrument
cluster is illuminated when the cruise
control ON/OFF button on the steering
wheel is pulled.
The indicator light turns off when the cruise
control ON/OFF button is pushed again.
Information about the use of cruise control
begins on page 1-91.
B260R01NF-GAT
Cruise SET Indicator Light
The Cruise SET indicator light in the instru-
ment cluster is illuminated when the cruise
control "COAST/SET" or "RES/ACCEL" switch
is pushed. The Cruise SET indicator light
does not illuminate when the cruise control
"CANCEL" switch is pushed or the system is
disengaged. To disengage the cruise control
system, refer to "To cancel the cruise speed"
on page 1-92.B260S01NF-GAT
Low Windshield Washer Fluid
Level Warning Light
The low windshield washer fluid warning light
comes on when the washer fluid reservoir is
approaching empty. When it comes on, add
washer fluid at your earliest opportunity.B270A01O-AATBRAKE PAD WEAR WARNING
SOUNDThe front and rear disc brake pads have wear
indicators that should make a high-pitched
squealing or scraping noise when new pads
are needed. The sound may come and go or
be heard all the time when the vehicle is
moving. It may also be heard when the brake
pedal is pushed down firmly. Excessive rotor
damage will result if the worn pads are not
replaced. See your Hyundai dealer immedi-
ately.
Page 71 of 286
1FEATURES OF YOUR HYUNDAI58
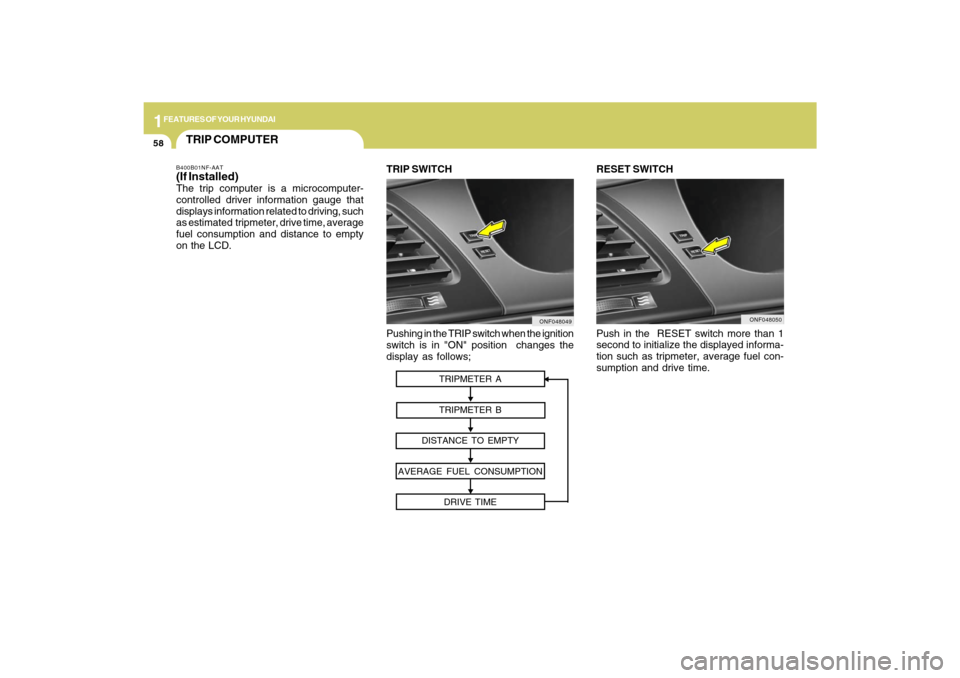
Pushing in the TRIP switch when the ignition
switch is in "ON" position changes the
display as follows;
ONF048049
TRIP SWITCH RESET SWITCH
Push in the RESET switch more than 1
second to initialize the displayed informa-
tion such as tripmeter, average fuel con-
sumption and drive time.
ONF048050
TRIP COMPUTERB400B01NF-AAT(If Installed)The trip computer is a microcomputer-
controlled driver information gauge that
displays information related to driving, such
as estimated tripmeter, drive time, average
fuel consumption and distance to empty
on the LCD.
TRIPMETER A
TRIPMETER B
DISTANCE TO EMPTY
AVERAGE FUEL CONSUMPTION
DRIVE TIME
Page 79 of 286
1FEATURES OF YOUR HYUNDAI66
INSTRUMENT PANEL LIGHT
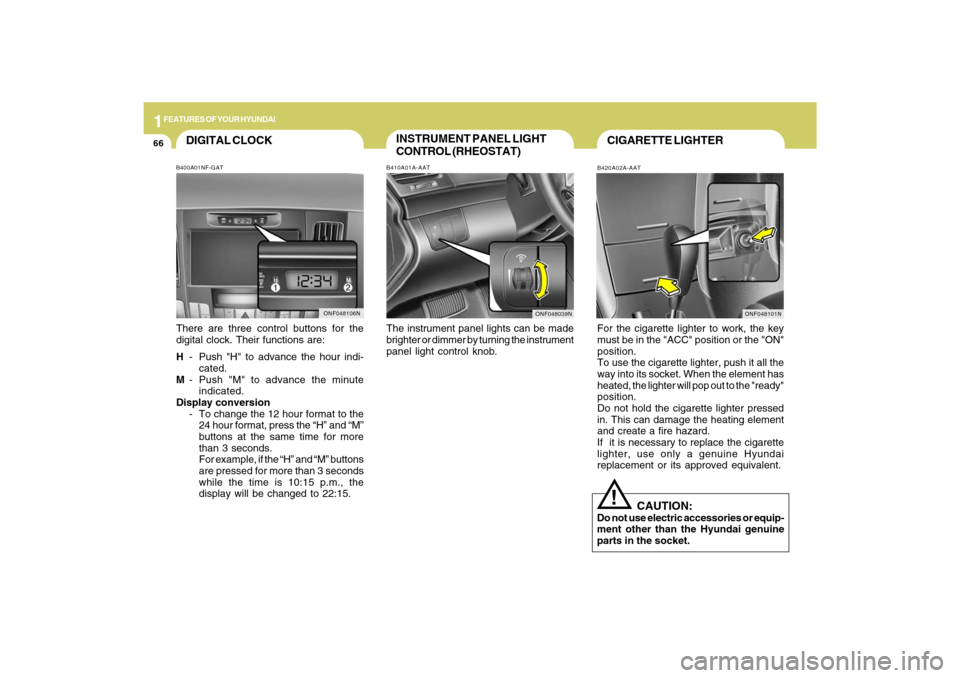
CONTROL (RHEOSTAT)B410A01A-AATThe instrument panel lights can be made
brighter or dimmer by turning the instrument
panel light control knob.
CIGARETTE LIGHTERB420A02A-AATFor the cigarette lighter to work, the key
must be in the "ACC" position or the "ON"
position.
To use the cigarette lighter, push it all the
way into its socket. When the element has
heated, the lighter will pop out to the "ready"
position.
Do not hold the cigarette lighter pressed
in. This can damage the heating element
and create a fire hazard.
If it is necessary to replace the cigarette
lighter, use only a genuine Hyundai
replacement or its approved equivalent.
!
CAUTION:
Do not use electric accessories or equip-
ment other than the Hyundai genuine
parts in the socket.
ONF048039N
DIGITAL CLOCKB400A01NF-GATThere are three control buttons for the
digital clock. Their functions are:
H- Push "H" to advance the hour indi-
cated.
M- Push "M" to advance the minute
indicated.
Display conversion
- To change the 12 hour format to the
24 hour format, press the “H” and “M”
buttons at the same time for more
than 3 seconds.
For example, if the “H” and “M” buttons
are pressed for more than 3 seconds
while the time is 10:15 p.m., the
display will be changed to 22:15.
ONF048106N
ONF048101N
Page 95 of 286
1FEATURES OF YOUR HYUNDAI82
!
handheld transmitter every two seconds
until the frequency signal has been learned.
The indicator light will flash slowly and
then rapidly after several seconds upon
successful training.
Operating HomeLink
®
To operate, simply press and release the
programmed HomeLink
® button. Activation
will now occur for the trained device (i.e.
garage door opener, gate operator, security
system, entry door lock, home/office
lighting, etc.). For convenience, the hand-
held transmitter of the device may also be
used at any time.
Reprogramming a Single HomeLink
® But-
ton
To program a new device to a previously
trained HomeLink
® button, follow these
steps:
1. Press and hold the desired HomeLink
®
button. Do NOT release until step 4 has
been completed.
2. When the indicator light begins to flash
slowly (after 20 seconds), position the
handheld transmitter 1 to 3 inches away
from the HomeLink
® surface.
3. Press and hold the handheld transmitter
button. The HomeLink
® indicator light
will flash, first slowly and then rapidly.4. When the indicator light begins to flash
rapidly, release both buttons.
5. Press and hold the just-trained
HomeLink
® button and observe the red
Status Indicator LED. If the indicator
light stays on constantly, programming
is complete and your new device should
activate.
Erasing HomeLink
® Buttons
Individual buttons cannot be erased.
However, to erase all three programmed
buttons:
1. Press and hold the two outer HomeLink
®
buttons until the indicator light begins to
flash-after 20 seconds.
2. Release both buttons. Do not hold for
longer than 30 seconds.
The Integrated HomeLink
® Wireless
Control System is now in the training (learn)
mode and can be programmed at any time
following the appropriate steps in the
Programming sections above.
FCC ID: NZLZTVHL3
IC: 4112A-ZTVHL3This device complies with Part 15 FCC
Rules. Operation is subject to the following
two conditions: (1) this device may not
cause harmful interference, and (2) this
device must accept any interference
received, including interference that may
cause undesired operation.
WARNING:
The transceiver has been tested and
complies with FCC and Industry Canada
rules. Changes or modifications not
expressly approved by the party
responsible for compliance could void
the user's authority to operate the
device.
NVS
® is a registered trademark and Z-
Nav™ is a trademark of the Gentex
Corporation, Zeeland, Michigan.
HomeLink
® is a registered trademark
owned by Johnson Controls, Incorporated,
Milwaukee, Wisconsin.
Page 129 of 286

1FEATURES OF YOUR HYUNDAI
116
PA710SB01NF-AAT1. FM Selection ButtonTurns to FM mode and toggles FM1 and
FM2 when the button is pressed each time.2. AM Selection ButtonTurns to AM mode, selects the AM.3. XM Selection ButtonTurns to XM mode, and toggles in the order
of XM1➟XM2➟XM3➟···➟XM1··· when the
button is pressed each time.4. CD/AUX Selection ButtonIf there is a CD in the CDP DECK it turns to
CD mode, and if a device is connected to
AUX then it toggles.
CD➟AUX➟CD··· when the button is
pressed each time.(It will not turn to AUX if
the auxiliary device is not connected)
5. Automatic Channel Selection
Buttono When the [SEEK
]button is pressed,
it reduces the band frequency by 200khz
to automatically select channel. Stops
at the previous frequency if no channel
is found.
o When the [SEEK ]button is pressed,
it increases the band frequency by
200khz to automatically select chan-
nel. Stops at the previous frequency if
no channel is found.
6. Power ON/OFF & Volume Control
ButtonTurns the set on/off when the IGNITION
SWITCH is on ACC or ON. If the button is
turned to the right, it increases the volume
and left, decreases the volume.7. SCAN ButtonIf this button is pressed, the frequencies
will increase and receive the correspond-
ing broadcasts.
This function will play the frequencies for
5 seconds (XM mode : 10 seconds) each
and find other broadcasts as the frequency
increases.
Press the button again when desiring to
continue listening to the currently playing
broadcast.
8. MUTE ButtonPress to temporarily cut off the Sound.9. Information Display ButtonInformation Display function operation (In-
formation is displayed each time (the) Key
is pressed) : Pressing the Category/
Channel➟ Artist Name/Song
Title➟Category/Channel... for 3 seconds
will display the corresponding text then
become restored.
Text Scroll operation
After pressing (the) Key, if the text to be
displayed is longer than the LCD text line,
then rotating the Tune Knob will operate
the Page up function displaying 16(Max.
characters) characters for 3 seconds each
dispalys.10. SET UP ButtonPress this button to turn to the XM option,
TEXT SCROLL, AVC and adjustment
mode.
If no action is taken for 5 seconds after
pressing the button, it will return to the play
mode.(After entering SET UP mode, move
between items using the left, right and
PUSH functions of the TUNE button.)
The set up item changes from TEXT
SCROLL ➟AVC➟XM...