2009 Hyundai Santa Fe clock reset
[x] Cancel search: clock resetPage 79 of 269
1FEATURES OF YOUR HYUNDAI
68
!
CAUTION:
Do not clean the inner side of the rear window glass with an abrasive typeof glass cleaner or use a scraper to remove the foreign deposits from the inner surface of the glass as thismay cause damage to the demister elements. NOTE: The engine must be running for the rear window demister to operate.
DIGITAL CLOCK
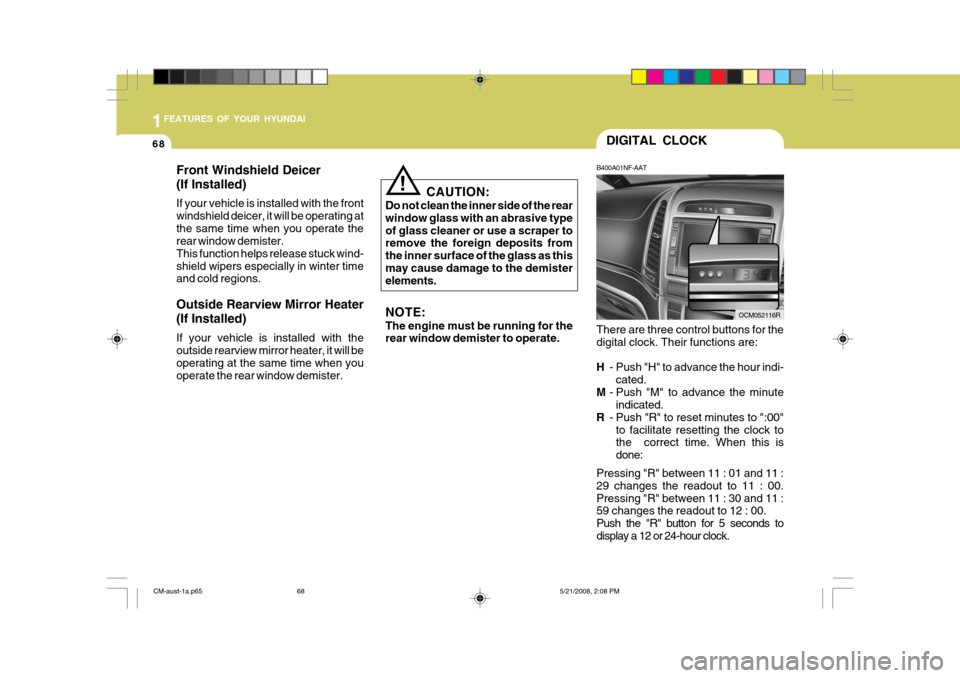
B400A01NF-AAT
There are three control buttons for the digital clock. Their functions are: H - Push "H" to advance the hour indi-
cated.
M - Push "M" to advance the minute
indicated.
R - Push "R" to reset minutes to ":00"
to facilitate resetting the clock to the correct time. When this is done:
Pressing "R" between 11 : 01 and 11 :29 changes the readout to 11 : 00.Pressing "R" between 11 : 30 and 11 : 59 changes the readout to 12 : 00.
Push the "R" button for 5 seconds todisplay a 12 or 24-hour clock.
OCM052116R
Front Windshield Deicer (If Installed) If your vehicle is installed with the front windshield deicer, it will be operating atthe same time when you operate the rear window demister. This function helps release stuck wind-shield wipers especially in winter time and cold regions. Outside Rearview Mirror Heater (If Installed) If your vehicle is installed with the outside rearview mirror heater, it will be operating at the same time when youoperate the rear window demister.
CM-aust-1a.p65
5/21/2008, 2:08 PM
68
Page 120 of 269
1
FEATURES OF YOUR HYUNDAI
109
B970C01CM-GAT Automatic Operation The FATC (Full Automatic Tempera- ture Control) system automatically con- trols heating and cooling by doing asfollows:
1. Push the AUTO button. It is indi-
cated by AUTO on the display. The modes, fan speeds, air intake and air-conditioning will be controlledautomatically by temperature set- ting. 2. Turn the "TEMP" knob to set the
desired temperature.The temperature will increase to the maximum 32°C(90°F) by turning theknob clockwise. The temperature will decrease to the minimum 17°C(62°F) by turning theknob counterclockwise.
NOTE: If the battery has been discharged or disconnected, the temperature mode will reset to Centigrade degrees. This is a normal condition and youcan change the temperature mode from Centigrade to Fahrenheit as follows;
OCM052098
OCM052101
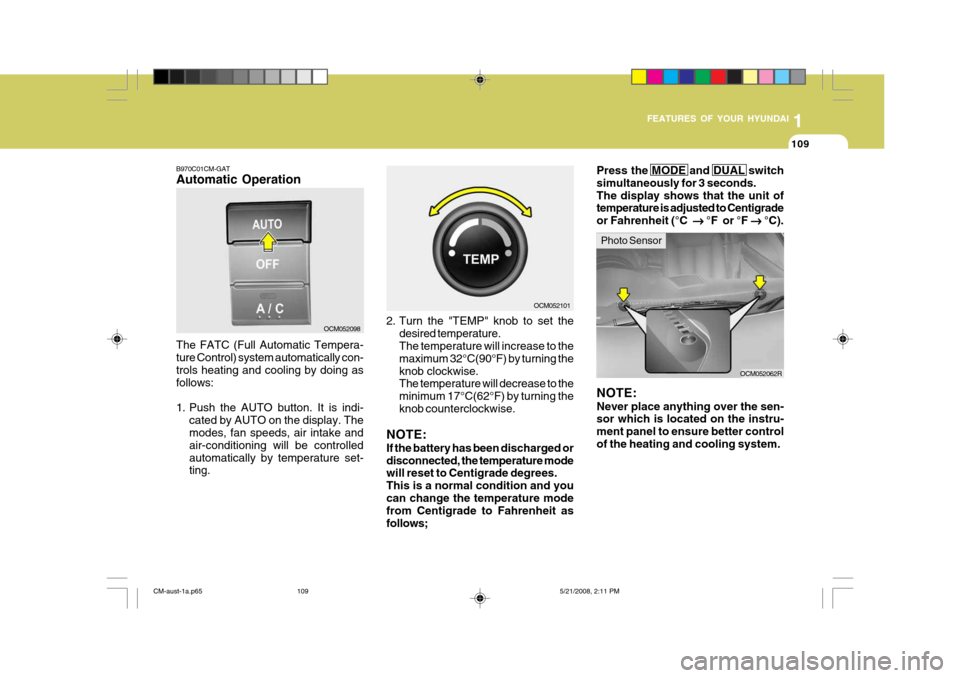
OCM052062R
NOTE: Never place anything over the sen- sor which is located on the instru- ment panel to ensure better controlof the heating and cooling system.Press the MODE and DUAL switch simultaneously for 3 seconds.The display shows that the unit of temperature is adjusted to Centigrade or Fahrenheit (°C ��
��
� °F or °F
��
��
� °C).
Photo Sensor
CM-aust-1a.p65 5/21/2008, 2:11 PM
109
Page 134 of 269
1
FEATURES OF YOUR HYUNDAI
123
1
FEATURES OF YOUR HYUNDAI
123
1
FEATURES OF YOUR HYUNDAI
123
1
FEATURES OF YOUR HYUNDAI
123
1
FEATURES OF YOUR HYUNDAI
123
1. Power ON/OFF&Volume Con- trol Button
Turns on/off the set when the IGNI- TION SWITH is on ACC or ON. If the button is turned to the right, it increasesthe volume and left,decreases the vol- ume. 2. FM Selection Button Turns to FM mode and toggles FM1and FM2 when the button is pressed each time. 3. AM Selection Button Pressing the [AM] button selects the AM band. AM Mode is displayed on the LCD.
4. Automatic Channel Selection
Button
o When the [SEEK
] button is
pressed, it increases the band fre- quency to automatically select chan-nel. Stops at the previous frequency if no channel is found.
o When the [TRACK
] button is
press- ed, it reduces the band fre- quency to automatically select chan- nel. Stops at the previous frequencyif no channel is found. 5. Preset Button Push [1]~[6] buttons less than 0.8 second to play the channel saved in each button. Push Preset button for 0.8second or longer to save current chan- nel to the respective button with a beep. 6. ST(AUTO STORE Button) When the button is pressed, it auto- matically selects and saves channelswith high reception rate to PRESET buttons [1]~[6] and plays the channel saved in PRESET1. If no channel issaved after AST, it will play the previ- ous channel.
7. SETUP Button Press this button to turn to the TEXT SCROLL adjustment mode. If no ac- tion is taken for 5 seconds after press- ing the button, it will return to the playmode. (After entering SETUPmode, PUSH functions of the TUNE button to adjust TEXT SCROLL.)
8. Manual Channel Selector &
Sound Quality Control
Turn this control while listening to a radio channel to manually adjust fre- quency. Turn clockwise to increase fre-quency and counterclockwise to reduce frequency. Pressing the button changes the BASS,MIDDLE, TREBLE, FADER and BAL- ANCE TUNE mode. The mode selected is shown on the display. After selectingeach mode, rotate the Audio control knob clockwise or counterclockwise. BASS Control To increase the BASS, rotate the knob clockwise, while to decrease the BASS,rotate the knob counterclockwise. MIDDLE Control To increase the MIDDLE, rotate the knob clockwise, while to decrease theMIDDLE, rotate the knob counterclock- wise.
CM-aust-1b.p65 5/19/2008, 6:33 PM
123
Page 144 of 269
1
FEATURES OF YOUR HYUNDAI
133
1
FEATURES OF YOUR HYUNDAI
133
1
FEATURES OF YOUR HYUNDAI
133
1
FEATURES OF YOUR HYUNDAI
133
1
FEATURES OF YOUR HYUNDAI
133
In case the iPod exclusive cable is connected to the multiple terminal onthe left hand side of the driver's seat. When the iPod is connected, the 'iPod' icon will be displayed on the top leftcorner of the display screen. 1. INFO Selection Button Displays the information of the file cur- rently played in the order of TITLE ➟
ARTIST ➟ALBUM ➟NORMAL
DISPLAY ➟ TITLE ➟... (Displays no in-
formation if the file has no song infor- mation.) 2. Track Moving Button
o Press the [TRACK
] button for
less than 0.8 second to play from the beginning of the song currently played. Press the button for less than 0.8 second and press it againwithin 1 seconds to move and play the previous track. Press the button for 0.8 second or longer to play thesong in reverse direction in fast speed.
o Press the [SEEK
] button for less
than 0.8 second to move to the next track. Press the button for 0.8 sec- ond or longer to play the song in forward direction in fast speed. 3. RANDOM Playback Button Press the button for less than 0.8 sec- ond to activate or deactivate the ran- dom playback of the songs within thecurrent category. Press the button for longer than 0.8 second to randomly play all songs in the entire album of theiPod. Press the button once again to cancel the mode. 4. REPEAT Button Repeats the song currently played. 5. iPod Selection Button If iPod is connected, it switches to the iPod mode from the CD mode to play the song files stored in the iPod. If no CD and auxiliary device is not con-nected, it displays "NO Media" for 3 seconds and returns to the previous mode. 6. Category Selection Button Moves to the upper category from currentlyplayed category of the iPod.
To move to(play) the category(song)displayed, MENU(preset6) You will beable to search through the lower cat- egory of the selected category. The order of iPod's category is SONG,ALBUMES, ARTISTS, GENRES, and iPod. 7. Search/ENTER Button When you turn the button clockwise, it will display the songs(category) next to the song currently played(category in the same level). Also, when you turnthe button counterclockwise, it will dis- play the songs(category) before the song currently played(category in thesame level). If you want to listen to the song dis- played in the song category, press thebutton, then it will skip to the selected song and play.
CM-aust-1b.p65
5/19/2008, 6:33 PM
133
Page 230 of 269
6
DO-IT-YOURSELF MAINTENANCE
23
CAUTION:
A burned-out fuse indicates that there is a problem in the electrical circuit. If you replace a fuse and it blows as soon as the accessory isturned on, the problem is serious and should be referred to a Hyundai dealer for diagnosis and repair.Never replace a fuse with anything except a fuse with the same or a lower amperage rating. A highercapacity fuse could cause damage and create a fire hazard.
!
NOTE: See page 6-38 for the fuse panel
descriptions. G200C01CM-GAT
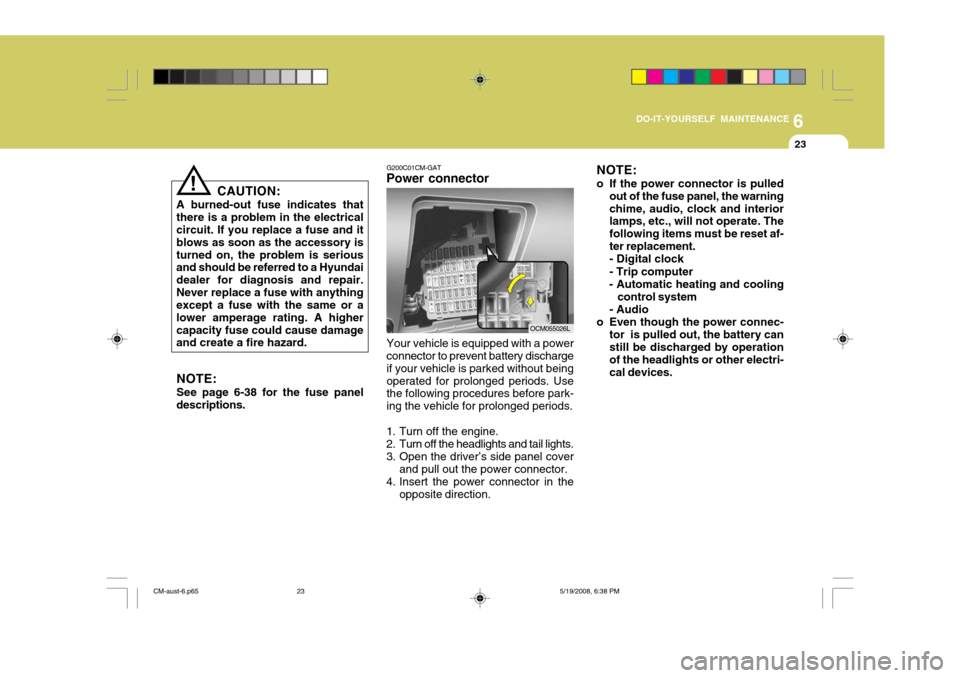
Power connector NOTE:
o If the power connector is pulled
out of the fuse panel, the warning chime, audio, clock and interior lamps, etc., will not operate. The following items must be reset af-ter replacement.- Digital clock - Trip computer
- Automatic heating and cooling
control system
- Audio
o Even though the power connec- tor is pulled out, the battery can still be discharged by operation of the headlights or other electri-cal devices.
Your vehicle is equipped with a power connector to prevent battery discharge if your vehicle is parked without beingoperated for prolonged periods. Use the following procedures before park- ing the vehicle for prolonged periods.
1. Turn off the engine.
2. Turn off the headlights and tail lights.
3. Open the driver’s side panel cover and pull out the power connector.
4. Insert the power connector in the opposite direction.
OCM055026L
CM-aust-6.p65 5/19/2008, 6:38 PM
23