2009 Hyundai Accent light
[x] Cancel search: lightPage 154 of 232
3 WHAT TO DO IN AN EMERGENCY
2
!
IF THE ENGINE WILL NOT START
D010B02A-AAT If Engine Doesn't Turn Over or Turns Over Slowly
1. If your car has an automatic
transaxle, be sure the gear selector lever is in "N" or "P" and the emer- gency brake is set.
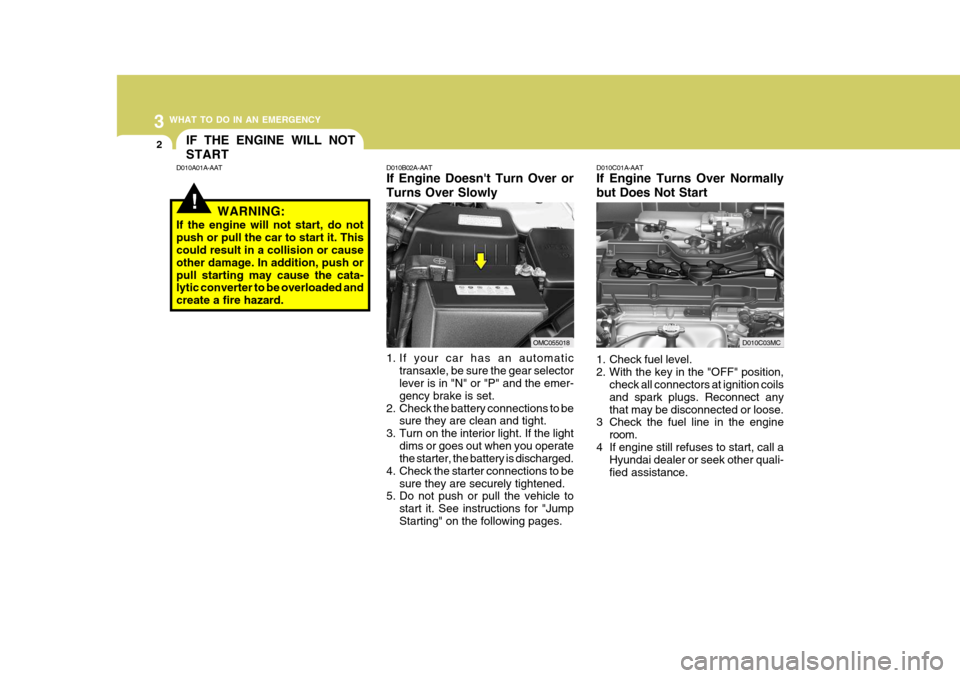
2. Check the battery connections to be sure they are clean and tight.
3. Turn on the interior light. If the light
dims or goes out when you operate the starter, the battery is discharged.
4. Check the starter connections to be
sure they are securely tightened.
5. Do not push or pull the vehicle to
start it. See instructions for "Jump Starting" on the following pages. D010C01A-AAT If Engine Turns Over Normally but Does Not Start
1. Check fuel level.
2. With the key in the "OFF" position,
check all connectors at ignition coilsand spark plugs. Reconnect anythat may be disconnected or loose.
3 Check the fuel line in the engine
room.
4 If engine still refuses to start, call a Hyundai dealer or seek other quali-fied assistance.
D010A01A-AAT
WARNING:
If the engine will not start, do notpush or pull the car to start it. This could result in a collision or cause other damage. In addition, push orpull starting may cause the cata- lytic converter to be overloaded and create a fire hazard.
OMC055018D010C03MC
Page 155 of 232
3
WHAT TO DO IN AN EMERGENCY
3
!
D020A02MC
JUMP STARTING
D010D01A-AAT If the Engine Stalls While Driv- ing
1. Reduce your speed gradually, keep- ing a straight line. Move cautiously off the road to a safe place.
2. Turn on your emergency flashers.
3. Try to start the engine again. If your
vehicle will not start, contact a Hyundai dealer or seek other quali- fied assistance.
WARNING:
The gas produced by the battery during the jump-start operation is highly explosive. If these instruc-tions are not followed exactly, seri- ous personal injury and damage to the vehicle may occur! If you arenot sure how to follow this proce- dure, seek qualified assistance. Automobile batteries contain sul-furic acid. This is poisonous and highly corrosive. When jump start- ing, wear protective glasses and becareful not to get acid on yourself, your clothing or on the car.
D020A02A-AAT
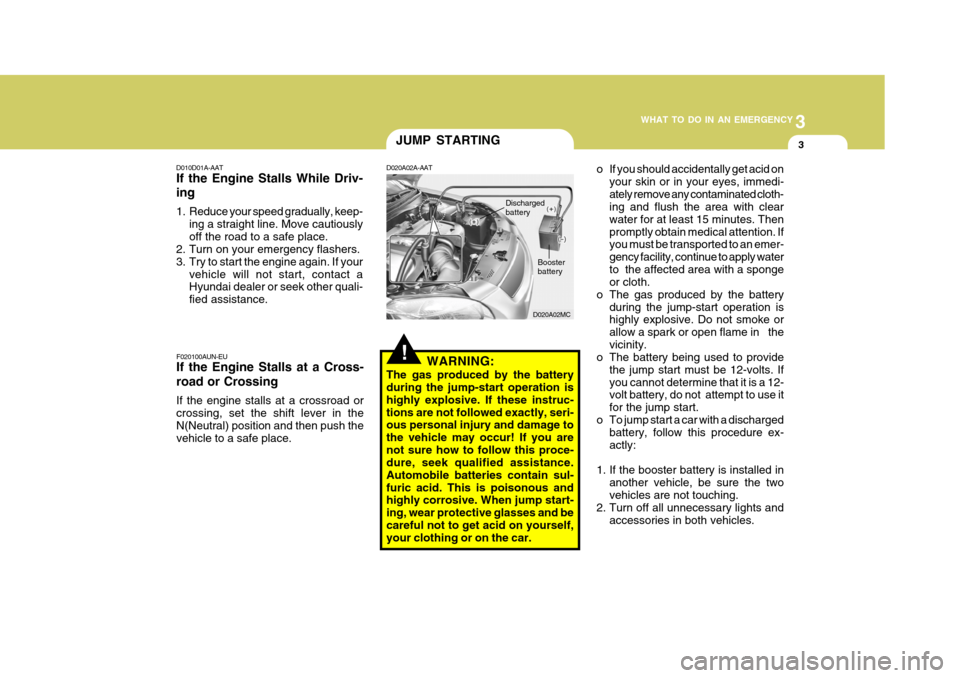
Discharged battery
Booster battery
o If you should accidentally get acid onyour skin or in your eyes, immedi- ately remove any contaminated cloth- ing and flush the area with clear water for at least 15 minutes. Thenpromptly obtain medical attention. If you must be transported to an emer- gency facility, continue to apply waterto the affected area with a sponge or cloth.
o The gas produced by the battery during the jump-start operation ishighly explosive. Do not smoke or allow a spark or open flame in thevicinity.
o The battery being used to provide
the jump start must be 12-volts. Ifyou cannot determine that it is a 12- volt battery, do not attempt to use it for the jump start.
o To jump start a car with a discharged battery, follow this procedure ex-actly:
1. If the booster battery is installed in another vehicle, be sure the twovehicles are not touching.
2. Turn off all unnecessary lights and
accessories in both vehicles.
F020100AUN-EU If the Engine Stalls at a Cross- road or Crossing If the engine stalls at a crossroad or crossing, set the shift lever in the N(Neutral) position and then push the vehicle to a safe place.
Page 156 of 232
3 WHAT TO DO IN AN EMERGENCY
4IF THE ENGINE OVERHEATS
D030A01A-DAT If your temperature gauge indicates overheating, you experience a loss of power, or hear loud pinging or knock- ing, the engine is probably too hot. Ifthis happens, you should:
1. Pull off the road and stop as soon as it is safe to do so.
2. Place the gear selector lever in "P"
(automatic), or neutral (manual transaxle) and set the hand brake. If the air conditioning is on, turn it off.
3. If coolant is running out under the car or steam is coming out from thebonnet, stop the engine. Do not open the bonnet until the coolant hasstopped running or the steaming has stopped. If there is no visible loss of coolant and no steam, leave theengine running and check to be sure the engine cooling fan is operating. If the fan is not running, turn the engineoff.
4. Check to see if the water pump drive
belt is missing. If it is not missing,check to see that it is tight. If the drive belt seems to be satisfactory, check for coolant leaking from theradiator, hoses or under the car.
6. Carefully remove the jumper cables
in the reverse order of attachment.
If you do not know why your batterybecame discharged (because the lightswere left on, etc.), have the charging system checked by your Hyundai dealer.
3. Attach the clamps of the jumper
cable in the exact order shown in theillustration. That is, first, attach one clamp of the jumper cable to the positive (+) post or cable of thedischarged battery. Then attach the other end of the same cable to the positive (+) post or cable of thebooster battery. Next, using the other cable, attach one clamp to the negative (-) post or cable of thebooster battery. Then attach the other end of that cable to a solid metal part of the engine away fromthe battery. Do not connect the cable to any moving part.
4. Start the engine in the car with the booster battery and let it run for afew minutes. This will help to as- sure that the booster battery is fullycharged. During the jumping opera- tion, run the engine in this vehicle at about 2,000 rpm.
5. Start the engine in the car with the discharged battery using the normalstarting procedure. After the enginestarts, leave the jumper cables con- nected and let the engine run at fast idle or about 2,000 rpm for severalminutes.
Page 158 of 232
3 WHAT TO DO IN AN EMERGENCY
6WHEEL AND TYRE CHANG- ING
D050A01MC-DAT In the event of a puncture and subse- quent tyre deflation occurring whilst the vehicle is in motion:
o Allow the vehicle speed to decrease,
without using the brakes if possible.
o Pull off the road or into the curb where it is safe to do so and stop the vehicle. Turn off the engine.
o Activate the hazard warning light, apply the hand brake and place thetransaxle in gear ("P" position forAutomatic Transaxle).
o Passengers should not remain in-
side the vehicle during wheel chang-ing.
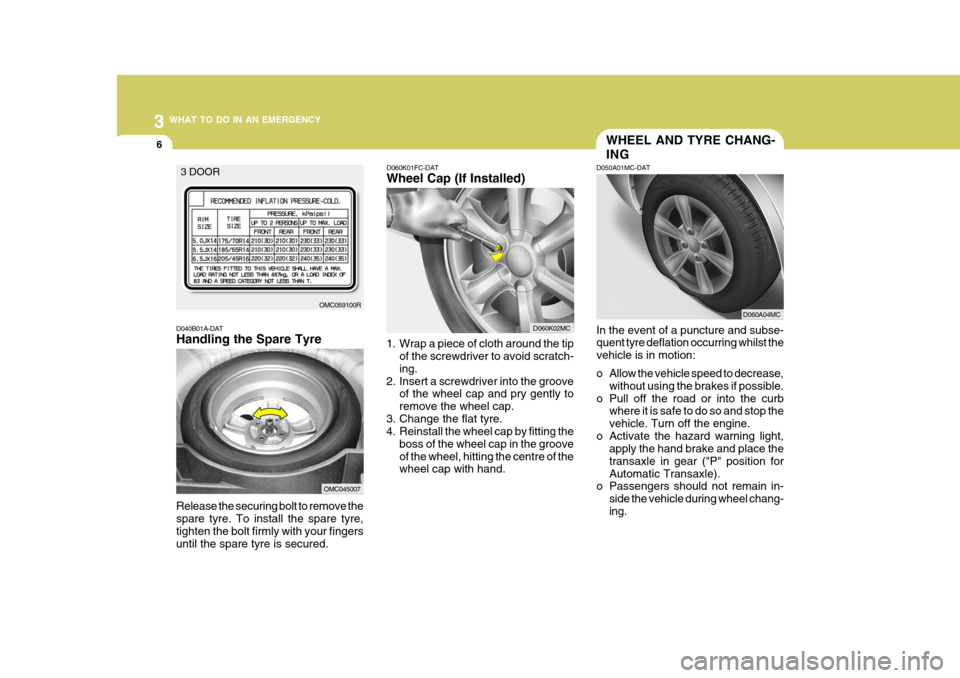
D040B01A-DAT Handling the Spare Tyre Release the securing bolt to remove the spare tyre. To install the spare tyre, tighten the bolt firmly with your fingers until the spare tyre is secured.
OMC059100R
3 DOOR
OMC045007
D060A04MC
D060K01FC-DAT Wheel Cap (If Installed)
1. Wrap a piece of cloth around the tip of the screwdriver to avoid scratch- ing.
2. Insert a screwdriver into the groove of the wheel cap and pry gently toremove the wheel cap.
3. Change the flat tyre.
4. Reinstall the wheel cap by fitting the
boss of the wheel cap in the groove of the wheel, hitting the centre of the wheel cap with hand.
D060K02MC
Page 171 of 232
44CORROSION PREVENTION AND APPEARANCE CARE
6CLEANING THE INTERIOR
E040D01A-AAT Cleaning the Seat Belts To clean the seat belts, use a cloth or sponge with mild soap or detergentand warm water. Do not use strong detergents, dye, bleach or abrasive materials on the seat belts as this mayweaken the fabric. While cleaning the belts, inspect them for excessive wear, cuts, fraying orother signs of damage and replace them if necessary.
E040C01A-AAT Cleaning the Carpets Use a foam-type carpet cleaner. Clean- ers of this type are available in aerosolcans in liquid form or powder. Read the instructions and follow them exactly. Using a vacuum cleaner with the ap-propriate attachment, remove as much dirt from the carpets as possible. Apply the foam following the manufacturer'sdirections, then rub in overlapping circles. Do not add water. These clean- ers work best when the carpet is keptas dry as possible.
Fine leather needs care, and should becleaned when necessary. Washingleather thoroughly with soap and water will keep your leather lustrous, beautiful and ensure you have many years ofusage. Take a piece of cheese cloth and using any mild soap and lukewarm water, work up a good lather. Thoroughly wash the leather. Wipe clean with aslightly damp cloth and dry with soft cloth. Do this as often as the leather becomes soiled.Consult your Hyundai dealer for recom- mended leather treatment products. During tanning operations, sufficient oils are incorporated through process- ing that none need be applied duringthe life of the leather. Oil applied to the finished surface will in no way help the leather and may do more harm thangood. Varnishes and furniture polishes should never be used under any con- ditions.
E040A01A-DAT To Clean the Vinyl Upholstery To clean the vinyl upholstery, first re- move loose dirt and dust with a vacuumcleaner. Then apply a solution of mild soap or detergent and water using a clean sponge or soft cloth. Allow this tostay on the surface to loosen the dirt, then wipe with a clean damp sponge or cloth. If all the dirt stains are not re-moved, repeat this procedure until the upholstery is clean. Do not use petrol, solvent, paint thinner or other strongcleaners. E040B01A-DAT To Clean the Leather Upholstery (If Installed) In the normal course of use, leather upholstered surfaces will, like any material, pick-up dust and dirt. Thisdust and dirt must be cleaned off or it may work into the surface of the leather, causing damage.
Page 182 of 232
Engine Compartment .................................................... 6-2
General Checks ........................................................... 6-3
Maintenance Precautions ............................................. 6-4
Checking the Engine Oil ............................................... 6-4
Checking and Changing the Engine Coolant ................ 6-7
Changing the Air Cleaner Filter ..................................... 6-8
Checking the Transaxle Oil (Manual) ..........................6-11
Checking the Transaxle Fluid (Automatic)..................6-11
Checking the B rakes ................................................... 6-13
Checking the Clutch Fluid ............................................ 6-14
Air Conditioning Care ................................................... 6-15
Changing the Climate Control Air Filter........................ 6-16
Checking and Replacing Fuses .................................. 6-17
Checking the Battery ................................................... 6-19
Power Steering Fluid Level .......................................... 6-21
Headlight Aiming Adjustment ....................................... 6-22
Replacement of Light Bulbs ......................................... 6-24
Bulb Wattage ............................................................... 6-29
Fuse Panel Description ............................................... 6-30
DO-IT-YOURSELF MAINTENANCE
6
6
Page 184 of 232
6
DO-IT-YOURSELF MAINTENANCE
3GENERAL CHECKS
G020A01A-AAT Engine Compartment The following should be checked regu- larly:
o Engine oil level and condition
o Transaxle fluid level and condition
o Brake fluid level
o Clutch fluid level
o Engine coolant level
o Windshield washer fluid level
o Accessory drive belt condition
o Engine coolant hose condition
o Fluid leaks (on or below compo- nents)
o Power steering fluid level
o Battery condition
o Air cleaner filter condition G020C01A-DAT Vehicle Interior The following should be checked each time when the vehicle is driven:
o Lights operation
o Windshield wiper operation
o Horn operation
o Demister, heating system operation
(and air conditioning, if installed)
o Steering operation and condition
o Mirror condition and operation
o Turn signal light operation
o Accelerator pedal operation
o Brake operation, including hand
brake
o Manual transaxle operation, includ- ing clutch operation
o Automatic transaxle operation, in- cluding "Park" mechanism opera-tion
o Seat control condition and opera- tion
o Seat belt condition and operation
o Sunvisor operation If you notice anything that does not operate correctly or appears to befunctioning incorrectly, inspect it care- fully and seek assistance from your Hyundai dealer if service is needed.
G020B01A-DAT Vehicle Exterior The following should be checked monthly:
o Overall appearance and condition
o Wheel condition and wheel nut torque
o Exhaust system condition
o Light condition and operation
o Windshield glass condition
o Wiper blade condition
o Paint condition and body corrosion
o Fluid leaks
o Door and bonnet lock condition
o Tyre pressure and condition (includ-
ing spare tyre)
Page 191 of 232
6 DO-IT-YOURSELF MAINTENANCE
10FILLING THE WASHER RESERVOIR
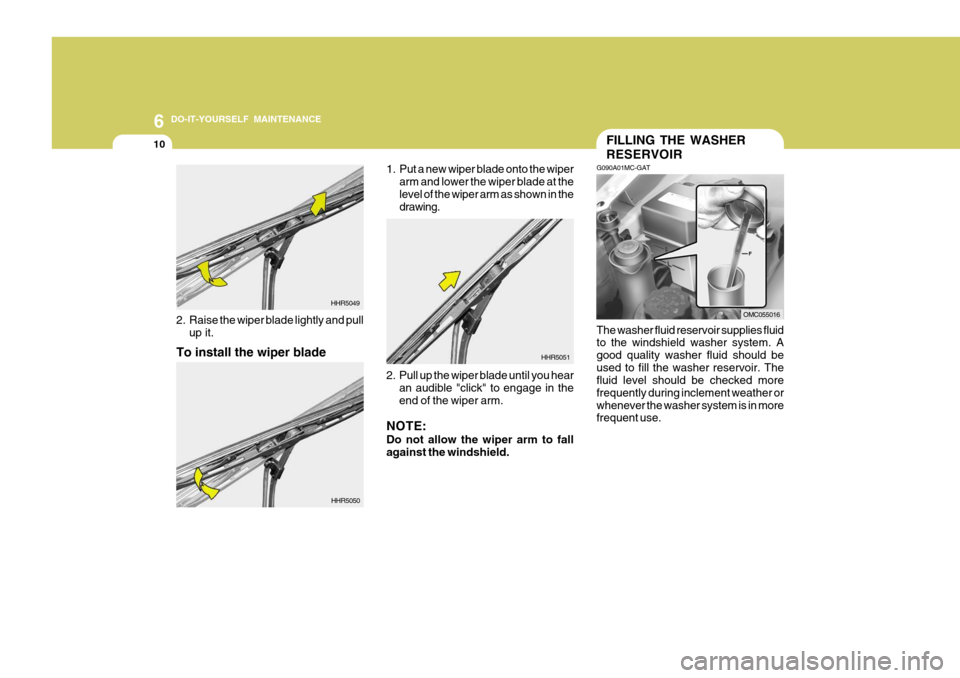
G090A01MC-GAT The washer fluid reservoir supplies fluid to the windshield washer system. A good quality washer fluid should beused to fill the washer reservoir. The fluid level should be checked more frequently during inclement weather orwhenever the washer system is in more frequent use.
2. Pull up the wiper blade until you hear
an audible "click" to engage in the end of the wiper arm.
NOTE: Do not allow the wiper arm to fall against the windshield. HHR5051
1. Put a new wiper blade onto the wiper
arm and lower the wiper blade at thelevel of the wiper arm as shown in the drawing.
To install the wiper blade
HHR5050
2. Raise the wiper blade lightly and pull up it. HHR5049OMC055016