2009 Hyundai Accent light
[x] Cancel search: lightPage 9 of 232
F9
CAUTION:
When installing a container of liquid air freshener inside the vehicle, do not place it near the instrument cluster nor on the instrument panel pad surface. If there is any leakage from the air freshener onto these areas (Instrument cluster, instrument panel pad or air ventilator), it may damage these parts. If the liquid from air freshener does leak onto these areas, wash them withwater immediately.
!
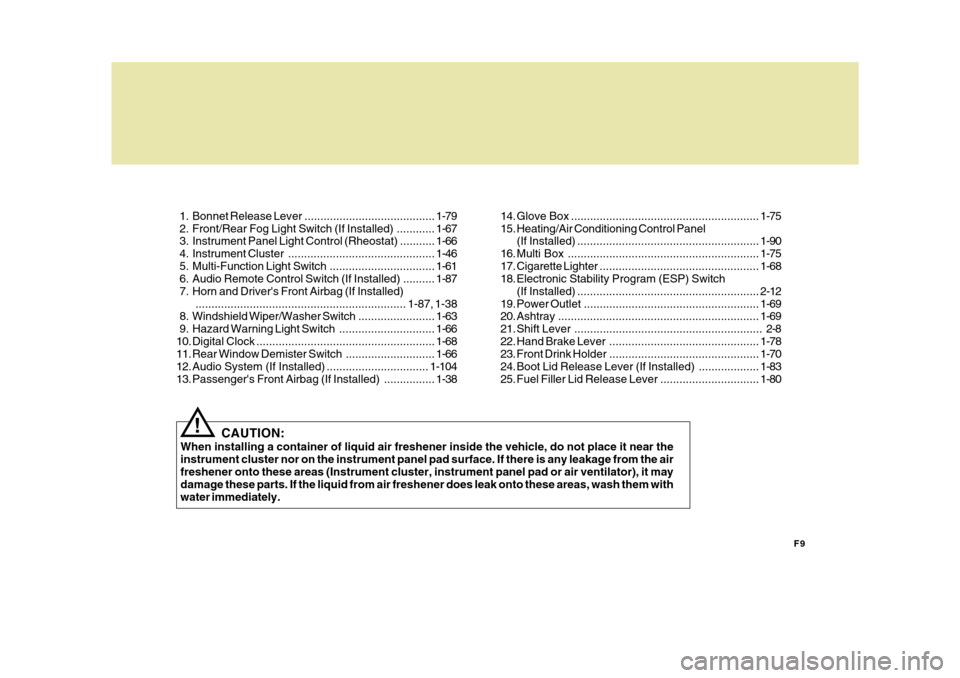
1. Bonnet Release Lever .........................................
1-79
2. Front/Rear Fog Light Switch (If Installed) ............ 1-67
3. Instrument Panel Light Control (Rheostat) ........... 1-66
4. Instrument Cluster.............................................. 1-46
5. Multi-Function Light Switch................................. 1-61
6. Audio Remote Control Switch (If Installed) .......... 1-87
7. Horn and Driver's Front Airbag (If Installed) .................................................................. 1-87, 1-38
8. Windshield W iper/Washer Switch ........................1-63
9. Hazard Warning Light Switch.............................. 1-66
10. Digital Clock ........................................................ 1-68
11. Rear Window Demist er Switch ............................ 1-66
12. Audio System (If Installed) ................................ 1-104
13. Passenger's Front Airbag (If Installed) ................1-3814. Glove Box ...........................................................
1-75
15. Heating/Air Conditioning Control Panel (If Installed) ......................................................... 1-90
16. Multi Box ............................................................ 1-75
17. Cigarette Lighter .................................................. 1-68
18. Electronic Stability Program (ESP) Switch
(If Installed) ......................................................... 2-12
19. Power Outlet ....................................................... 1-69
20. Ashtray ............................................................... 1-69
21. Shift Lever ........................................................... 2-8
22. Hand Brake Lever ............................................... 1-78
23. Front Drink Holder ............................................... 1-70
24. Boot Lid Release Lever (If Installed) ................... 1-83
25. Fuel Filler Lid Release Lever ...............................1-80
Page 10 of 232

YOUR VEHICLE AT A GLANCE
F10B255A03MC-DAT INDICATOR SYMBOLS ON THE INSTRUMENT CLUSTER * More detailed explanations of these items will be found begining on page 1-50.
Turn Signal Indicator Lights
SRS (Airbag) Service Reminder Indicator O/D OFF Indicator Light (Automatic transaxle only) High Beam Indicator Light
Low Oil Pressure Warning Light
ABS Service Reminder Indicator (If Installed)
Door Ajar Warning Light
Hand Brake/Low Brake Fluid Level Warning Light Charging System Warning Light Low Fuel Level Warning Light Malfunction Indicator Light
Immobiliser Warning Light
Boot Lid/Tail Gate Open Warning Light
Engine Coolant Temperature Warning Light Seat Belt Warning Light
Electronic Stability Program Indicator Lights (If Installed)
Page 12 of 232
FEATURES OF YOUR HYUNDAI
1
1
Fuel Recommendations ................................................ 1-2
Running in Your New Hyundai ..................................... 1-3
Immobiliser System ...................................................... 1-3
Door Locks ................................................................... 1-5
Theft-Alarm System ...................................................... 1-8Window Glass............................................................. 1-11
Seats ........................................................................... 1-13
Seat Belts .................................................................... 1-22
Child Restraint System ................................................ 1-28
Supplemental Restraint (AIRBAG) System .................1-37
Instrument Cluster and Indicator Lights .......................1-46
Warning and Indicator Lights....................................... 1-50
Trip Computer .............................................................. 1-58
Multi-Function Light Sw itch .......................................... 1-61
Windshield Wiper/Washer Switch ................................1-63
Sunroof ........................................................................ 1-70
Mirror ........................................................................... 1-75
Bonnet Release ........................................................... 1-79
Heating and Cooling Control .......... ..............................1-89
Stereo Sound System ................................................. 1-99
Antenna ..................................................................... 1-103
Audio System ............................................................ 1-104
Page 19 of 232
1FEATURES OF YOUR HYUNDAI
8THEFT-ALARM SYSTEM
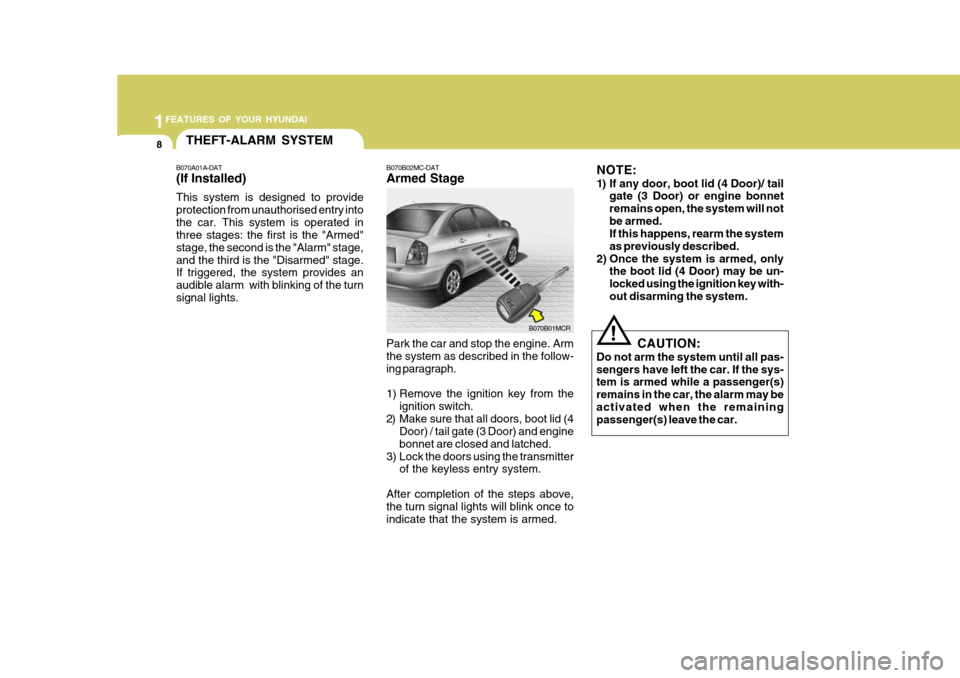
Park the car and stop the engine. Arm the system as described in the follow- ing paragraph.
1) Remove the ignition key from theignition switch.
2) Make sure that all doors, boot lid (4 Door) / tail gate (3 Door) and engine bonnet are closed and latched.
3) Lock the doors using the transmitter of the keyless entry system.
After completion of the steps above, the turn signal lights will blink once to indicate that the system is armed.
! CAUTION:
Do not arm the system until all pas- sengers have left the car. If the sys- tem is armed while a passenger(s) remains in the car, the alarm may beactivated when the remaining passenger(s) leave the car.
B070A01A-DAT (If Installed) This system is designed to provide protection from unauthorised entry intothe car. This system is operated in three stages: the first is the "Armed" stage, the second is the "Alarm" stage,and the third is the "Disarmed" stage. If triggered, the system provides an audible alarm with blinking of the turnsignal lights.
B070B02MC-DAT Armed StageB070B01MCRNOTE:
1) If any door, boot lid (4 Door)/ tail
gate (3 Door) or engine bonnet remains open, the system will notbe armed. If this happens, rearm the system as previously described.
2) Once the system is armed, only the boot lid (4 Door) may be un-locked using the ignition key with-out disarming the system.
Page 20 of 232
1
FEATURES OF YOUR HYUNDAI
9
B070D03MC-DAT Disarmed Stage
B070C02MC-DATAlarm Stage The alarm will be activated if any of the following occurs while the car is parked and the system is armed.
1) Any door, tail gate (3 Door) included,
is opened without using the trans- mitter.
2) The boot lid (4 Door) is opened with-
out using the ignition key.
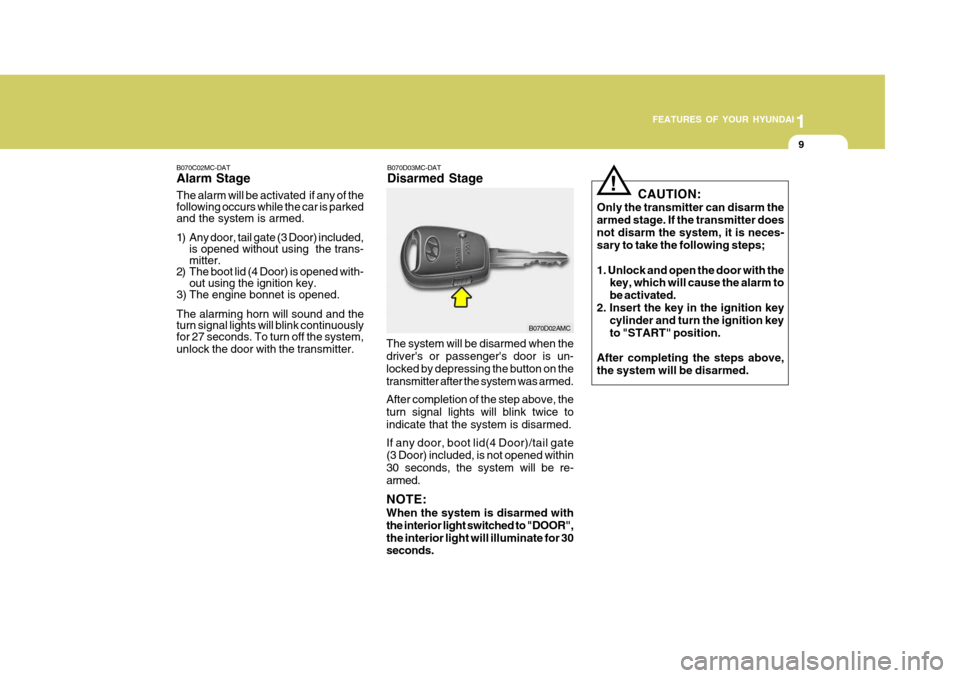
3) The engine bonnet is opened. The alarming horn will sound and the turn signal lights will blink continuouslyfor 27 seconds. To turn off the system, unlock the door with the transmitter. The system will be disarmed when the driver's or passenger's door is un- locked by depressing the button on thetransmitter after the system was armed. After completion of the step above, the turn signal lights will blink twice to indicate that the system is disarmed. If any door, boot lid(4 Door)/tail gate (3 Door) included, is not opened within 30 seconds, the system will be re-armed. NOTE: When the system is disarmed with the interior light switched to "DOOR",the interior light will illuminate for 30 seconds.
B070D02AMCCAUTION:
Only the transmitter can disarm the armed stage. If the transmitter doesnot disarm the system, it is neces- sary to take the following steps; 1. Unlock and open the door with the key, which will cause the alarm to be activated.
2. Insert the key in the ignition key cylinder and turn the ignition keyto "START" position.
After completing the steps above,the system will be disarmed.
!
Page 21 of 232
1FEATURES OF YOUR HYUNDAI
10
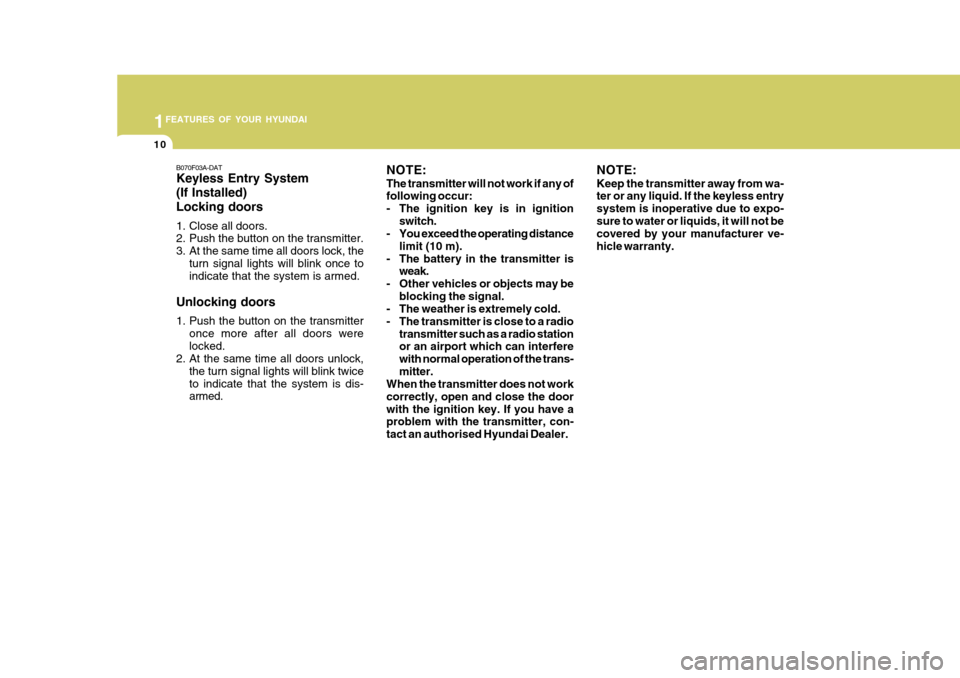
B070F03A-DAT Keyless Entry System (If Installed)Locking doors
1. Close all doors.
2. Push the button on the transmitter.
3. At the same time all doors lock, theturn signal lights will blink once to indicate that the system is armed.
Unlocking doors 1. Push the button on the transmitter once more after all doors were locked.
2. At the same time all doors unlock,
the turn signal lights will blink twiceto indicate that the system is dis- armed. NOTE: The transmitter will not work if any of following occur:
- The ignition key is in ignition
switch.
- You exceed the operating distance
limit (10 m).
- The battery in the transmitter is weak.
- Other vehicles or objects may be blocking the signal.
- The weather is extremely cold.
- The transmitter is close to a radio
transmitter such as a radio station or an airport which can interfere with normal operation of the trans-mitter.
When the transmitter does not workcorrectly, open and close the doorwith the ignition key. If you have a problem with the transmitter, con- tact an authorised Hyundai Dealer. NOTE: Keep the transmitter away from wa- ter or any liquid. If the keyless entry system is inoperative due to expo-sure to water or liquids, it will not be covered by your manufacturer ve- hicle warranty.
Page 22 of 232
1
FEATURES OF YOUR HYUNDAI
11
!
WINDOW GLASS
B050A01A-AAT
To raise or lower the window, turn the window regulator handle clockwise or counterclockwise. WARNING:
When opening or closing the win-dows, make sure your passenger's arms, hands and body are safely out of the way.
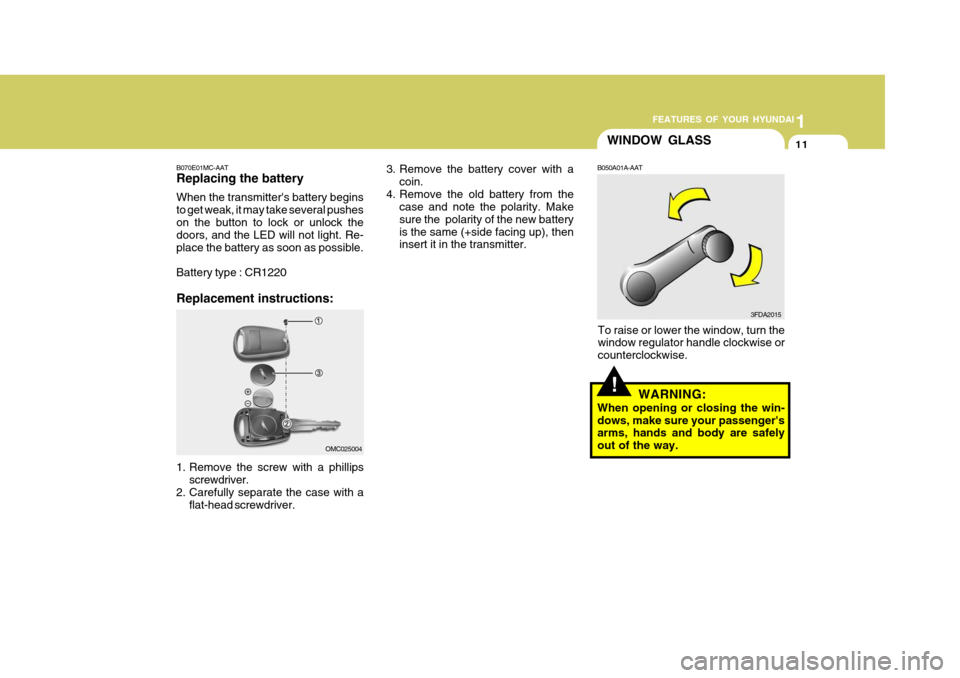
3. Remove the battery cover with a
coin.
4. Remove the old battery from the case and note the polarity. Makesure the polarity of the new batteryis the same (+side facing up), then insert it in the transmitter.
B070E01MC-AAT Replacing the battery When the transmitter's battery begins to get weak, it may take several pusheson the button to lock or unlock the doors, and the LED will not light. Re- place the battery as soon as possible. Battery type : CR1220 Replacement instructions:
1. Remove the screw with a phillipsscrewdriver.
2. Carefully separate the case with a flat-head screwdriver. OMC025004
3FDA2015
Page 36 of 232
1
FEATURES OF YOUR HYUNDAI
25
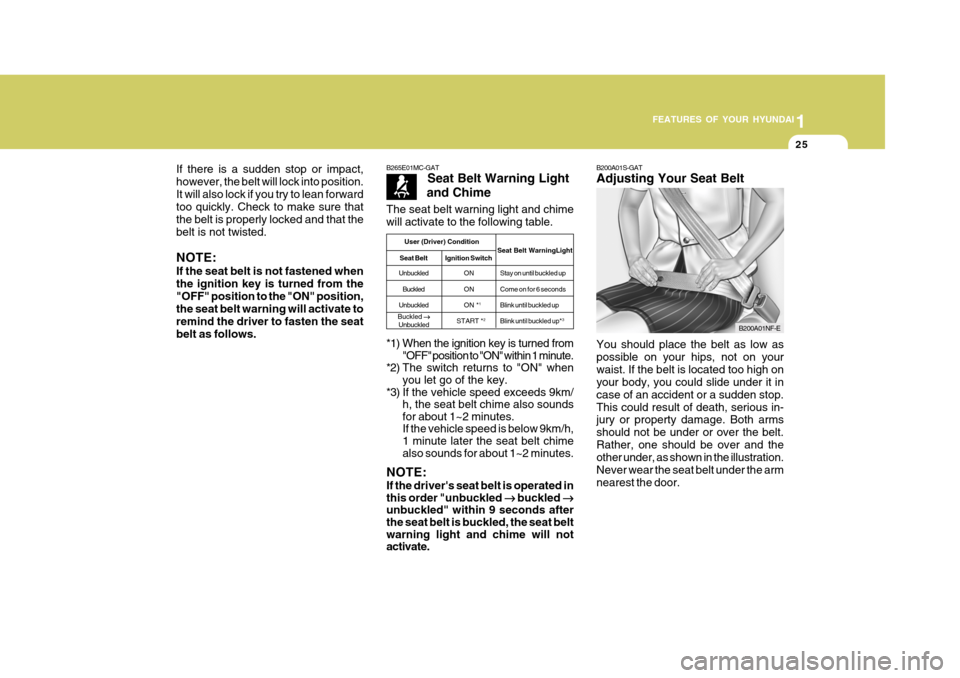
B200A01S-GAT Adjusting Your Seat Belt You should place the belt as low as possible on your hips, not on yourwaist. If the belt is located too high on your body, you could slide under it in case of an accident or a sudden stop.This could result of death, serious in- jury or property damage. Both arms should not be under or over the belt.Rather, one should be over and the other under, as shown in the illustration. Never wear the seat belt under the armnearest the door.
If there is a sudden stop or impact,however, the belt will lock into position.It will also lock if you try to lean forward too quickly. Check to make sure that the belt is properly locked and that thebelt is not twisted. NOTE: If the seat belt is not fastened when the ignition key is turned from the"OFF" position to the "ON" position, the seat belt warning will activate to remind the driver to fasten the seatbelt as follows.
*1) When the ignition key is turned from
"OFF" position to "ON" within 1 minute.
*2) The switch returns to "ON" when
you let go of the key.
*3) If the vehicle speed exceeds 9km/ h, the seat belt chime also sounds for about 1~2 minutes.If the vehicle speed is below 9km/h,1 minute later the seat belt chime also sounds for about 1~2 minutes.
NOTE: If the driver's seat belt is operated in this order "unbuckled ��
��
� buckled
��
��
�
unbuckled" within 9 seconds after the seat belt is buckled, the seat belt warning light and chime will notactivate.
The seat belt warning light and chime will activate to the following table.B265E01MC-GAT
Seat Belt Warning Light
and Chime
User (Driver) Condition
Seat Belt WarningLight
Seat Belt Ignition Switch
Unbuckled ON Stay on until buckled up
Buckled O N Come on for 6 seconds
Unbuckled ON * 1
Blink until buckled up
START * 2
Blink until buckled up* 3
Buckled
��
��
�
Unbuckled
B200A01NF-E