Page 22 of 232
1
FEATURES OF YOUR HYUNDAI
11
!
WINDOW GLASS
B050A01A-AAT
To raise or lower the window, turn the window regulator handle clockwise or counterclockwise. WARNING:
When opening or closing the win-dows, make sure your passenger's arms, hands and body are safely out of the way.
3. Remove the battery cover with a
coin.
4. Remove the old battery from the case and note the polarity. Makesure the polarity of the new batteryis the same (+side facing up), then insert it in the transmitter.
B070E01MC-AAT Replacing the battery When the transmitter's battery begins to get weak, it may take several pusheson the button to lock or unlock the doors, and the LED will not light. Re- place the battery as soon as possible. Battery type : CR1220 Replacement instructions:
1. Remove the screw with a phillipsscrewdriver.
2. Carefully separate the case with a flat-head screwdriver. OMC025004
3FDA2015
Page 182 of 232

Engine Compartment .................................................... 6-2
General Checks ........................................................... 6-3
Maintenance Precautions ............................................. 6-4
Checking the Engine Oil ............................................... 6-4
Checking and Changing the Engine Coolant ................ 6-7
Changing the Air Cleaner Filter ..................................... 6-8
Checking the Transaxle Oil (Manual) ..........................6-11
Checking the Transaxle Fluid (Automatic)..................6-11
Checking the B rakes ................................................... 6-13
Checking the Clutch Fluid ............................................ 6-14
Air Conditioning Care ................................................... 6-15
Changing the Climate Control Air Filter........................ 6-16
Checking and Replacing Fuses .................................. 6-17
Checking the Battery ................................................... 6-19
Power Steering Fluid Level .......................................... 6-21
Headlight Aiming Adjustment ....................................... 6-22
Replacement of Light Bulbs ......................................... 6-24
Bulb Wattage ............................................................... 6-29
Fuse Panel Description ............................................... 6-30
DO-IT-YOURSELF MAINTENANCE
6
6
Page 200 of 232

6
DO-IT-YOURSELF MAINTENANCE
19
!
CHECKING THE BATTERY
o If battery fluid is on your skin, flushthe affected areas with water for at least 15 minutes and then seek medi- cal assistance.
o If battery fluid is in your eyes, rinse
out your eyes with water and getmedical assistance as soon as pos- sible. While you are being driven toget medical assistance, continue to rinse your eyes by using a sponge or soft cloth saturated with water.
o If you swallow battery fluid, drink a large quantity of water or milk fol-lowed by milk of magnesia, eat araw egg or drink vegetable oil. Get medical assistance as soon as pos- sible.
While batteries are being charged (ei- ther by a battery charger or by the vehicle's alternator), they produce ex-plosive gases. Always observe these warnings to reduce the risk of injury:
o Charge batteries only in a well ven- tilated area.
o Do not permit flames, sparks or smoking in the area.
o Keep children away from the area.
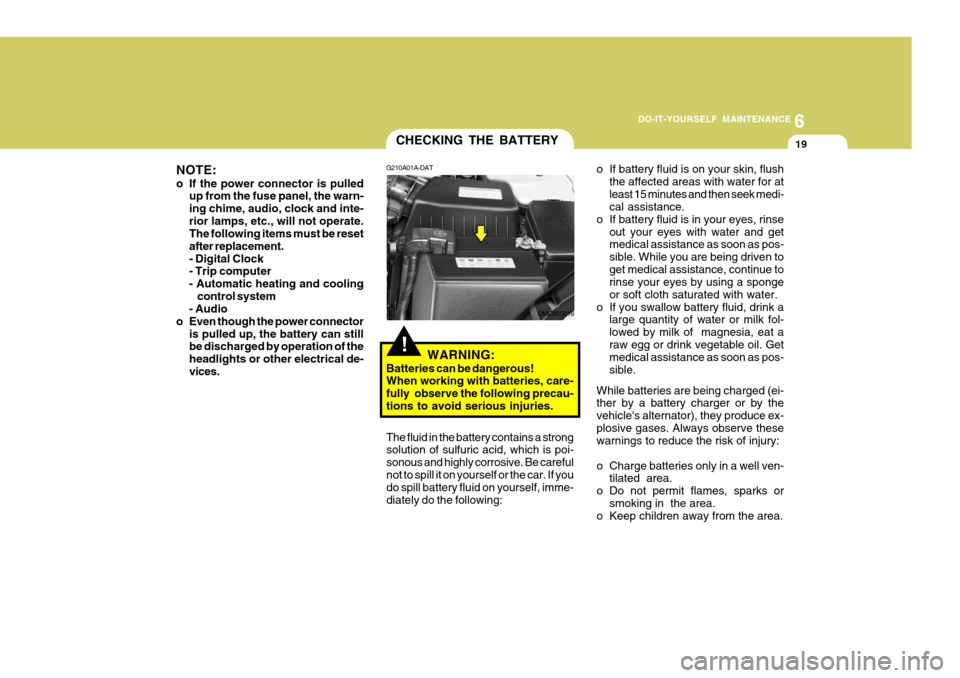
G210A01A-DAT
WARNING:
Batteries can be dangerous! When working with batteries, care- fully observe the following precau-tions to avoid serious injuries.
The fluid in the battery contains a strong solution of sulfuric acid, which is poi- sonous and highly corrosive. Be carefulnot to spill it on yourself or the car. If you do spill battery fluid on yourself, imme- diately do the following:
OMC055018
NOTE:
o If the power connector is pulled
up from the fuse panel, the warn- ing chime, audio, clock and inte-rior lamps, etc., will not operate. The following items must be reset after replacement.- Digital Clock - Trip computer
- Automatic heating and cooling control system
- Audio
o Even though the power connector is pulled up, the battery can stillbe discharged by operation of the headlights or other electrical de-vices.
Page 205 of 232

6 DO-IT-YOURSELF MAINTENANCE
24
Headlight
1. Allow the bulb to cool. Wear eye protection.
2. Open the engine bonnet and discon- nect the negative (-) post of the battery.
3. Always grasp the bulb by its plastic base, avoid touching the glass.
4. Disconnect the power cord from the
back of the headlight.
o After heavy, driving rain or wash-ing, headlight and taillight lenses could appear frosty. This condi-tion is caused by the temperature difference between the lamp in- side and outside. This is similarto the condensation on your win- dows inside your vehicle during the rain and doesn’t indicate aproblem with your vehicle. If the water leaks into the lamp bulb circuitry, have the vehicle checkedby an authorised Hyundai dealer.
REPLACEMENT OF LIGHT BULBS
G260A01MC-DAT Before attempting to replace a light bulb, be sure the switch is turned to the "OFF" position. The next paragraph shows how to reachthe light bulbs so they may be changed. Be sure to replace the burned-out bulb with one of the same number and watt-age rating. All bulbs are available from your Hyundai dealers Parts Department. See page 6-29 for the wattage descrip-tions.
CAUTION:
o Keep the lamps out of contact with petroleum products, such as oil, petrol, etc.
o If you don't have necessary tools, the correct bulbs and the exper-tise, consult your authorised Hyundai dealer.
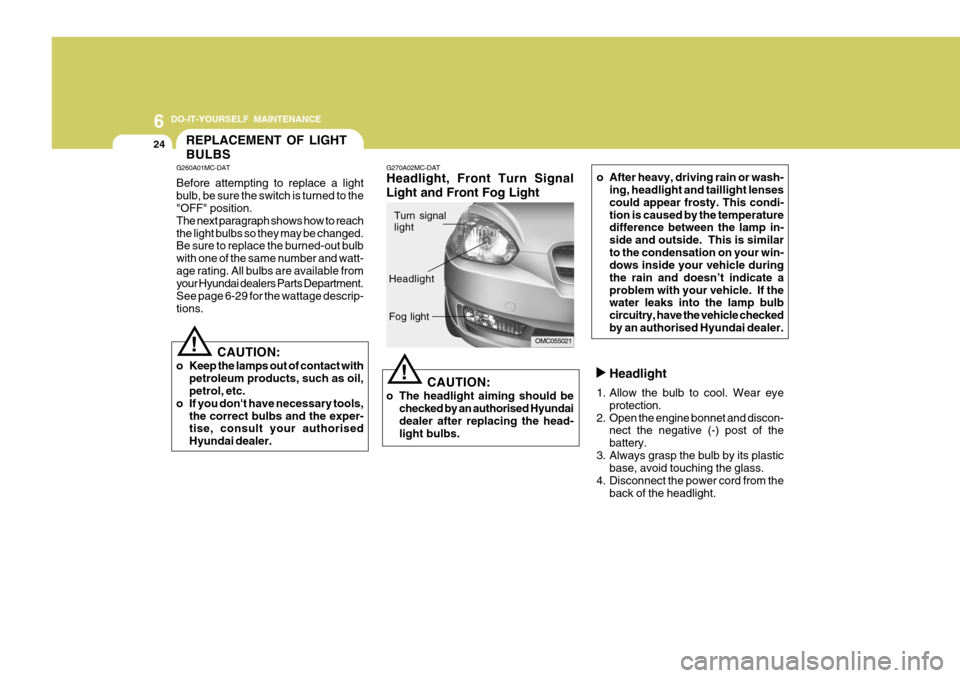
! G270A02MC-DAT Headlight, Front Turn Signal Light and Front Fog Light
CAUTION:
o The headlight aiming should be checked by an authorised Hyundai dealer after replacing the head- light bulbs.
!
OMC055021
Turn signal light
Headlight Fog light
Page 206 of 232

6
DO-IT-YOURSELF MAINTENANCE
25
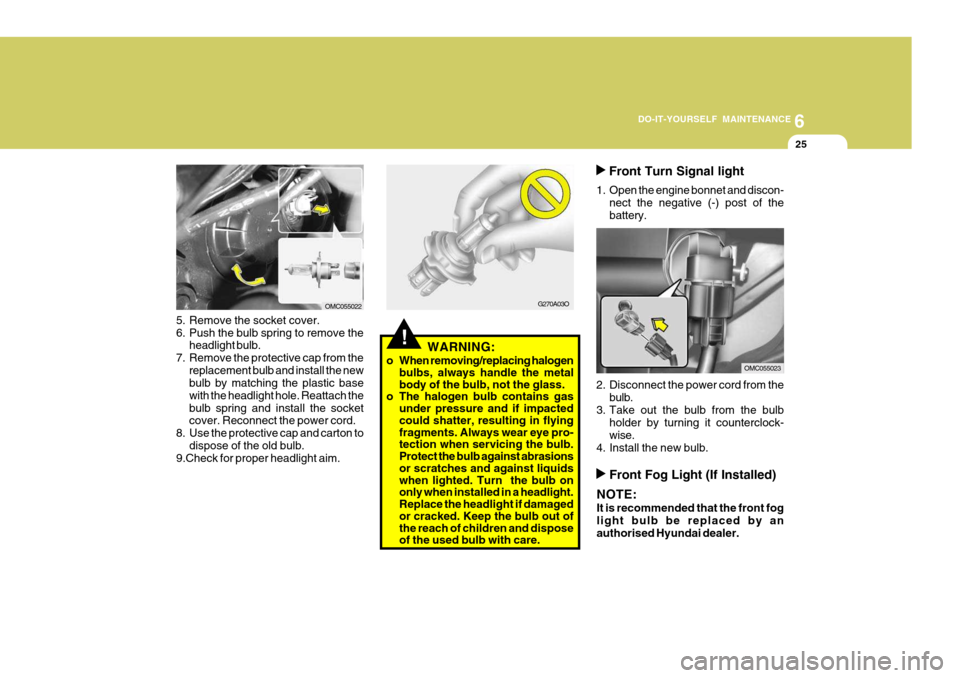
Front Turn Signal light
1. Open the engine bonnet and discon- nect the negative (-) post of the battery.
2. Disconnect the power cord from the bulb.
3. Take out the bulb from the bulb holder by turning it counterclock-wise.
4. Install the new bulb.
G270A03O
!WARNING:
o When removing/replacing halogen bulbs, always handle the metal body of the bulb, not the glass.
o The halogen bulb contains gas
under pressure and if impacted could shatter, resulting in flying fragments. Always wear eye pro- tection when servicing the bulb. Protect the bulb against abrasions or scratches and against liquids when lighted. Turn the bulb on only when installed in a headlight. Replace the headlight if damaged or cracked. Keep the bulb out of the reach of children and dispose of the used bulb with care.
5. Remove the socket cover.
6. Push the bulb spring to remove the
headlight bulb.
7. Remove the protective cap from the replacement bulb and install the new bulb by matching the plastic base with the headlight hole. Reattach thebulb spring and install the socket cover. Reconnect the power cord.
8. Use the protective cap and carton to dispose of the old bulb.
9.Check for proper headlight aim.
OMC055022
OMC055023
Front Fog Light (If Installed)
NOTE: It is recommended that the front fog light bulb be replaced by anauthorised Hyundai dealer.