2009 HONDA FIT door lock
[x] Cancel search: door lockPage 110 of 352

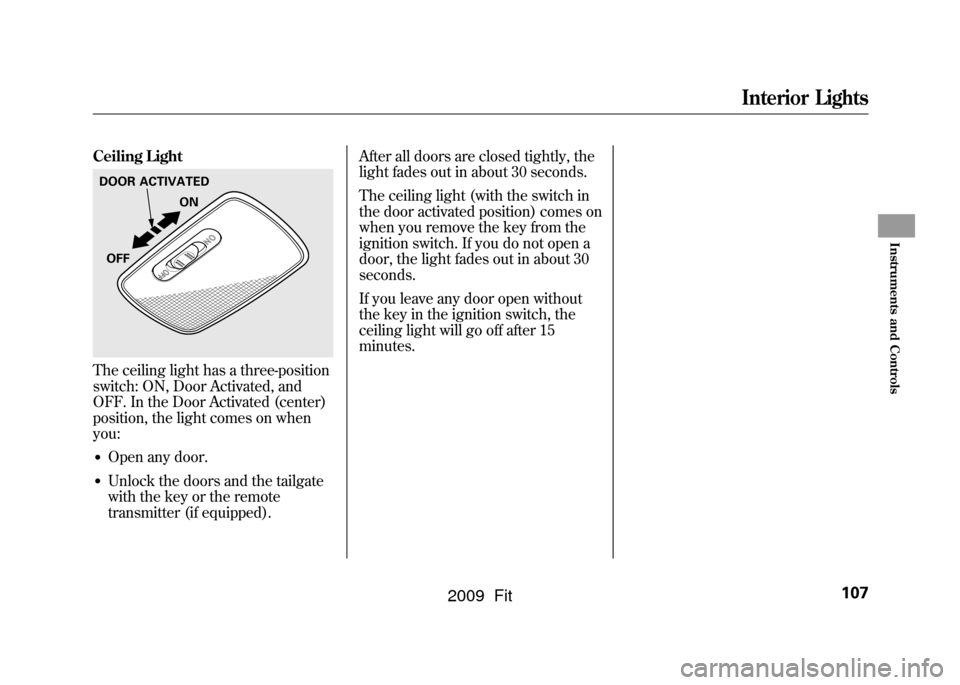
Ceiling LightThe ceiling light has a three-position
switch: ON, Door Activated, and
OFF. In the Door Activated (center)
position, the light comes on when
you:●Open any door.●Unlock the doors and the tailgate
with the key or the remote
transmitter (if equipped).After all doors are closed tightly, the
light fades out in about 30 seconds.
The ceiling light (with the switch in
the door activated position) comes on
when you remove the key from the
ignition switch. If you do not open a
door, the light fades out in about 30
seconds.
If you leave any door open without
the key in the ignition switch, the
ceiling light will go off after 15
minutes.DOOR ACTIVATED
ON
OFF
Interior Lights
107
Instruments and Controls
2009 Fit
Page 196 of 352

On Sport modelThe security system helps to protect
your vehicle and valuables from
theft. The horn sounds and a
combination of headlights, parking/
side marker lights and taillights
flashes if someone attempts to break
into your vehicle or remove the audio
unit. This alarm continues for 2
minutes, then the system resets. To
reset an activated system before the
2 minutes have elapsed, unlock the
driver's door with the key or the
remote transmitter.
The security system automatically
sets 15 seconds after you lock the
doors, hood, and the tailgate. For the
system to activate, you must lock the
doors and the tailgate from the
outside with the key, driver's lock
tab, door lock master switch, or
remote transmitter. The security
system indicator on the instrument
panel starts blinking immediately to
show you the system is setting itself.
Once the security system is set,
opening any door, the tailgate, or the
hood without using the key or the
remote transmitter, will cause it to
alarm. It also alarms if the radio is
removed from the dashboard or the
wiring is cut.
The alarm will also be activated if a
passenger inside the locked vehicle
turns the ignition switch on.The security system will not set if the
hood, tailgate, or any door is not fully
closed. If the system will not set,
check the door and tailgate open
indicator on the instrument panel
(see page
62)to see if the doors and
tailgate are fully closed. Since it is
not part of the monitor display,
manually check the hood.
NOTE: To see if the system is set
after you exit the vehicle, press the
LOCK button on the remote
transmitter within 5 seconds. If the
system is set, the horn will beep
once.
Do not attempt to alter this system or
add other devices to it.
SECURITY SYSTEM INDICATOR
Security System
193
Features
2009 Fit
Page 218 of 352

You should do the following checks
and adjustments before you drive
your vehicle.
1. Make sure all windows, mirrors,and outside lights are clean and
unobstructed. Remove frost, snow,
or ice.
2. Check that the hood is fully closed.
3. Visually check the tires. If a tire looks low, use a gauge to check its
pressure (see page273).
4. Check that any items you may be carrying are stored properly or
fastened down securely. 5. Check the seat adjustment (see
page 93).
6. Check the adjustment of the inside and outside mirrors (see page
101).
7. Check the steering wheel adjustment (see page 77).
8. Make sure the doors and the tailgate are securely closed and
locked.
9. Fasten your seat belt. Check that your passengers have fastened
their seat belts (see page 14).
10. When you start the engine, check the gauges and indicators in the
instrument panel (see page 59).
Preparing to Drive
215
Driving
2009 Fit
Page 232 of 352

Always use the parking brake when
you park your vehicle. Make sure the
parking brake is set firmly, or your
vehicle may roll if it is parked on an
incline.
If your vehicle has an automatic
transmission, set the parking brake
before you put the transmission in
Park. This keeps the vehicle from
moving and putting pressure on the
parking mechanism in the
transmission.Parking Tips
●Make sure the windows are
closed.●Turn off the lights.●Place any packages, valuables, etc.
in the cargo area or take them with
you.●Lock the doors and the tailgate.On Sport modelCheck the indicator on the
instrument panel to verify that the
security system is set.●Never park over dry leaves, tall
grass, or other flammable
materials. The hot three way
catalytic converter could cause
these materials to catch on fire.
●If the vehicle is facing uphill, turn
the front wheels away from the
curb. If your vehicle has a manual
transmission, put it in first gear
and set the parking brake.●If the vehicle is facing downhill,
turn the front wheels toward the
curb. If your vehicle has a manual
transmission, put it in reverse gear
and set the parking brake.●Make sure the parking brake is
fully released before driving away.
Driving with the parking brake
partially set can overheat or
damage the rear brakes.
Parking
229
Driving
2009 Fit
Page 284 of 352

If you need to park your vehicle for
an extended period (more than 1
month), there are several things you
should do to prepare it for storage.
Proper preparation helps prevent
deterioration and makes it easier to
get your vehicle back on the road. If
possible, store your vehicle indoors.●Fill the fuel tank.●Wash and dry the exterior
completely.●Clean the interior. Make sure the
carpeting, floor mats, etc., are
completely dry.●Leave the parking brake off. Put
the transmission in reverse
(manual) or Park (automatic).●Block the rear wheels.
●If the vehicle is to be stored for a
longer period, it should be
supported on jackstands so the
tires are off the ground.●Leave one window open slightly (if
the vehicle is being stored
indoors).●Disconnect the battery.●Support the front and rear wiper
blade arms with a folded towel or
rag so they do not touch the
windshield.●To minimize sticking, apply a
silicone spray lubricant to all door
and tailgate seals. Also, apply a
vehicle body wax to the painted
surfaces that mate with the door
and tailgate seals.
●Cover the vehicle with a
‘‘breathable ’’cover, one made
from a porous material such as
cotton. Non-porous materials, such
as plastic sheeting, trap moisture,
which can damage the paint.●If possible, periodically run the
engine until it reaches full
operating temperature (the cooling
fans cycle on and off twice).
Preferably, do this once a month.
Vehicle Storage
281
Maintenance
2009 Fit
Page 297 of 352

In freezing temperatures, turn the
engine on and leave it running
while the flat tire is being serviced.
Prolonged exposure to the cold
may cause the vehicle's battery to
weaken. Under cold conditions,
safely start the vehicle's engine and
keep the engine running at idle
when operating the air pump.Running the engine with the
vehicle in an enclosed or even
partly enclosed area can cause
a rapid build-up of toxic carbon
monoxide.
Breathing this colorless,
odorless gas can cause
unconsciousness and even
death. Only run the engine to
power the air pump with the
vehicle outdoors.
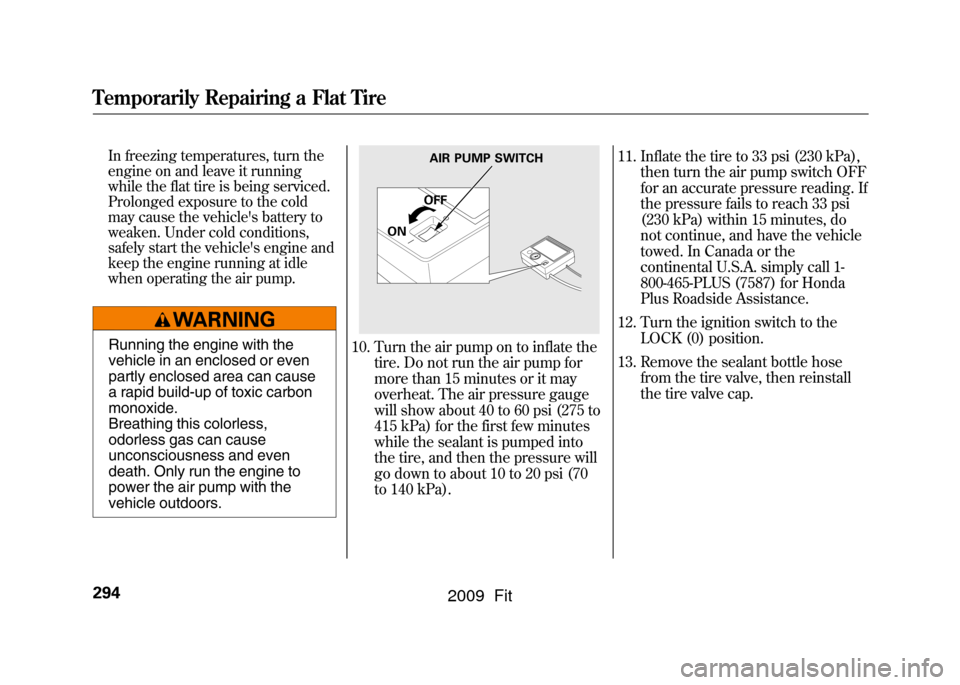
10. Turn the air pump on to inflate thetire. Do not run the air pump for
more than 15 minutes or it may
overheat. The air pressure gauge
will show about 40 to 60 psi (275 to
415 kPa) for the first few minutes
while the sealant is pumped into
the tire, and then the pressure will
go down to about 10 to 20 psi (70
to 140 kPa). 11. Inflate the tire to 33 psi (230 kPa),
then turn the air pump switch OFF
for an accurate pressure reading. If
the pressure fails to reach 33 psi
(230 kPa) within 15 minutes, do
not continue, and have the vehicle
towed. In Canada or the
continental U.S.A. simply call 1-
800-465-PLUS (7587) for Honda
Plus Roadside Assistance.
12. Turn the ignition switch to the LOCK (0) position.
13. Remove the sealant bottle hose from the tire valve, then reinstall
the tire valve cap.
AIR PUMP SWITCH
OFF
ON
Temporarily Repairing a Flat Tire294
2009 Fit
Page 312 of 352

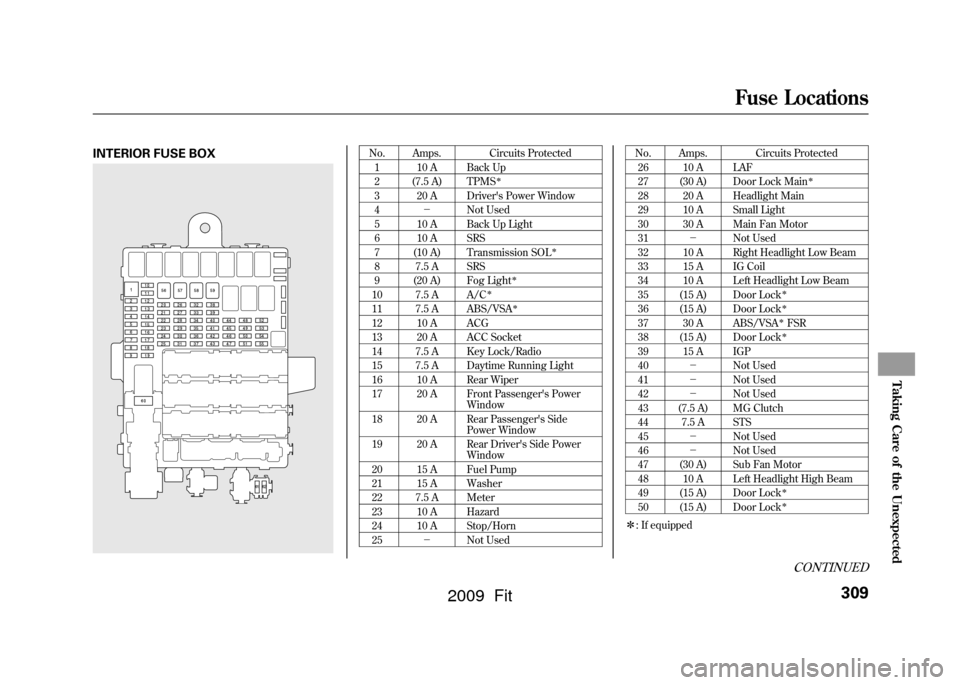
INTERIOR FUSE BOX
No. Amps. Circuits Protected1 10 A Back Up
2 (7.5 A) TPMS
ꭧ
3 20 A Driver's Power Window
4 -Not Used
5 10 A Back Up Light
6 10 A SRS
7 (10 A) Transmission SOL
ꭧ
8 7.5 A SRS
9 (20 A) Fog Light
ꭧ
10 7.5 A A/C
ꭧ
11 7.5 A ABS/VSA
ꭧ
12 10 A ACG
13 20 A ACC Socket
14 7.5 A Key Lock/Radio
15 7.5 A Daytime Running Light
16 10 A Rear Wiper
17 20 A Front Passenger's Power Window
18 20 A Rear Passenger's Side Power Window
19 20 A Rear Driver's Side Power Window
20 15 A Fuel Pump
21 15 A Washer
22 7.5 A Meter
23 10 A Hazard
24 10 A Stop/Horn
25 -Not Used No. Amps. Circuits Protected
26 10 A LAF
27 (30 A) Door Lock Main
ꭧ
28 20 A Headlight Main
29 10 A Small Light
30 30 A Main Fan Motor
31 -Not Used
32 10 A Right Headlight Low Beam
33 15 A IG Coil
34 10 A Left Headlight Low Beam
35 (15 A) Door Lock
ꭧ
36 (15 A) Door Lock
ꭧ
37 30 A ABS/VSA
ꭧFSR
38 (15 A) Door Lockꭧ
39 15 A IGP
40 -Not Used
41 -Not Used
42 -Not Used
43 (7.5 A) MG Clutch
44 7.5 A STS
45 -Not Used
46 -Not Used
47 (30 A) Sub Fan Motor
48 10 A Left Headlight High Beam
49 (15 A) Door Lock
ꭧ
50 (15 A) Door Lock
ꭧ
ꭧ : If equipped
CONTINUED
Fuse Locations
309
Taking Care of the Unexpected
2009 Fit
Page 340 of 352

A
AAABBB ~CCC
.................................
3
Accessories and Modifications
..........................
206
ACCESSORY (Ignition Key Position)
...................................
80
Accessory Power Socket
............
106
Additives, Engine Oil
.................
254
Adjusting the Steering Wheel
......
77
Advanced Airbags
........................
27
Airbag (SRS)
............................
9, 22
Air Conditioning System
............
110
Usage
......................................
111
Air Pressure, Tires
..............
273, 274
Alcohol in Gasoline
....................
198
Antifreeze
...................................
256
Anti-lock Brakes (ABS) Indicator Light
..................
62, 231
Operation
................................
231
Anti-theft, Audio System
.............
191
Anti-theft Steering Column Lock
.........................................
80
Audio System
.............................
115 Auto Control Mode, Starting
Engine
....................................
216
Auto Door Locking
.......................
83
Auto Door Locking/Unlocking
....
83
Auto Door Unlocking
...................
85
Automatic Seat Belt Tensioners
...
20
Automatic Speed Control
...........
194
Automatic Transmission
............
219
Capacity, Fluid
........................
319
Checking Fluid Level
..............
259
Paddle Shifters
........................
224
Shifting
...................................
219
Shift Lever Position Indicators
............................
219
Shift Lever Positions
...............
220
Shift Lock Release
...................
223
Automatic Transmission Fluid
...
259
Auxiliary Input Jack
...................
190
Average Fuel Mileage
..................
70
B
Battery Charging System Indicator
........................
60, 303 Jump Starting
..........................
299
Maintenance
...........................
279
Specifications
..........................
320
Before Driving
...........................
197
Belts, Seat
................................
8, 18
Beverage Holders
......................
106
Booster Seats
...............................
50
Brakes Anti-lock Brakes (ABS)
...........
231
Break-in, New Linings
.............
198
Bulb Replacement
...................
266
Fluid
.......................................
261
Parking
...................................
102
System Design
........................
230
System Indicator
...............
60, 305
Wear Indicators
.......................
230
Braking System
..........................
230
Break-in, New Vehicle
................
198
Brightness Control, Instruments
..............................
76
CONTINUED
Index
I
INDEX
2009 Fit