2009 GMC SAVANA PASSENGER door lock
[x] Cancel search: door lockPage 116 of 406
Outside Towing Mirrors
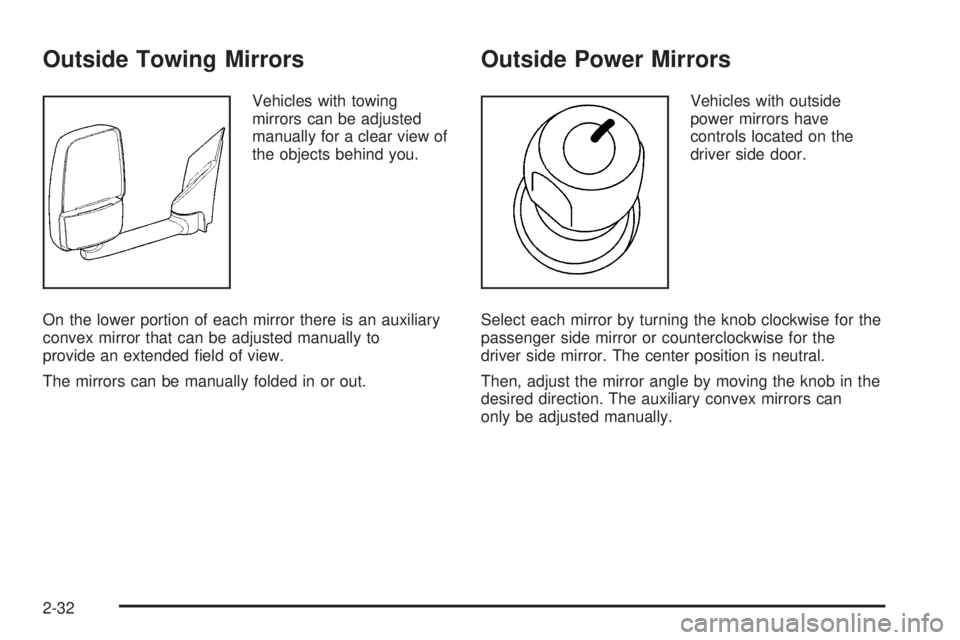
Vehicles with towing
mirrors can be adjusted
manually for a clear view of
the objects behind you.
On the lower portion of each mirror there is an auxiliary
convex mirror that can be adjusted manually to
provide an extended field of view.
The mirrors can be manually folded in or out.
Outside Power Mirrors
Vehicles with outside
power mirrors have
controls located on the
driver side door.
Select each mirror by turning the knob clockwise for the
passenger side mirror or counterclockwise for the
driver side mirror. The center position is neutral.
Then, adjust the mirror angle by moving the knob in the
desired direction. The auxiliary convex mirrors can
only be adjusted manually.
2-32
Page 131 of 406

For vehicles first sold in Canada, the off position only
works for vehicles that are shifted into the P (Park)
position.
AUTO (Automatic):Turns on the headlamps
automatically at normal brightness, together with the
following:
•Parking Lamps
•Instrument Panel Lights
•Taillamps
•License Plate Lamps
;(Parking Lamps):Turns on the parking lamps
together with the following:
•Instrument Panel Lights
•Taillamps
•License Plate Lamps
2(Headlamps):Turns on the headlamps together
with the following lamps listed below.
•Parking Lamps
•Instrument Panel Lights
•Taillamps
•License Plate LampsIf the headlamps are turned on while the vehicle is on,
the headlamps turn off automatically 10 minutes
after the ignition is turned off. If the headlamps are
turned on while the vehicle is off, the headlamps will
continue to stay on. To prevent the battery from
being drained, turn the control to the
9position.
A warning chime sounds if the driver door is opened
while the ignition switch is off and the headlamps are on.
To change the headlamps from low beam to high
beam, push the turn signal/multifunction lever toward
the instrument panel.
Headlamps on Reminder
If a door is open, a reminder chime sounds when the
headlamps or parking lamps are manually turned on and
the key is out of the ignition. To turn off the chime,
turn the headlamp switch to off or auto and then back
on, or close and re-open the door. In the auto mode, the
headlamps turn off once the ignition is in LOCK/OFF
or may remain on until the headlamp delay ends,
if enabled in the Driver Information Center (DIC). See
“Exit Lighting” underDIC Vehicle Customization on
page 3-57.
3-13
Page 133 of 406
If the vehicle is started in a dark garage, the automatic
headlamp system comes on immediately. Once the
vehicle leaves the garage, it takes approximately
30 seconds for the automatic headlamp system to
change to DRL if it is light outside. During that delay,
the instrument panel cluster may not be as bright
as usual. Make sure the instrument panel brightness
control is in the full bright position. SeeInstrument Panel
Brightness on page 3-15.
Instrument Panel Brightness
The knob for this feature is located next to the exterior
lamps control.
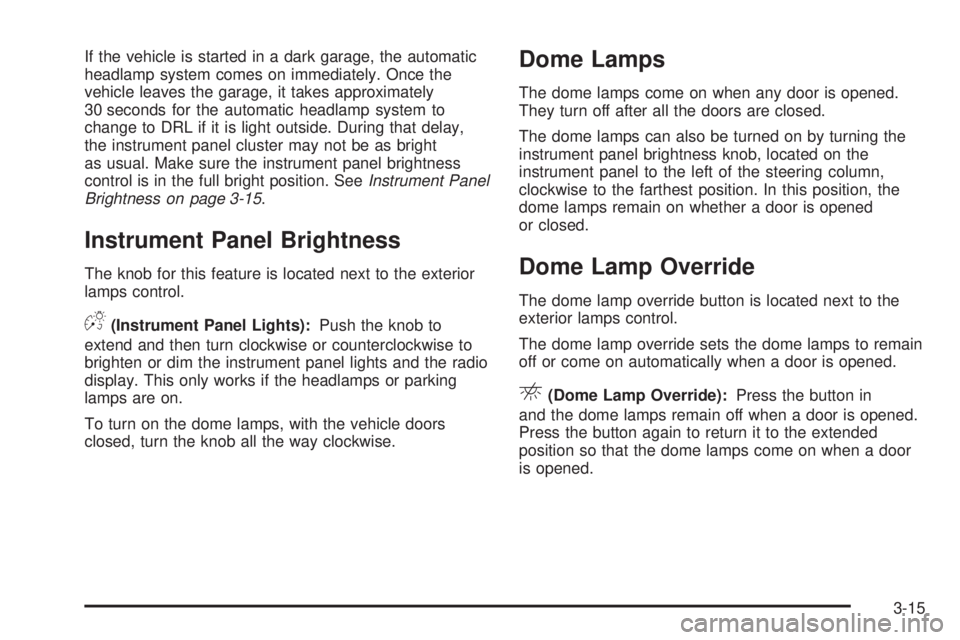
D(Instrument Panel Lights):Push the knob to
extend and then turn clockwise or counterclockwise to
brighten or dim the instrument panel lights and the radio
display. This only works if the headlamps or parking
lamps are on.
To turn on the dome lamps, with the vehicle doors
closed, turn the knob all the way clockwise.
Dome Lamps
The dome lamps come on when any door is opened.
They turn off after all the doors are closed.
The dome lamps can also be turned on by turning the
instrument panel brightness knob, located on the
instrument panel to the left of the steering column,
clockwise to the farthest position. In this position, the
dome lamps remain on whether a door is opened
or closed.
Dome Lamp Override
The dome lamp override button is located next to the
exterior lamps control.
The dome lamp override sets the dome lamps to remain
off or come on automatically when a door is opened.
E(Dome Lamp Override):Press the button in
and the dome lamps remain off when a door is opened.
Press the button again to return it to the extended
position so that the dome lamps come on when a door
is opened.
3-15
Page 136 of 406
Ashtray(s) and Cigarette Lighter
If your vehicle has this feature it is located in the center
console or on the instrument panel. Pull up on the
ashtray door to open it if it is in the console or pull the
door open it if it is on the instrument panel.
Notice:If papers, pins, or other �ammable items
are put in the ashtray, hot cigarettes or other
smoking materials could ignite them and possibly
damage the vehicle. Never put �ammable items
in the ashtray.
To remove the ashtray, pull it out from the console or
from the slide out door. To reinstall the ashtray,
slide it back to the original position.
To use the cigarette lighter, if the vehicle has one, push
it in all the way, and let go. When it is ready for use,
it will pop back out by itself.
Do not use the lighter to plug in accessory devices.
Use the power outlets provided.
Notice:Holding a cigarette lighter in while it is
heating does not let the lighter back away from the
heating element when it is hot. Damage from
overheating can occur to the lighter or heating
element, or a fuse could be blown. Do not hold a
cigarette lighter in while it is heating.
Climate Controls
Climate Control System
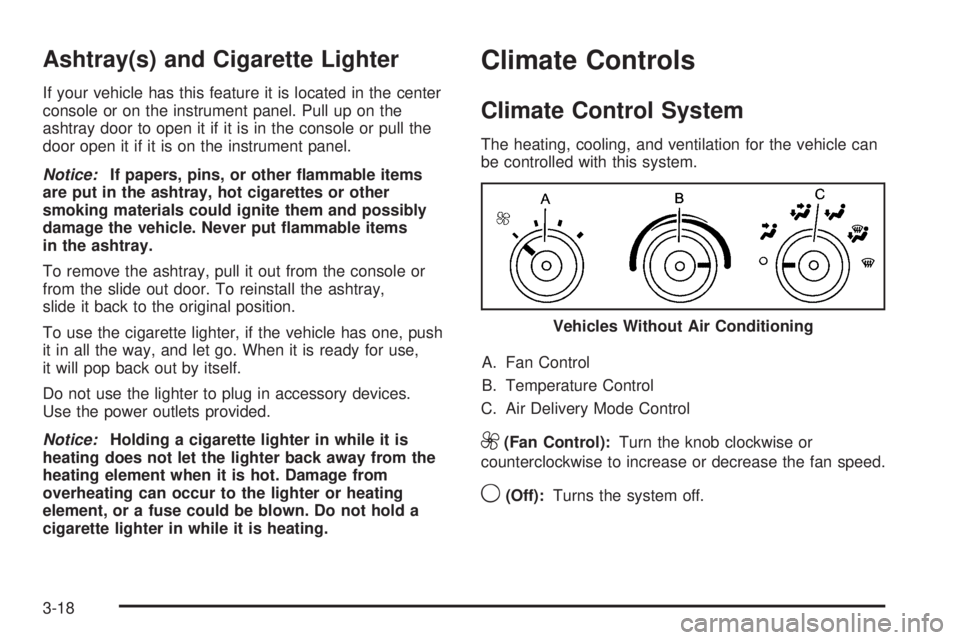
The heating, cooling, and ventilation for the vehicle can
be controlled with this system.
A. Fan Control
B. Temperature Control
C. Air Delivery Mode Control
9(Fan Control):Turn the knob clockwise or
counterclockwise to increase or decrease the fan speed.
9(Off):Turns the system off. Vehicles Without Air Conditioning
3-18
Page 176 of 406
LANGUAGE
This feature allows you to select the language in which
the DIC messages will appear.
Press the customization button until the LANGUAGE
screen appears on the DIC display. Press the set/reset
button once to access the settings for this feature.
Then press the customization button to scroll through
the following settings:
ENGLISH (default):All messages will appear in
English.
FRANCAIS:All messages will appear in French.
ESPANOL:All messages will appear in Spanish.
ARABIC:All messages will appear in Arabic.
NO CHANGE:No change will be made to this feature.
The current setting will remain.
To select a setting, press the set/reset button while the
desired setting is displayed on the DIC. A beep will
sound once a language has been selected.
AUTO DOOR LOCK
This feature allows you to select when the vehicle’s
doors will automatically lock. SeeProgrammable
Automatic Door Locks on page 2-7for more information.
Press the customization button until AUTO DOOR
LOCK appears on the DIC display. Press the set/reset
button once to access the settings for this feature.
Then press the customization button to scroll through
the following settings:
SHIFT OUT OF PARK (default):The doors will
automatically lock when the vehicle is shifted out of
P (Park).
AT VEHICLE SPEED:The doors will automatically lock
when the vehicle speed is above 8 mph (13 km/h) for
three seconds.
NO CHANGE:No change will be made to this feature.
The current setting will remain.
To select a setting, press the set/reset button while the
desired setting is displayed on the DIC.
3-58
Page 177 of 406
AUTO DOOR UNLOCK
This feature allows you to select whether or not to turn
off the automatic door unlocking feature. It also
allows you to select which doors and when the doors
will automatically unlock. SeeProgrammable Automatic
Door Locks on page 2-7for more information.
Press the customization button until AUTO DOOR
UNLOCK appears on the DIC display. Press the
set/reset button once to access the settings for this
feature. Then press the customization button to scroll
through the following settings:
OFF:None of the doors will automatically unlock.
DRIVER AT KEY OUT:Only the driver’s door will
unlock when the key is taken out of the ignition.
DRIVER IN PARK:Only the driver’s door will unlock
when the vehicle is shifted into P (Park).
ALL AT KEY OUT:All of the doors will unlock when
the key is taken out of the ignition.ALL IN PARK (default):All of the doors will unlock
when the vehicle is shifted into P (Park).
NO CHANGE:No change will be made to this feature.
The current setting will remain.
To select a setting, press the set/reset button while the
desired setting is displayed on the DIC.
REMOTE DOOR LOCK
This feature allows you to select the type of feedback
you will receive when locking the vehicle with the
Remote Keyless Entry (RKE) transmitter. You will not
receive feedback when locking the vehicle with the RKE
transmitter if the doors are open. SeeRemote Keyless
Entry (RKE) System Operation on page 2-4for more
information.
Press the customization button until REMOTE DOOR
LOCK appears on the DIC display. Press the set/reset
button once to access the settings for this feature.
Then press the customization button to scroll through
the following settings:
OFF:There will be no feedback when you press the
lock button on the RKE transmitter.
LIGHTS ONLY:The exterior lamps will flash when you
press the lock button on the RKE transmitter.
3-59
Page 178 of 406
HORN ONLY:The horn will sound on the second press
of the lock button on the RKE transmitter.
HORN & LIGHTS (default):The exterior lamps will
flash when you press the lock button on the RKE
transmitter, and the horn will sound when the lock button
is pressed again within five seconds of the previous
command.
NO CHANGE:No change will be made to this feature.
The current setting will remain.
To select a setting, press the set/reset button while the
desired setting is displayed on the DIC.
REMOTE DOOR UNLOCK
This feature allows you to select the type of feedback
you will receive when unlocking the vehicle with
the Remote Keyless Entry (RKE) transmitter. You will
not receive feedback when unlocking the vehicle
with the RKE transmitter if the doors are open. See
Remote Keyless Entry (RKE) System Operation
on page 2-4for more information.Press the customization button until REMOTE DOOR
UNLOCK appears on the DIC display. Press the
set/reset button once to access the settings for this
feature. Then press the customization button to scroll
through the following settings:
LIGHTS OFF:The exterior lamps will not flash when
you press the unlock button on the RKE transmitter.
LIGHTS ON (default):The exterior lamps will
flash when you press the unlock button on the RKE
transmitter.
NO CHANGE:No change will be made to this feature.
The current setting will remain.
To select a setting, press the set/reset button while the
desired setting is displayed on the DIC.
3-60
Page 179 of 406
DELAY DOOR LOCK
This feature allows you to select whether or not the
locking of the vehicle’s doors will be delayed. When
locking the doors with the power door lock switch and a
door is open, this feature will delay locking the doors
until five seconds after the last door is closed. You will
hear three chimes to signal that the delayed locking
feature is in use. The key must be out of the ignition for
this feature to work. You can temporarily override
delayed locking by pressing the power door lock switch
twice or the lock button on the RKE transmitter twice.
SeeDelayed Locking on page 2-7for more information.
Press the customization button until DELAY DOOR
LOCK appears on the DIC display. Press the set/reset
button once to access the settings for this feature.
Then press the customization button to scroll through
the following settings:
OFF:There will be no delayed locking of the vehicle’s
doors.
ON (default):The doors will not lock until five seconds
after the last door is closed.
NO CHANGE:No change will be made to this feature.
The current setting will remain.
To select a setting, press the set/reset button while the
desired setting is displayed on the DIC.
EXIT LIGHTING
This feature allows you to select the amount of time you
want the exterior lamps to remain on when it is dark
enough outside. This happens after the key is turned
from ON/RUN to LOCK/OFF.
Press the customization button until EXIT LIGHTING
appears on the DIC display. Press the set/reset button
once to access the settings for this feature. Then
press the customization button to scroll through the
following settings:
OFF:The exterior lamps will not turn on.
30 SECONDS (default):The exterior lamps will stay on
for 30 seconds.
1 MINUTE:The exterior lamps will stay on for
one minute.
2 MINUTES:The exterior lamps will stay on for
two minutes.
NO CHANGE:No change will be made to this feature.
The current setting will remain.
To select a setting, press the set/reset button while the
desired setting is displayed on the DIC.
3-61