Page 304 of 532
out of the situation in a slow controlled manner. This
control works well for avoiding further vehicle dam-
age. Once you decide it is time to use the winch look
for a good anchor point. It needs to be strong enough
to hold more than the vehicle’s weight and provide a
direction of pull as straight as possible. Use block and
tackle if necessary to improve the angle of pull or
increase the winch’s pulling force. If the anchor point
is a tree use a strap around its base and hook the cable
to the strap. If it is another vehicle, then place that
vehicle in PARK and block the front tires. If you cannot
find an anchor point within reach try using your spare
tire by burying it. Once you have determined an
anchor point hook up the cable, ensuring there are a
least five wraps of cable left on the drum, and place a
floor mat or something else over the strung out cable.
Placing something over the strung out cable helps
keep the cable on the ground if it breaks. Next, place
the vehicle in 1st gear and apply a very light throttle asyou power the winch in. Be careful not to allow slack
in the cable as you recover the vehicle. Do not try to
guide the cable into the drum. If it starts to bunch up
on one end, let it. You can re-spool the cable after-
wards. Never use a winch cable as a tow strap and
always stand back while winching.
WARNING!
Winch cables are under high tension when in use and
can become a projectile if they fail. Never stand over
or straddle the winch cable. Never jerk or overload
the winch cable. Never stand in front of the vehicle
while winching. Failure to follow these instructions
can result in serious or fatal injury.After Driving Off-RoadOff-road operation puts more stress on your vehicle than
does most on-road driving. After driving off-road, it is
always a good idea to check for damage.
302 STARTING AND OPERATING
Page 306 of 532
LIMITED-SLIP DIFFERENTIAL – IF EQUIPPEDThe limited-slip differential provides additional traction
on snow, ice, mud, sand and gravel, particularly when
there is a difference between the traction characteristics
of the surface under the right and left rear wheels. During
normal driving and cornering, the limited-slip unit per-
forms similarly to a conventional differential. On slip-
pery surfaces, however, the differential delivers more of
the driving effort to the rear wheel having the better
traction.
The limited-slip differential is especially helpful during
slippery driving conditions. With both rear wheels on a
slippery surface, a slight application of the accelerator
will supply maximum traction. When starting with only
one rear wheel on an excessively slippery surface, slight
momentary application of the parking brake may be
necessary to gain maximum traction.
WARNING!
On vehicles equipped with a limited-slip differential
never run the engine with one rear wheel off the
ground since the vehicle may drive through the rear
wheel remaining on the ground. You could lose
control of the vehicle.
Care should be taken to avoid sudden accelerations when
both rear wheels are on a slippery surface. This could
cause both rear wheels to spin, and allow the vehicle to
slide sideways on the crowned surface of a road or in a
turn.DRIVING ON SLIPPERY SURFACESWhen driving on wet or slushy roads, it is possible for a
wedge of water to build up between the tire and road
surface. This is known as hydroplaning and may cause
partial or complete loss of vehicle control and stopping
304 STARTING AND OPERATING
Page 309 of 532
WARNING!
•
Driving through standing water limits your vehi-
cle’s traction capabilities. Do not exceed 5 mph
(8 km/h) when driving through standing water.
•
Driving through standing water limits your vehi-
cle’s braking capabilities, which increases stop-
ping distances. Therefore, after driving through
standing water, drive slowly and lightly press on
the brake pedal several times to dry the brakes.
•
Getting water inside your vehicle’s engine can
cause it to lock up and stall out, and leave you
stranded.
•
Failure to follow these warnings may result in
injuries that are serious or fatal to you, your
passengers, and others around you.
DRIVING OFF-ROAD — RAM TRUCK ONLYCare should be taken when attempting to climb steep
hills or driving diagonally across a hill or slope. If natural
obstacles force you to travel diagonally up or down a hill,
choose a mild angle and keep as little side tilt as possible.
Keep the vehicle moving and make turns slowly and
cautiously.
If you must back down a hill, back straight down using
REVERSE gear. Never back down in NEUTRAL, or
diagonally across the hill.
When driving over sand, mud, and other soft terrain,
shift to low gear and drive steadily. Apply the accelerator
slowly to avoid spinning the wheels.
DO NOT REDUCE the tire pressures for this type of
driving.
STARTING AND OPERATING 307
5
Page 324 of 532
the vehicle and never near the wire rope or snatch
block. Your situation may have other\bno people\bzones.
15. Begin winching. With the winching vehicles engine
on and light tension already on the wire rope, begin
winching slowly and steadily. Be sure that the wire rope
is winding evenly and tightly around the spooling drum. For additional assistance, the winched vehicle can be
slowly driven while being pulled by the winch. Continue
pulling until the vehicle is on stable ground. If you are
able to drive the vehicle, the winching operation is
complete.
No People Zones
Using The Remote Control
322 STARTING AND OPERATING
Page 326 of 532
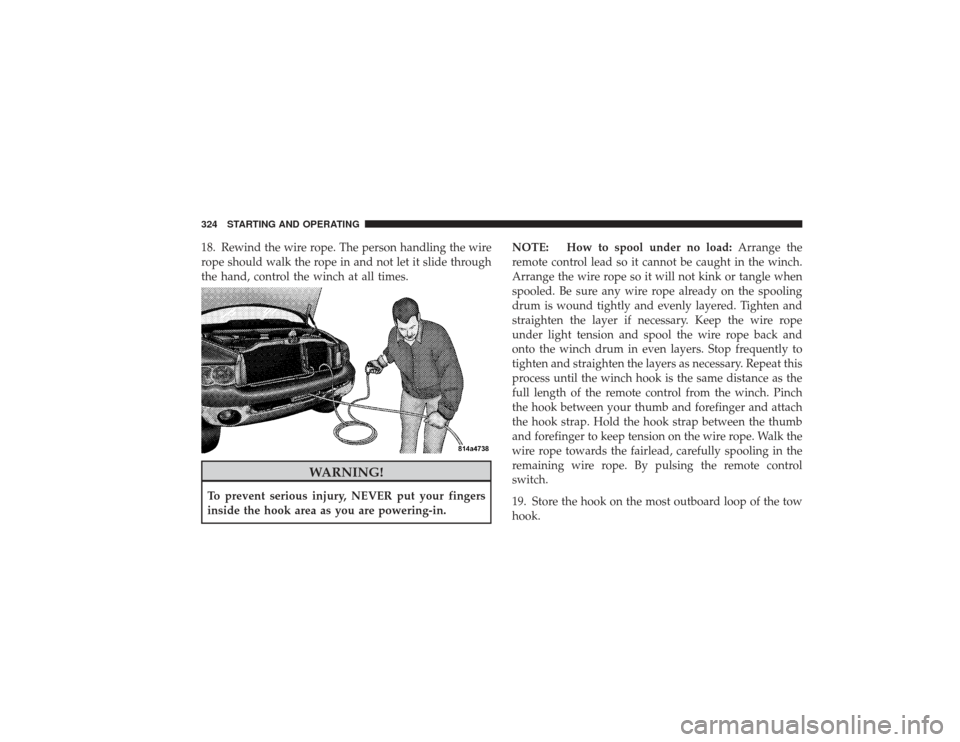
18. Rewind the wire rope. The person handling the wire
rope should walk the rope in and not let it slide through
the hand, control the winch at all times.
WARNING!
To prevent serious injury, NEVER put your fingers
inside the hook area as you are powering-in.NOTE: How to spool under no load:
Arrange the
remote control lead so it cannot be caught in the winch.
Arrange the wire rope so it will not kink or tangle when
spooled. Be sure any wire rope already on the spooling
drum is wound tightly and evenly layered. Tighten and
straighten the layer if necessary. Keep the wire rope
under light tension and spool the wire rope back and
onto the winch drum in even layers. Stop frequently to
tighten and straighten the layers as necessary. Repeat this
process until the winch hook is the same distance as the
full length of the remote control from the winch. Pinch
the hook between your thumb and forefinger and attach
the hook strap. Hold the hook strap between the thumb
and forefinger to keep tension on the wire rope. Walk the
wire rope towards the fairlead, carefully spooling in the
remaining wire rope. By pulsing the remote control
switch.
19. Store the hook on the most outboard loop of the tow
hook.324 STARTING AND OPERATING
Page 331 of 532
WARNING!
Fluid level should be checked on a level surface and
with the engine off to prevent injury from moving
parts and to ensure accurate fluid level reading. Do
not overfill. Use only manufacturer’s recommended
power steering fluid.
If necessary, add fluid to restore to the proper indicated
level. With a clean cloth, wipe any spilled fluid from all
surfaces. Refer to “Fluids, Lubricants, and Genuine
Parts” in Section 7 for the correct fluid type.PARKING BRAKEThe foot-operated parking brake is positioned below the
lower left corner of the instrument panel. To release the
parking brake, pull the parking brake release handle. NOTE:
The “Brake Warning Light” will come on and
flash to indicate that the parking brake is applied. You
must be sure that the parking brake is fully applied
before leaving the vehicle.
Be sure the parking brake is firmly set when parked and
the shift lever is in the PARK position. When parking on
Parking Brake
STARTING AND OPERATING 329
5
Page 333 of 532
If either the front or rear hydraulic system loses normal
braking capability, the remaining system will still func-
tion with some loss of overall braking effectiveness. This
will be evident by increased pedal travel during applica-
tion, greater pedal force required to slow or stop, and
activation of the “Brake Warning Light” and the “ABS
Warning Light” (If Equipped) during brake use.3500 Dual Rear Wheel Models OnlyThe brake system power assist is provided by a hydro-
boost unit which shares fluid with the power steering
system. You may experience some clicking or hissing
noises from the hydro-boost system during hard braking
conditions.
NOTE:Under cold temperatures, pedal effort will be
higher than normal until the power steering fluid reaches
operating temperature.
Four-Wheel Anti-Lock Brake System
WARNING!
The Four-Wheel Anti-Lock Brake System contains
sophisticated electronic equipment. It may be sus-
ceptible to interference caused by improperly in-
stalled or high output radio transmitting equipment.
This interference can cause possible loss of anti-lock
braking capability. Installation of such equipment
should be performed by qualified professionals.
The Four-Wheel Anti-lock Brake System (ABS) is de-
signed to aid the driver in maintaining vehicle control
under adverse braking conditions. The system operates
with a separate computer to modulate hydraulic pressure
to prevent wheel lockup and help avoid skidding on
slippery surfaces.
STARTING AND OPERATING 331
5
Page 334 of 532
The system’s pump motor runs during an ABS stop to
provide regulated hydraulic pressure. The pump motor
makes a low humming noise during operation. This is
normal.
The ABS conducts a low-speed selftest at about 10 mph
(16 km/h). If you have your foot lightly on the brake
while this test is occurring, you may feel slight pedal
movement. The movement can be more apparent on ice
and snow. This is normal.
The ABS pump motor runs during the self-test at 10 mph
(16 km/h) and during an ABS stop. The pump motor
makes a low humming noise during operation. This is
normal.
When you are in a severe braking condition involving
use of the ABS, you will experience some pedal drop as
the vehicle comes to a complete stop. This is the result of
the system reverting to the base brake system and is
normal.Engagement of the ABS may be accompanied by a
pulsing sensation. You may also hear a clicking noise.
These occurrences are normal, and indicate that the
system is functioning.
ABS Warning LightThe ABS includes an amber warning light. When the light
is illuminated, the ABS is not functioning. The system
reverts to standard, non-anti-lock brakes.
WARNING!
•
Pumping of the anti-lock brakes will diminish
their effectiveness and may lead to an accident.
Pumping makes the stopping distance longer. Just
press firmly on your brake pedal when you need
to slow down or stop.
(Continued)
332 STARTING AND OPERATING