Page 126 of 469

because a door is open. This includes the glove box light,
but not the trunk light. To restore interior light operation,
either turn the ignition switch ON or cycle the light
switch.
Dimmer Control
The dimmer control is part of the
headlight switch and is located on the
left side of the instrument panel. With
the parking lights or headlights on,
rotating the dimmer control upward
will increase the brightness of the in-
strument panel lights and, if
equipped, the lighting in the door map pockets, door
handles and cupholders.
Dome Light Position
Rotate the dimmer control completely upward to the
second detent to turn on the interior lights. The interior
lights will remain on when the dimmer control is in this
position.
Interior Light Defeat (OFF)
Rotate the dimmer control to the extreme bottom off
position. The interior lights will remain off when the
doors are open.
Parade Mode (Daytime Brightness Feature)
Rotate the dimmer control upward to the first detent.
This feature brightens all text displays such as the
odometer, Electronic Vehicle Information Center (EVIC),
and radio when the parking lights or headlights are on.
124 UNDERSTANDING THE FEATURES OF YOUR VEHICLE
Page 128 of 469

regulate the wipe interval from a minimum of one cycle
every second to a maximum of approximately 23 seconds
between cycles.
WARNING!
Sudden loss of visibility through the windshield
could lead to an accident. You might not see other
vehicles or other obstacles. To avoid sudden icing of
the windshield during freezing weather, warm the
windshield with the defroster before and during
windshield washer use.
Mist Feature
Push the multifunction lever inward (toward the steering
column) to the first detent to activate a single wipe cycle
to clear off road mist or spray from a passing vehicle. The
wipers will continue to operate until you release the
multifunction lever.
Windshield Washers
To use the washer, push the multifunction lever inward
(toward the steering column) to the second detent and
hold it for as long as washer spray is desired.
If you activate the washer while the windshield wiper
control is in the delay range, the wipers will operate for
two wipe cycles after releasing the multifunction lever
and then resume the intermittent interval previously
selected.
If you activate the washer while the windshield wiper is
turned off, the wipers will operate for three wipe cycles
and then turn off.
Headlights On With Wipers (Available with Auto
Headlights Only)
When this feature is active, the headlights will turn on
approximately 10 seconds after the wipers are turned on
if the headlight switch is placed in the AUTO (A)
126 UNDERSTANDING THE FEATURES OF YOUR VEHICLE
Page 129 of 469
position. In addition, the headlights will turn off when
the wipers are turned off if they were turned on by this
feature.
The Headlights On with Wipers feature can be enabled or
disabled. Refer to ”Headlights On with Wipers,” under
“Personal Settings (Customer-Programmable Features)”
under “Electronic Vehicle Information Center (EVIC)” in
Section 4.
TILT/TELESCOPING STEERING COLUMN
This feature allows you to tilt the steering column
upward or downward. It also allows you to lengthen or
shorten the steering column. The tilt/telescoping control
handle is located below the steering wheel at the end of
the steering column.To unlock the steering column, pull the control handle
outward. To tilt the steering column, move the steering
wheel upward or downward as desired. To lengthen or
shorten the steering column, pull the steering wheel
Tilt Steering Column
3
UNDERSTANDING THE FEATURES OF YOUR VEHICLE 127
Page 131 of 469

simultaneously. If this occurs, the Electronic Speed Con-
trol System can be reactivated by pushing the Electronic
Speed Control ON/OFF button and resetting the desired
vehicle set speed.
To Activate
Push and release the ON/OFF button located
on the end of the Electronic Speed Control
lever. The indicator light in the instrument
cluster will illuminate to show that the speed
control system is on. To turn the system off, push and
release the ON/OFF button again. The system and the
indicator light will turn off.
WARNING!
Leaving the Electronic Speed Control system on
when not in use is dangerous. You could accidentally
set the system or cause it to go faster than you want.
You could lose control and have an accident. Always
leave the system OFF when you are not using it.
To Set A Desired Speed
When the vehicle reaches the speed desired, push the
lever downward to SET DECEL and release. Remove
your foot from the accelerator pedal and the vehicle will
operate at the selected speed.
NOTE:
•Electronic Speed Control will only function in 3rd, 4th,
or 5th gear when in the Autostick�mode (if
equipped).
3
UNDERSTANDING THE FEATURES OF YOUR VEHICLE 129
Page 133 of 469
 speed decrease. Each time the lever is
tapped, speed decreases.
To Accelerate For Passing
Press the accelerator as you would norma")
Tapping the lever to SET DECEL once will result in a
1 mph (1.6 km/h) speed decrease. Each time the lever is
tapped, speed decreases.
To Accelerate For Passing
Press the accelerator as you would normally. When the
pedal is released, the vehicle will return to the set speed.
Using Electronic Speed Control on Hills
NOTE:The Electronic Speed Control system maintains
speed up and down hills. A slight speed change on
moderate hills is normal.
The automatic transmission will downshift while climb-
ing uphill or descending downhill. This downshift is
necessary to maintain vehicle set speed.On steep hills, a greater speed loss or gain may occur, so
it may be preferable to drive without Electronic Speed
Control.
WARNING!
Electronic Speed Control can be dangerous where the
system cannot maintain a constant speed. Your ve-
hicle could go too fast for the conditions and you
could lose control. An accident could be the result.
Do not use Electronic Speed Control in heavy traffic
or on roads that are winding, icy, snow-covered, or
slippery.3
UNDERSTANDING THE FEATURES OF YOUR VEHICLE 131
Page 134 of 469
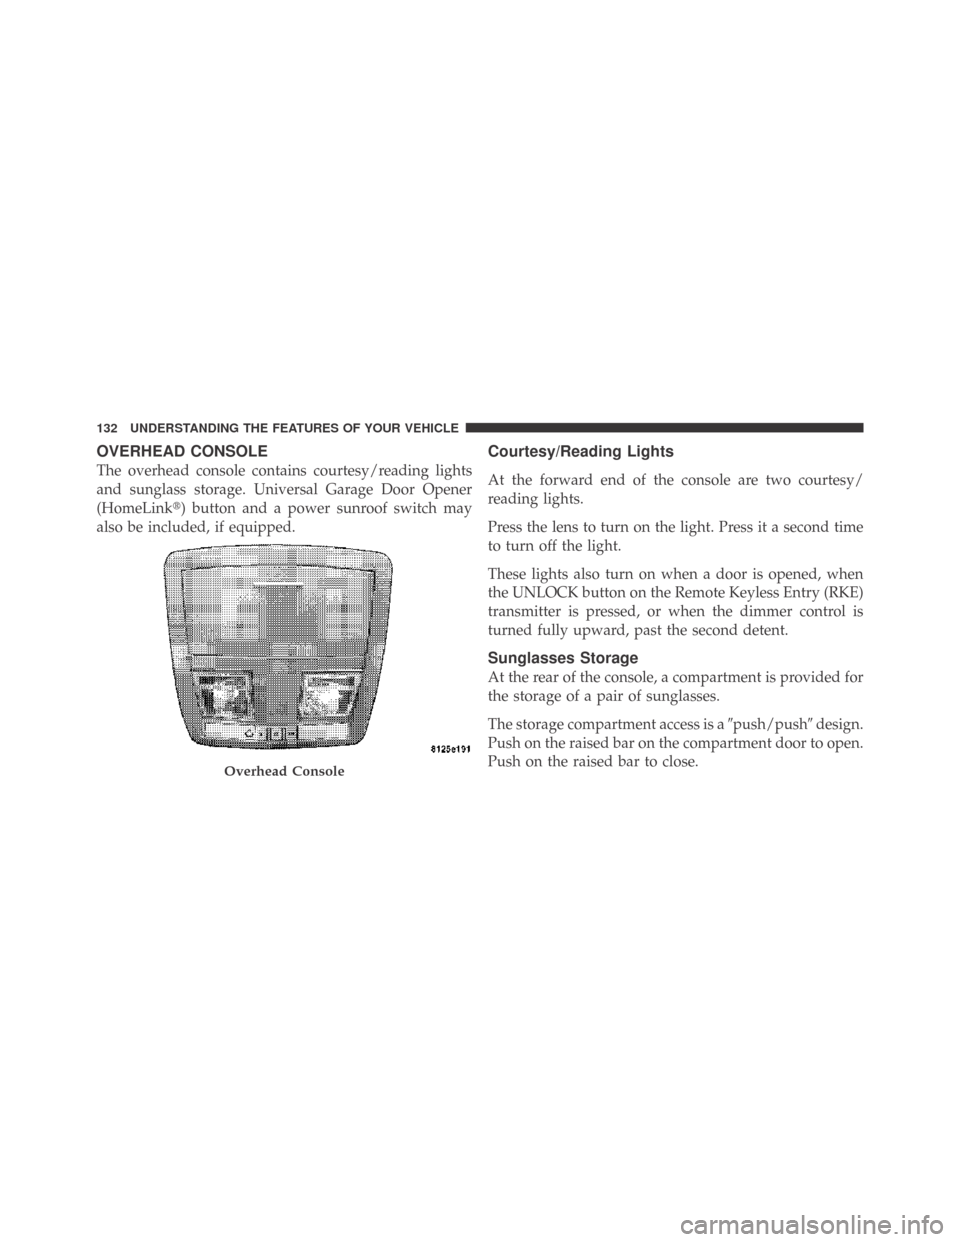
OVERHEAD CONSOLE
The overhead console contains courtesy/reading lights
and sunglass storage. Universal Garage Door Opener
(HomeLink�) button and a power sunroof switch may
also be included, if equipped.
Courtesy/Reading Lights
At the forward end of the console are two courtesy/
reading lights.
Press the lens to turn on the light. Press it a second time
to turn off the light.
These lights also turn on when a door is opened, when
the UNLOCK button on the Remote Keyless Entry (RKE)
transmitter is pressed, or when the dimmer control is
turned fully upward, past the second detent.
Sunglasses Storage
At the rear of the console, a compartment is provided for
the storage of a pair of sunglasses.
The storage compartment access is a�push/push�design.
Push on the raised bar on the compartment door to open.
Push on the raised bar to close.
Overhead Console
132 UNDERSTANDING THE FEATURES OF YOUR VEHICLE
Page 135 of 469
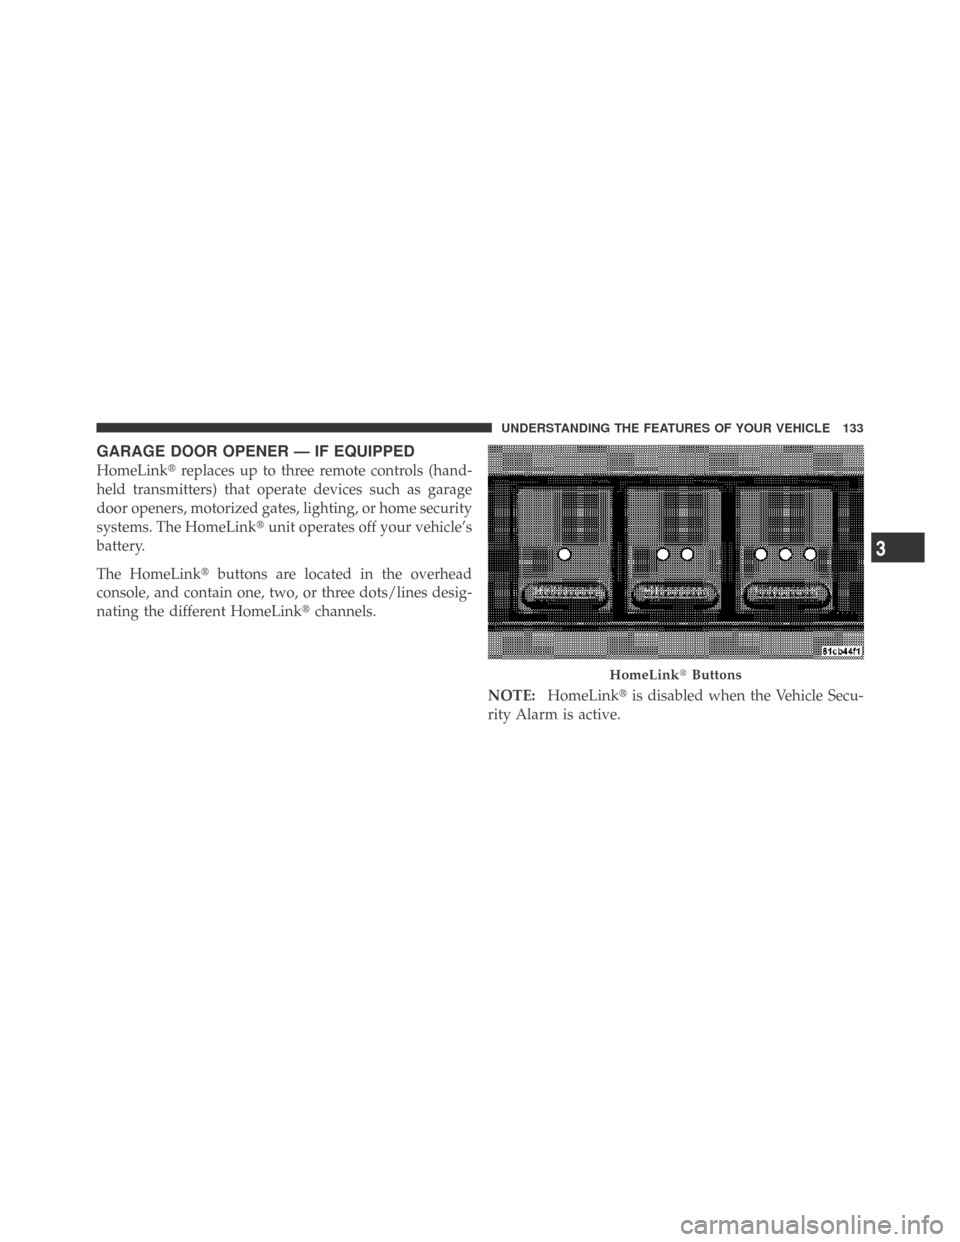
GARAGE DOOR OPENER — IF EQUIPPED
HomeLink�replaces up to three remote controls (hand-
held transmitters) that operate devices such as garage
door openers, motorized gates, lighting, or home security
systems. The HomeLink�unit operates off your vehicle’s
battery.
The HomeLink�buttons are located in the overhead
console, and contain one, two, or three dots/lines desig-
nating the different HomeLink�channels.
NOTE:HomeLink�is disabled when the Vehicle Secu-
rity Alarm is active.
HomeLink�Buttons
3
UNDERSTANDING THE FEATURES OF YOUR VEHICLE 133
Page 139 of 469
 after several seconds of
transmission – which may not be long enough for
Ho")
Gate Operator/Canadian Programming
Canadian radio-frequency laws require transmitter sig-
nals to “time-out” (or quit) after several seconds of
transmission – which may not be long enough for
HomeLink�to pick up the signal during programming.
Similar to this Canadian law, some U.S. gate operators are
designed to “time-out” in the same manner.
It may be helpful to unplug the device during the cycling
process to prevent possible overheating of the garage
door or gate motor.
If you are having difficulties programming a garage door
opener or a gate operator, replace “Programming
HomeLink” Step 3 with the following:
3. Continue to press and hold the HomeLink�button
while you press and release - every two seconds
(“cycle”) your hand-held transmitter until HomeLink�has successfully accepted the frequency signal. The
EVIC display will change from “CHANNEL # TRAIN-
ING” to “CHANNEL # TRAINED.”
If you unplugged the device for training, plug it back in
at this time.
Then proceed with Step 4 under “Programming
HomeLink�” earlier in this section.
Using HomeLink�
To operate, simply press and release the programmed
HomeLink�button. Activation will now occur for the
trained device (i.e., garage door opener, gate operator,
security system, entry door lock, home/office lighting,
etc.) The hand-held transmitter of the device may also be
used at any time.
3
UNDERSTANDING THE FEATURES OF YOUR VEHICLE 137