Page 115 of 534
, to o")
RCP monitors the rear detection zones on both sides of
the vehicle, for objects that are moving toward the side of
the vehicle with a minimum speed of approximately 1 to
2 mph (1 km/h to 3 km/h), to objects moving a maxi-
mum of approximately 10 mph (16 km/h), such as in
parking lot situations.NOTE:In a parking lot situation, oncoming vehicles can
be obscured by vehicles parked on either side. If the
sensors are blocked by other structures or vehicles, the
system will not be able to alert the driver.
When RCP is on and the vehicle is in REVERSE, the
driver is alerted using both the visual and audible
alarms, including radio muting.
WARNING!
RCP is not a Back Up Aid system. It is intended to be
used to help a driver detect an oncoming vehicle in a
parking lot situation. Drivers must be careful when
backing up, even when using RCP. Always check
carefully behind your vehicle, look behind you, and
be sure to check for pedestrians, animals, other
vehicles, obstructions, and blind spots before back-
ing up. Failure to do so can result in serious injury or
death.
RCP Detection Zones
UNDERSTANDING THE FEATURES OF YOUR VEHICLE 113
3
ProCarManuals.com
Page 146 of 534
Manual Front And Second Row Seat Adjuster
The adjusting bar is located under the front of the seat.
Pull the bar upward and move the seat to the desired
position. Release the bar to lock the seat into position.Using body pressure, move forward and rearward on the
seat to be sure the seat adjusters have latched.
WARNING!
Adjusting a seat while the vehicle is moving is
dangerous. The sudden movement of the seat could
cause you to lose control. The seat belt might not be
properly adjusted and you could be injured. Adjust
any seat only while the vehicle is parked.
Manual Seat Adjuster
144 UNDERSTANDING THE FEATURES OF YOUR VEHICLE
ProCarManuals.com
Page 152 of 534
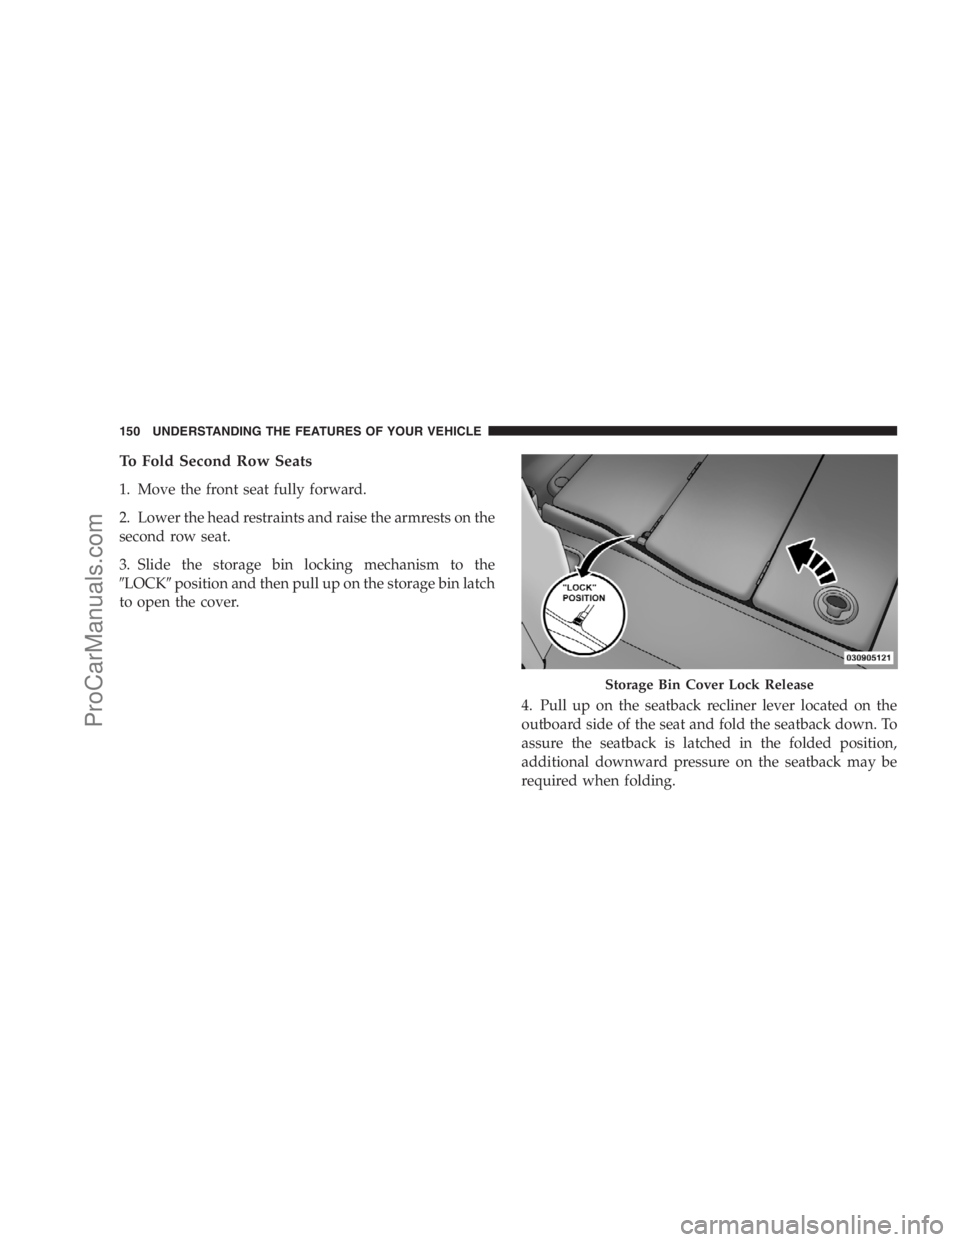
To Fold Second Row Seats
1. Move the front seat fully forward.
2. Lower the head restraints and raise the armrests on the
second row seat.
3. Slide the storage bin locking mechanism to the
�LOCK�position and then pull up on the storage bin latch
to open the cover.
4. Pull up on the seatback recliner lever located on the
outboard side of the seat and fold the seatback down. To
assure the seatback is latched in the folded position,
additional downward pressure on the seatback may be
required when folding.
Storage Bin Cover Lock Release
150 UNDERSTANDING THE FEATURES OF YOUR VEHICLE
ProCarManuals.com
Page 154 of 534
CAUTION!
The storage bin cover must be locked and flat to
avoid damage from contact with the front seat tracks,
which have minimal clearance to the cover.
WARNING!
In an accident, serious injury could result if the seat
storage bin covers are not properly latched.
•DO NOT drive the vehicle with the storage bin
covers open.
•Keep the storage bin covers closed and latched
while the vehicle is in motion.
•DO NOT use a storage bin latch as a tie down.
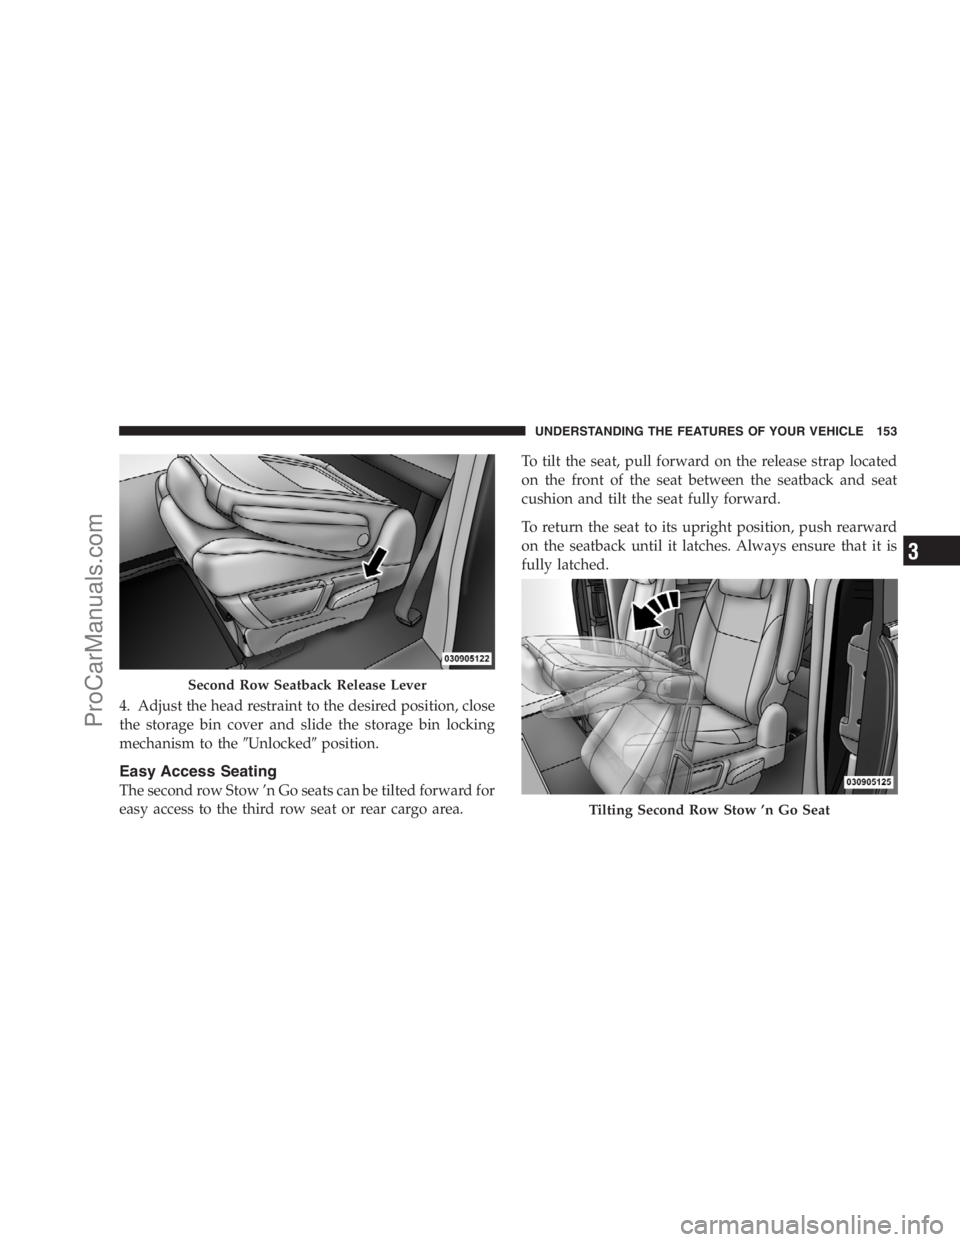
To Unfold Second Row Seats
1. Pull up on the storage bin latch to open the cover.2. Pull up on the handle to lift the seat out of the storage
bin and push the seat rearward to latch the seat anchors.
3. Pull upward on the seatback recliner lever, located on
the outboard side of the seat, to return the seatback to its
full upright position.
Second Row Seat Release Handle
152 UNDERSTANDING THE FEATURES OF YOUR VEHICLE
ProCarManuals.com
Page 155 of 534
4. Adjust the head restraint to the desired position, close
the storage bin cover and slide the storage bin locking
mechanism to the�Unlocked�position.
Easy Access Seating
The second row Stow ’n Go seats can be tilted forward for
easy access to the third row seat or rear cargo area.To tilt the seat, pull forward on the release strap located
on the front of the seat between the seatback and seat
cushion and tilt the seat fully forward.
To return the seat to its upright position, push rearward
on the seatback until it latches. Always ensure that it is
fully latched.
Second Row Seatback Release Lever
Tilting Second Row Stow ’n Go Seat
UNDERSTANDING THE FEATURES OF YOUR VEHICLE 153
3
ProCarManuals.com
Page 157 of 534
rotation. Once the seat begins to rotate, the handle may
be released. The seat locks in position once reaching the
forward or rearward positions only.
Seatbacks fold forward on an angle, not flat. This allows
the seats to swivel when the seatbacks are folded.WARNING!
Failure to comply with the following conditions
could result in serious injury or even death.
•NEVER place any child seat or infant carrier in the
Swivel ’n Go seat while it is in the rearward facing
position.
•The swivel seat should be locked in the forward
position when using any child seat or infant
carriers, with the vehicle in motion.
WARNING!
Failure to comply with the following conditions
could result in serious injury or even death.
(Continued)
Swivel Release
UNDERSTANDING THE FEATURES OF YOUR VEHICLE 155
3
ProCarManuals.com
Page 158 of 534
WARNING! (Continued)
•Occupants riding in Swivel ’n Go seating must be
wearing their seat belt and the seat must be locked
in either the forward-facing or rearward-facing
position.
•Make sure the Swivel ’n Go seat is in a locked
position with the release handle fully engaged.
Test the seat after it is locked to see that it doesn’t
swivel.
Removing Swivel ’n Go Premium Seating — If
Equipped
1. Remove any obstructions from the floor behind the
seat, and stow the third row seat.
2. Pull up on the release bar located at the bottom front
edge of the swivel seat.3. From behind the seat, lift up on the rear of the seat
cushion while pulling the seat in a rearward direction.
4. Remove the seat from vehicle through the liftgate.
Rollers are part of the seat frame and will ease the
removal process.
Release Bar
156 UNDERSTANDING THE FEATURES OF YOUR VEHICLE
ProCarManuals.com
Page 160 of 534
The table and leg are stored beneath the floor when not in
use. To install the table follow these steps:
1. Open the floor storage cover in front of the second row
seats.
2. Remove the pole and table top by loosening the hook
and loop straps.3. Swivel the second row seats so they are facing the rear.
4. Insert pole into base by aligning the lock button into
notch of the base.
5. Twist the pole in a clockwise rotation until it stops.
Table and Leg Storage
Installing Table Leg Into Base
1 — Table Base 2 — Lock/Release Button 158 UNDERSTANDING THE FEATURES OF YOUR VEHICLE
ProCarManuals.com


•Occupants riding in Swivel ’n Go seating must be
wearing their seat belt and the seat must be locked
in either the forward-facing or rearward-facing
position.
•Make sure th")
