Page 60 of 410

Maintaining Your Airbag System
WARNING!
•Modifications to any part of the airbag system
could cause it to fail when you need it. You could
be injured if the airbag system is not there to
protect you. Do not modify the components or
wiring, including adding any kind of badges or
stickers to the steering wheel hub trim cover or the
upper right side of the instrument panel. Do not
modify the front bumper, vehicle body structure,
or add aftermarket side steps or running boards.(Continued)
WARNING! (Continued)
•Do not attempt to modify any part of your ad-
vanced airbag system. The airbag may inflate
accidentally or may not function properly if modi-
fications are made. Take your vehicle to an autho-
rized dealer for any advanced airbag system ser-
vice.
•If your seat, including your trim cover and cushion
needs to be serviced in any way (including re-
moval or loosening/tightening of seat attachment
bolts), take the vehicle to your authorized dealer.
•Only manufacturer approved seat accessories may
be used. If it is necessary to modify an advanced
airbag system for persons with disabilities, contact
your authorized dealer.(Continued)
58 THINGS TO KNOW BEFORE STARTING YOUR VEHICLE
Page 75 of 410

Airbag Warning Light
The light should come on and remain on for six to eight
seconds as a bulb check when the ignition switch is first
turned ON. If the light is not lit during starting, see your
authorized dealer. If the light stays on, flickers, or comes
on while driving, have the system checked by an autho-
rized dealer.
Defroster
Check operation by selecting the defrost mode and place
the blower control on high speed. You should be able to
feel the air directed against the windshield. See your
authorized dealer for service if your defroster is
inoperable.
Periodic Safety Checks You Should Make Outside
the Vehicle
Tires
Examine tires for excessive tread wear and uneven wear
patterns. Check for stones, nails, glass, or other objectslodged in the tread. Inspect the tread and sidewall for
cuts and cracks. Check the wheel nuts for tightness.
Check the tires (including spare) for proper pressure.
Lights
Have someone observe the operation of exterior lights
while you work the controls. Check turn signal and high
beam indicator lights on the instrument panel.
Door Latches
Check for positive closing, latching, and locking.
Fluid Leaks
Check area under vehicle after overnight parking for fuel,
engine coolant, oil, or other fluid leaks. Also, if gasoline
fumes are detected or if fuel, power steering fluid, or
brake fluid leaks are suspected, the cause should be
located and corrected immediately.
2
THINGS TO KNOW BEFORE STARTING YOUR VEHICLE 73
Page 85 of 410

it your purse, pocket, or briefcase), as long as your phone
is turned on and has been paired to the vehicle’s
uconnect�phone. The uconnect� phone allows up to
seven cellular phones to be linked to the system. Only
one linked (or paired) cellular phone can be used with the
system at a time. The system is available in English,
Spanish, or French languages.
Phone Button The rearview mirror contains the microphone
for the system (depending on the type of
mirror and radio equipped), and either the
radio or the mirror has the two control buttons
(PHONE Button and VOICE RECOGNITION button)
that will enable you to access the system.
Voice Recognition Button Actual button location may vary with the ra-
dio. The individual buttons are described in the
“Operation” section. The uconnect�
phone can be used with any Hands-Free
Profile certified Bluetooth� cellular phone. See the
uconnect� website for supported phones. If your cellular
phone supports a different profile (e.g., Headset Profile)
you may not be able to use any uconnect� phone
features. Refer to your cellular service provider or the
phone manufacturer for details.
The uconnect� phone is fully integrated with the vehi-
cle’s audio system. The volume of the uconnect� phone
can be adjusted either from the radio volume control
knob or from the steering wheel radio control (right
switch), if so equipped.
The radio display will be used for visual prompts from
the uconnect� phone such as �CELL�or caller ID on
certain radios.
3
UNDERSTANDING THE FEATURES OF YOUR VEHICLE 83
Page 131 of 410
If either light remains on and does not flash, or there is a
very fast flash rate, check for a defective outside light
bulb. If an indicator fails to light when the lever is
moved, it would suggest that the fuse or indicator bulb is
defective.
High Beam/Low Beam Select Switch
Push the multifunction lever away from the steering
wheel to switch the headlights to high beam. Pull the
lever toward the steering wheel to switch the headlights
back to low beam.
Turn Signal Control
High Beam, Low Beam, and Passing Lights
3
UNDERSTANDING THE FEATURES OF YOUR VEHICLE 129
Page 132 of 410
Flash-to-Pass
You can signal another vehicle with your headlights by
lightly pulling the multifunction lever toward the steer-
ing wheel. This will turn on the high beam headlights
until the lever is released.
NOTE:If the multifunction lever is held in the flash-to-
pass position for more than 15 seconds, the high beams
will shut off. If this occurs, wait 30 seconds for the next
flash-to-pass operation.
WINDSHIELD WIPERS AND WASHERS
The wipers and washers are operated by a switch
on the control lever. The lever is located on the
right side of the steering column. Rotate the
control to select the desired wiper speed.
Windshield Wiper Operation
Rotate the control to the second detent for low-speed
wiper operation, or to the third detent for high-speed
operation.
Wiper/Washer Switch
130 UNDERSTANDING THE FEATURES OF YOUR VEHICLE
Page 134 of 410

Windshield Washers
To use the washer, pull the control lever toward you and
hold while spray is desired. If the lever is pulled while in
the delay range, the wiper will operate in low-speed for
two wipe cycles after the lever is released, and then
resume the intermittent interval previously selected.
If the lever is pulled while in the off position, the wipers
will operate for two wipe cycles, then turn off.
Mist Feature
Push down on the wiper control lever to activate a single
wipe to clear the windshield of road mist or spray from
a passing vehicle. As long as the lever is held down, the
wipers will continue to operate.
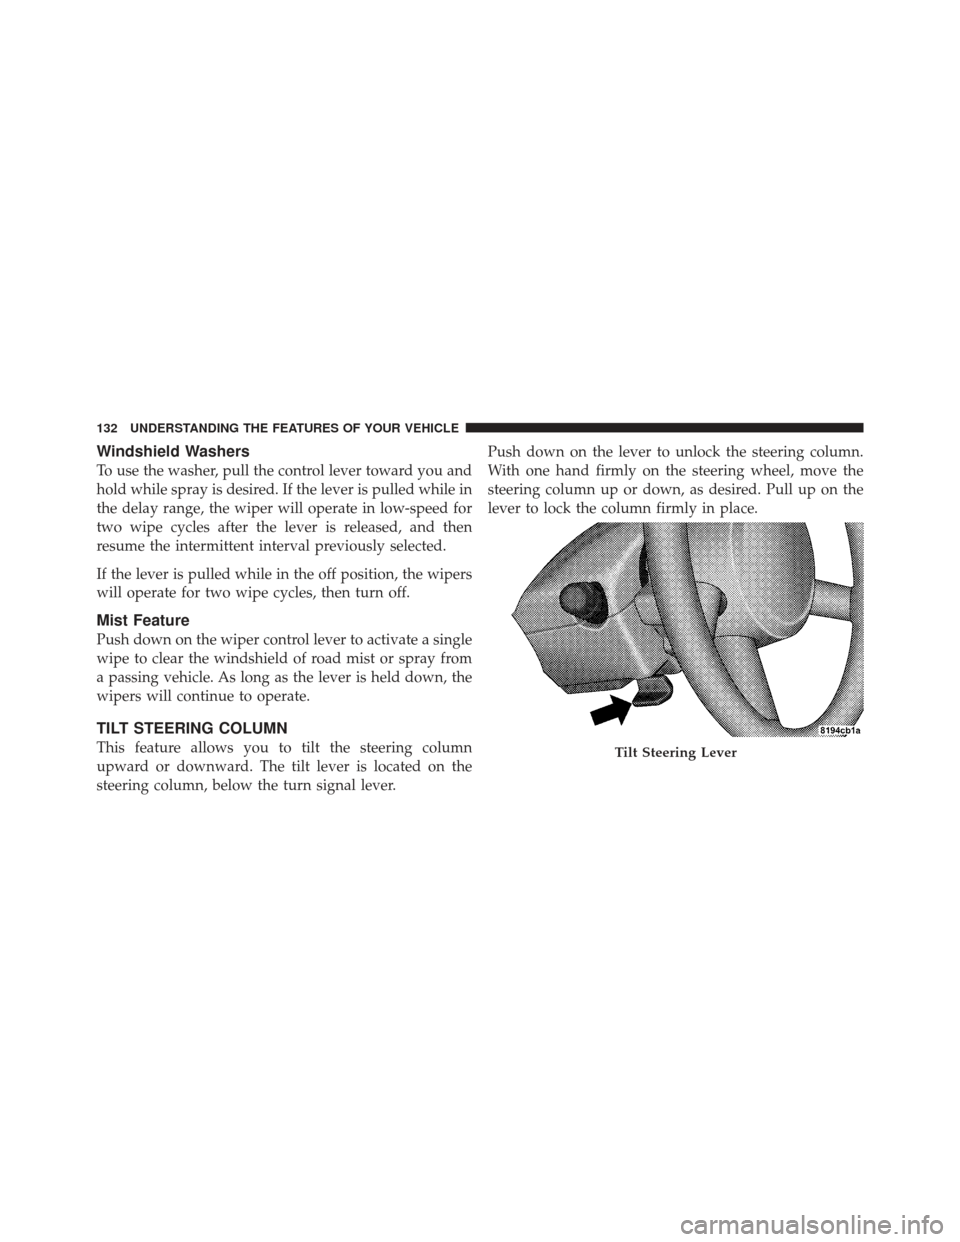
TILT STEERING COLUMN
This feature allows you to tilt the steering column
upward or downward. The tilt lever is located on the
steering column, below the turn signal lever.Push down on the lever to unlock the steering column.
With one hand firmly on the steering wheel, move the
steering column up or down, as desired. Pull up on the
lever to lock the column firmly in place.Tilt Steering Lever
132 UNDERSTANDING THE FEATURES OF YOUR VEHICLE
Page 135 of 410

WARNING!
Tilting the steering column while the vehicle is
moving is dangerous. Without a stable steering col-
umn, you could lose control of the vehicle and have
an accident. Adjust the column only while the ve-
hicle is stopped. Be sure it is locked before driving.
ELECTRONIC SPEED CONTROL — IF EQUIPPED
When engaged, Electronic Speed Control takes over the
accelerator operation at approximately either 30 mph
(40 km/h ) or 35 mph (56 km/h) depending on the model
or engine size. The Electronic Speed Control lever is
located on the right side of the steering wheel.NOTE:
In order to ensure proper operation, the Elec-
tronic Speed Control System has been designed to shut
down if multiple Speed Control functions are operated
simultaneously. If this occurs, the Electronic Speed Con-
trol System can be reactivated by pushing the Electronic
Speed Control ON/OFF button and resetting the desired
vehicle set speed.
Electronic Speed Control Lever
3
UNDERSTANDING THE FEATURES OF YOUR VEHICLE 133
Page 235 of 410

•Look at the shift indicator window on the console to
ensure it is in the PARK position.
•When engaged in PARK, you will not be able to move
the shift lever rearward without pressing the lever
knob button.
CAUTION!
Before moving the shift lever out of PARK, you must
turn the ignition from LOCK to ON, so the steering
wheel and shift lever are released. Otherwise, dam-
age to the steering column or shift lever could result.
REVERSE
This range is for moving the vehicle backward. Shift into
REVERSE only after the vehicle has come to a complete
stop.
NEUTRAL
This range is used when vehicle is standing for pro-
longed periods with engine running. Engine may be
started in this range. Set the parking brake if you must
leave the vehicle.
WARNING!
Do not coast in NEUTRAL and never turn off the
ignition to coast down a hill. These are unsafe
practices that limit your response to changing traffic
or road conditions. You might lose control of the
vehicle and have an accident.
DRIVE/OVERDRIVE
This range should be used for most city and highway
driving. It provides smoothest upshifts and downshifts,
and best fuel economy.
5
STARTING AND OPERATING 233