Page 60 of 493

•Seat Belt Reminder Light
•Knee Impact Bolsters
•Front Acceleration Sensors
•Driver and Front Passenger Seat Belt Pretensioners
How the Airbag System Works
•
TheOccupant Restraint Controller (ORC)determines
if a frontal collision is severe enough to require the
airbags to inflate. The front airbag inflators are de-
signed to provide different rates of airbag inflation
from direction provided by the ORC. The ORC will not
detect rollover.
•For vehicles so equipped, the ORC also determines if a
side impact is severe enough to deploy the supple-
mental side curtain airbag and/or supplemental front
seat-mounted side airbag as required for each type of
impact.
•The ORC also monitors the readiness of the electronic
parts of the system whenever the ignition switch is in
the START or ON positions. These include all of the
items listed above except the knee bolster, the instru-
ment panel, and the steering wheel and column. If the
key is in the LOCK position, in the ACC position, or
not in the ignition, the airbags are not on and they will
not inflate.
•The ORC also turns on the Airbag Warning
Light in the instrument panel for six to eight
seconds as a self-check when the ignition is
first turned on. After the self-check, the
Airbag Warning Light will turn off. If the ORC detects
a malfunction in any part of the system, it turns on the
Airbag Warning Light either momentarily or continu-
ously. A single chime will sound if the light comes on
again after initial start-up.
58 THINGS TO KNOW BEFORE STARTING YOUR VEHICLE
Page 64 of 493

However, if you haven’t healed significantly within a
few days or if you have any blistering, see your doctor
immediately.
•As the airbags deflate, you may see some smoke-like
particles. The particles are a normal by-product of the
process that generates the nontoxic gas used for airbag
inflation. These airborne particles may irritate the skin,
eyes, nose, or throat. If you have skin or eye irritation,
rinse the area with cool water. For nose or throat
irritation, move to fresh air. If the irritation continues,
see your doctor. If these particles settle on your
clothing, follow the garment manufacturer’s instruc-
tions for cleaning.
•It is not advisable to drive your vehicle after the
airbags have been deployed. If you are involved in
another collision, the airbags will not be in place to
protect you.
WARNING!
Deployed airbags can’t protect you in another colli-
sion. Have the airbags replaced by an authorized
dealer as soon as possible.
Enhanced Accident Response System
In the event of an impact that causes airbag deployment,
with the vehicle stopped, and the vehicle communication
network intact, and the power intact, the Enhanced
Accident Response System performs the following func-
tions:
•Cuts off fuel to the engine.
•Flashes hazard lights.
•Turns on the interior lights, which remain on as long as
the battery has power or until the ignition key is
removed.
•Unlocks the doors automatically.
62 THINGS TO KNOW BEFORE STARTING YOUR VEHICLE
Page 74 of 493

NOTE:
•Ensure that the tether strap does not slip into the
opening between the seatbacks as you remove slack in
the strap.
•When using the LATCH attaching system to install a
child restraint, please ensure that all seat belts not
being used for occupant restraints are stowed and out
of reach of children. It is recommended that before
installing the child restraint, buckle the seat belt so the
seat belt is tucked behind the child restraint and out of
reach. If the buckled seat belt interferes with the child
restraint installation, instead of tucking the seat belt
behind the child restraint, route the seat belt through
the child restraint belt path and then buckle it. This
should stow the seat belt out of the reach of an
inquisitive child. Remind all children in the vehicle
that the seat belts are not toys and should not be
played with, and never leave your child unattended in
the vehicle.
WARNING!
Improper installation of a child restraint to the
LATCH anchorages can lead to failure of an infant or
child restraint. The child could be badly injured or
killed. Follow the manufacturer’s directions exactly
when installing an infant or child restraint.
Installing Child Restraints Using the Vehicle Seat
Belts
The passenger seat belts are equipped with either cinch-
ing latch plates or Automatic Locking Retractors (ALRs),
which are designed to keep the lap portion tight around
the child restraint so that it is not necessary to use a
locking clip. Pulling up on the shoulder portion of the
lap/shoulder belt will tighten the belt. The cinching latch
plate will keep the belt tight; however, any seat belt
system will loosen with time, so check the belt occasion-
ally and pull it tight if necessary.
72 THINGS TO KNOW BEFORE STARTING YOUR VEHICLE
Page 75 of 493

Seat belts with an automatic locking retractor have a
distinctive label on the seat belt webbing. The seat belt
must be in the Automatic Locking mode in order to
enable a child restraint to be tightly installed. Refer to
“Automatic Locking Mode” in this section. A locking clip
should not be necessary once the automatic locking
feature is enabled. Position the shoulder and lap belt on
the child restraint. The automatic locking retractor is
activated by first attaching the child seat, then pulling all
of the webbing out of the retractor, then allowing the
webbing to retract back into the retractor. Tighten web-
bing. To release, simply unbuckle the seat belt by de-
pressing the button, allowing the webbing to retract into
the retractor.In the rear seat, you may have trouble tightening the
lap/shoulder belt on the child restraint because the
buckle or latch plate is too close to the belt path opening
on the restraint. Disconnect the latch plate from the
buckle and twist the short buckle end belt several times
to shorten it. Insert the latch plate into the buckle with the
release button facing out.
If the belt still can’t be tightened, or if pulling and
pushing on the restraint loosens the belt, you may need
to do something more. Disconnect the latch plate from
the buckle, turn the buckle around, and insert the latch
plate into the buckle again. If you still can’t make the
child restraint secure, try a different seating position.
THINGS TO KNOW BEFORE STARTING YOUR VEHICLE 73
2
Page 78 of 493

SAFETY TIPS
Transporting Passengers
NEVER TRANSPORT PASSENGERS IN THE CARGO
AREA.
WARNING!
•It is extremely dangerous to ride in a cargo area,
inside or outside of a vehicle. In a collision, people
riding in these areas are more likely to be seri-
ously injured or killed.
•Do not allow people to ride in any area of your
vehicle that is not equipped with seats and seat
belts.
•Be sure everyone in your vehicle is in a seat and
using a seat belt properly.
Lock Your Vehicle
Always remove the key from the ignition and lock all
doors when leaving the vehicle unattended, even in yourown driveway or garage. Try to park your vehicle in a
well-lit area and never invite theft by leaving articles of
value exposed.
Exhaust Gas
WARNING!
Exhaust gases can injure or kill. They contain carbon
monoxide (CO), which is colorless and odorless.
Breathing it can make you unconscious and can
eventually poison you. To avoid breathing (CO)
follow these safety tips:
Do not run the engine in a closed garage or in confined
areas any longer than needed to move your vehicle in or
out of the area.
If it is necessary to sit in a parked vehicle with the engine
running, adjust your heating or cooling controls to force
outside air into the vehicle. Set the blower at high speed.
76 THINGS TO KNOW BEFORE STARTING YOUR VEHICLE
Page 80 of 493

Defroster
Check operation by selecting the defrost mode and place
the blower control on high speed. You should be able to
feel the air directed against the windshield. See your
authorized dealer for service if your defroster is
inoperable.
Periodic Safety Checks You Should Make Outside
The Vehicle
Tires
Examine tires for excessive tread wear and uneven wear
patterns. Check for stones, nails, glass, or other objects
lodged in the tread. Inspect the tread and sidewall for
cuts and cracks. Check the wheel nuts for tightness.
Check the tires (including spare) for proper pressure.
Lights
Have someone observe the operation of exterior lights
while you work the controls. Check turn signal and high
beam indicator lights on the instrument panel.
Door Latches
Check for positive closing, latching, and locking.
Fluid Leaks
Check area under vehicle after overnight parking for fuel,
engine coolant, oil, or other fluid leaks. Also, if gasoline
fumes are detected or if fuel, power steering fluid, or
brake fluid leaks are suspected, the cause should be
located and corrected immediately.
78 THINGS TO KNOW BEFORE STARTING YOUR VEHICLE
Page 88 of 493
when backing up. The mirrors will move back to their
previous position when the transmission is shifted out of
REVERSE.
The�Tilt in Reverse�feature can be enabled or disabled.
Refer to “Tilt Mirrors Down in Reverse,” under “Personal
Settings (Customer-Programmable Features)” under
“Electronic Vehicle Information Center (EVIC)” in
Section 4.
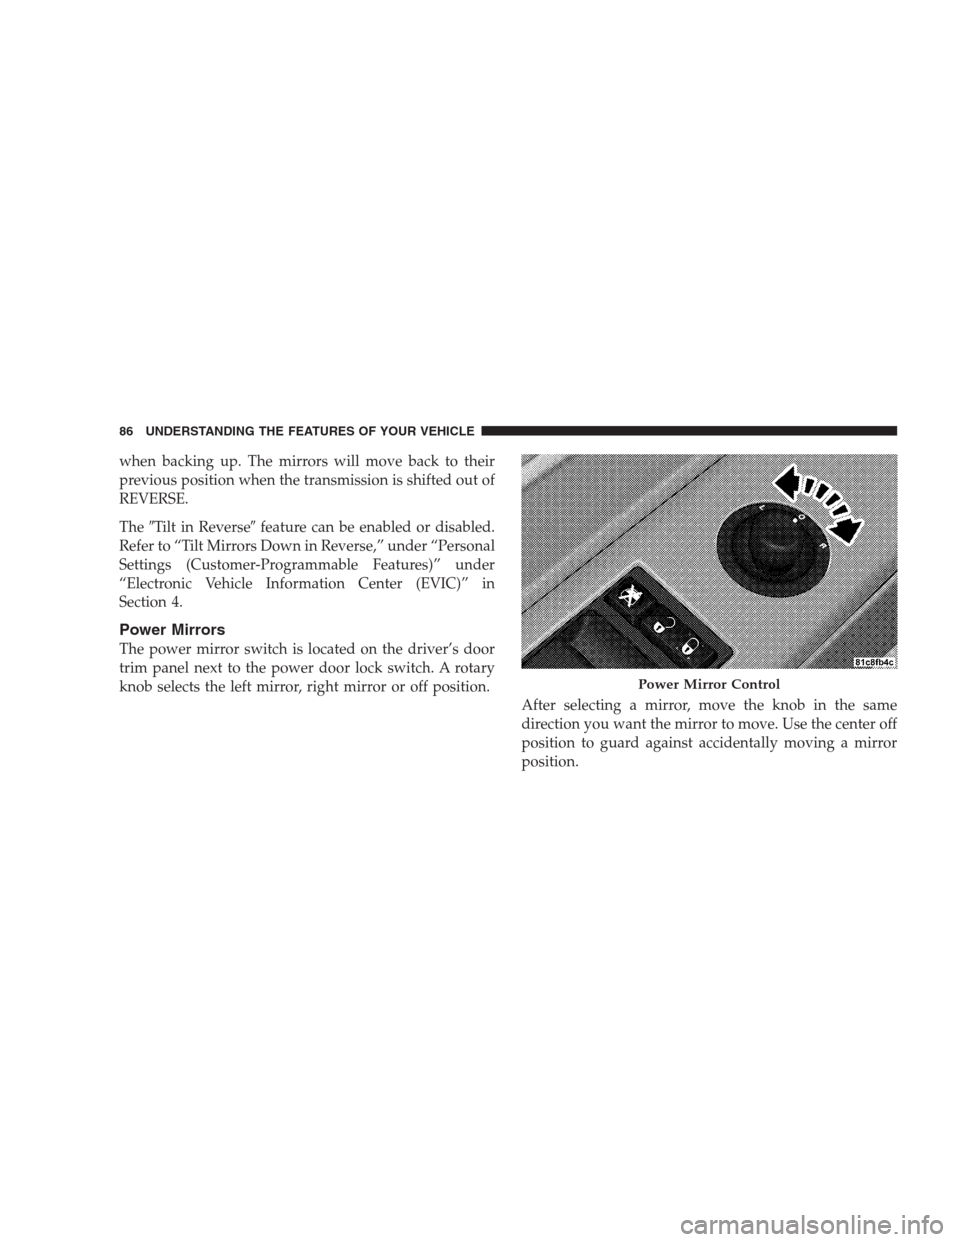
Power Mirrors
The power mirror switch is located on the driver’s door
trim panel next to the power door lock switch. A rotary
knob selects the left mirror, right mirror or off position.
After selecting a mirror, move the knob in the same
direction you want the mirror to move. Use the center off
position to guard against accidentally moving a mirror
position.
Power Mirror Control
86 UNDERSTANDING THE FEATURES OF YOUR VEHICLE
Page 130 of 493

WARNING!
•Be certain that the seatback is securely locked into
position. If the seatback is not securely locked into
position, the seat will not provide the proper
stability for child seats and/or passengers. An
improperly latched seat could cause serious injury.
•The cargo area in the rear of the vehicle (with the
rear seatbacks in the locked-up or folded down
position) should not be used as a play area by
children when the vehicle is in motion. They could
be seriously injured in an accident. Children
should be seated and using the proper restraint
system.
DRIVER MEMORY SEAT — IF EQUIPPED
This feature allows the driver to store up to two different
memory profiles for easy recall through a Memory
switch. Each memory profile contains desired position
settings for the driver seat, side mirror, adjustable pedals,
and power tilt and telescopic steering column, and a set
of desired radio station presets.
The Memory switch is located on the driver’s door trim
panel. The switch contains an (S) button to activate the
memory save function. It also contains a rocker switch
labeled with the number (1) and the number (2). The
rocker switch allows the driver to recall either of two
pre-programmed memory profiles by pressing the appro-
priate side of the switch.
128 UNDERSTANDING THE FEATURES OF YOUR VEHICLE