2009 CHEVROLET TRAVERSE sunroof
[x] Cancel search: sunroofPage 1 of 422

Seats and Restraint
System............................... 1-1
Head Restraints
.............. 1-2
Front Seats
.................... 1-3
Rear Seats
.................... 1-9
Safety Belts
..................1-14
Child Restraints
.............1-27
Airbag System
..............1-46
Restraint System
Check
......................1-59
Features and Controls...... 2-1
Keys
............................. 2-2
Doors and Locks
............ 2-8
Windows
......................2-14
Theft-Deterrent
Systems
...................2-16
Starting and Operating
Your Vehicle
.............2-20
Mirrors
.........................2-31
Object Detection
Systems
...................2-36
OnStar
®System
............2-43Universal Home Remote
System
.....................2-47
Storage Areas
...............2-52
Sunroof
........................2-56
Instrument Panel............... 3-1
Instrument Panel
Overview
.................... 3-4
Climate Controls
............3-19
Warning Lights, Gages,
and Indicators
............3-30
Driver Information
Center (DIC)
.............3-44
Audio System(s)
............3-73
Driving Your Vehicle......... 4-1
Your Driving, the Road,
and the Vehicle
........... 4-1
Towing
........................4-21
Service and
Appearance Care............... 5-1
Service
.......................... 5-3
Fuel
.............................. 5-5
Checking Things Under
the Hood
.................... 5-9Headlamp Aiming
..........5-33
Bulb Replacement
.........5-33
Windshield Wiper Blade
Replacement
.............5-35
Tires
...........................5-36
Appearance Care
..........5-78
Vehicle Identi�cation
......5-85
Electrical System
...........5-85
Capacities and
Speci�cations
............5-92
Maintenance Schedule...... 6-1
Maintenance Schedule
..... 6-1
Customer Assistance
Information........................ 7-1
Customer Assistance and
Information
................. 7-1
Reporting Safety
Defects
.....................7-14
Vehicle Data Recording
and Privacy
...............7-16
Index....................................i-1
2009 Chevrolet Traverse Owner ManualM
Page 66 of 422

Storage AreasGlove Box..........................2-52
Cupholders.........................2-52
Instrument Panel Storage......2-52
Center Console Storage.......2-52
Second Row Center
Console............................2-53
Floor Mats..........................2-54
Luggage Carrier..................2-54
Convenience Net.................2-55
Cargo Cover.......................2-55
Cargo Tie Downs................2-55
Cargo Management
System.............................2-55
SunroofSunroof..............................2-56
Keys
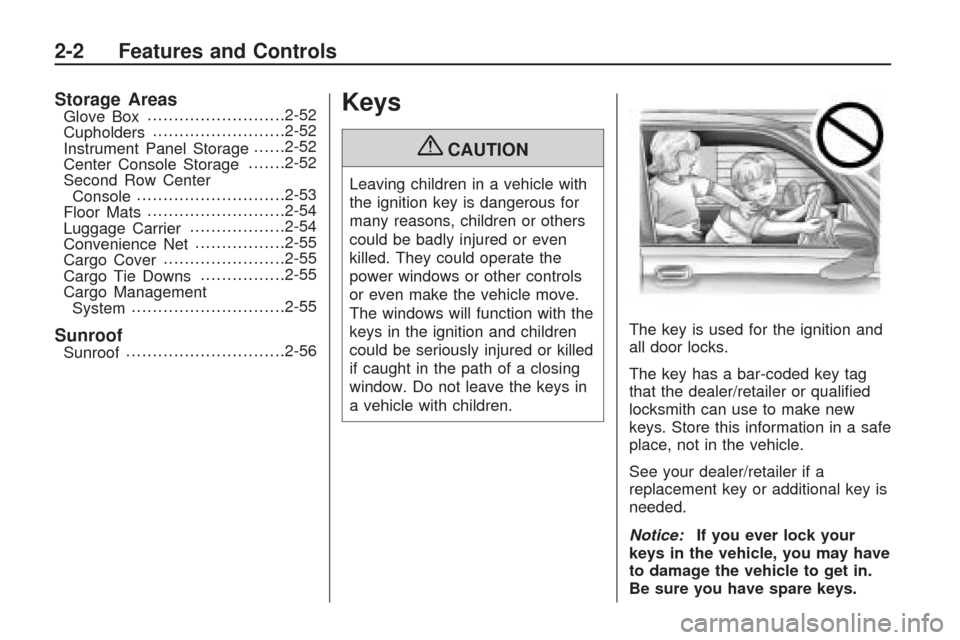
{CAUTION
Leaving children in a vehicle with
the ignition key is dangerous for
many reasons, children or others
could be badly injured or even
killed. They could operate the
power windows or other controls
or even make the vehicle move.
The windows will function with the
keys in the ignition and children
could be seriously injured or killed
if caught in the path of a closing
window. Do not leave the keys in
a vehicle with children.The key is used for the ignition and
all door locks.
The key has a bar-coded key tag
that the dealer/retailer or quali�ed
locksmith can use to make new
keys. Store this information in a safe
place, not in the vehicle.
See your dealer/retailer if a
replacement key or additional key is
needed.
Notice:If you ever lock your
keys in the vehicle, you may have
to damage the vehicle to get in.
Be sure you have spare keys.
2-2 Features and Controls
Page 86 of 422

Retained Accessory
Power (RAP)
These vehicle accessories can be
used for up to 10 minutes after
the ignition key is turned off:
Audio System
Power Windows
Sunroof (if equipped)
Power to the windows and sunroof
will work up to 10 minutes or
until a door is opened.
The radio continues to work for
10 minutes or until the driver’s door
is opened.
For an additional 10 minutes of
operation, close all the doors and
turn the key to ON/RUN and
then back to LOCK/OFF.
All these features will work when
the key is in the ON/RUN or
ACC/ACCESSORY positions.
Starting the Engine
Move the shift lever to P (Park) or
N (Neutral). The engine will not start
in any other position. To restart the
engine when the vehicle is already
moving, use N (Neutral) only.
Notice:Do not try to shift to
P (Park) if the vehicle is moving.
If you do, you could damage
the transmission. Shift to P (Park)
only when the vehicle is stopped.
Starting Procedure
1. With your foot off the accelerator
pedal, turn the ignition to START.
When the engine starts, let go of
the key. The idle speed will slow
down as the engine warms. Do
not race the engine immediately
after starting it. Operate the
engine and transmission gently to
allow the oil to warm up and
lubricate all moving parts.The vehicle has a
Computer-Controlled Cranking
System. This feature assists
in starting the engine and
protects components. If the
ignition key is turned to the
START position, and then
released when the engine
begins cranking, the engine
will continue cranking for a
few seconds or until the vehicle
starts. If the engine does not
start and the key is held in
START, cranking will be stopped
after 15 seconds to prevent
cranking motor damage.
To prevent gear damage, this
system also prevents cranking if
the engine is already running.
Engine cranking can be stopped
by turning the ignition switch
to the ACC/ACCESSORY
or LOCK/OFF position.
2-22 Features and Controls
Page 120 of 422

Sunroof
The vehicle may have a sunroof
over the front seats and a rear
sunroof over the second row seats.
The rear sunroof does not open.
The switches to operate the
front sunroof and rear sunshade
are located on the headliner
above the rearview mirror.
The ignition must be in ON/RUN or
ACC/ACCESSORY to operate
the sunroof. SeeIgnition Positions
on page 2-21.
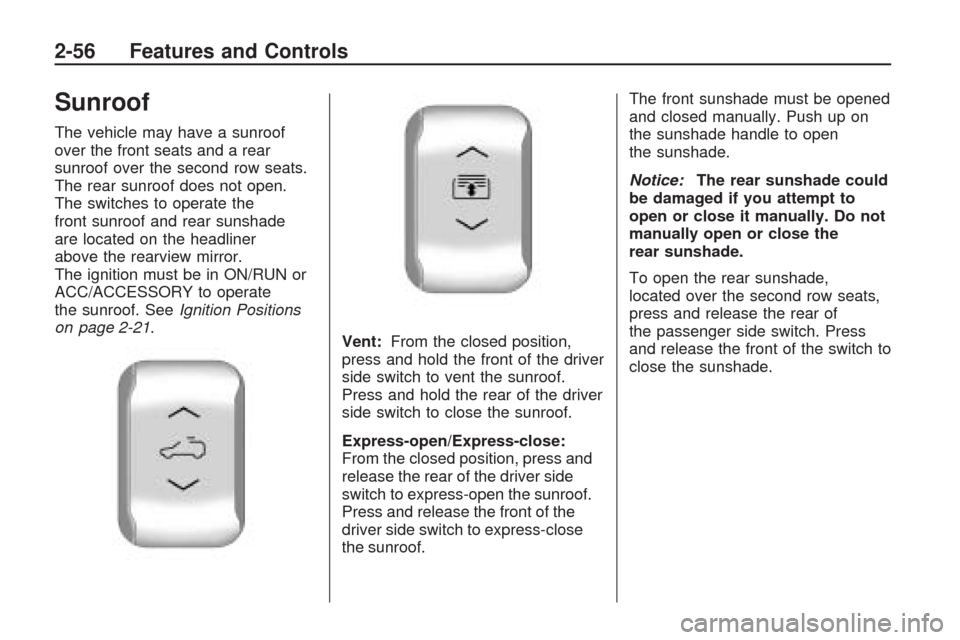
Vent:From the closed position,
press and hold the front of the driver
side switch to vent the sunroof.
Press and hold the rear of the driver
side switch to close the sunroof.
Express-open/Express-close:
From the closed position, press and
release the rear of the driver side
switch to express-open the sunroof.
Press and release the front of the
driver side switch to express-close
the sunroof.The front sunshade must be opened
and closed manually. Push up on
the sunshade handle to open
the sunshade.
Notice:The rear sunshade could
be damaged if you attempt to
open or close it manually. Do not
manually open or close the
rear sunshade.
To open the rear sunshade,
located over the second row seats,
press and release the rear of
the passenger side switch. Press
and release the front of the switch to
close the sunshade.
2-56 Features and Controls
Page 175 of 422

3. Press the set/reset button to
scroll through and select the
appropriate variance zone.
4. Press the trip/fuel button until
the vehicle heading, for example,
N for North, is displayed in
the DIC.
5. If calibration is necessary,
calibrate the compass.
See “Compass Calibration
Procedure” following.
Compass Calibration
The compass can be manually
calibrated. Only calibrate the
compass in a magnetically clean
and safe location, such as an
open parking lot, where driving
the vehicle in circles is not a danger.
It is suggested to calibrate away from
tall buildings, utility wires, manhole
covers, or other industrial structures,
if possible.If CAL should ever appear in the
DIC display, the compass should
be calibrated.
If the DIC display does not show a
heading, for example, N for North,
or the heading does not change after
making turns, there may be a strong
magnetic �eld interfering with the
compass. Such interference may
be caused by a magnetic CB or cell
phone antenna mount, a magnetic
emergency light, magnetic note pad
holder, or any other magnetic item.
Turn off the vehicle, move the
magnetic item, then turn on the
vehicle and calibrate the compass.
To calibrate the compass, use the
following procedure:
Compass Calibration Procedure
1. Before calibrating the compass,
make sure the compass zone
is set to the variance zone in
which the vehicle is located.
See “Compass Variance (Zone)
Procedure” earlier in this section.Do not operate any switches
such as window, sunroof, climate
controls, seats, etc. during the
calibration procedure.
2. Press the vehicle information
button until PRESS
VTO
CALIBRATE COMPASS
displays.
3. Press the set/reset button to start
the compass calibration.
4. The DIC will display
CALIBRATING: DRIVE IN
CIRCLES. Drive the vehicle
in tight circles at less than
5 mph (8 km/h) to complete the
calibration. The DIC will display
CALIBRATION COMPLETE for a
few seconds when the calibration
is complete. The DIC display will
then return to the previous menu.
Instrument Panel 3-55
Page 247 of 422

Cellular Phone Usage
Cellular phone usage may cause
interference with the vehicle’s radio.
This interference may occur when
making or receiving phone calls,
charging the phone’s battery, or
simply having the phone on. This
interference causes an increased
level of static while listening to the
radio. If static is received while
listening to the radio, unplug the
cellular phone and turn it off.
Multi-Band Antenna
The multi-band antenna is located
on the roof of the vehicle. This type
of antenna is used with the AM/FM
radio, as well as OnStar
®and the
XM™ Satellite Radio Service
System, if the vehicle has these
features. Keep this antenna clear
of snow and ice build up for clear
radio reception. If the vehicle has
a sunroof, the performance of the
radio system may be affected if the
sunroof is open. Loading items onto
the roof of the vehicle can interfere
with the performance of the radio
system and, if the vehicle has this
feature, OnStar
®. Make sure the
multi-band antenna is not obstructed.
Instrument Panel 3-127
Page 372 of 422

Fuses Usage
FSCMFuel System Control
Module
HORN Horn
HTD WASHHeated Windshield
Washer Fluid
HTD MIRHeated Outside
Rearview Mirror
HVAC
BLWRHeating, Ventilation
and Air Conditioning
Blower
LT HI
BEAMLeft High-Beam
Headlamp
LT LO
BEAMLeft Low-Beam
Headlamp
LT PRK Left Parking Lamp
LT TRLR
STOP/TRNTrailer Left
Stoplamp and Turn
SignalFuses Usage
ODD
COILSOdd Injector Coils
PCM IGNPowertrain Control
Module Ignition
PWR
L/GATEPower Liftgate
PWR
OUTLETPower Outlet
REAR
CAMERARear Camera
RR APORear Accessory
Power Outlet
RR DEFOG Rear Defogger
RR HVACRear Climate
Control System
RT HI
BEAMRight High-Beam
Headlamp
RT LO
BEAMRight Low-Beam
HeadlampFuses Usage
RT PRK Right Parking Lamp
RT TRLR
STOP/TRNTrailer Right
Stoplamp and Turn
Signal
RVC SNSRRegulated Voltage
Control Sensor
S/ROOF/
SUNSHADESunroof
SPARE Spare
Stop Lamps
(China
Only)Stop Lamps
(China Only)
STRTR Starter
TCMTransmission
Control Module
TRANS Transmission
TRLR
BCK/UPTrailer Back-up
Lamps
5-90 Service and Appearance Care
Page 419 of 422

Rearview Mirror, Automatic
Dimming ..........................2-31
Rearview Mirrors..................2-31
Reclining Seatbacks............... 1-8
Recommended Fluids and
Lubricants........................6-12
Recreational Vehicle Towing . . . 4-21
Reimbursement Program,
GM Mobility....................... 7-6
Remote Keyless Entry (RKE)
System............................. 2-3
Remote Keyless Entry (RKE)
System, Operation.............. 2-4
Remote Vehicle Start............. 2-6
Removing the Flat Tire and
Installing the Spare Tire.....5-68
Removing the Spare Tire
and Tools........................5-66
Replacement Bulbs..............5-34
Replacement Parts,
Maintenance....................6-14
Reporting Safety Defects to
General Motors................7-14
Reporting Safety Defects
to the Canadian
Government.....................7-14
Reporting Safety Defects
to the United States
Government.....................7-14Restraint System Check
Checking the Restraint
Systems.......................1-59
Replacing Restraint System
Parts After a Crash........1-60
Retained Accessory
Power (RAP) ....................2-22
Roadside Assistance
Program............................ 7-6
Rocking Your Vehicle to
Get it Out ........................4-16
Roof
Sunroof...........................2-56
Running the Vehicle While
Parked............................2-30
S
Safety Belt Reminders..........3-32
Safety Belts
Care of ...........................5-80
Extender.........................1-27
How to Wear Safety Belts
Properly.......................1-17
Lap-Shoulder Belt.............1-22
Safety Belts Are for
Everyone.....................1-14
Use During Pregnancy......1-26Safety Defects
Reporting to Canadian
Government..................7-14
Reporting to
General Motors.............7-14
Reporting to the United
States Government........7-14
Safety Warnings and Symbols.... iii
Scheduled Maintenance.......... 6-3
Additional Required
Services........................ 6-6
Scheduling Appointments........ 7-8
Sealant Kit, Tire...................5-57
Seats
Driver Seat Height
Adjuster......................... 1-3
Head Restraints................. 1-2
Heated and Cooled Seats.... 1-5
Heated Seats..................... 1-5
Manual Lumbar.................. 1-4
Memory, Mirrors................. 1-6
Power Lumbar ................... 1-5
Power Seats...................... 1-4
Rear Seat Operation........... 1-9
Reclining Seatbacks............ 1-8
Third Row Seat................1-12
Second Row Center
Console..........................2-53
INDEX i-9