Page 113 of 376

4. Fully set the parking brake.
5. Shift the transmission to P (Park) or N (Neutral).
6. Idle the engine. If you used the idling control knob to
increase the engine speed, restore it all the way to
the left to reduce the engine speed.
7. If the vehicle has a Power Take Off (PTO), turn the
PTO off. SeePower Take-Off (PTO) on page 2-30.
8. Press the DPF switch in the instrument panel
switchbank. SeeInstrument Panel Switchbank
on page 3-18. The green DPF indicator light comes
on, the exhaust gas control valve operates,
engine idle speed automatically increases, and DPF
cleaning begins. Do not leave the vehicle
unattended during manual cleaning.9. When both the green and the yellow or red DPF
indicator lights go off, cleaning is completed.
Manual cleaning is normally completed in about
30 minutes.
Under certain operating conditions, manual cleaning
might not be able to be performed, even if the soot level
in the DPF requires cleaning. This can occur because of
low coolant temperature, low battery voltage, high
exhaust temperature or immediately after starting the
vehicle. When manual cleaning is requested and coolant
temperature is low, an engine warm-up cycle is started.
The green indicator light will come on, the exhaust gas
control valve operates, and engine rpm increases to help
raise engine coolant temperature. When operating
conditions allow, cleaning will begin.
2-49
Page 114 of 376

Running the Vehicle While Parked
It is better not to park with the engine running. But if you
ever have to, here are some things to know.
{CAUTION:
Idling a vehicle in an enclosed area with poor
ventilation is dangerous. Engine exhaust may
enter the vehicle. Engine exhaust contains Carbon
Monoxide (CO) which cannot be seen or smelled.
It can cause unconsciousness and even death.
Never run the engine in an enclosed area that has
no fresh air ventilation. For more information, see
Engine Exhaust on page 2-45.
{CAUTION:
It can be dangerous to get out of the vehicle if the
automatic transmission shift lever is not fully in
P (Park) with the parking brake firmly set. The
vehicle can roll. Do not leave the vehicle when the
engine is running unless you have to. If you have
left the engine running, the vehicle can move
suddenly. You or others could be injured. To be
sure the vehicle will not move, even when it is on
fairly level ground, always set the parking brake
and move the automatic transmission shift lever to
P (Park), or the manual transmission shift lever to
Neutral.
Follow the proper steps to be sure the vehicle will
not move.
2-50
Page 115 of 376

Mirrors
Manual Rearview Mirror
Hold the inside rearview mirror in the center to move
it for a clearer view behind your vehicle. Adjust the
mirror to avoid glare from the headlamps behind you.
Push the tab forward for daytime use and pull it for
nighttime use.
Outside Manual Mirrors
Adjust the outside rearview mirrors to see a little of the
side of your vehicle, and the area beside your vehicle.
Manually fold the mirrors inward to prevent damage when
going through an automatic car wash. To fold, push the
mirror toward the vehicle. Push the mirror outward, to
return to its original position.
Outside Power Mirrors
If the vehicle has outside power mirrors, they can be
adjusted from the inside of the vehicle.
Controls for the outside
power mirrors are located
on the driver door.
Select the mirror you want to move by turning the switch
clockwise or counterclockwise to adjust the driver or
passenger side mirror. The center position is neutral.
Then, adjust the mirror by pressing the outer arrows on
the switch until the mirror is in the desired position.
2-51
Page 116 of 376
Outside Convex Mirrors
{CAUTION:
A convex mirror can make things (like other
vehicles) look farther away than they really are.
If you cut too sharply into the right or left lane, you
could hit a vehicle. Check the regular outside
mirrors (or the inside mirror, if you have one)
before changing lanes.
The vehicle may have convex mirrors on both the driver
side and the passenger side. They are curved to
allow more to be seen from the driver seat.
Outside Heated Mirrors
If your vehicle has this feature, the outside rearview
mirrors can be defrosted.
The switch is located in
the instrument panel
switchbank.
Press the bottom of the switch to turn the outside
heated rearview mirrors on. The switch indicator light
comes on and stays on whenever the outside heated
rearview mirrors are activated.
2-52
Page 117 of 376

Storage Areas
Your vehicle includes a number of storage
compartments.
Some vehicles have storage areas in the instrument
panel. Another small storage area may be located
overhead. Other models may have more storage area
underneath the front passenger bench seat. Lift the seat
cushion to use the storage area.
Your vehicle may have a storage tray located behind
the driver and passenger seats.
All models also have storage compartments located
beneath the floorboard on both sides of the vehicle.
Center Console Storage
Your vehicle may have a center console compartment.
The back of your center bench seat may also fold
forward to reveal a console compartment.
The release strap for the center console is located
between the center seat and passenger seat.
To expose the storage compartment, pull the strap to
release the seatback. Then fold the seatback forward.
To open the storage compartment, press the release
button and lift the lid rearward. With the lid closed, it can
be used as a clipboard to hold papers in place.
Before returning the seatback to the upright position,
make sure the console is closed. Lift the seatback all the
way up until it clicks. Push and pull on the seatback
to make sure the seat is locked in place.
2-53
Page 118 of 376
Page 119 of 376

Instrument Panel Overview...............................3-4
Hazard Warning Flashers................................3-6
Horn .............................................................3-6
Tilt Wheel.....................................................3-6
Turn Signal/Multifunction Lever.........................3-7
Turn and Lane-Change Signals........................3-7
Headlamp High/Low-Beam Changer..................3-8
Windshield Wipers..........................................3-8
Windshield Washer.........................................3-9
Cruise Control..............................................3-10
Exterior Lamps.............................................3-14
Headlamps on Reminder................................3-14
Daytime Running Lamps (DRL).......................3-15
Marker Lamps..............................................3-16
Instrument Panel Brightness...........................3-16
Dome Lamps ...............................................3-16
Entry Lighting...............................................3-17
Reading Lamps............................................3-17
Instrument Panel Switchbank..........................3-18
Accessory Power Outlet(s).............................3-19
Ashtray(s) and Cigarette Lighter......................3-19Climate Controls............................................3-20
Climate Control System.................................3-20
Outlet Adjustment.........................................3-22
Rear Heating System....................................3-23
Warning Lights, Gages, and Indicators............3-23
Instrument Panel Cluster................................3-24
Speedometer and Odometer...........................3-25
Trip Odometer..............................................3-25
Tachometer.................................................3-25
Engine Speed Limiter....................................3-25
Safety Belt Reminders...................................3-26
Airbag Readiness Light..................................3-27
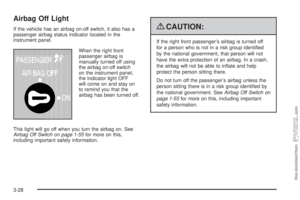
Airbag Off Light............................................3-28
Charging System Light
..................................3-29
Voltmeter Gage............................................3-30
Service Transmission Warning Light................3-30
Range Inhibit Warning Indicator......................3-31
Brake System Warning Light..........................3-31
Antilock Brake System (ABS) Warning Light........3-33
Trailer Antilock Brake System Warning Light.......3-34
Engine Coolant Temperature Gage..................3-34
Section 3 Instrument Panel
3-1
Page 120 of 376

Low Coolant Warning Light............................3-35
Wait to Start Light........................................3-35
Malfunction Indicator Lamp.............................3-36
Oil Pressure Gage........................................3-38
Low Oil Level Light.......................................3-39
Change Engine Oil Light................................3-39
Engine Overspeed Warning Light....................3-40
Engine Shutdown Warning Light.....................3-40
Transmission Temperature Gage.....................3-40
Exhaust Brake Indicator Light.........................3-41
Differential Lock Indicator Light.......................3-41
Reduced Engine Power Light.........................3-42
Highbeam On Light.......................................3-42
Daytime Running Lamps (DRL)
Indicator Light...........................................3-42
Low Washer Fluid Warning Light.....................3-43
Power Take-Off Light (PTO)...........................3-43Check Gages Warning Light...........................3-43
Fuel Gage...................................................3-44
Water in Fuel Warning Light...........................3-45
Change Fuel Filter Warning Light....................3-45
Diesel Particulate Filter Warning Light..............3-46
Air Filter Restriction Indicator..........................3-46
Air Pressure Gage........................................3-47
Hourmeter Gage...........................................3-47
Audio System(s).............................................3-48
Setting the Clock..........................................3-48
Radio(s)......................................................3-49
Theft-Deterrent Feature..................................3-57
Radio Reception...........................................3-58
Fixed Mast Antenna......................................3-58
Chime Level Adjustment................................3-58
Section 3 Instrument Panel
3-2